
Wavelab is one of the most long-established wave editors around, a mainstay of the Windows production world for many years that also came to the Mac platform eventually. Although it has many talents, mastering music is what it is arguably best known for. Here’s a guide to the steps you’ll need to take to master your music in Wavelab. Although the version shown is the Pro version, I have tried to stick to mostly core tools that should be available in the more entry-level versions as well.
1. Prepare Your Mix
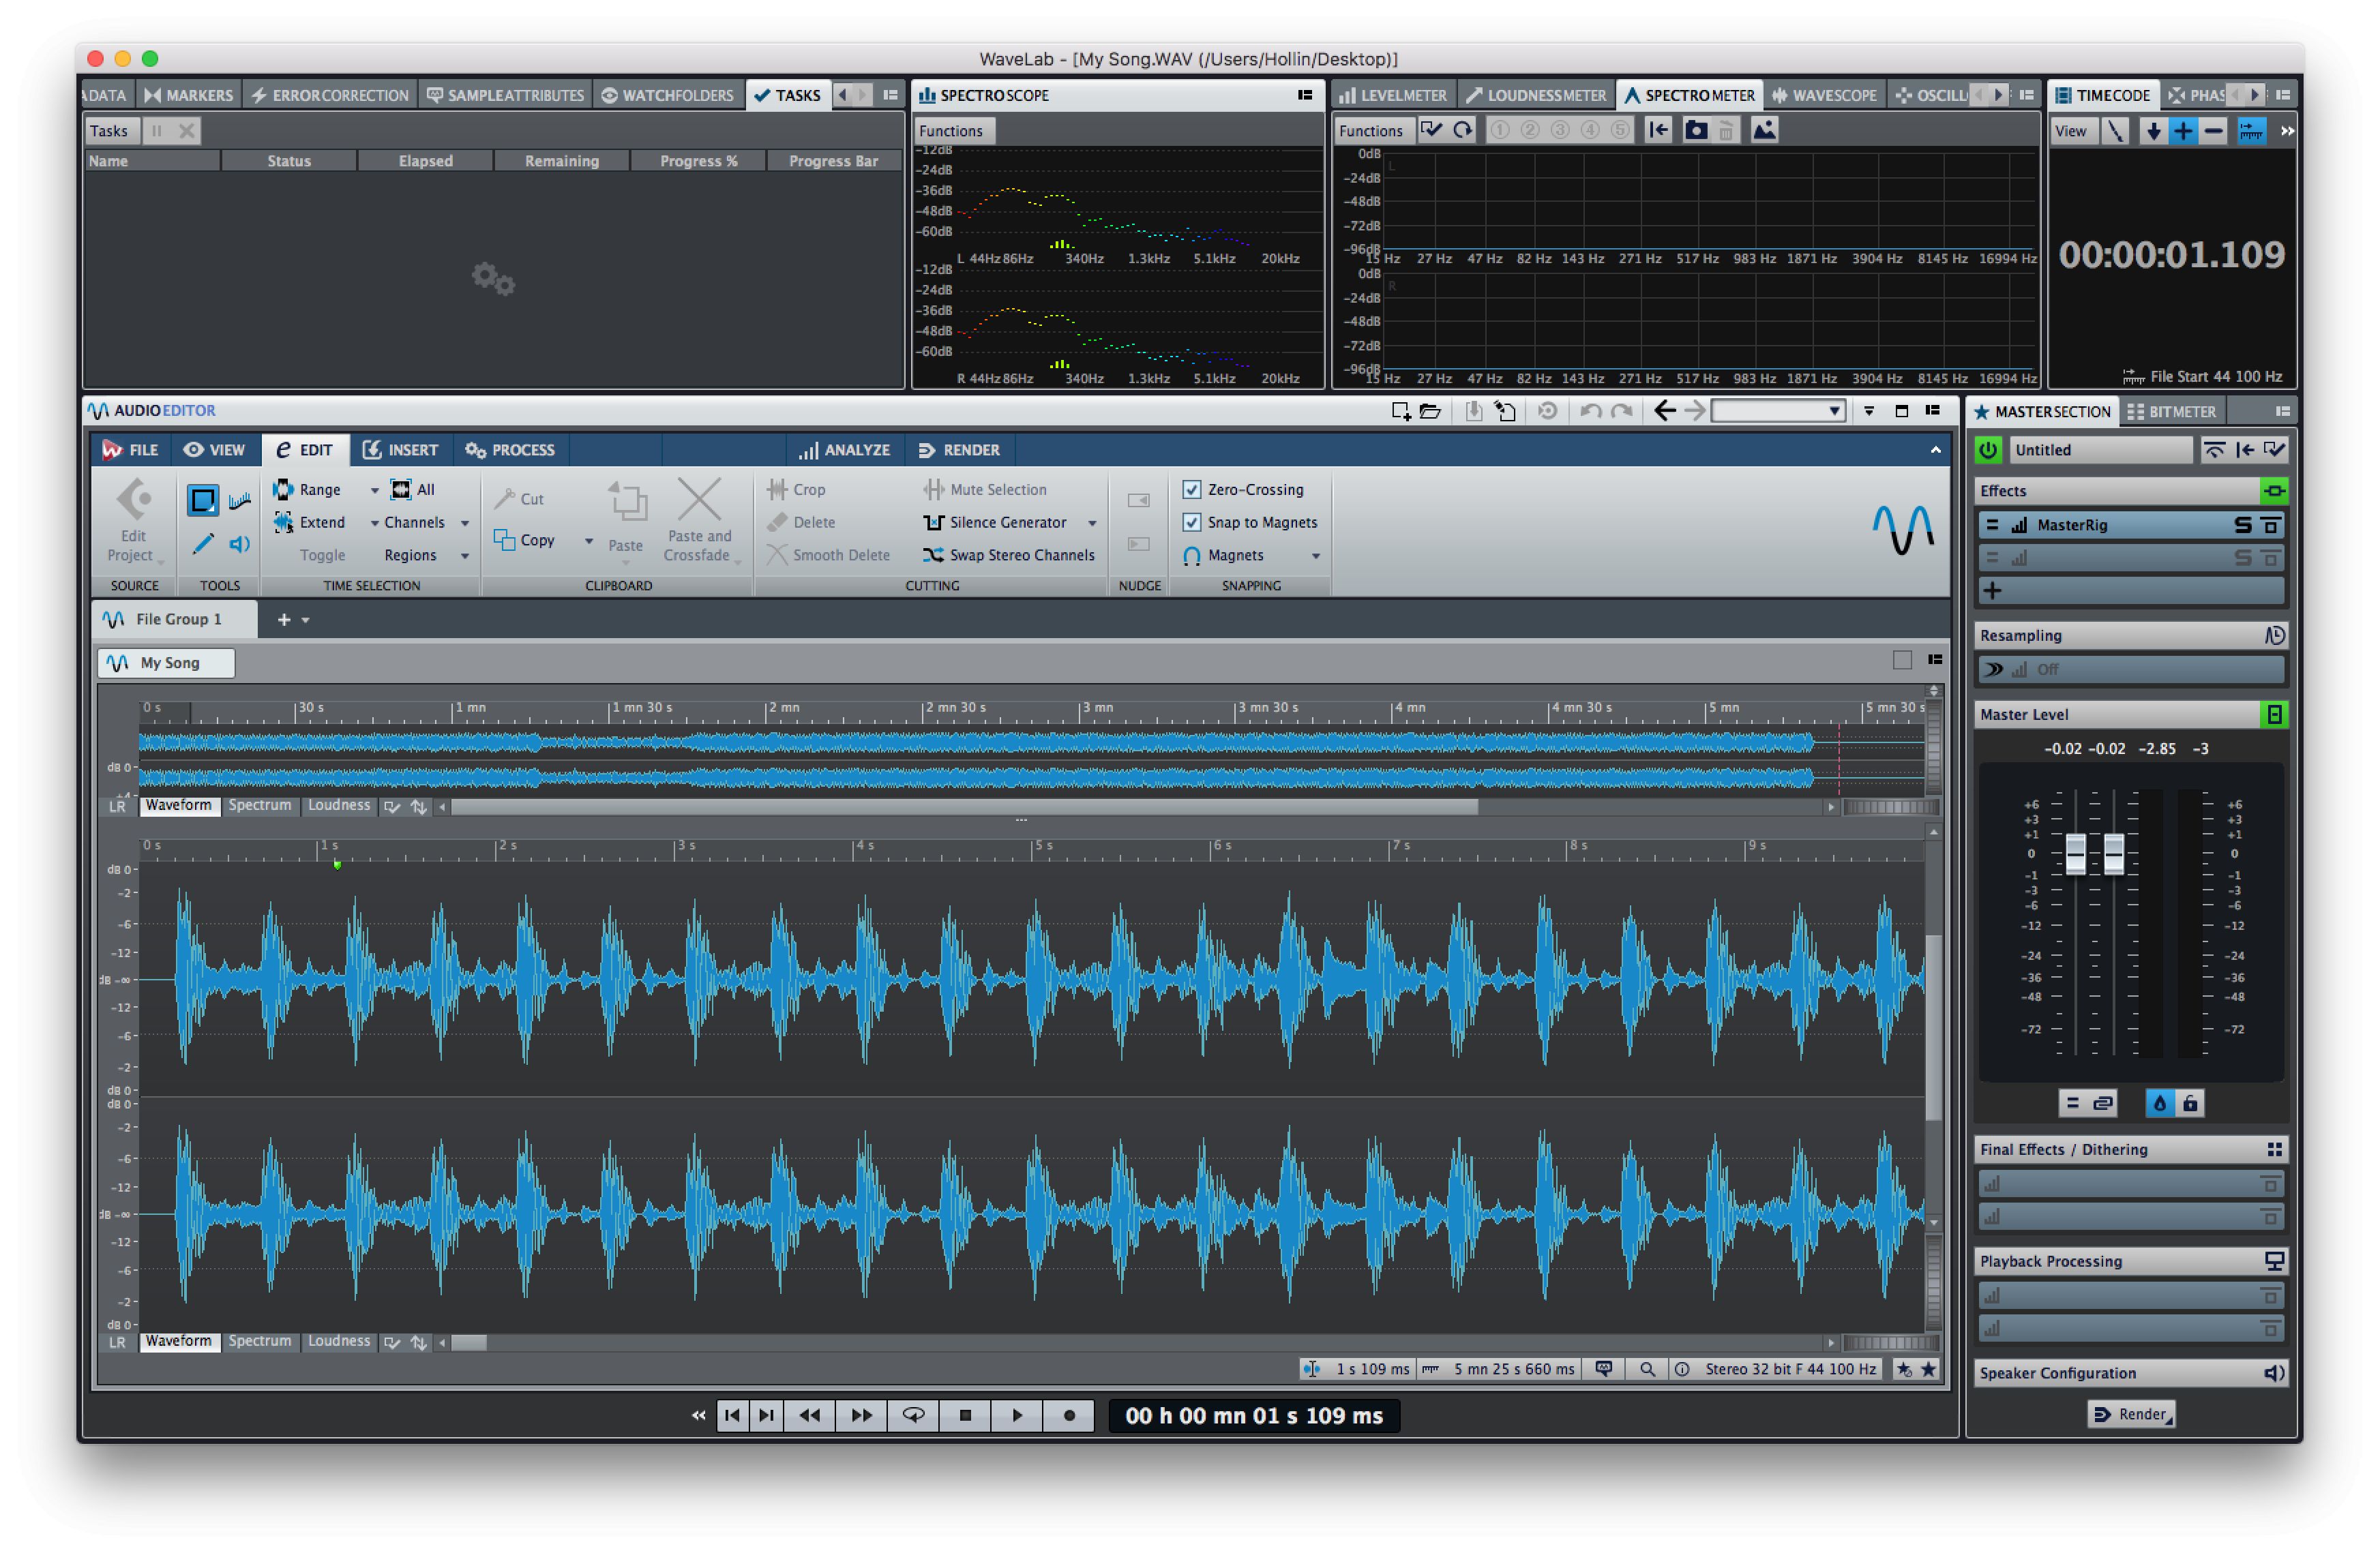
This workshop assumes that you have mixed your track, either in a DAW or on a hardware system, and that it is now ready for mastering. Don’t assume you can fix any problems at the mastering stage – it’s really for sweetening and boosting levels overall rather than trying to target specific issues in a mix. If in doubt, go back and perfect the mix. When you’re ready, open Wavelab and create a new empty project. Then import your file by dragging from the desktop or using the File > Import menu.
2. Top And Tail Your File

You can do this step now or later, it doesn’t matter as long as it gets done. Zoom in on the start of the waveform. You should have left some empty space at the start and end when exporting your mix, to ensure nothing gets accidentally cut off. Here, you need to tighten up the file length. If there is a lot of space, select around 75% of it and then choose Edit > Cut to remove it. If there is less space, select the section just before the first transient and then choose Process > Fade In. Use your judgement here – if a second or two of audio sounds right, leave that amount of space. If you want the sound to kick in very quickly, you can leave less space. Repeat this step at the end of the waveform using the Fade Out command, making sure you don’t cut off any reverb or delay tails.
3. Check Out Master Rig
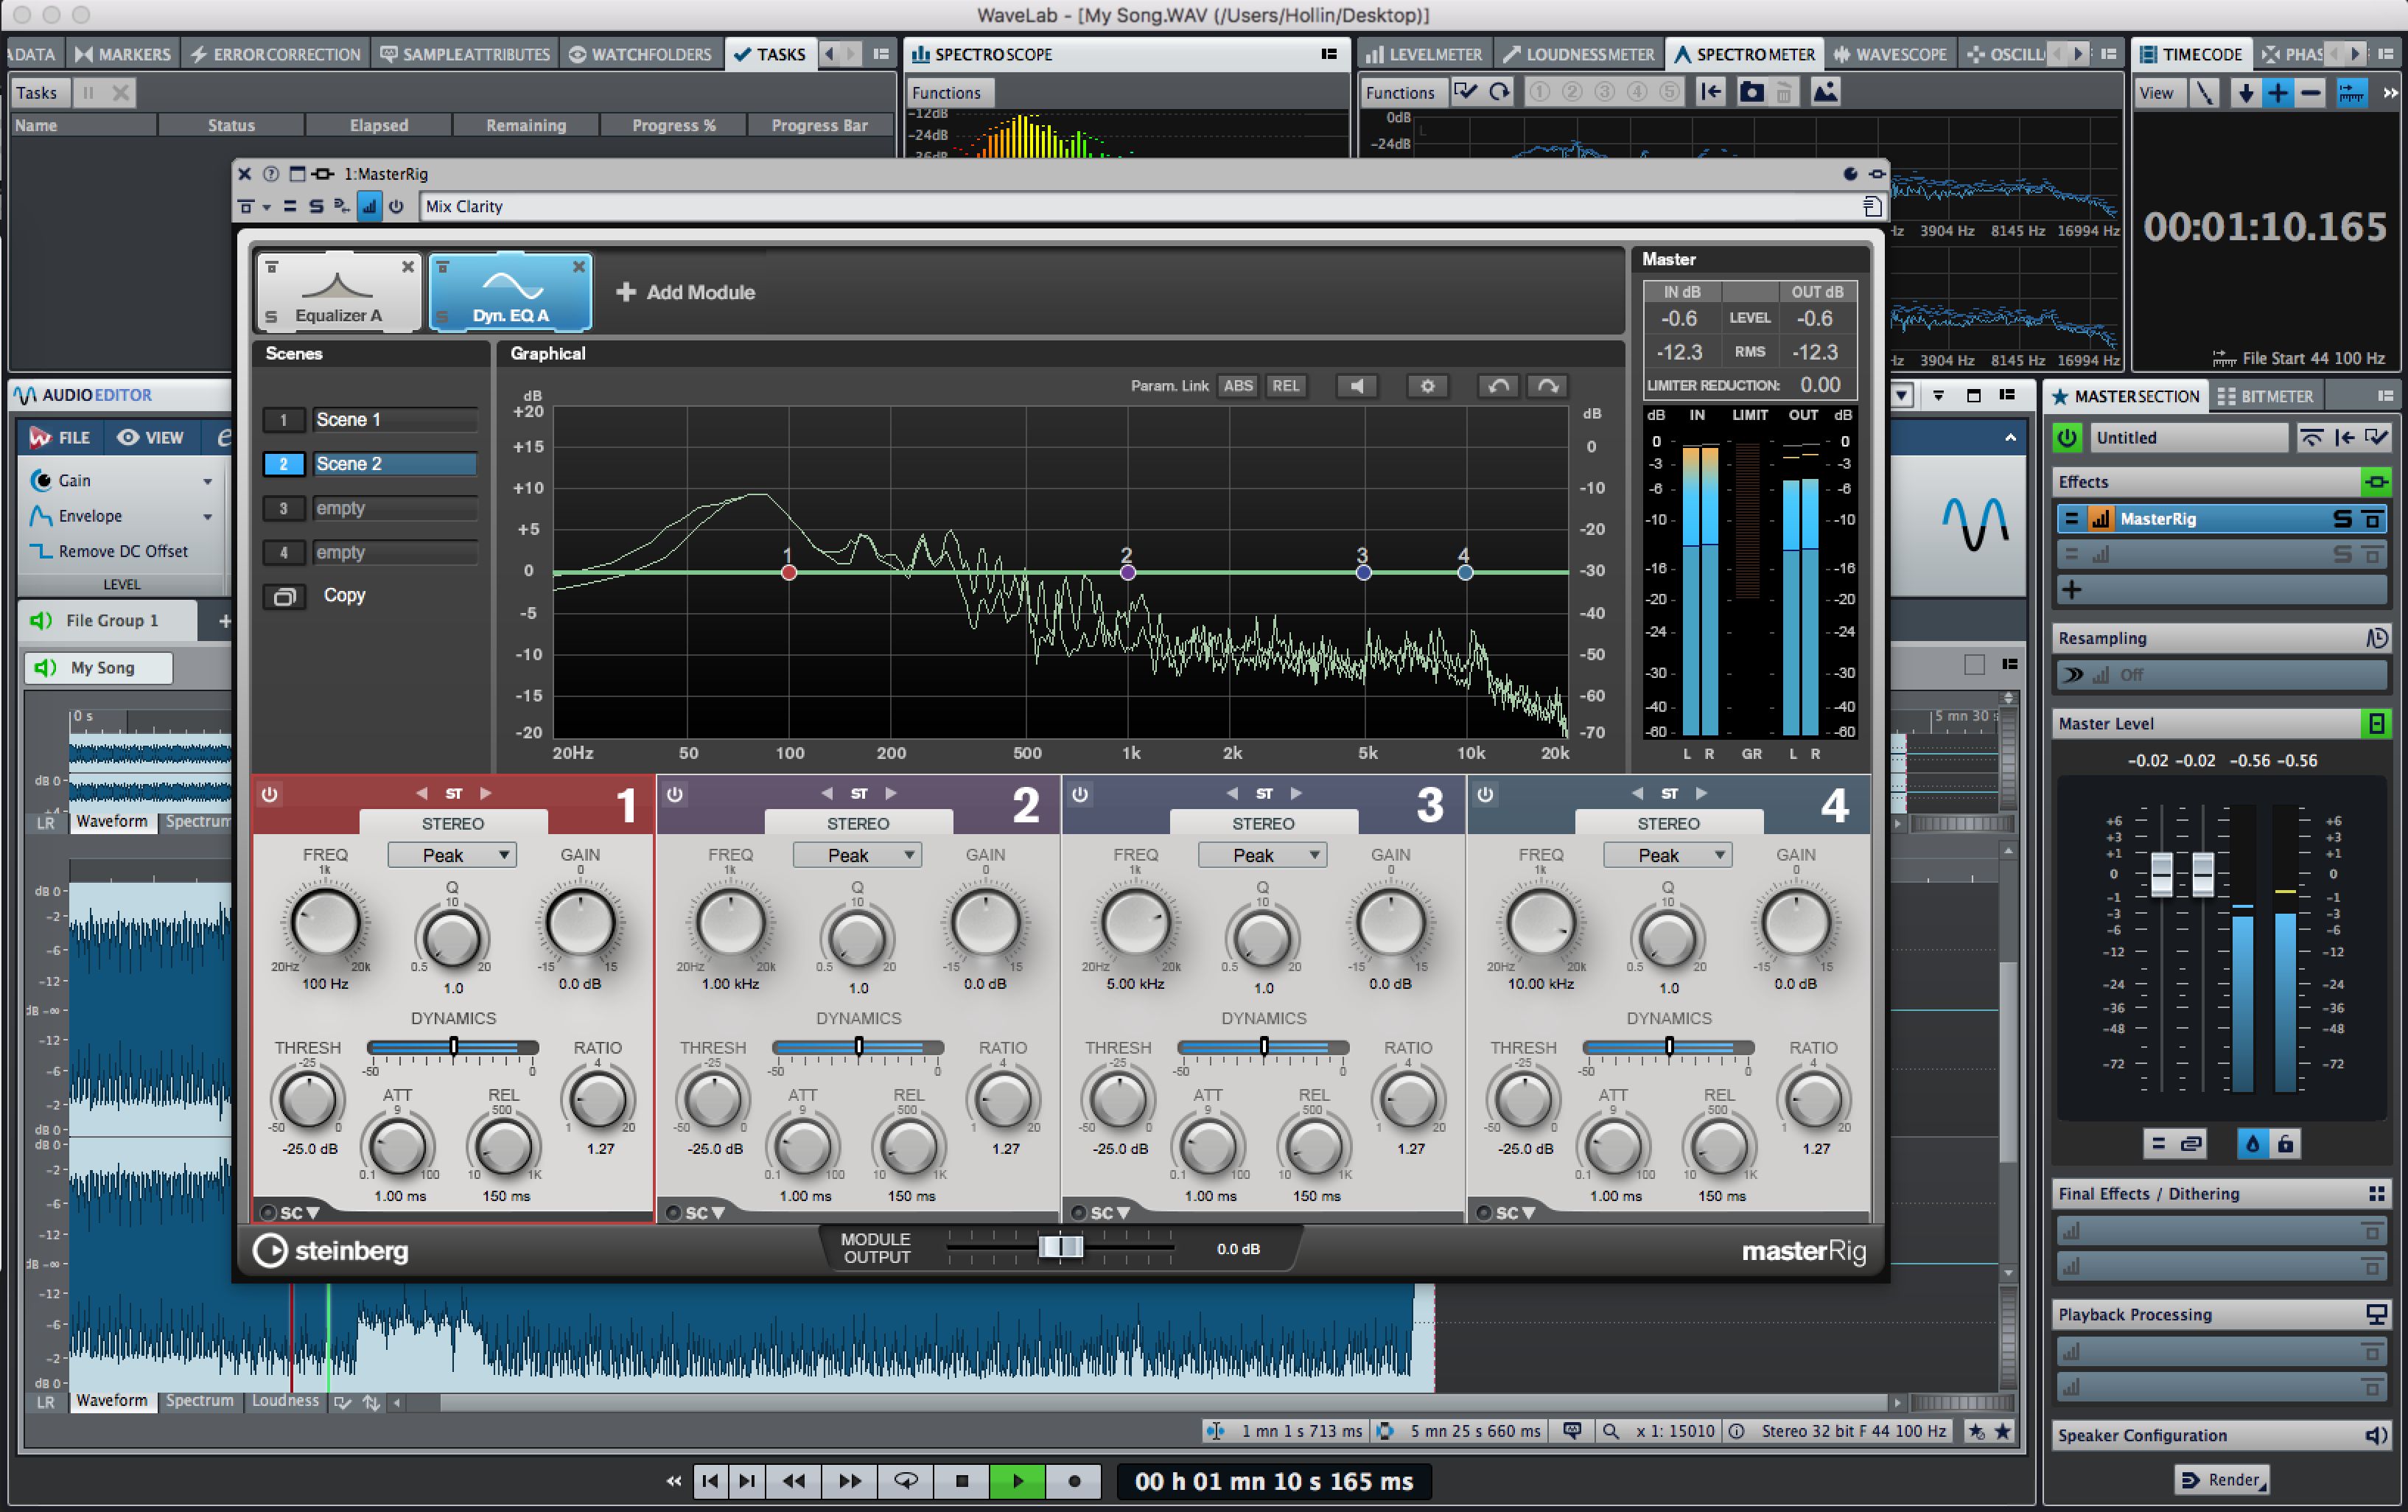
Some people perform a normalization process on a master, but it’s better to use live plug-ins to deal with gain since these can be tweaked, whereas normalization is a one-pass deal. Although you may want to go with your own VST plug-ins for processing, WaveLab 9 has Master Rig, a dedicated all-in-one mastering effect that’s specially designed for this task. Go to the Master Section on the right of the main window and if Master Rig isn’t alreadly loaded, call up an instance of it from the effects menu.
4. Compare Multiple Treatments
One of the cool things about Master Rig is that it has “Scenes” – four slots which can hold four different treatments, and you can flip between these to quickly audition different mastering setups for the same track without having to manually keep putting settings back after trying something new. Use the Copy button to copy and paste setups if you like, or try completely different treatments in different slots.
5. Work With The Modules
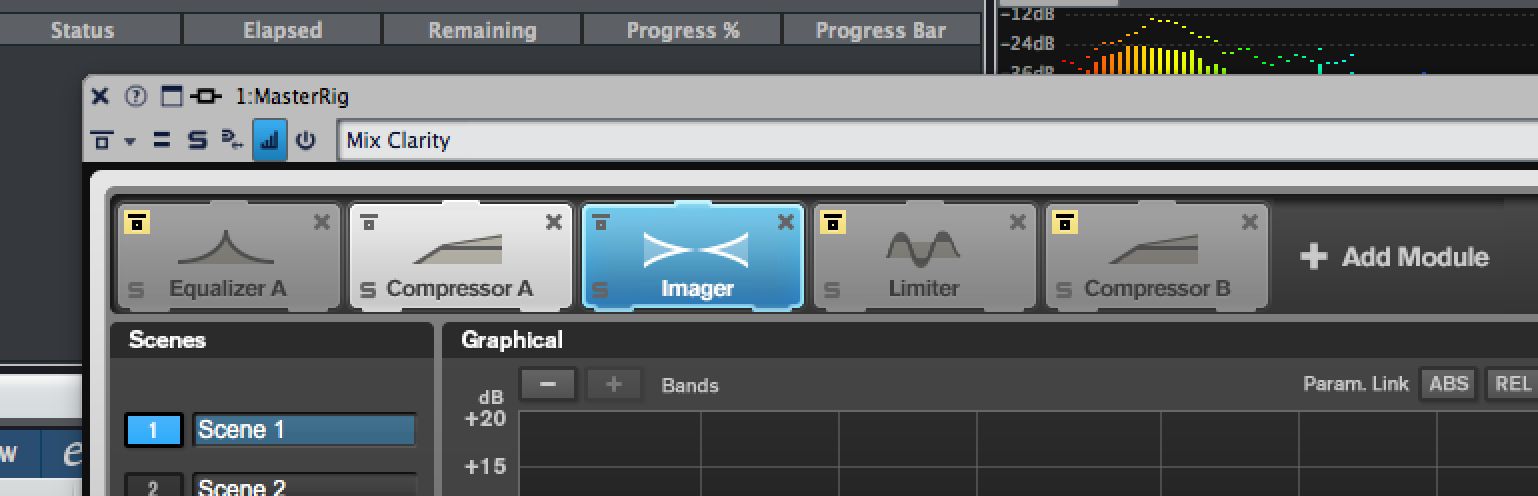
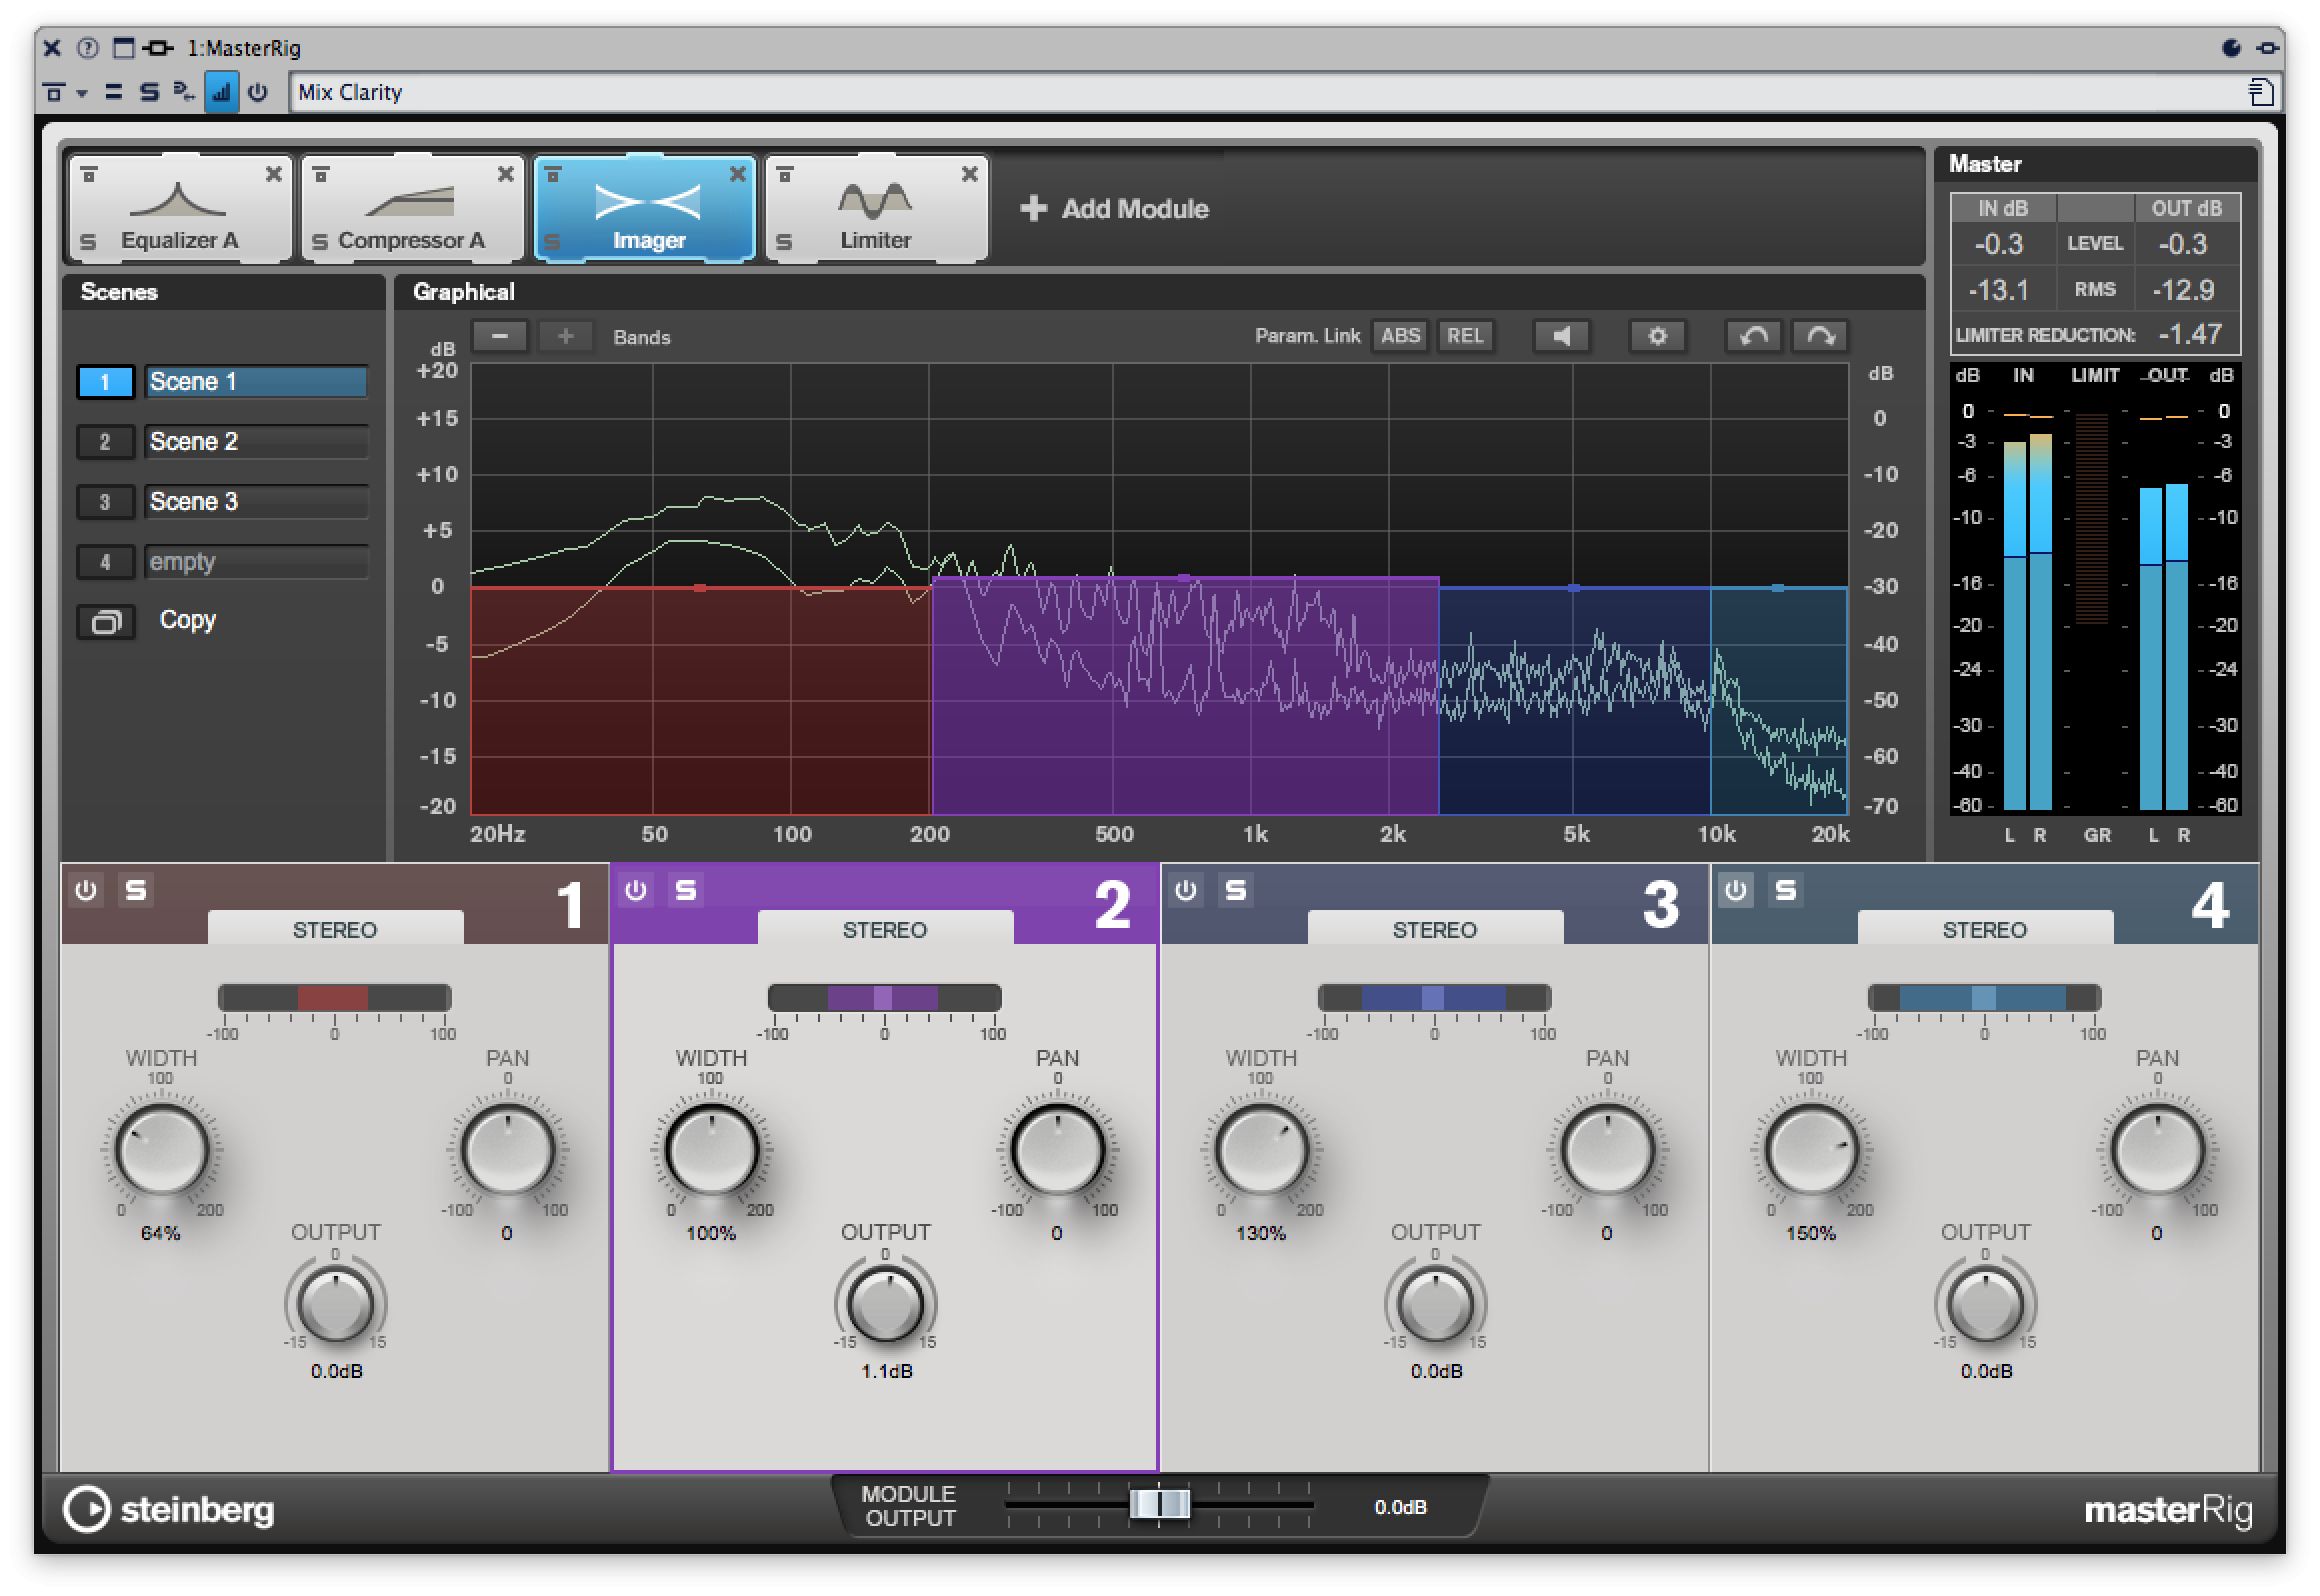
When you’re making settings in Master Rig, you’ll see an area at the top of its window where you can manage the different processor modules. This makes it basically a mastering suite in its own right. Add a module using the plus button, re-order modules by dragging them around, and mute or solo them using the respective buttons on each module. This is a quick way to see what any given module is adding to or taking away from your overall signal.
6. Use Multiband Mode – But With Care
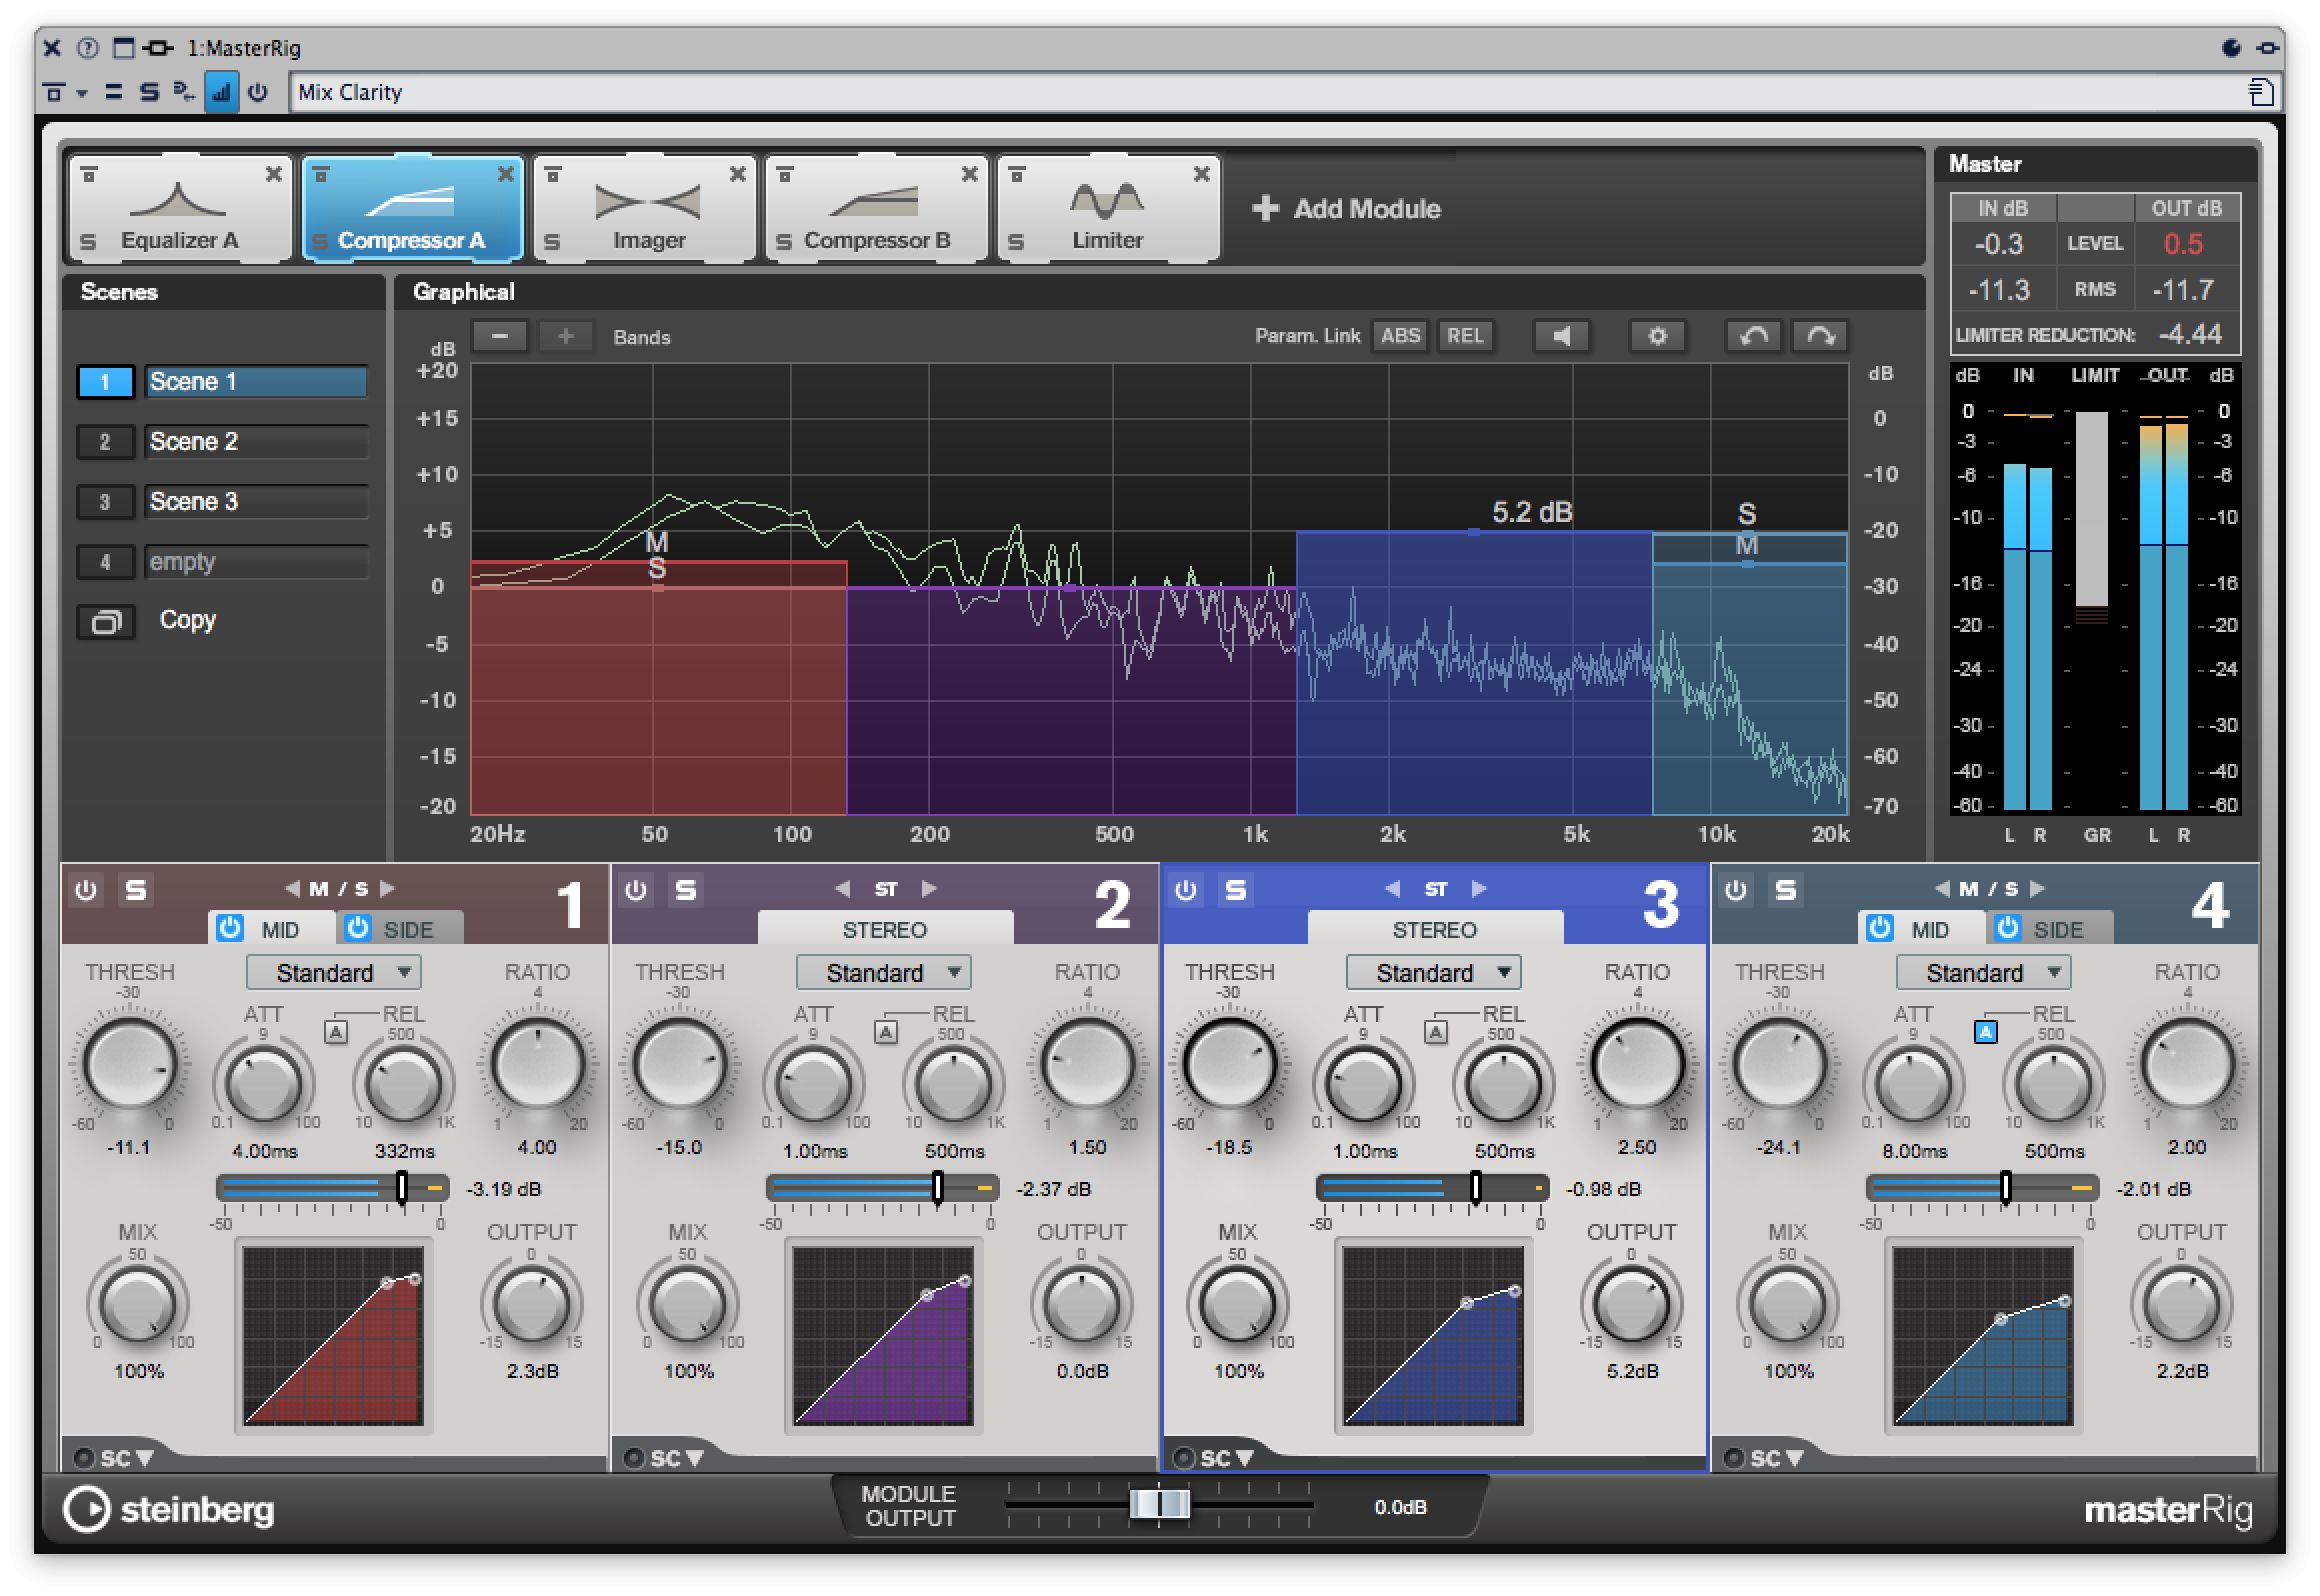
You will notice that many of the modules work in multiband mode and this is shown using different colours. Compressors, stereo processors and saturators for example can have up to 4 bands active at any time, each with a separate setting. Some of these can be switched between stereo and mid / side modes as well. Multiband processing gives you a lot of scope to tweak specific frequency ranges within a master, but be careful not to go too far. It’s easy to quickly stray into making a mix sound weird if you’re moving the compression of the lower mids one way, the stereo mix of the top end another way and so on. If you do work in multiband mode, try to make changes subtly and only when necessary.
7. Meter And Monitor
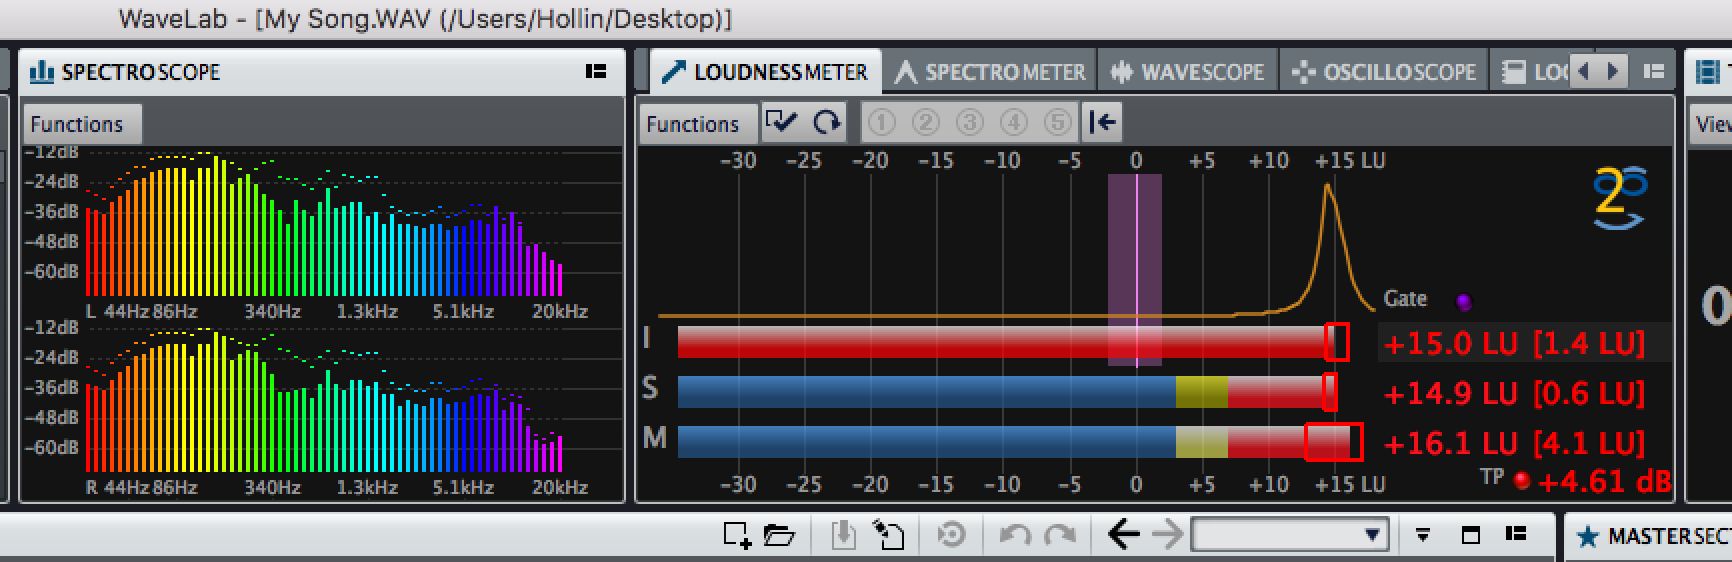
One of Wavelab’s most powerful features is its meters. Far more advanced than simple level meters, these can be found at the top, with tabs allowing you to move between different meter types. You’ll want to consult the manual to find out precisely what each of these does (because there’s a lot of detail), but two are particularly useful even for non-scientists. The Spectroscope gives you a good idea of where the energy and weight of your sound lives. Too much bottom end or not enough top will be evident from very solid or overly thin colour at the relevant end. The Loudness meter is also useful for gauging how your track is doing relative to industry standard level requirements. Again this is a whole topic in itself so if you’re mastering for a client, do read up on it.
8. Use Your Own Plugs
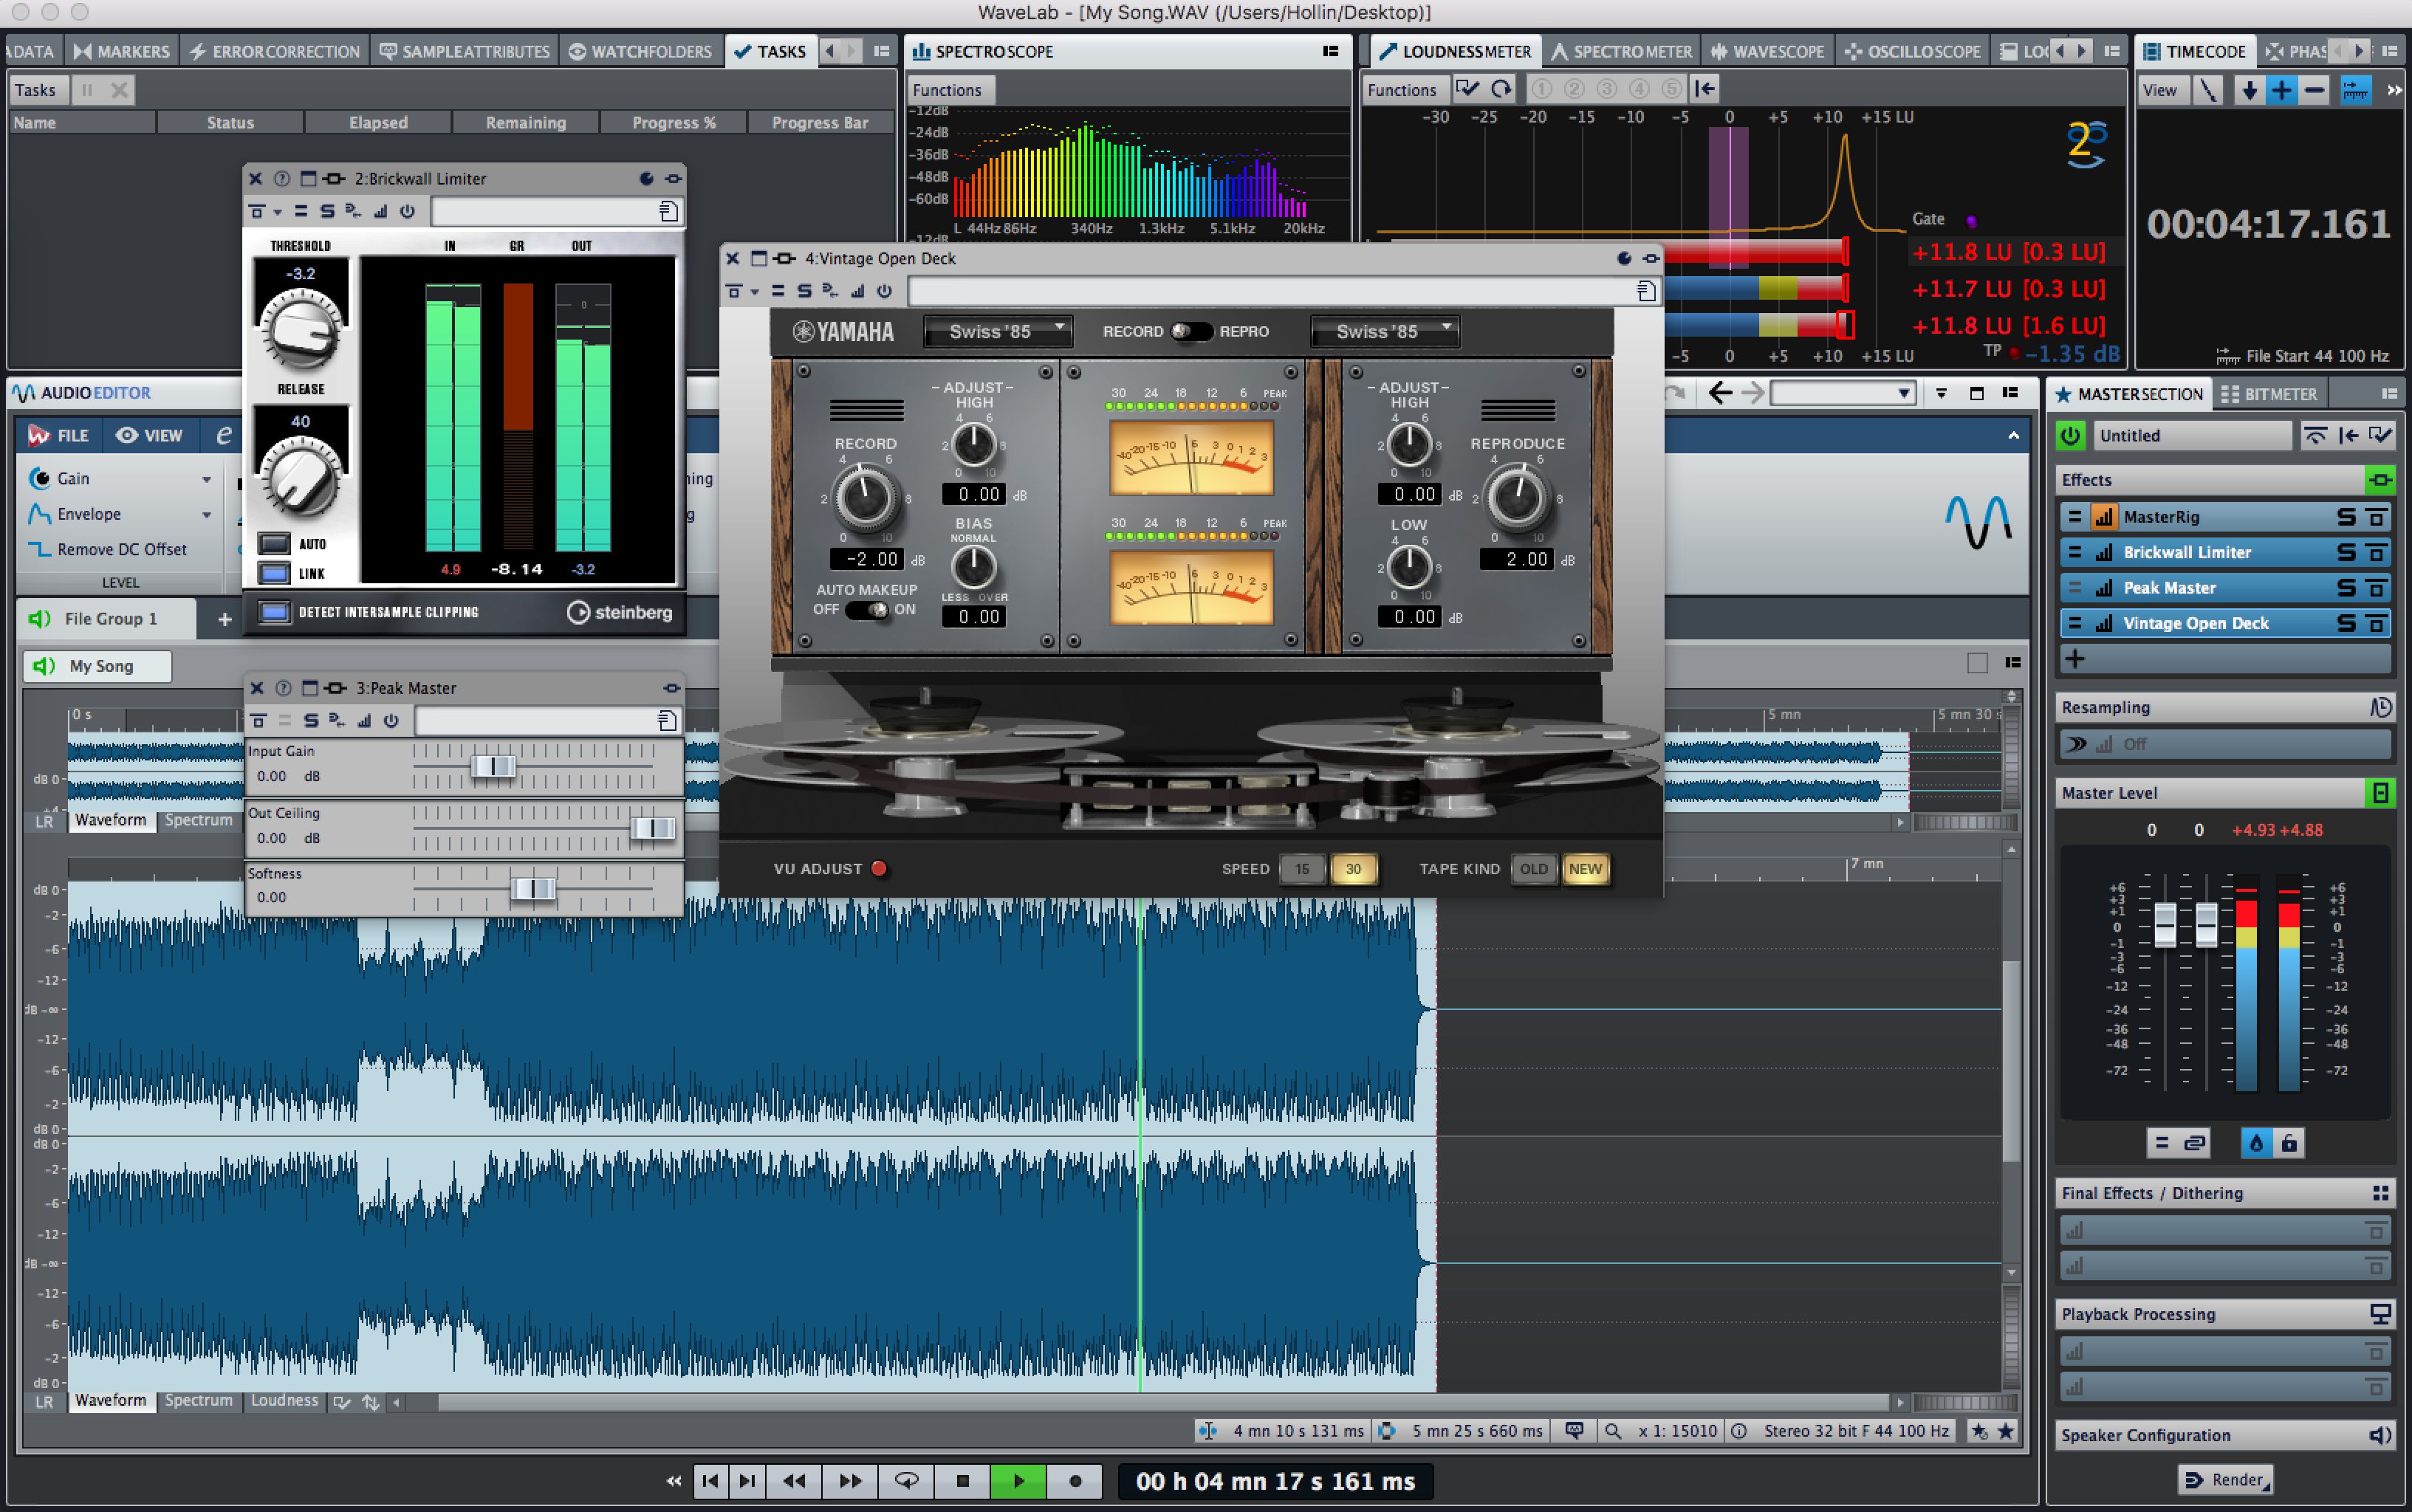
You have access to your own plug-in collection too of course and you can add extra processing using further insert slots in the Effects area. EQ, compression, limiting, stereo imaging and perhaps saturation – here I’m using Steinberg’s Vintage Open Deck for a gorgeous tape warmth – are all good ones to look at.
9. Batch Export With Options
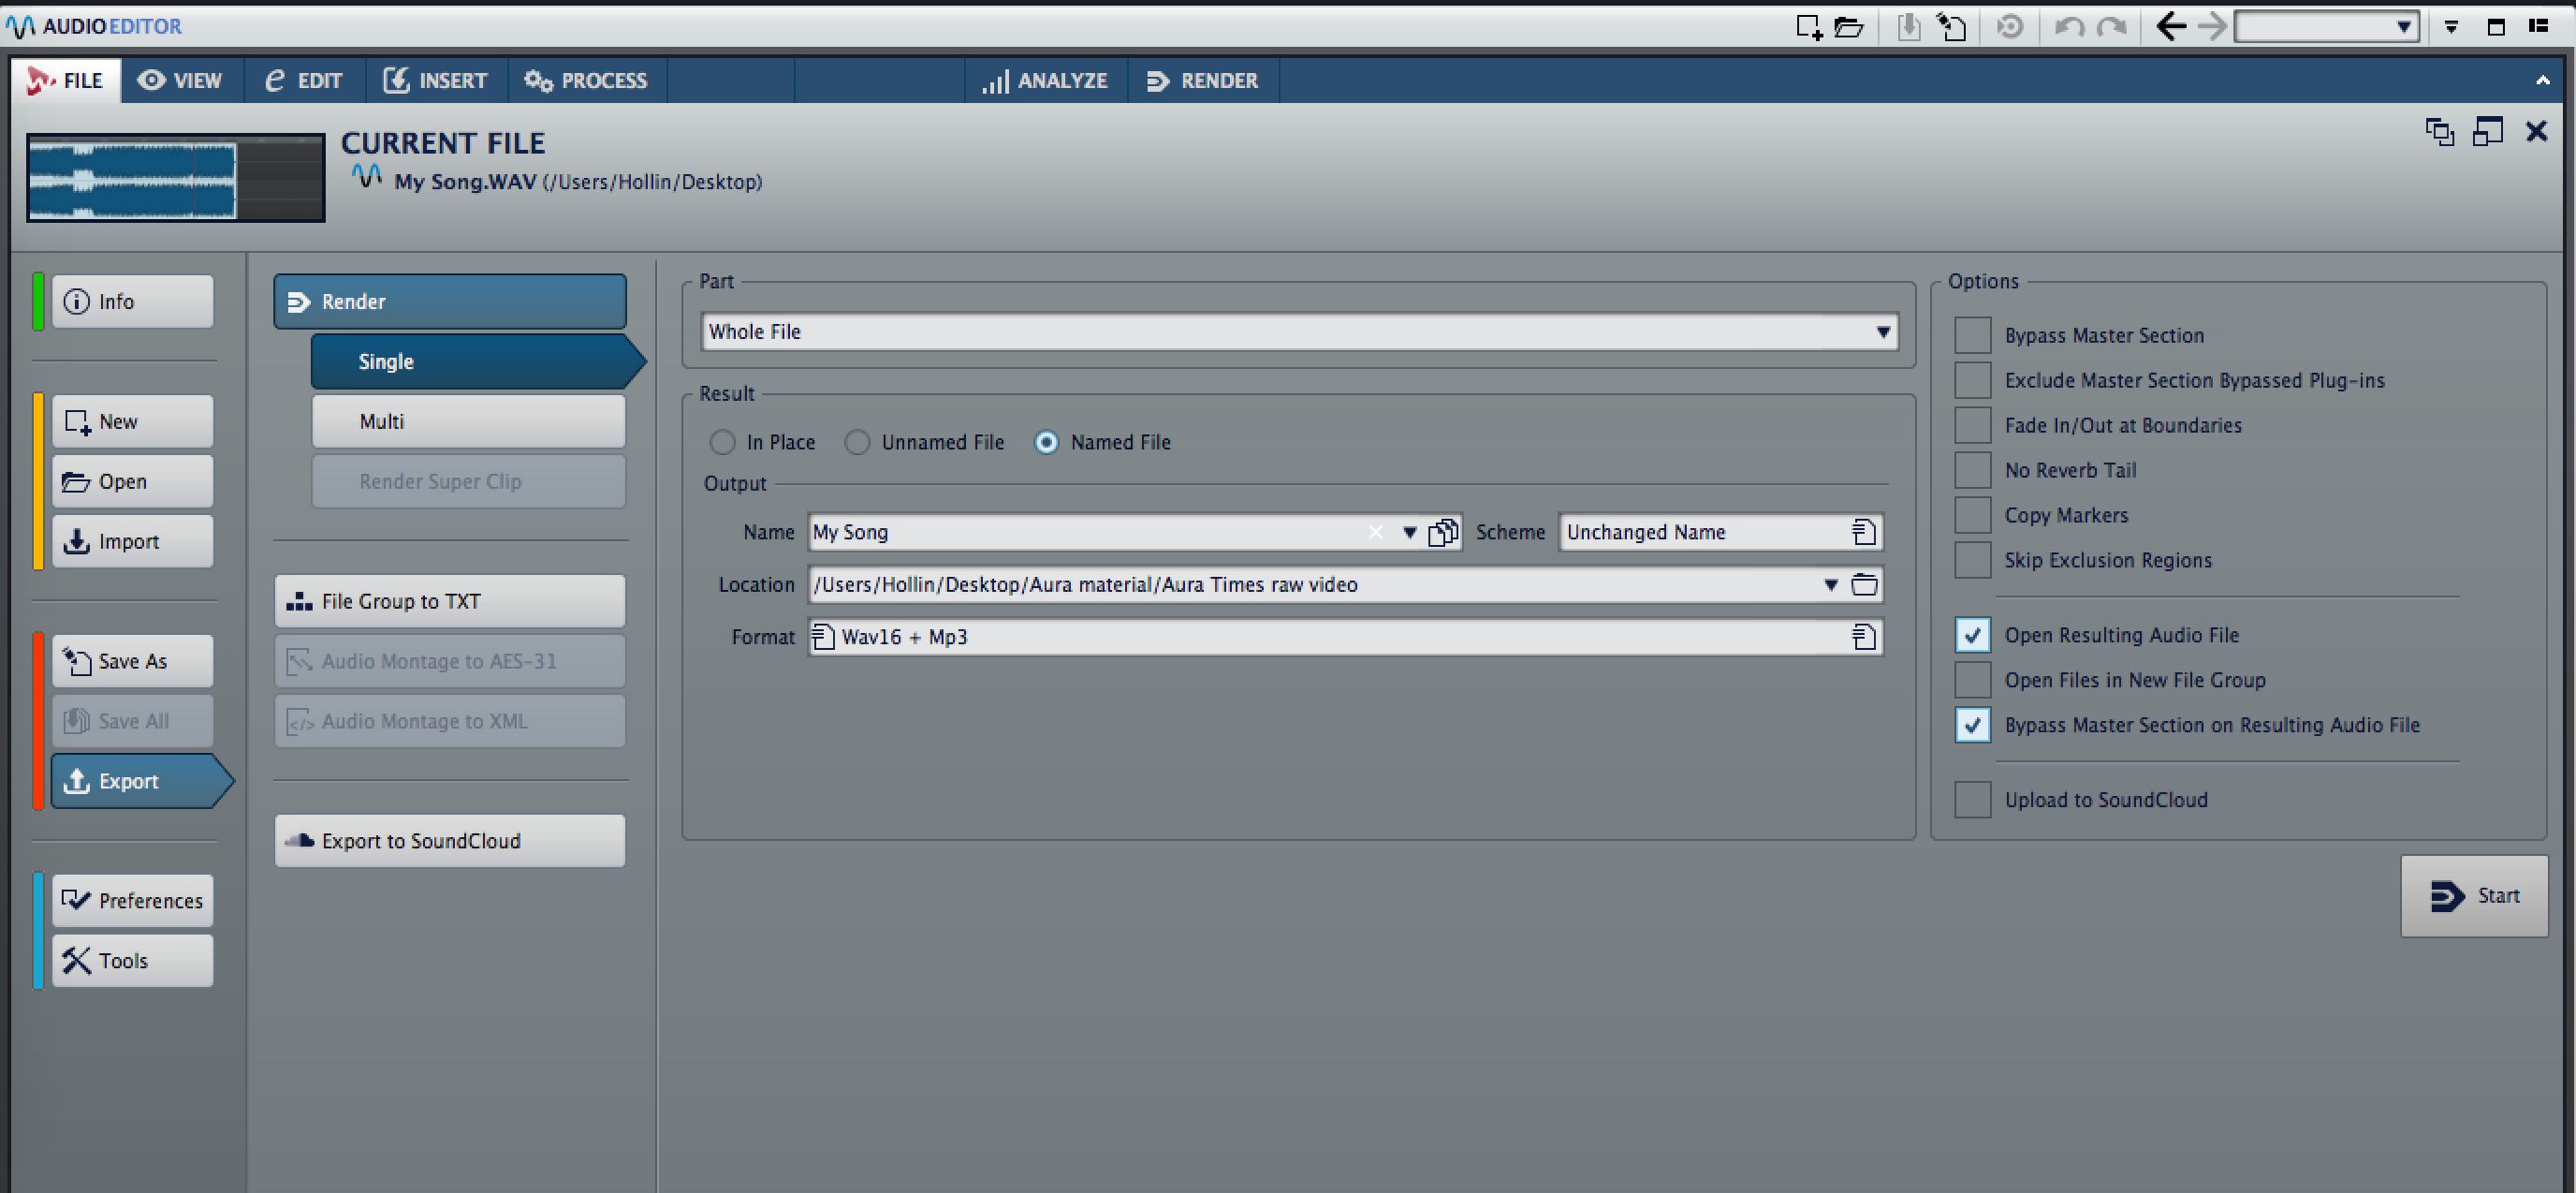
When you’re finally done processing (and making all those creative decisions could take a while), go to the Audio Editor File menu and choose the Export option. Here you can see a bunch of options including the ability to export full quality and compressed versions at the same time, include or exclude master processing and from the Render menu, even choose to export multiple files out at once as a Montage, should you wish. Remember also that as long as you save your Wavelab project and keep your source files, you will be able to reopen the raw project at any point and make changes. Don’t assume a master is perfect until you’re absolutely sure that it is!

Discussion
Want to join the discussion?
Create an account or login to get started!