
Trance beats are not that difficult to produce, let's face it. Why? Well, they are 4/4, 16-beat, it's a generic 4 on the floor drum beat with the snare on the 5 and 13, and kick marking every bar. The only thing that really separates really generic trance beats from really interesting trance beats (all of which are still 16 beats long) would be the hi-hats.
Think about it, it's always the boom-boom-boom-boom of the kick, the snare is always pretty constant on the 5 & 13, but the hi-hats tend to vary dramatically. In this Quick Tutorial, I'd like to show you a quick and easy way to get grooving hi-hats with very little effort in Reason. You can also use this tip with others DAWs: Logic, Pro Tools, Cubase, etc.
Step 1 - Choose a Hi-hat
First, pick out out a decent open hi-hat. Personally, I like something a little higher up the frequency spectrum. You'll see the type I'm talking about in a second when you hear the first rendition of the hi-hat loop I'm creating. Generally, one of the 909 styles with a slightly lower decay. Feel free to experiment, of course!
Step 2 - Draw in 8 Hi-Hat Notes
Now, in your favorite DAW, create a 16-beat pattern of an open hi-hat playing over half a measure. This means drawing in approximately 8 notes within a 16th-note grid. Keep in mind, this will sound like hell at first. Don't worry, there's a method behind this madness.
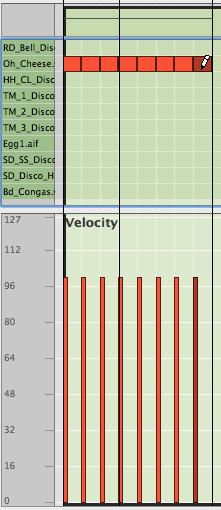
Yep, I bet you'll shoot yourself if you listen to this one beat for over a minute, so make sure you press the stop button and move on to the next step.
Step 3 - Pattern Your Velocities
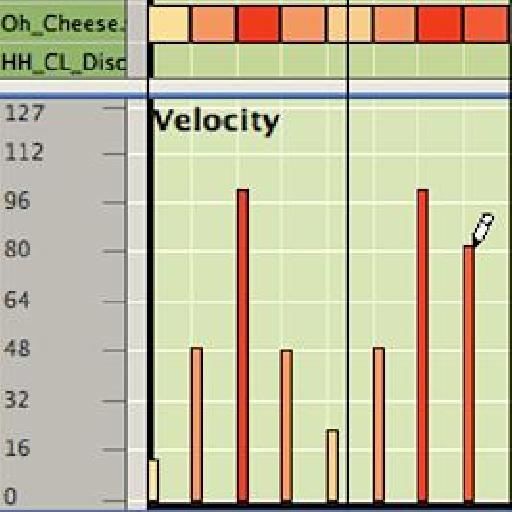
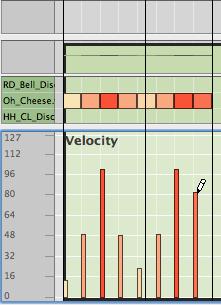
Here's where the fun starts. Go into the velocity editor of whatever DAW you are using—they all have them. In Reason, it's the edit mode. Now, I'm going to use the velocity editor to create that pumping side-chain effect often heard used on the kick drum. What gives me more of an advantage with this though, is that I can also introduce minor nuances of the classic rhythm that will set my pattern apart.
I'll make the first note very low velocity, then the next note a little more audible. Finally, on all of the 3s, 7s, 11s and 15s, I'll make the velocity pretty hot. This would also be where the classic open hi-hat would be prominent.
Step 4: Adjust your Drum's Velocity Sensitivity
Okay, so far it's still sounding a little 'meh'. Let's make a slight adjustment. In my drums module, I'm going to go to the open hi-hat channel, and bump up the velocity sensitivity. Let's check it out now:
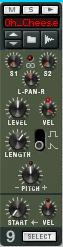
Okay, now I have that good ol' pumping hi-hat rhythm. I also have the option of adjusting the length of playback of the open hi-hat as the song moves to certain parts to make it more 'airy' or choppy. Let's hear it with a kick:
Now, you can add in additional percussion, loops, crashes, and rides as needed.
Check out the Live 8 404 - Making Electronic Dance Music, Logic 404 - Mixing Electronica and Reason 5 102 - Kong: King of Drums for more info on creating and mixing beats in your DAW.

Discussion
Want to join the discussion?
Create an account or login to get started!