
Gadget for iPhone and iPad has practically the same functionality as the Mac version, but on the desktop you get to see all 4 main sections at once! So these techniques can be translated to the iOS apps, just using one of the 4 interface sections at a time. You can download the project file for this tutorial here.
1. Fire Up The Desktop App
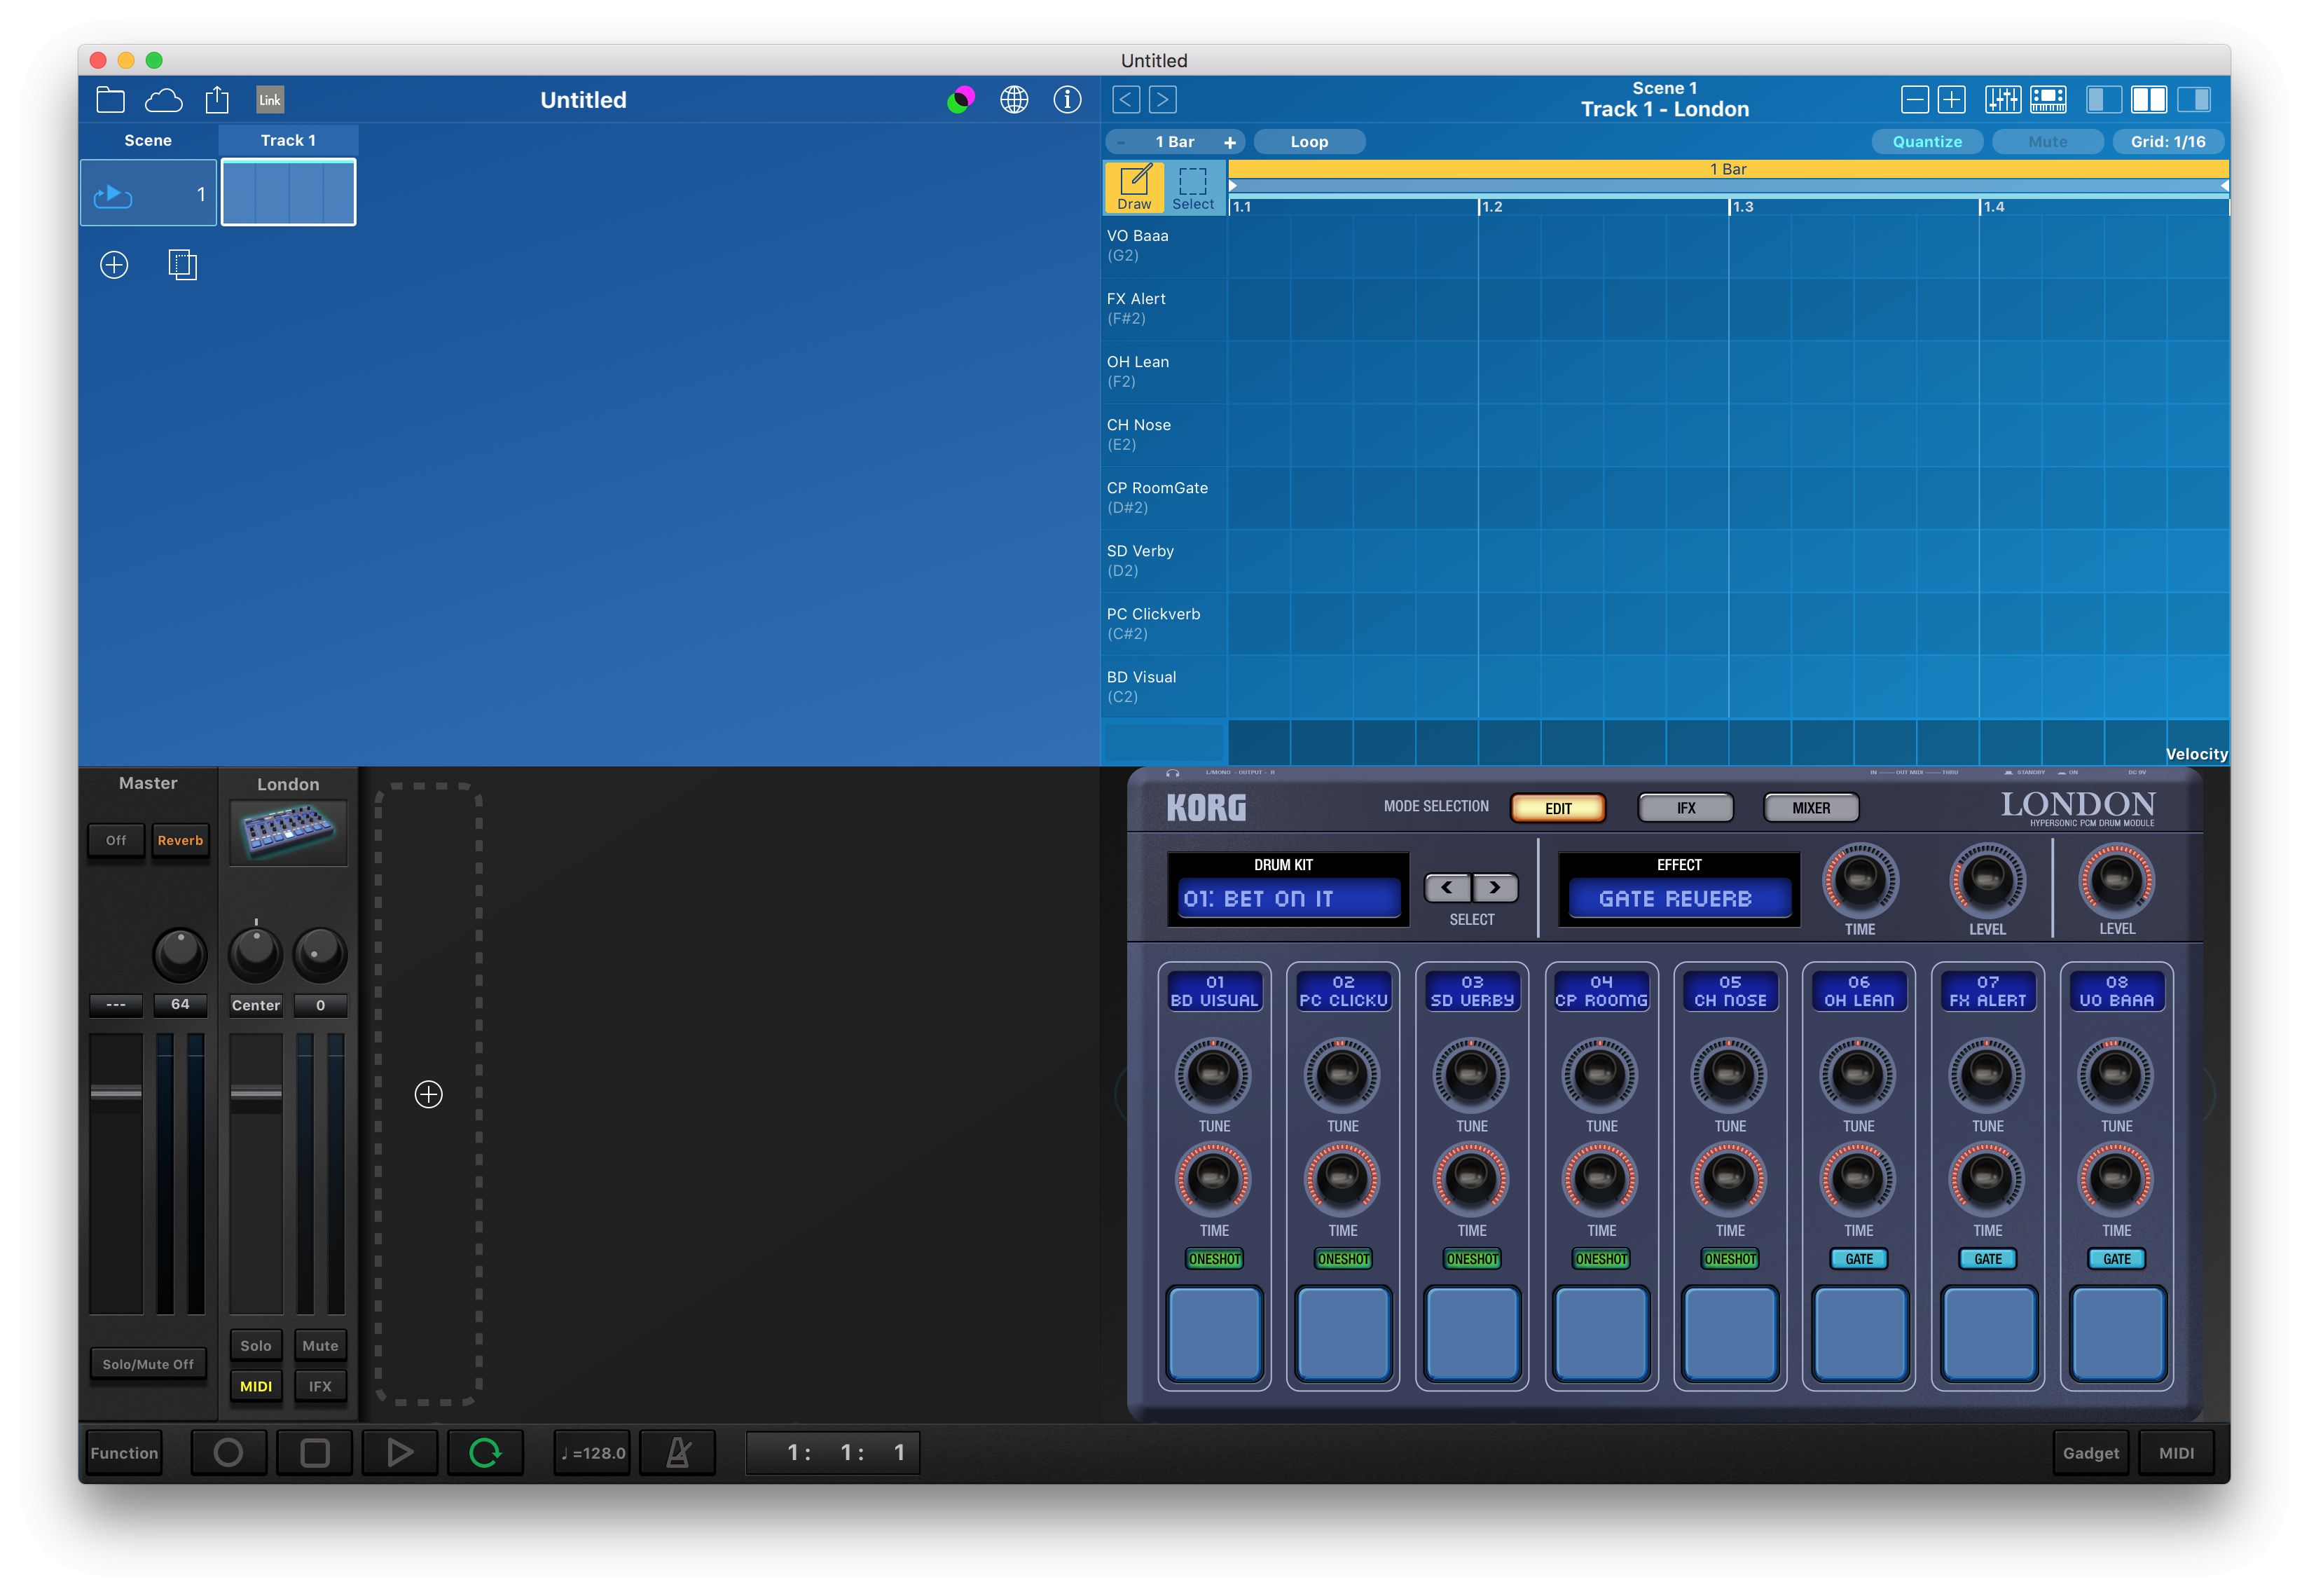
Gadget for Mac will ask you to choose an instrument when you first open it and although you don't have to start with a beat, it makes sense to choose a drum machine as that will probably often form the basis of your track. Here, we have selected a London Drum Module and then been taken to the main screen.
2. Get Started
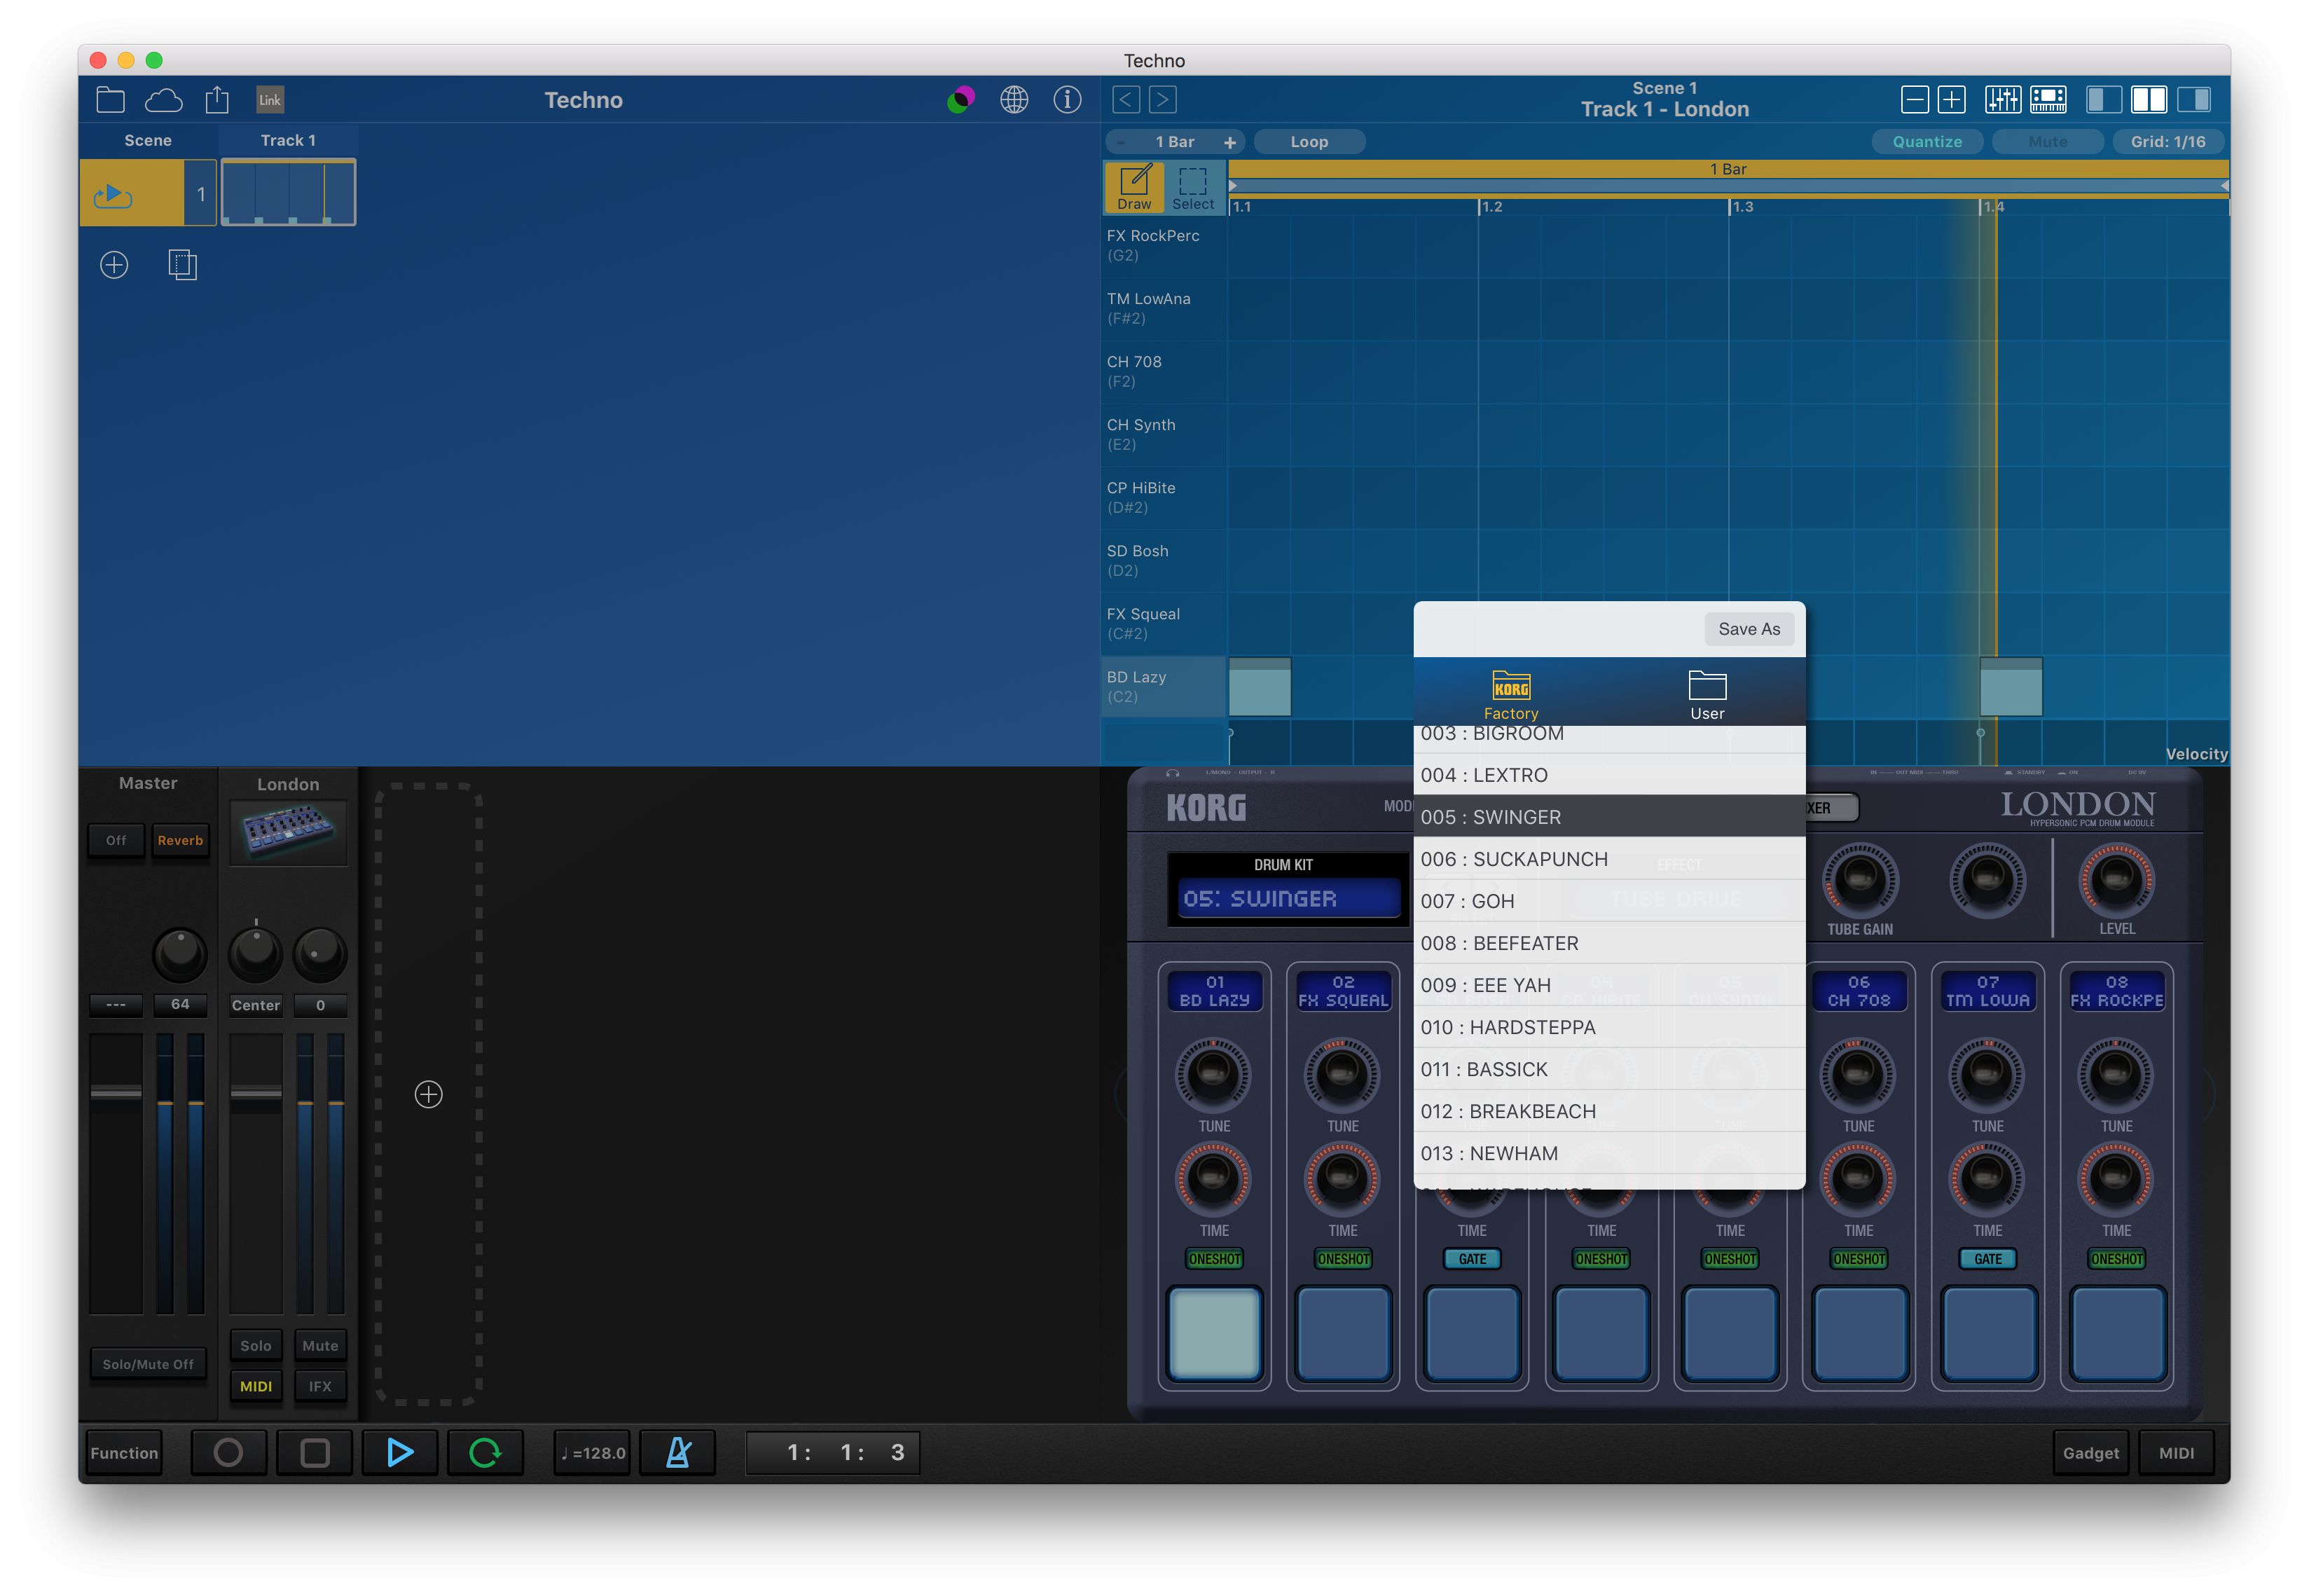
Next up, choose a kit that you like the sound of and set the tempo in Gadget’s transport panel. For techno you’re going to be looking at anywhere from about 120 to 145 BPM, though you can be creative about this if you like. Use your MIDI input device to enter a 4/4 kick pattern and play back to hear it. You can use the mouse for this if you don’t have a MIDI device to hand - indeed this is one of the great things about Gadget, it allows you to work without a keyboard.
3. Add More Elements

Now add a couple of snare and maybe closed hat beats - just something to quickly put together a typical techno rhythm. You can alter the quantise and grid settings by clicking in the top right hand corner of the MIDI grid if you like - however for dance music in this genre, fairly tight 1/16 quantisation usually works well.
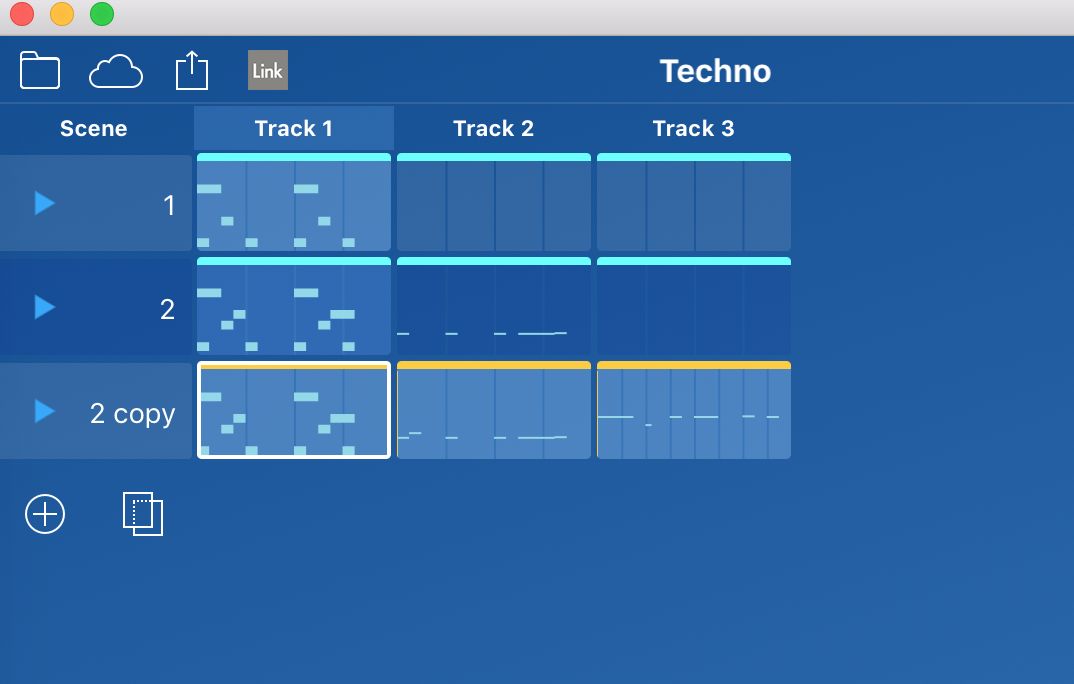
4. Duplicate The Part
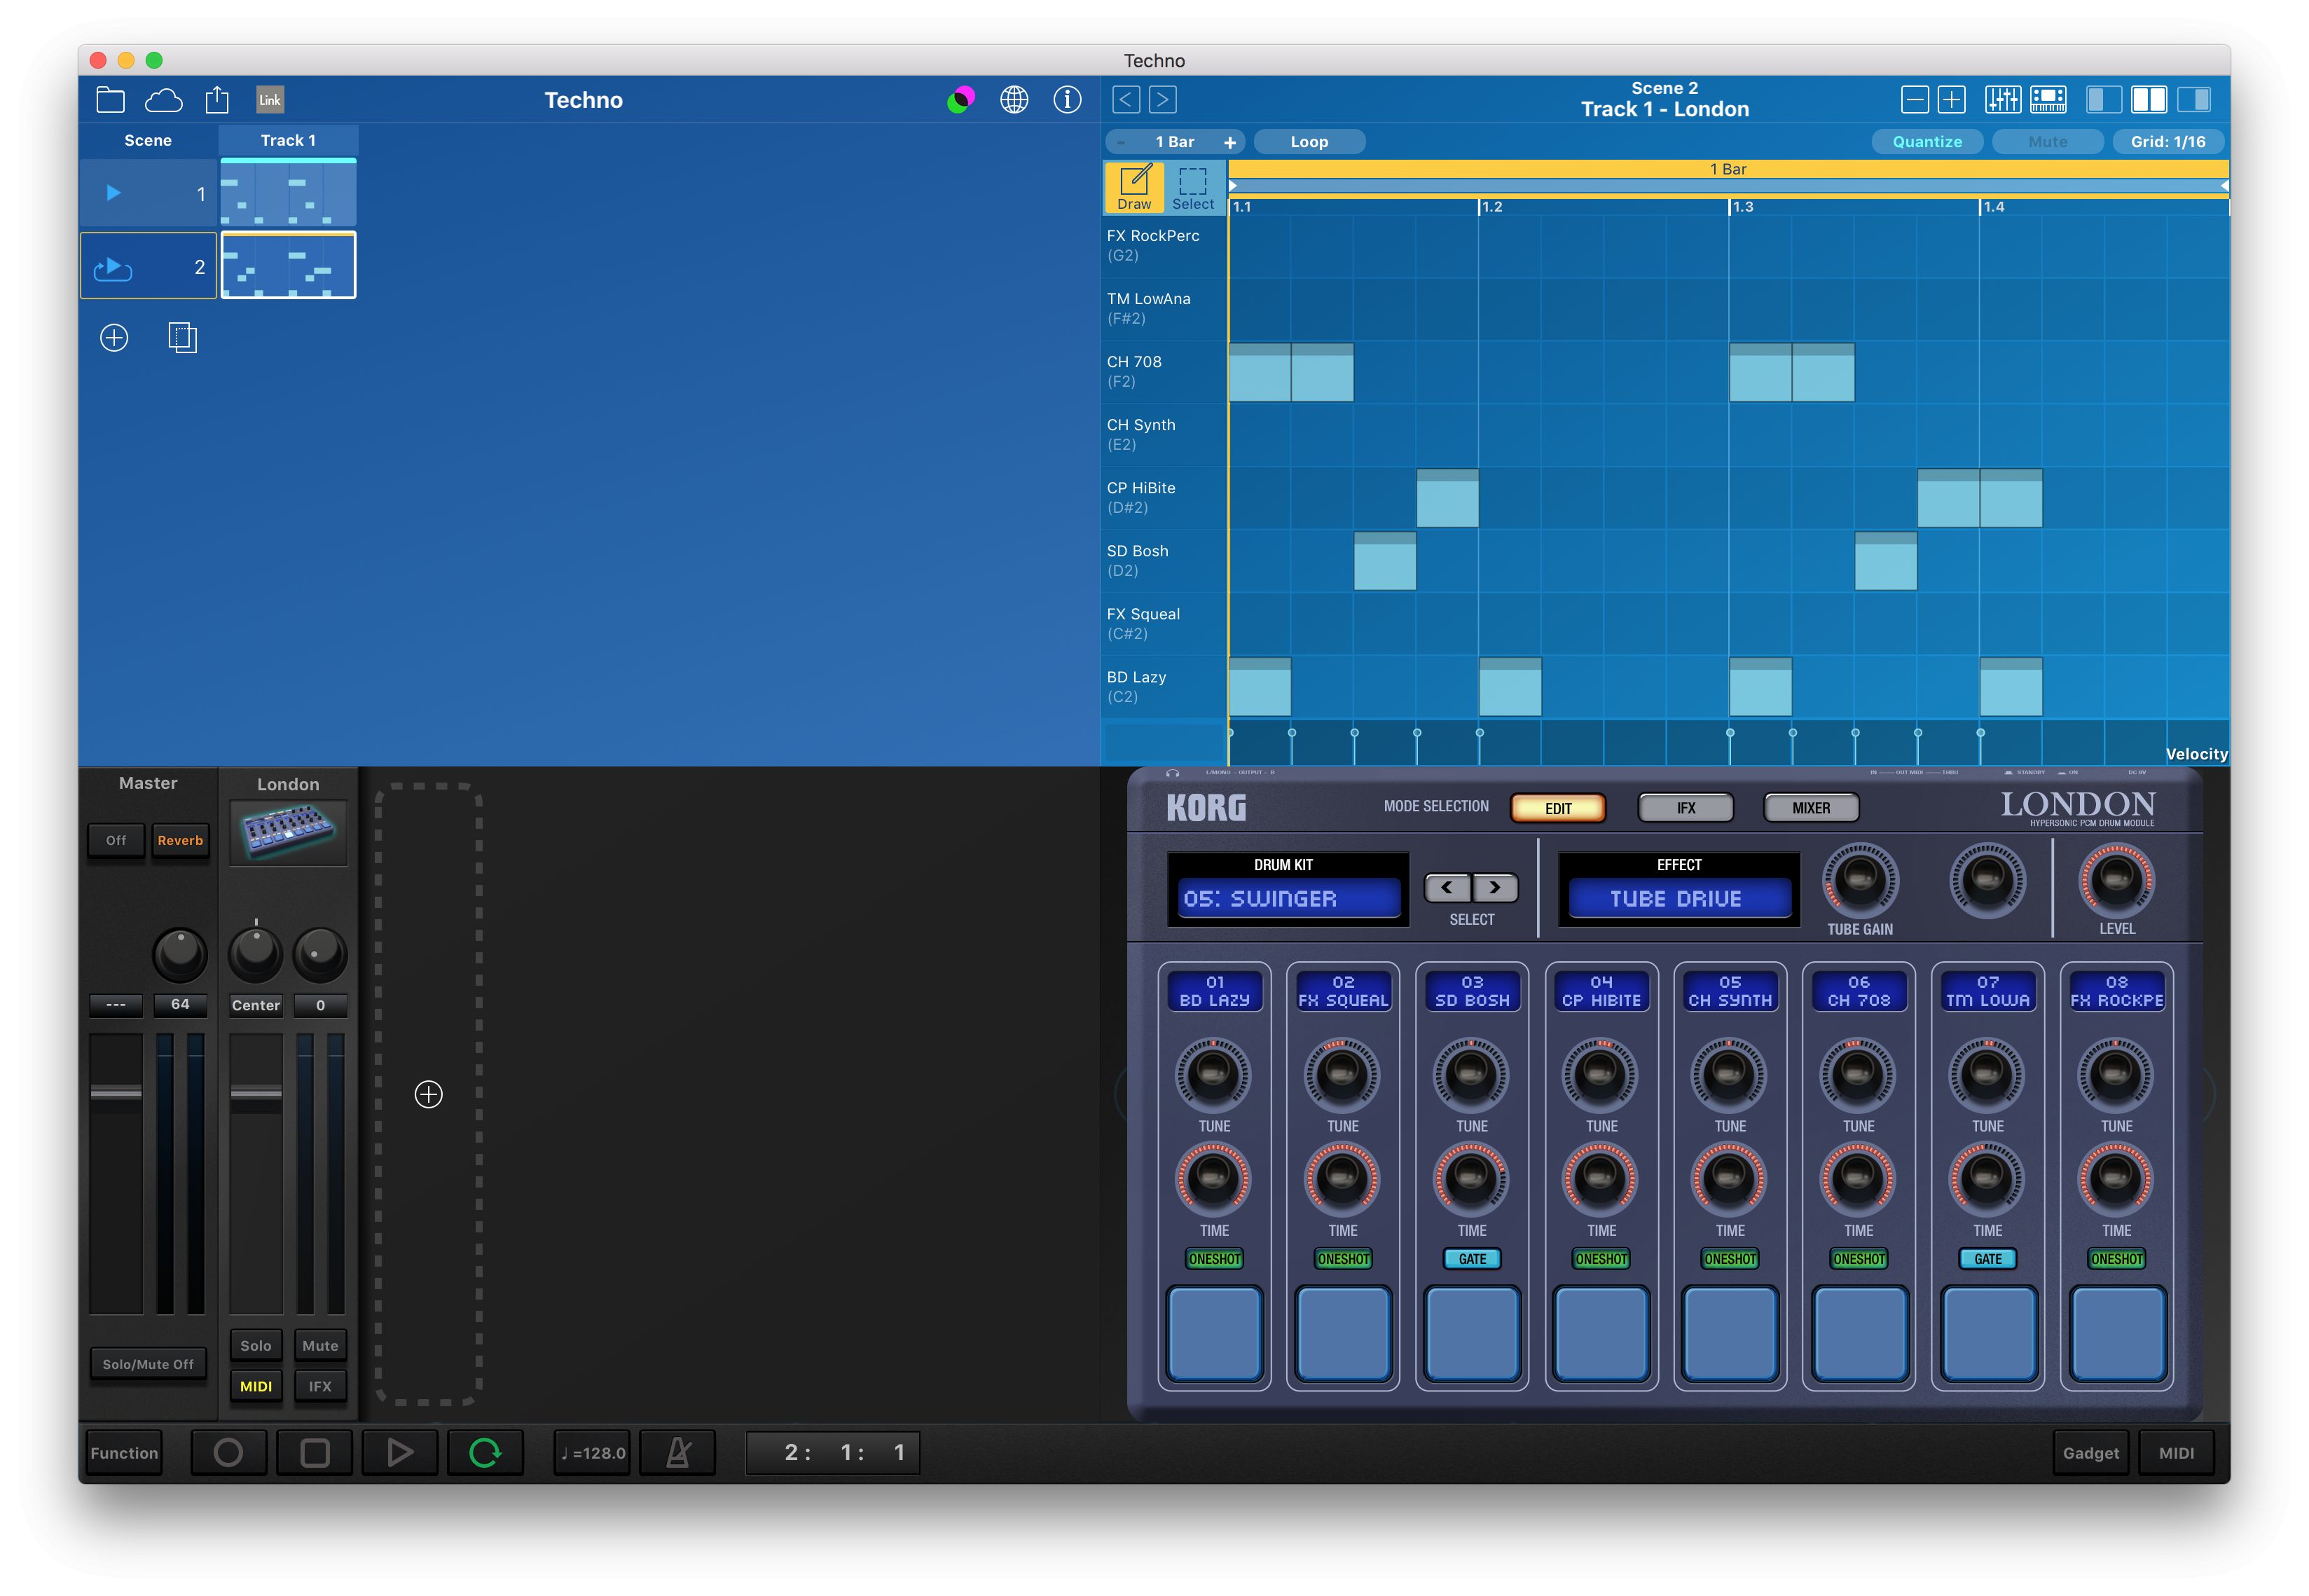
You’ll need your beat to start to evolve, so click the plus button in the Scene window to add a new scene. Then either right click on your existing clip and choose to copy and paste it to the new scene, or drag and drop it into the empty area. Gadget will duplicate the clip. Now you can start adding more hits to the new clip and it will be independent of the original. Simply use the Scene select pads to flip between playing different scenes.
5. Add Some Bass
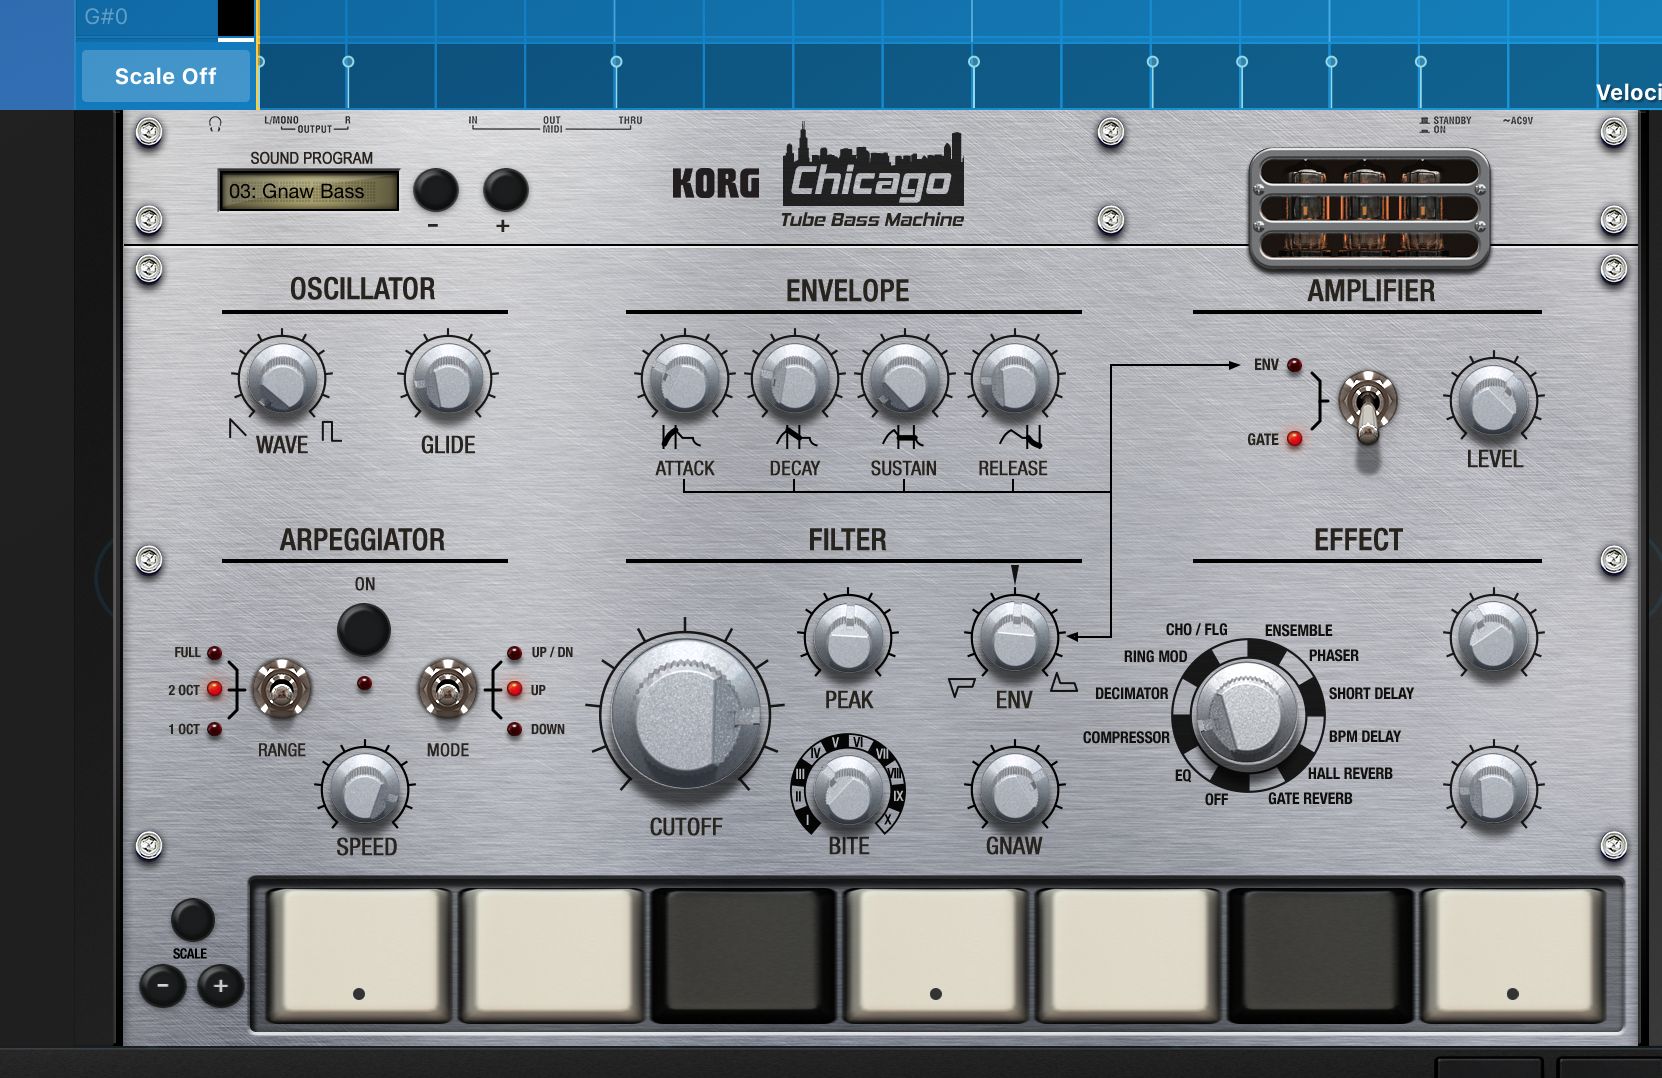
Click on the Add Gadget button in the Gadget area at the bottom left and choose a bass instrument. Here, we have loaded an instance of Chicago and chosen a cool sounding preset, then drawn in a simple bass pattern. By tweaking the synth’s controls and effects we can really fatten up the bass part. Already, this is starting to sound good.
6. Add A Lead
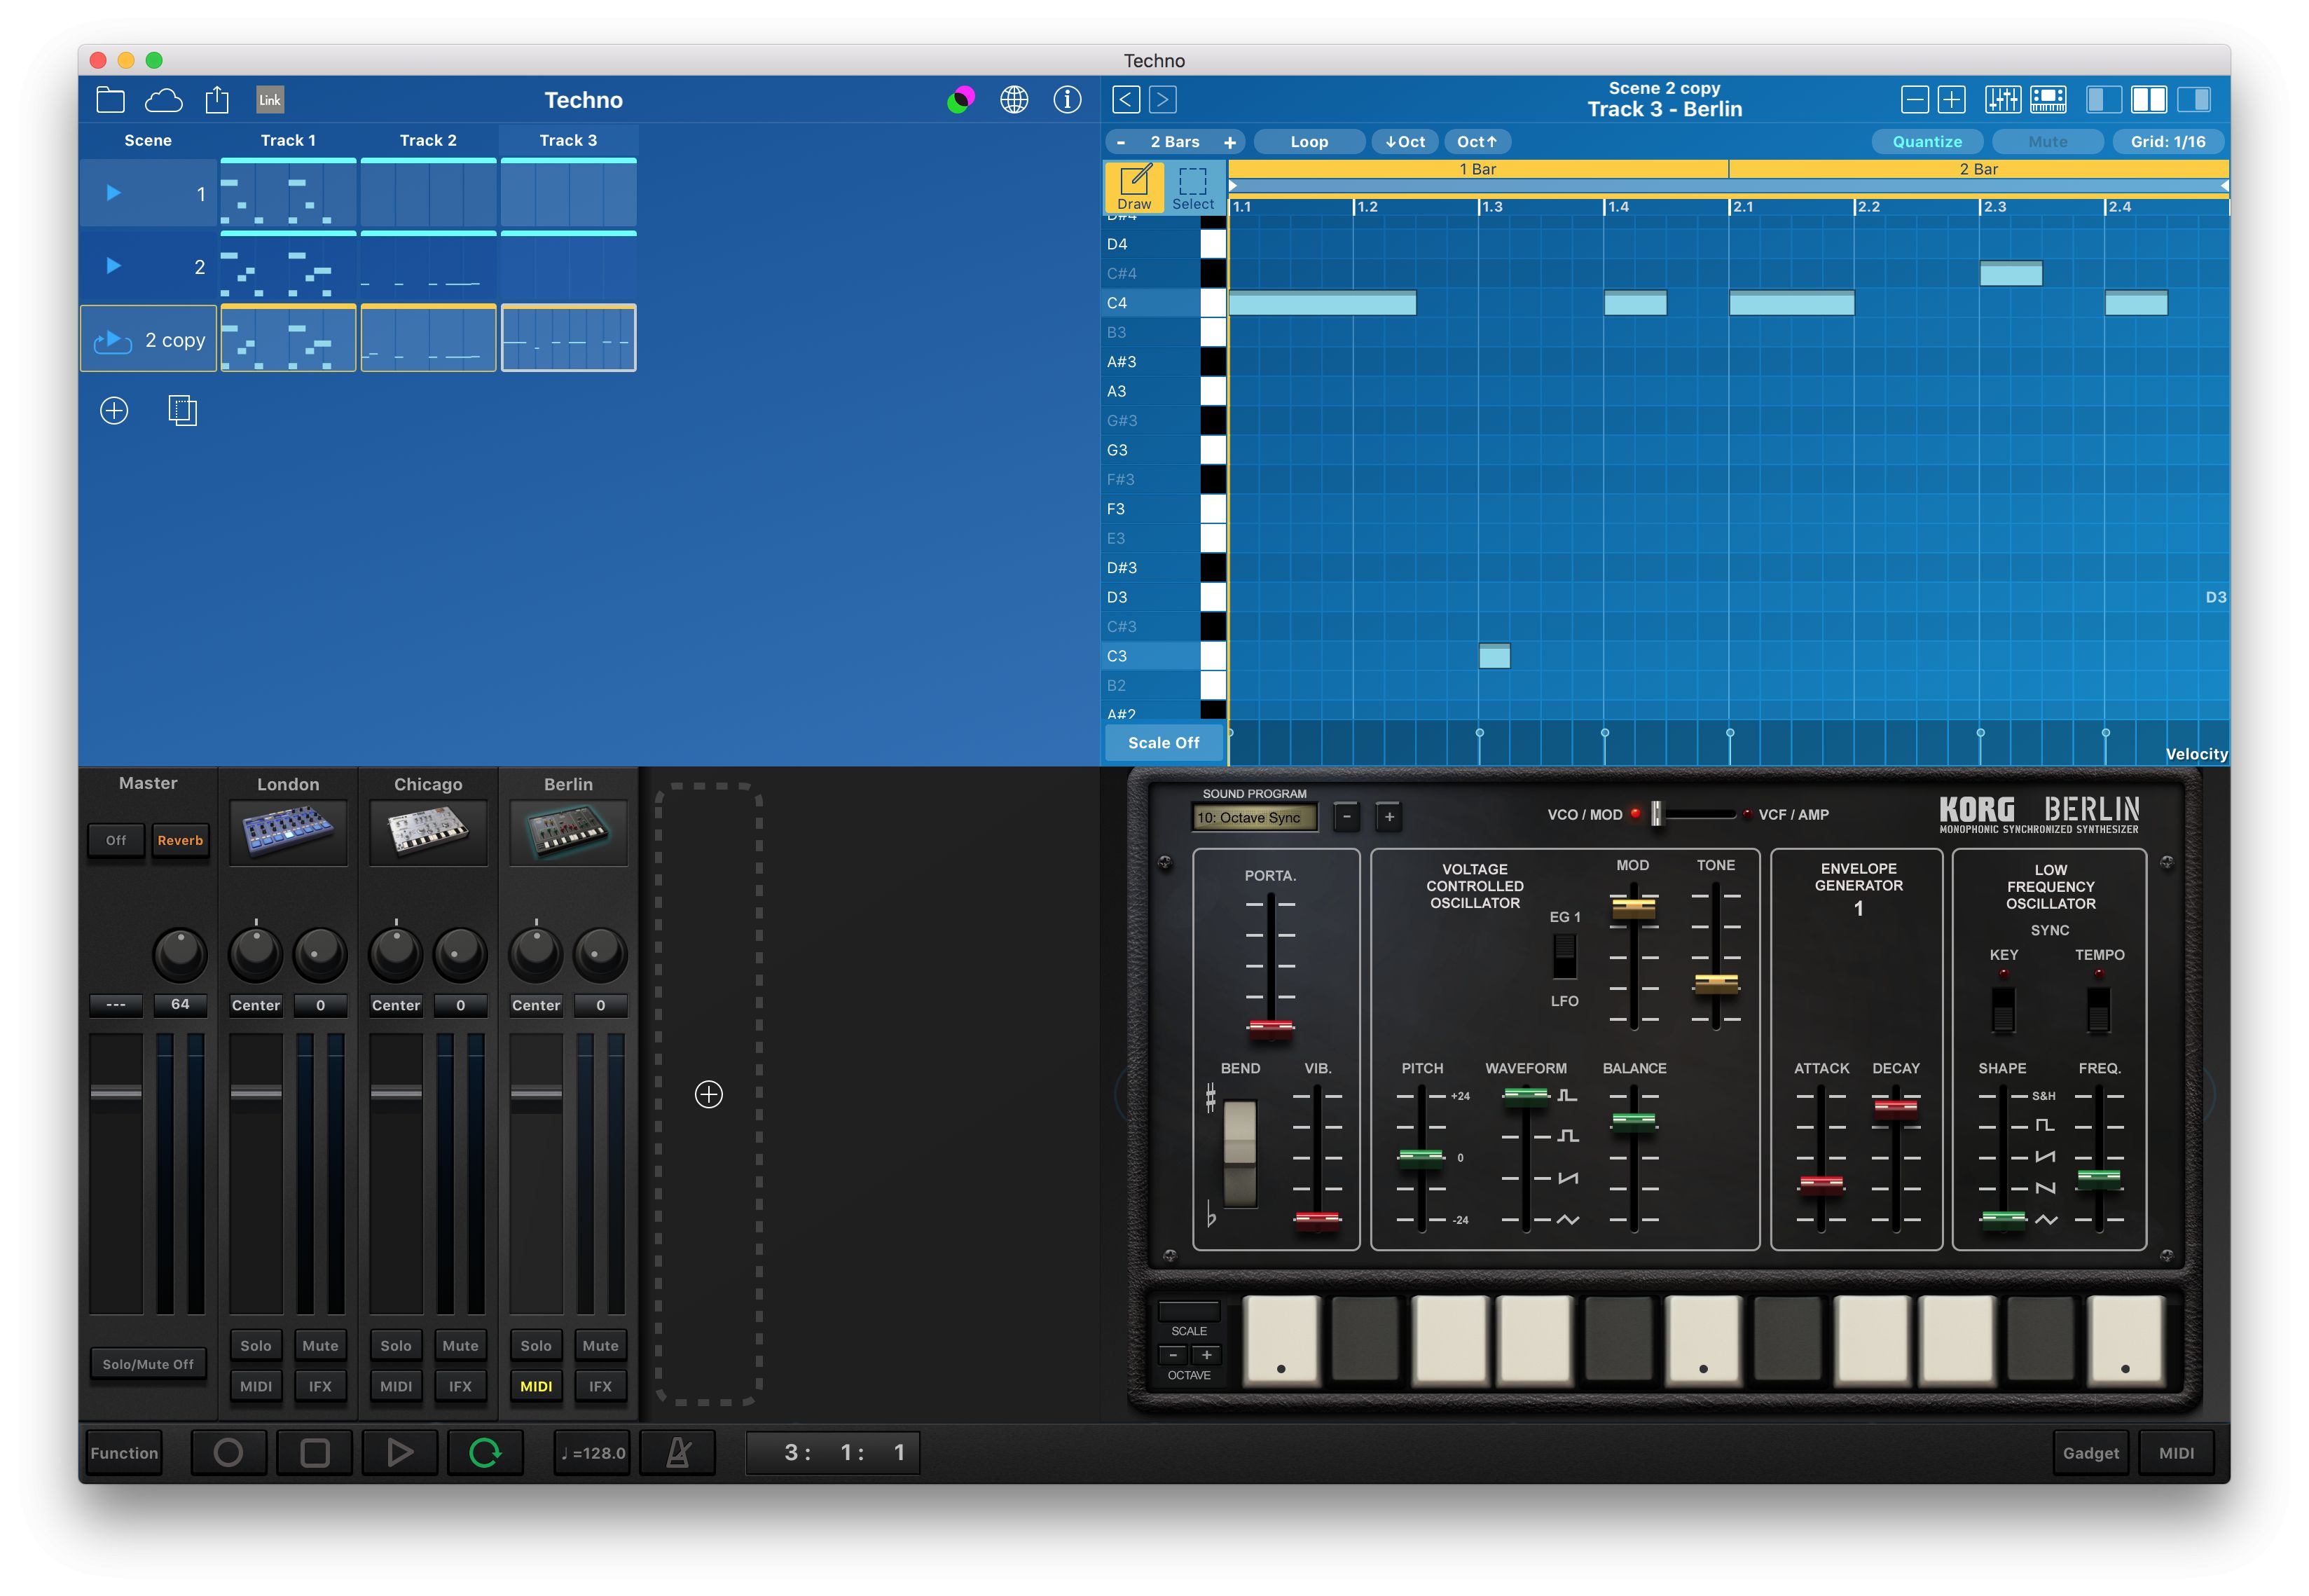
Now try adding a lead synth. This time, in the MIDI editor window at the top right, increase the number of bars in the clip by using the Bars button, choosing 2 or 4 bars so that you have more space in which to program a lead part. Here we have chosen the Korg Berlin and found a nice lead sound, then messed with the parameters so it fits into the tone of our track as it exists at the moment.
7. Add FX
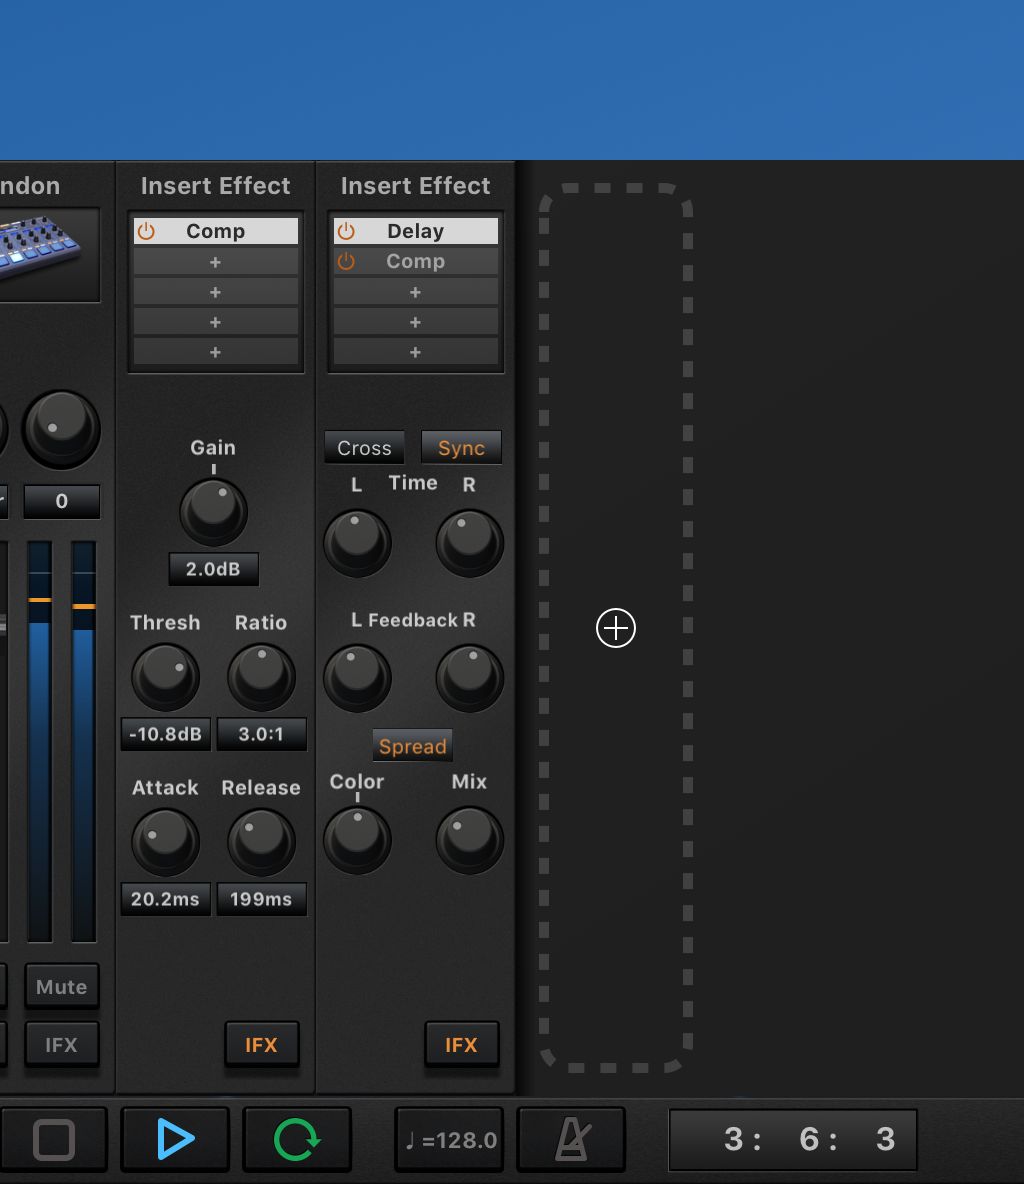
If the modules you have chosen don’t have sufficiently flexible or varied effects built in, you can still add more by going to the mixer and for any Gadget, clicking the iFX button. Then from the insert slots available, click to choose an effect from Gadget’s built in ones. Each has its own set of controls that you can use to tweak the sound. Here we have added some delay to the lead as well as some compression to the bass, which helps to tie things together as well as giving more space and movement to the top end.
8. Build It Up
From this point you can keep adding parts, patterns, scenes and instruments, specifying the number of repeats for scenes, bar lengths and so on to build your track. The sequencer section makes it easy to quickly add, duplicate and modify patterns to build tracks quite easily.
9. Change Scene Settings
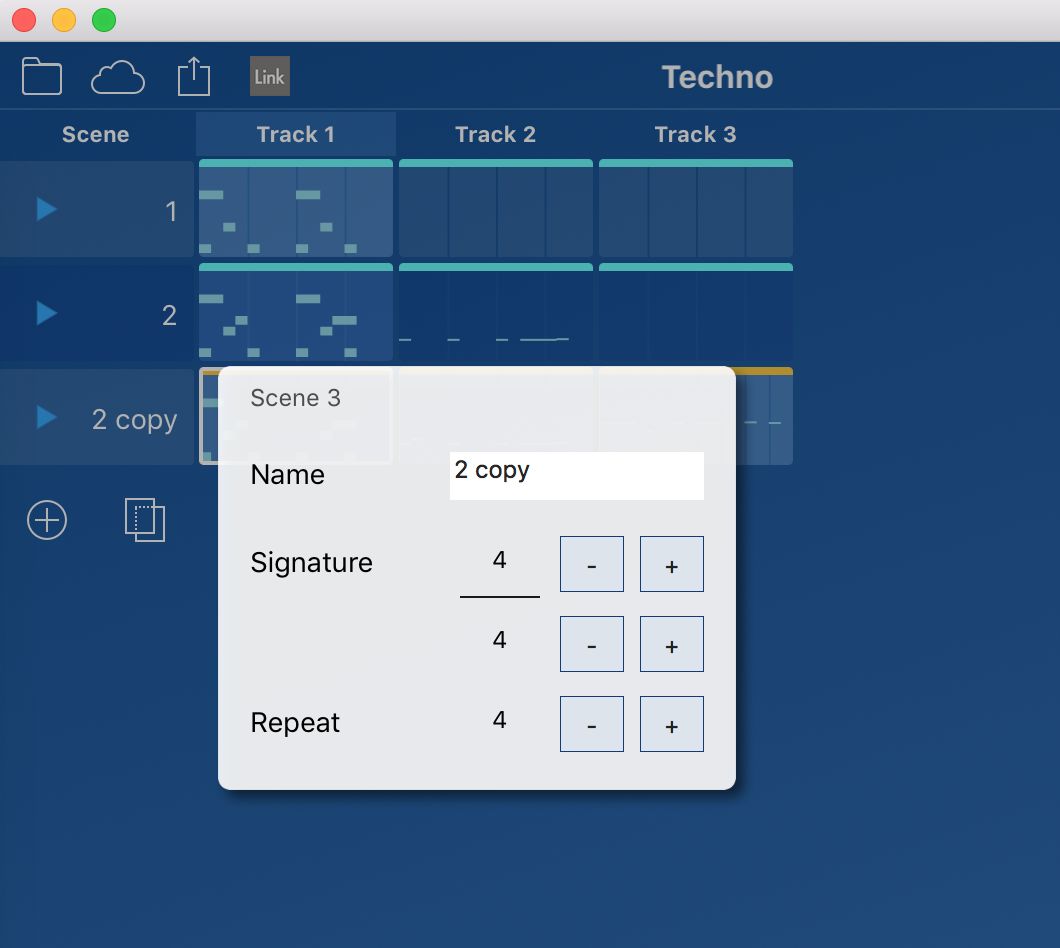
This one may have escaped your attention but if you right click on a Scene’s name in the sequencer, you can not only rename or remove it but also alter its settings. This lets you set things like the time signature of that particular scene as well as its number of repeats. You can use this slightly hidden functionality to make the sequencer behave in a way that is more complex than simply building up lots of loops of the same length.
10. Build The Rhythms

One of the things about Gadget that makes it so well suited to creating techno and other kinds of EDM is that it has plenty of easily programmable drum modules. So it’s simple to add layers of percussion and other beats, bringing them in and out of the mix as required using the sequencer. In this example we have added an instance of Tokyo, which is an analog percussion synthesizer. Simply painting in some notes to its MIDI grid lets us augment and solidify our beat with just a few clicks.
11. Add More FX
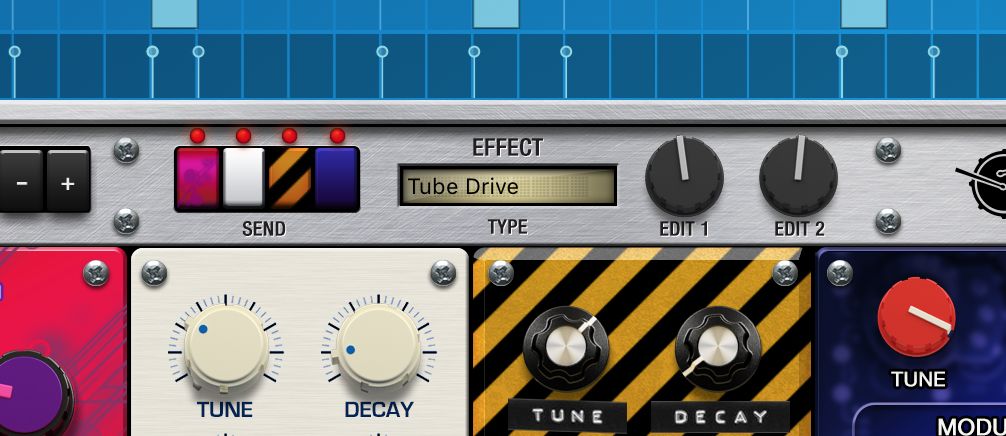
Most Gadgets have their own built in FX and these work in different ways. Here, we have been able to send each of the four percussion engines in the beatbox to an effect - in this case, tube distortion. Remember that further insert slots are also available in the mixer.
12. Export

Finally when you’re done, you can export your project in a number of ways. You can export the Master channel to output the whole thing as a single stereo file. Choosing the All Tracks option will perform a batch export of each track individually, which is great for mixing it on a different system, perhaps using a different DAW. Or you can export each channel one at a time. The Export menu also has the option to export as an Ableton Live project so you can open the song in Live. All in all, there are a lot of options available to you. Plus of course you can use Gadget on your iPad or iPhone as well!
Download the project file for this tutorial here.

Discussion
Want to join the discussion?
Create an account or login to get started!