
Ableton Live is known, at this point, for many different sounds. Though, it's still known the most as a remix tool... or a loop machine from hell! As a result, people tend to forget the instruments that are available in Live, opting to use favorite 3rd-party plug-ins instead. Ableton Live actually has some great instruments of its own. And today, I'd like to show you how to use Analog to make a really nice pad, in order to bring some beauty into your world... and music.
Step 1. Analog
I'll select the Instruments tab within the Browser and drag, of course Analog into the Session view. I don't have to create a MIDI track ahead of time. All I need to do is drag it in.

Once instantiated, you'll enjoy the first appearance of an instrument named Analog. This guy can look a little intimidating, at first. But, once you start making some parameter adjustments of your own, it's quite fun. So, let's get to work!
First, I'll click on the Amp section, which will change the internal display to look something like this, below...

This screen actually gives you access to the settings of the Amplitude Envelope, a key tool to sculpt your synth patch into something that really resembles a pad. Currently, because we're on the default patch, it just sounds like a beep when you press a key, but if we raise the Attack value up to 52 ms, you'll notice things come in much smoother!

Raising Attack values causes Analog to slowly bring sound in, when a key is pressed, as opposed to an instant beep. I can also modify Analog to suit our Pad Purposes further, by increasing the Release to 1.04s. This will make it where our pad can be heard just a little longer after releasing the keyboard key. I usually like a little more release with pads, because I want to be able to emulate the giant orchestral halls and have things washed out to create an environment. However, there's a better way, outside of pushing your CPU, with a soft synth. More on that soon!

Now, one more modification in the Amp section. I'll increase the Sustain all the way up so that the volume of the tone produced sustains at the same level the entire time one or multiple keys are pressed. By having this big, loud and proud, you can keep the levels stable, and not have to worry about them slightly lowering, due to Decay settings later.
Alright, now let's make things bigger! I'll go over to the Volume section of Analog and activate Uni (or Unison Mode) and increase the Detune value to 42.97. If you play Analog for a sec, you'll already hear a big difference!

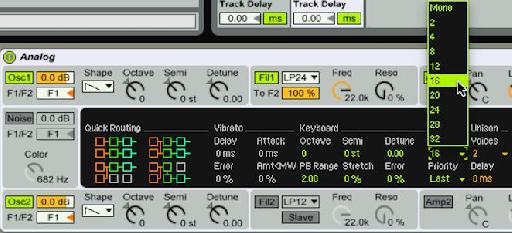
However, you'll notice that when you play some big chords'"like I know I will... as soon as I finish writing this, I'm going to play some music'"that you're only able to play a few keys before another one cuts out. This is due to a lowered amount of polyphony (by default), as lots of polyphony without need can really slow down a processor. I'll raise the value of Keyboard voices (not Unison) to 16. This will allow us to play two hands of chords (if you're really that crazy with a pad this thick) and be as expressive as we like.

Step 2. Effects
Of course, this pad will pass for acceptable in many circles. But, not mine. This needs something to make it feel more real, alive and holy. I'll first bring in an effect that is awesome for increasing thickness, even more. I'll drop the Chorus on to the track with my Analog, so that it's working as an insert, now.

To keep things reined in, I'll reduce the Dry/Wet knob so that it's at 37%. Remember: Chorus detunes incoming signal as well. Since the patch already has detuning in from Analog itself, I don't want to go too crazy, or it will just sound bad.
I'll also raise the Amount to 1.28ms and the Rate to 4.07Hz. This will speed up how fast the Chorus is taking the signal in and out of tune, and give us that little boost we need to keep things thick!
Alright, now we need to give it some atmosphere. And, nothing does that better than Reverb. Thankfully, Ableton has an amazing one! Drag one in, now!

Once it's in, you'll hear a very big difference. It's starting to sound orchestral! But, let's up the ante. I'll raise the Dry/Wet up to 89%, which is normally waaaay too much! However, when it comes to pads, you can get away with things other instruments can't. And, by placing Analog so deep into the Reverb's virtual auditorium, things already sound much more alive.
Now, I'll start disabling a few things we don't need. I'll deselect the Chorus option on the Reverb, as well as disabling the High button in the Diffusion Network. Chorus will just interfere with what we already set in motion with the Chorus device we brought in, and the Diffusion, in this case, removes some of the frequencies I'd like to keep in the tail.

Finally, I'll raise the Decay time up to 6.83s. Now, we have ourselves a big, big pad. By raising the decay, I allow the reverb to do something that it is far better at than Analog, the instrument itself. I'm able to disguise all of those broken decays in filtered, droning, huge reverberations. Now, I'm ready to score, or just fill in behind the band!

By the way, if you're wanting something even more somber, try raising the Attack, within Analog, that we modified in the first step of this exercise. By increasing the value, you'll make the entrance of our pad, slower, and feel more dark and orchestral!
Learn more Ableton Live Sound Design Tips in these videos here.

Discussion
Want to join the discussion?
Create an account or login to get started!