
I often find that I come up with melody lines by recording a scratch vocal of the ideas that I have. They can by hums, ahhs, or ohhs. Most often I replace these ideas later with proper vocals or translate them to synths, bass lines, etc. But why not make use of these scratch ideas? I find that by heavily processing these sounds, you can incorporate the newly developed sounds into your productions. I will demonstrate this process in Logic, but the same steps can be applied in any other DAW.
Step 1 – Scratch Correction
Here is a track I am working on. I have recorded a scratch vocal idea that forms a nice melody. I would like to incorporate into the track:
Here is the vocal soloed:
First, I cut out the sections of the audio region where there is no vocal, as these sections may contain low-level noise that may be increased with the added processing to the audio. I have added fades to the start and ends points of each of these regions for smoother transitions between the regions.

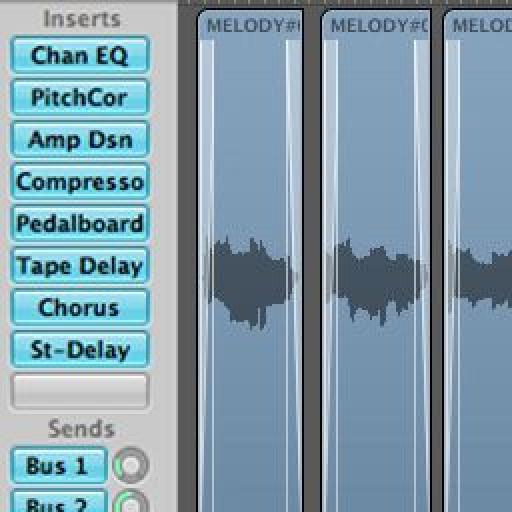
I have inserted a Channel EQ and have rolled off the low-end rumble with a low cut set to about 530Hz, and I have added a slight peak at 5100hz to bring out the vocal character.

Next I have added the Pitch Correction plugin to sort out some of my out-of-tune notes. I have removed the notes on the pitch correction keyboard that are not featured in the vocal sample. I have set a fast Response time so that the pitch correction kicks in quite fast.

Take a listen to the corrected scratch vocal now:
Step 2 – Amp Simulation Processing
Next up is to add some amp simulation and distortion processing. I find that these type of plugins add rich harmonics to vocal scratch tracks, and change them from sounding like a voice, to a more synth oriented sound.
I have used Logic's Amp Designer for the amp simulation. I have chosen a Large Tweed amp simulator, combined with a Tweed 4 x 10 Speaker. I have tweaked the settings on the amp by increasing the Gain, Treble and Presence controls.

To tame the peaks in the now more gain-oriented sound, I have added a Compressor. I have used the VCA circuit type with a ratio of 2.1:1, and a Threshold of -22.0db. Test out what Attack and Release suits your audio file. I have chosen fast Attack and Release times.

I find that by adding multiple overdrive/distortion plugins, you really get this vocal-synth to growl. I have the Rawk! distortion unit, and next the Grinder. The second overdrive/distortion unit will feed off the previous one, creating a 'Wall-of-Sound' distorted signal. If you find this is too much you can drop the gain amounts on each of the plugins.

Take a listen to the heavily distorted sound here:
Step 3 – Modulation Effects
Now time for the modulation effects. First I have added a Tape Delay effect. The delay has a ¼-note sync rate. I have increased the Feedback to 36% with a Wet setting of 19%. I have also added some LFO Rate and LFO Depth and have set the Flutter Rate and Flutter Intensity accordingly to add an analog delay style to the effect.

Next up is a Chorus effect. I have increased the Intensity to 21% with a Rate of 0.7hz and a Mix of 36%.

Lastly I have added a Stereo Delay to spread the sound around. The Left and Right have different Wet Mixes to create differentiation from the Left to the Right sides of the mix.

Take a listen to the audio now with the modulation effects:
Step 4 – Bus Effects
You can take it a step further and add some bus effects. I have a Space Designer reverb, which I have applied to my other channel strips so that the sounds appear to be in the same room. I have applied a heavy dose of reverb to this sound.

I also want to apply some phaser modulation to the sound, but I want to be able to mix the dry and wet signals together. I have opted to add the phaser to an auxiliary channels and to send the bus levels from the audio channel strip to this auxiliary channel.
I have used Logic's Microphaser on the auxiliary channel. It has a LFO Rate of 0.22hz; a Feedback of 37% and the Intensity is set all the way to 100% because it is applied as a send effect.
On the audio channel strip I have increased to bus send to the phaser to about 50%.

Take a listen to the sound now:
And here is the processed scratch vocal with the rest of the track:
Conclusion
As you can see by applying some effects in your DAW you can transform a rough audio track into something completely different that can really add to your productions. Test out these tricks and see what happens!
Check out the following tutorials for other audio processing and manipulation techniques:
Melodyne 201: Advanced Melodyne
Live 8 303: Ableton Live 8 TNT Tips and Tricks 1
Discussion
Want to join the discussion?
Create an account or login to get started!