
When it comes to automating effects and instrument parameters over time, Logic gives the end user a lot of excellent choices. For example, it's possible to use Hyper Draw (Region-based automation) or Track Automation and program these offline or record them in real time. Most users will be used to setting up automation in one of Logic's MIDI Editors or even directly within the Arrange area. However, there is another area of Logic (well, an instrument plug-in in Logic), that provides its own automation mode: Ultrabeat.
One feature which Ultrabeat has that other Logic instruments don't'"and I'm looking squarely at the EXS24 as I type this'"is a Step Sequencer. This Step Sequencer makes it a breeze to quickly and painlessly program drum patterns without ever leaving the Ultrabeat interface. Better still, in Logic 9, Ultrabeat was given a revamp. Not only does it have a full view step sequencer area, but you can now adjust sound settings independently for every step. It's very easy to work with and in this quick tip we'll take a look at the basics of automating the ADSR Envelope for a snare voice in Ultrabeat.
Step 1 - Step Up
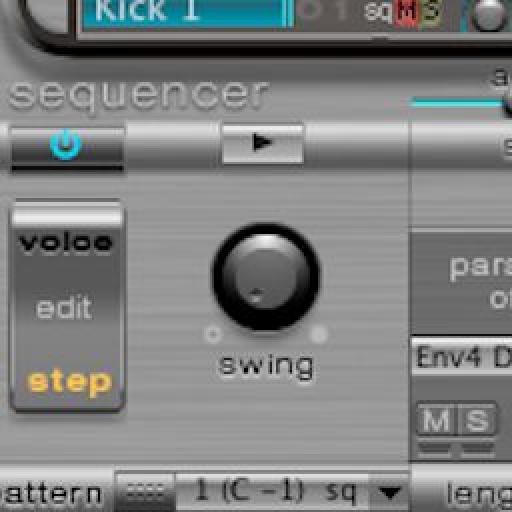
You can choose any setting or preset kit in Ultrabeat and, in fact, any voice to automate. The important thing is to check that you have some steps programmed in. Once you've chosen your Ultrabeat kit make sure you're not in "Full View" and select the Snare Voice. If there are no steps visible simply draw some in by clicking on the numbers above the vertical bars in the Sequencer area.
Click on the "step" button in the bottom left of Ultrabeat's interface to enter Step Mode.
Step 2 - Watch Your Step
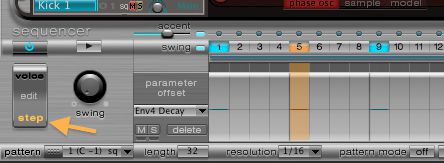
You'll immediately notice that many controls in the main Synthesizer area of Ultrabeat are now highlighted yellow. This highlighting indicates sound parameters that can be automated on a "step-by-step" basis.
First we should select a step in Ultrabeat's sequencer. Click on the top of a step to select it. For this example I've chosen Step 5.
Step 3 - Adjusting Parameters
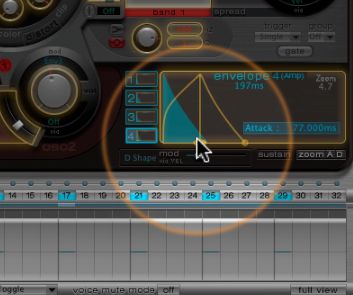
Next, choose a sound parameter (I've got my sights set on the ADSR Envelope, and in particular the Attack Time). Remember that any of the parameters highlighted yellow can be adjusted differently for any individual step.
Simply click on the parameter or move its value graphically:
You can repeat this process for other steps by selecting a step and then adjusting the parameter value as desired.
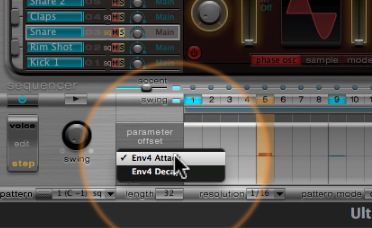
Step 4 - Parameter Offset
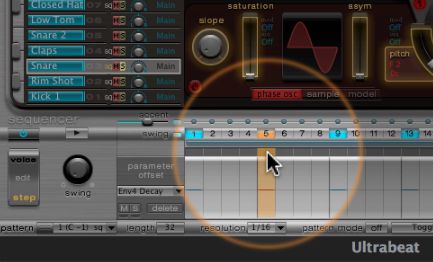
Within the step sequencer section is the 'parameter offset' drop-down menu. The parameter(s) you have clicked on in the Synthesizer area will be available from this drop-down menu.
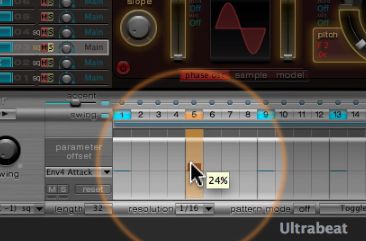
You can also adjust the parameter's value for the selected step by dragging up or down on the step itself. So go ahead and change the parameter values for different steps.
Step 5 - Back in Logic's Editors
Once you're done automating you may want to take the pattern into Logic's Arrange area. Drag the pattern button (bottom left corner of the Ultrabeat window) and place it on the Ultrabeat track lane in Logic's Arrange area.
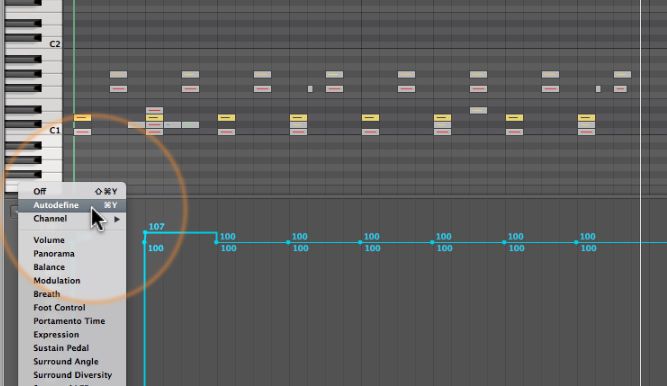
You can now view the Hyper Draw data in any MIDI Editor. In this example I've opened the Ultrabeat region in the Piano Roll and from the left arrow chosen "Autodefine" to see the automation we created in Ultrabeat.
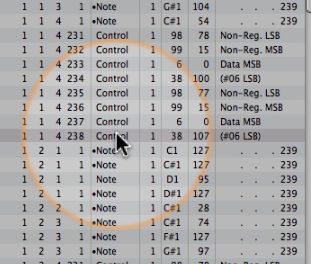
For an easier way to view what Control Change (CC) data has been written to the region you can view the region's contents in the Event List window. You can, of course, edit the CC data right here, too!
There are other ways to automate Ultrabeat's sound parameters using a MIDI Controller in real time or offline or using track automation, but there's something satisfyingly easy about being able to experiment and program parameters directly within Ultrabeat's sequencer. Try it out!

Discussion
Thanks so much for this as it is just what I was wishing for !
A video on this would be great too.Showing Logic's Editors,Autodefine etc and it's direct link to Ultrabeat.
I'd recommend using a Monitor object to view the CC values coming from UB's channel strip...
:)
Ultrabeat certainly is more capable and robust than many realise. Having said that I do enjoy using FXpansion's Tremor and SonicCHarge's SynPlant too!
:)
Want to join the discussion?
Create an account or login to get started!