
I got more positive feedback on the first article on this subject and requests for “more” than any other article I have contributed. So, once more into the breach!
Click Zones
In Pic 1, I have opened the Audio Preferences and navigated to the Editing tab in the General tab. In the Pointer Tool in Arrange Provides section, you see Fade Tool Click Zones and Marquee Tool Click Zones. Fine, but what the heck is a “click zone” and what does this allow you to do?

Pic 1
Quite simply, a click zone alters the behavior of the Pointer Tool in the Arrange area when these are checked or unchecked.
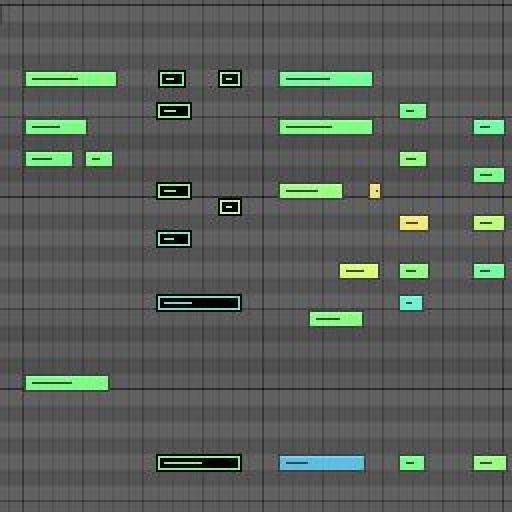
Normally, if you hold the Pointer Tool over any region, it changes to the Loop Tool, allowing you to draw in a precise number of loops. If you check Fade Tool Click Zones however, then when you hold the Pointer Tool over the top right side of the region, it changes to the weird looking icon that you can see in Pic 2 that allows you to draw in fade ins and fade outs without having to select the Fade Tool or go to the Region Inspector Parameter Box. In Pic 3, I have drawn in a fade in and a fade out using this functionality.

Pic 2

Pic 3
Similarly, if you check Marquee Tool Click Zones, then when you hold the Pointer Tool over various areas in regions, it changes to the Marquee Tool.
It's still possible to change the Pointer Tool to the Loop Tool with these Preference choices depending on where you place the Pointer Tool. Holding down the Option key will temporarily restore the normal behavior.
Other Editing Preferences in the General Tab
There are some other interesting preference options in this tab. See Pic 4.

Pic 4
Add “Last Edit Function” to Region Name is, I think, fairly self-explanatory. Dividing a region for instance, will now result in the newly created second region having the word “divided” added to its name, as you see in Pic 5.

Pic 5
I would also say that Select Regions on Track selection is self-explanatory, although I will never know how these guys decide which words should be in caps and which not. But Living Groove connection? What does that mean?
Well, checking it means that if you have created a Groove template (a very useful and IMHO under-utilized quantization method for making tracks feel great together) editing an original region also alters any quantization template derived from that region. So for instance, if you have a bass software instrument region with quantization settings that you have created a Groove template from applied to a kick drum, changing the original settings to the bass region will automatically change them for the kick drum as well.
Finally, we have Smart Loop Handling of Scissors and Split by Playhead. This is a straight forward affair. In Pic 6, I have a looped region. With this preference enabled, if I cut the region in the looped area, it creates another region that I can loop or not loop, as you see in Pic 7.

Pic 6

Pic 7
Remember folks, these are Preferences, not Project Settings, and so are global to the application. And will affect all Logic projects, present, past, and future.
Float Windows
When Logic Pro 8 introduced its new GUI that allowed users to do pretty much all they needed to do in the Arrange Window, sadly a casualty was the ability to “tear off” pretty much any editor into a floating window that could be dragged around the interface and utilized. Only two remain and in my experience most Logic users who began with LP8 or 9 are unaware of them and just how useful they are.
First, there is the Event Float, which can be opened either by going under the Options menu or by key command. See Pic 8.

Pic 8
Whether your “go to” MIDI editor is the Piano Roll or Score Editor, there is no denying that the Event List is the most detailed editor, as it shows you event information at the tick level. But for those users who do not care to leave one open due to lack of screen real estate, like on a laptop, or only feel the need to see the detailed information one event at a time, the Event Float is a terrific asset. You can position it anywhere in your interface and lock your screenset and any event you select in the other MIDI editors will be displayed. I cannot imagine working without it. See Pic 9.

Pic 9
The other truly invaluable Floating window is the Region Inspector float, found directly below the Event Float in the Options menu. While I usually quantize regions, many prefer, and frequently I do as well, to only quantize specific events in the Piano Roll editor, and since I rarely “hard” quantize to 100% and therefore have Q-Strength and Q-Range settings, the Region Inspector float makes it really easy to select events in the Piano Roll editor and quantize the to the desired settings, as I am doing in Pic 10.

Pic 10
If you have not yet made friends with these wonderful tools, I highly recommend that you do so.
Less useful but worth mentioning is the ability to open your most recently visited Environment layer as a borderless, Inspector-less window. Holding down the Option key while navigating under the Windows menu to the Environment, see Pic 11, will open up an Environment window that is as I described. See Pic 12.

Pic 11

Pic 12
Personally, I do not remember feeling the need for that, but as they say in internet speak, YMMV.
Consolidating Projects
When Logic Pro 8 introduced the “project” concept, clearly a variant on ProTools' “session” workflow, it gave us the ability to keep imported audio files, recorded audio files in the project, bounces, etc. in the same Project folder, as well as Sampler Instruments, samples, IRs, etc. in appropriate sub-folders.
But unlike ProTools, which does this whether you want to or not, Logic Pro gives us options, and options lead to choices, and some users make some…err…unfortunate choices. So, especially if you receive a Logic project from another user, you may want to “consolidate” you project. This simply puts files in the correct sub-folders.
You can do this either by key command or by going under File > Project > Consolidate. It will bring up the window you see in Pic 13.

Pic 13
As you can see, it gives you a nice range of choices that will make working worth your project, or archiving it, cleaner and more efficient. Well worth doing, IMHO.

Discussion
The 'Region Inspector float' tip deserves a fist-bump.
Yo
Did not know about the option+click on the Environment menu item.
Thanks Jay
Want to join the discussion?
Create an account or login to get started!