So in the last installment we made a control appear in our interface. Well in this part we're going to hook up that control to a parameter and make it useful to us.
Making Stuff Work
Every parameter that can be automated in Kontakt can be addressed by the KSP. All of these parameters have an address, these come in the form of the built-in variables. You'll know one of these as they're all uppercase (e.g. $ENGINE_PAR_BITS).
In this part we'll be using a varied selection of commands and variables to give our interface control a link to a parameter inside Kontakt, give it some useful display info and also retain its settings when the instrument is saved and loaded. This is just one control we're going to look at, but the techniques are applicable to every UI control you'll create in Kontakt. Let's start!
Engine Parameter Commands
In part 2, we bypassed an effect using a MIDI note. We're going to do something similar here but with a user created control. To do this we use set_engine_par() which is one of the Engine Parameter Commands (see KSP Reference Manual). Other useful ones in this group include get_engine_par() and get_engine_par_display(). We'll be using the latter of these.
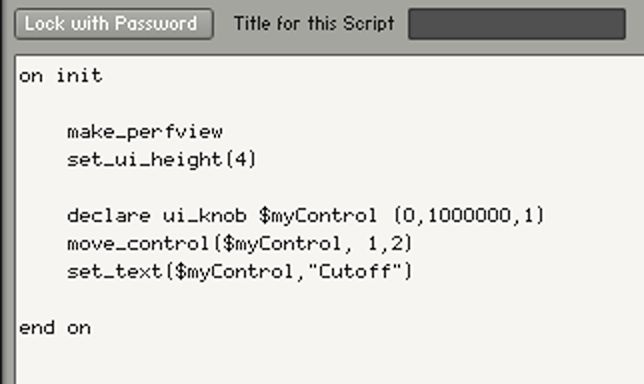
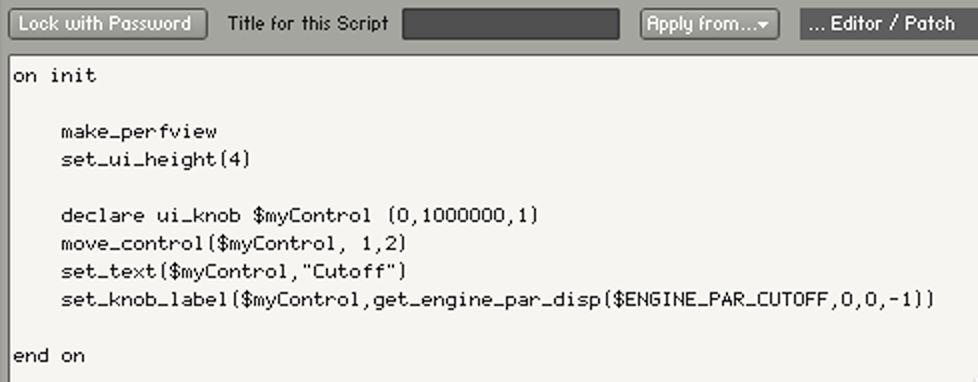
These allow you to set and retrieve the value of a parameter inside Kontakt, say the Cutoff for a filter effect. So let's just create a control using what we learned in the last part. We'll also make a Performance View.
I've set the resolution of the control knob to 1000000 which is the full internal resolution for Kontakt parameters. It's important to set this value if you want to cover the whole range of the parameters value.
Load a 4-Pole LP filter into Slot 1 of the Group 1 insert effects. You might want to load a sample into Kontakt so you can hear the effect.
Linking The Control
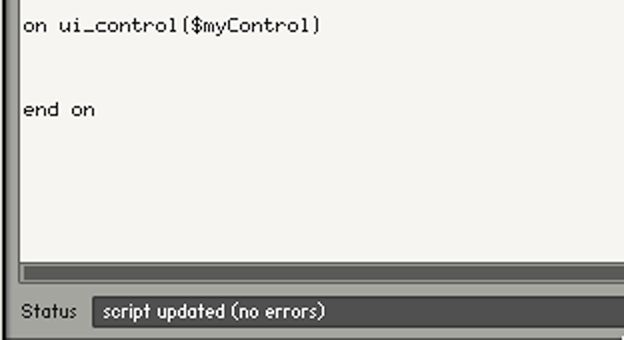
To make this work, we need to place our set_engine_par() command inside a special callback called on ui_control. It looks like this.

You'll notice if I hit 'Apply' I get an error (I see a lot of these! :D).
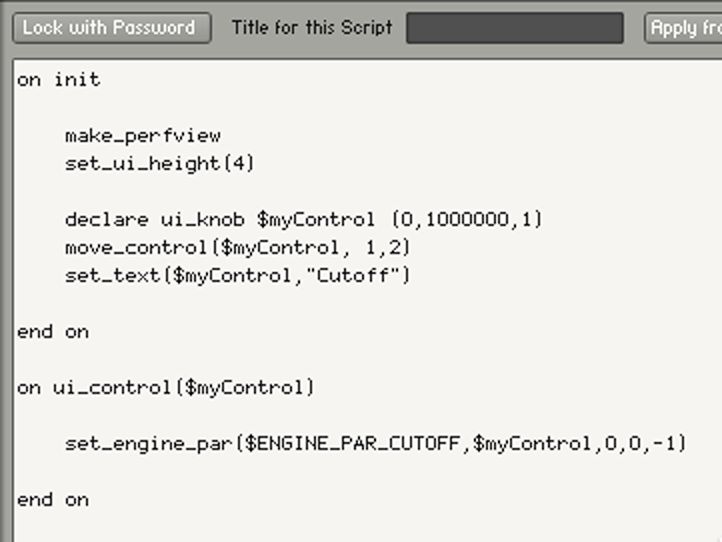
This is because we need to fill the brackets with the variable of the control we want to assign to this callback. In our case $myControl. So now it looks like this.
Doing this means whenever we move this control we can run some code inside the callback specific to this control. So let's assign this control to the cutoff of the Filter in Slot 1 of the Group Inserts. We do this with set_engine_par().
set_engine_par(
So first off is the parameter we want to target which is Cutoff. This is done with $ENGINE_PAR_CUTOFF. This works with all filters. You'll find a complete list of all effects parameters in the KSP Reference Manual under Engine Parameter Variables.
set_engine_par($ENGINE_PAR_CUTOFF,
Next is the value. We want to assign the value of our UI Control Knob that we created to the Cutoff amount. To send the value of this knob to the Cutoff we input the variable name for that knob which is $myControl.
set_engine_par($ENGINE_PAR_CUTOFF, $myControl,
Next we need to give it directions to the slot where the effect lives. It's in Group 1 which is the first group so has a group index of 0. Kontakt always counts from 0 for groups, zones and slots.
set_engine_par($ENGINE_PAR_CUTOFF, $myControl, 0,
The slot index of the first effect is again 0.
set_engine_par($ENGINE_PAR_CUTOFF, $myControl, 0, 0,
The last value 'generic' is for targeting Instrument Inserts (0) or Send Inserts (1). Since none of these are applicable we use -1.
set_engine_par($ENGINE_PAR_CUTOFF, $myControl, 0, 0,-1)
We now place this between our on ui_control callback.
Now when we move $myControl the Cutoff will follow its position! Brilliant!

Setting The Display Information
At the moment, the value we're seeing in the Performance View makes no sense in relation to the Cutoff frequency of the effect as it's set to a number between 1-1000000. So how do we display what we're seeing in the effect inside the Performance View? We can do this using the command set_knob_label() in conjunction with get_engine_par_display(). Let me explain.
set_knob_label() is used to change the value display of a knob much in the same way set_text() is used to change its label. I can get the current value of the Cutoff effect using get_engine_par_display() and rewrite our knobs value with that. Here's how.
set_knob_label() has two parameters.
set_knob_label(
The variable will be the UI element we want to change namely $myControl.
set_knob_label($myControl,
The text will be the display value off the Cutoff parameter.
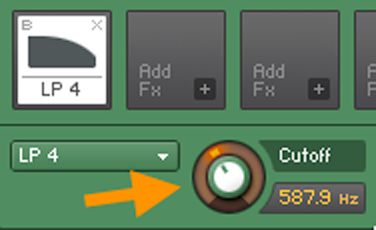
We get this using get_engine_par_display(). The format is similar to what we used in set_engine_par().
get_engine_par_disp(
Which for Cutoff in Group 1, Slot 1 is...
get_engine_par_disp($ENGINE_PAR_CUTOFF, 0, 0,-1)
This chunk of code goes into the
Now when I move the control I get the value of the Cutoff inside the effect.
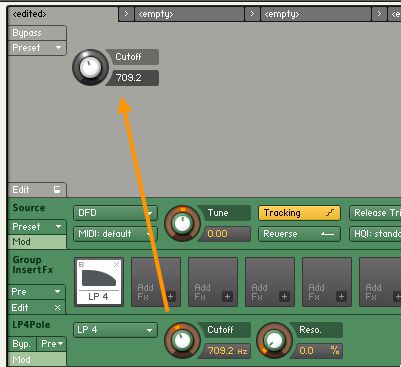
So that's good! But I have a problem! When I hit 'Apply' (try this!) again or we're to load the script from a preset or reload the instrument I don't see the value and my control is reset to 0!!
Firstly to see the value of the Cutoff when I initialize the script all I need to do is copy my set_knob_label() into the on init callback.
Now I see the value on initialization.
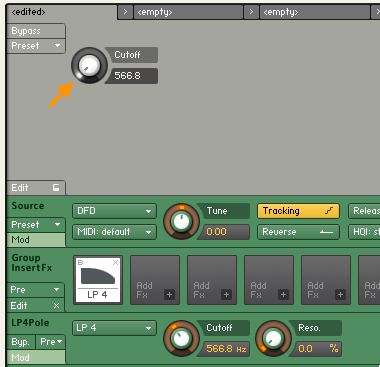
But my control is still being reset to 0! We can solve this though using another variable command called make_persistent().
Make Settings Stick
make_persistent(
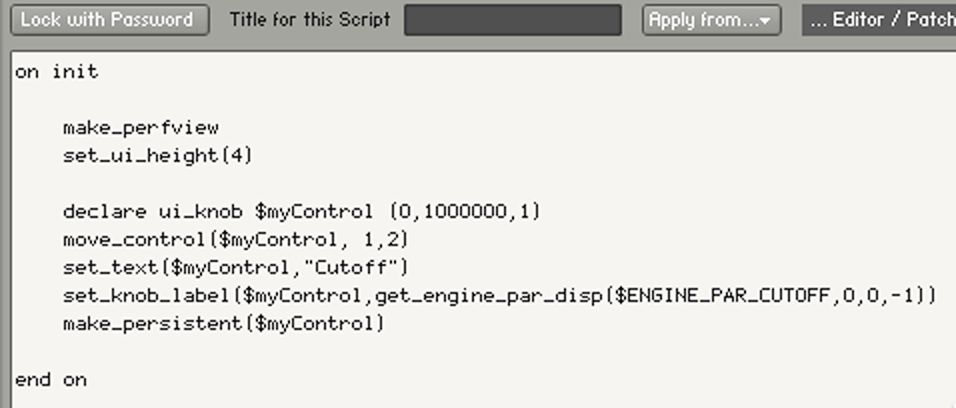
This is done by adding...
make_persistent($myControl)
to out on init callback.
My setting is retained when I hit 'Apply'.
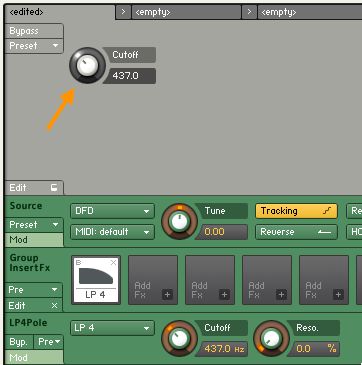
This variable setting will be stored inside the script when you:
- Save a script as a preset.
- Save the Instrument or Multi.
- Save your host DAW project.
Final Touches
The final step is to add the correct value unit to our control. As the Cutoff is displayed in Hz, let's add that to the control.
We do this with set_knob_unit(). This has two parameters.
set_knob_unit(
The variable is $myControl.
set_knob_unit($myControl,
The unit is set using one of the built-in unit variables, in this case $KNOB_UNIT_HZ.
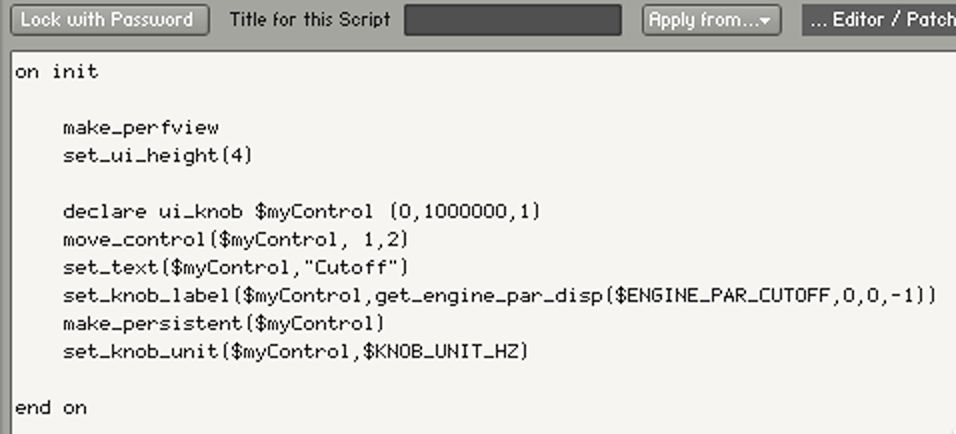
set_knob_unit($myControl, $KNOB_UNIT_HZ)
There are a few of these including ones for DB, ms, %, Octave and Semitone. We add this to the on init callback.
Adding this to the on init callback give us this.
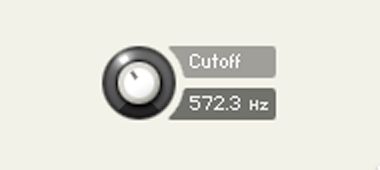
A shiny working custom UI Control for our Filter Cutoff!
Conclusion
So that's it for this series! I hope you've got something out of this and maybe it's sparked some interest in scripting in Kontakt. There's a lot I haven't covered here but it's a start and there's lot more to learn I can assure you!
Till then!
Quick Links
Introduction To Scripting in Kontakt, Part 1
Introduction To Scripting in Kontakt, Part 2
Introduction To Scripting in Kontakt, Part 3
Introduction To Scripting in Kontakt, Part 4
Introduction To Scripting in Kontakt, Part 5 (you're reading it!)




 © 2024 Ask.Audio
A NonLinear Educating Company
Discussion
thanks for this great introduction. That's all i need for my instruments, except for placing a background picture on the performance view.
Greetz,
Patrice
This video can answer you question.
https://www.youtube.com/watch?v=oe4ul-pljEo
Scroll to about halfway thru it.
Basically, click on the wrench to see inside the patch.
Click on Instrument parameters. Select instrument tab. Then upload instrumnet wall paper. Only certain image formats work.
Good luck!
Thanks for sharing your expertise in such a clear and easily understandable way!
My quest in Kontakt scripting:
How to automate a user defined knob, button or slider.
Do you have any clues for me?
Thanks!
I can see you've covered knobs here - but I'm using a script where I declare sliders instead of knobs, and then use custom images to display my own knobs.
I can't figure out how to get these sliders to control certain engine parameters like attack, without snapping. I'm attempting to control the attack parameter the same way you would with a knob, but the problem is I'm using my custom knob, which requires that I use sliders instead.
None of the Kontakt manuals cover this type of approach, so I'm out of answers. Can you help?
I want to create a knob which could regulate the amount of unprocessed and processed signal, in other words, a parallel processing of two signals (Dry/Wet). I have some inserts (eq, comp, transient...) in different busses (kick, snare, hat...) so I would like to listen drums completely organic, with nothing of that inserts (knob at 0%) and with more of that processing (knob increase up to 100%). Maybe some way to send signal before busses and after busses to a channel which operates in parallel way? Also, I have another question: How can I assign a knob to dry or wet reverb and delay? (I tried with $ENGINE_PAR_SENDLEVEL_0 but it does not work) I have not seen the option in the KSP manual. I hope I had explained well, English is not my language. I hope hearing you soon.
Greetings!!
Want to join the discussion?
Create an account or login to get started!