So last time we looked at variables. In this part we're going to have a look at the basics of some interface stuff.
The ability to design your own custom interfaces in Kontakt really sets it apart from any other software sampler. Each instrument you make can be designed to give you or the user easy access to important parameters for tweaking without having to delve into the internal (and sometimes daunting) workings of Kontakt.
It also allows you (or the developer) a chance to stamp some artistic design features on to your instrument by adding custom artwork and user interface elements. Every library you buy (and Kontakt's built in library) has its own unique look and feature set. This is all down to scripting.
So how do you do this? Well, I'll show you!
Create A Performance View
The first thing you need to do to create any sort of interface is to create a Performance View. This is done using a very simple line of code between your on init ... end on callback.
make_perfview
You also need to set a height. The performance view can be measured in two ways, in Grid Mode or Pixels.
Using Grids
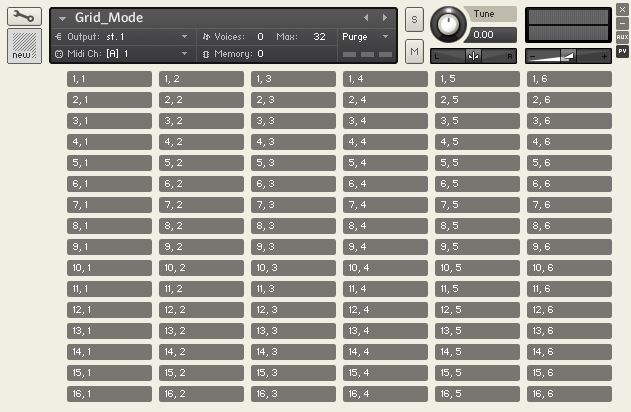
In Grid Mode the Performance View is divided into six columns. Each column can have up to 16 rows. Each grid block has a grid coordinate. Columns 1-6 and Rows 1-16. Below you can see these grid blocks and their respective coordinates.
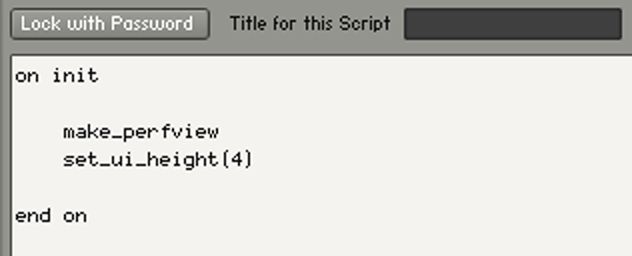
To set the height in grid amounts you need to add the following command.
set_ui_height()
Between the brackets you'll add the number of vertical rows you want. This is set in multiples of two rows, or a number from 1-8. This is because a default Knob is two rows high.
So if we want our Performance View eight rows high we would add '4' into the brackets.
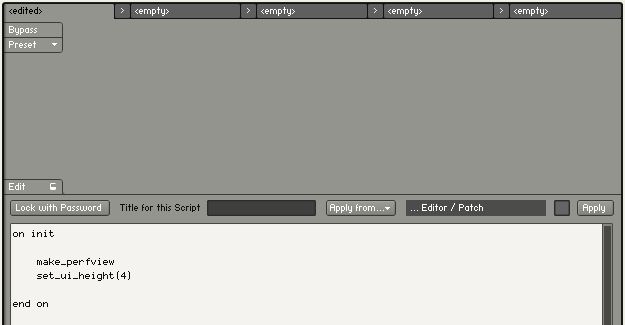
When you hit 'Apply' you'll notice the Script Editor will expand. This is because all the controls you create are also viewable in the script editor so you can see what you're doing.
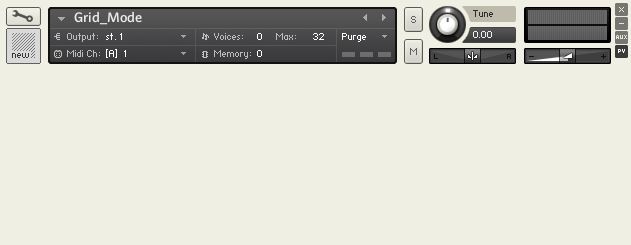
If you come out of instrument edit mode you'll also see that the Kontakt interface has gone from its default size...
to an expanded version based on the grid height you set.
Once you've created some controls you'll place these using grid coordinates. More on this later. For the following examples I'm going to use Grid Mode.
Using Pixels
Saying that you can also set your height in pixels (Kontakt 4 and above). You do this using..
set_ui_height_px()
This is useful if you're working to a graphic background and need to place controls at the pixel level. So setting a height of '250' inside the brackets will make your work area 250px high.
set_ui_height_px(250)
When moving controls, you will then use pixel values to place them. In Kontakt 5 the Performance View has been expanded from 350px in previous versions to 540px.
So now we have an area to work with let's make some stuff!
Anything To Declare?
In order to create a UI control or User Interface Control we first need to 'declare' it between our on init callback. This is the same as when we declared our variables last time. A big part of why we do this is that each control we create is assigned a variable name so we can reference it in our scripts.
In Kontakt there are a number of UI controls you can create. Each has its own call sign, all start with the prefix ui_ . These are:
- ui_knob - A default rotary dial.
- ui_slider - A default slider / horizontal fader.
- ui_label - Simple text label
- ui_button - A simple button
- ui_menu - A drop down menu
- ui_switch - Simple on/off switch
- ui_table - Useful interface for sequencers and arpeggiators
- ui_file_selector - For selecting and loading files
- ui_level_meter - A simple audio level meter (Kontakt 5)
- ui_text_edit - Enter user text
- ui_value_edit - Enter a user value
- ui_waveform - Add a waveform display of a zone or slices (Kontakt 5)
To create a control we use the following code. For a default Knob this will be...
declare ui_knob $
You'll find each control you create has a different set of parameters. For instance ui_label has two parameters for width and height which are set in grid amounts.
declare ui_label $
Defining Parameters
The first thing you need to do is give your UI control a unique variable name. Let's say we're creating a default Knob. I could call it myKnob.
declare ui_knob $myKnob (
Anytime I want to use this Knob to do something I reference $myKnob.
I now need to set its parameters up. With the default Knob I have three.
min = The minimum value
max = The maximum value
display-ratio = Divides the range to simplify display numbers
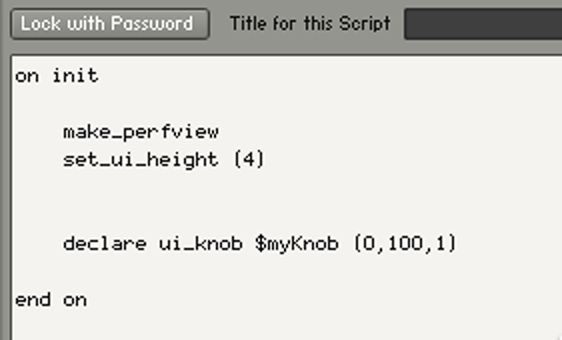
Using the following code will generate a default Knob that goes from 1-100 in 100 steps (100/1).
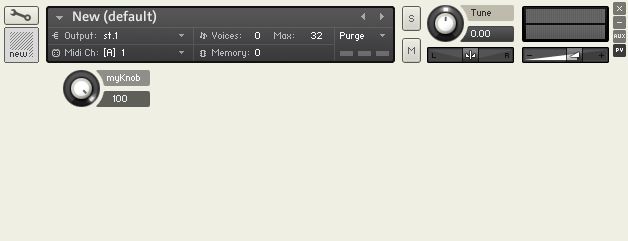
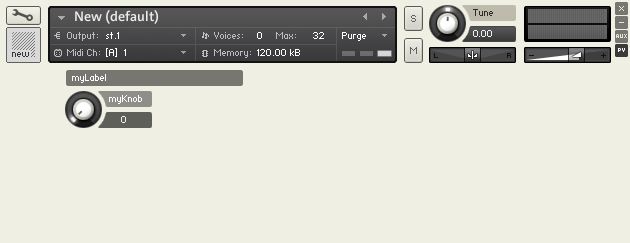
This will now also be present in the Performance View.
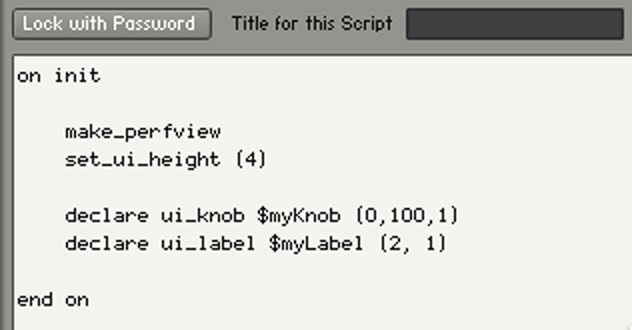
Let's add a Label. I'll name it myLabel.
declare ui_label $myLabel (
I'll also set its width and height in grid measurements.
Which gives me this.
You'll find all the information about the various parameters in the KSP Reference Manual in the User Interface Controls chapter.
Moving UI Controls
There is another set of elements called User Interface Commands that are there to help you manipulate your UI controls. One of these is called move_control().
This has three parameters.
move_control(
- variable = The variable name of the UI control you want to move.
- x-position = The horizontal position in grid coordinates.
- y-position = The vertical position in grid coordinates.
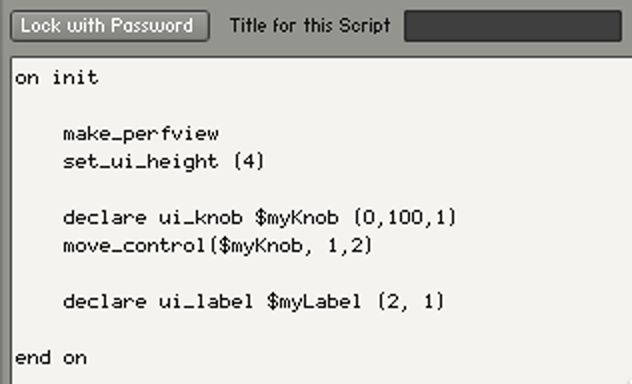
Let's say I want to move myKnob below myLabel. I can do this by using the following code.
This will move it to the 1st column, 2nd row. You can also use move_control_px() and replace the grid values with pixel values.
Rename Your Controls
Currently both our Knob and Label are named by default with their variable name. This is easy to change using another User Interface Command called set_text(). This has two parameters.
set_text(
- variable = The variable name of the UI control you want to change the text for.
- text = The replacement text in quotations.
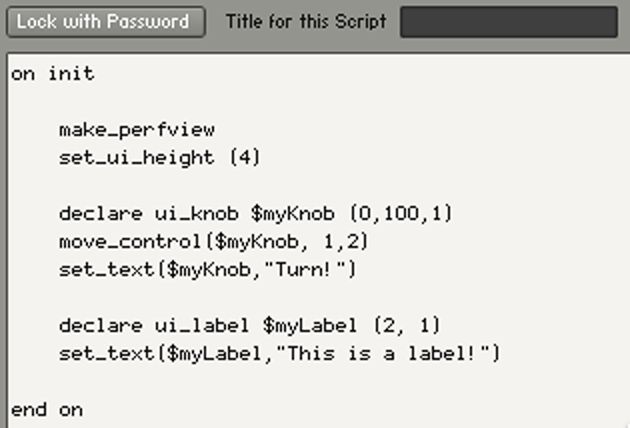
I've added set_text() to both my control elements like this..
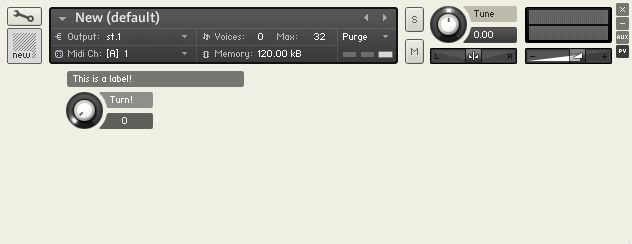
Here's the result.
Hopefully you can see where this is going. We declare and set up our control parameters and then further manipulate the controls with useful predefined commands (see the chapter User Interface Commands in the KSP Reference Manual).
Next time we'll add some real world functionality to some controls. Which is where the fun starts!!
You can download the code examples in this PDF.
Quick Links
Introduction To Scripting in Kontakt, Part 1
Introduction To Scripting in Kontakt, Part 2
Introduction To Scripting in Kontakt, Part 3
Introduction To Scripting in Kontakt, Part 4 (you're reading it!)
Introduction To Scripting in Kontakt, Part 5




 © 2024 Ask.Audio
A NonLinear Educating Company
Discussion
Want to join the discussion?
Create an account or login to get started!