
Nonostante l'abbondanza di effetti e strumenti software, qualcosa sul carattere e l'interfaccia tattile di un vero e proprio strumento sempre appello ai musicisti. Per fortuna, Ableton Live è più in grado di integrarli. In questo articolo, e vi mostrerà come.
Requisiti di base
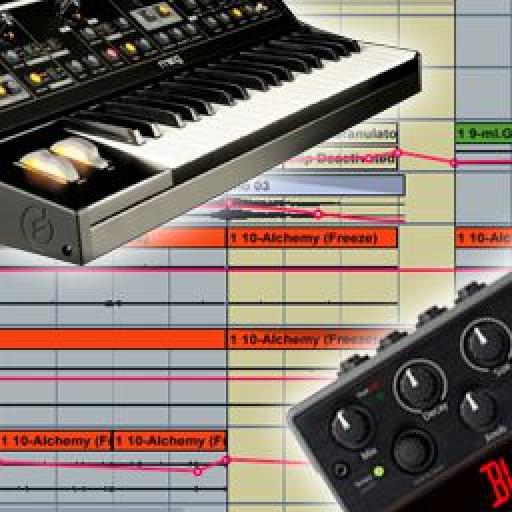
Il requisito più importante per l'utilizzo di effetti hardware esterni o strumenti all'interno di Live è un multiplo di ingresso / uscita della scheda audio. Ogni segnale che deve entrare o uscire di Live sarà necessario propri input dedicati o uscite sulla scheda audio. Diamo un'occhiata ad un setup semplice ma tipico:

Tutto l'hardware deve essere collegato alla scheda audio prima di poter essere utilizzato in Live.
Nell'esempio precedente abbiamo una scheda audio con 4 ingressi mono e 4 uscite mono, una drum machine, una unità di riverbero e una coppia di monitor sono collegati. Le linee arancione rappresentano una connessione audio e le frecce indicano la direzione del audio. La linea verde rappresenta una connessione MIDI. L'ingranaggio più hai, più gli ingressi e le uscite necessarie sulla scheda audio.
Impostazione Live
Assumendo corretti collegamenti hardware sono a posto, ci sono alcune cose da controllare in diretta se stessa. Dirigetevi verso le preferenze '

Ingressi e uscite audio deve essere abilitato in preferenze audio.

È possibile scegliere di utilizzare gli ingressi e le uscite come coppie stereo o mono.
Tutti i sintetizzatori e drum machine che sono collegati via midi sarà necessario le relative porte MIDI abilitati nel tab MIDI delle Preferenze '.

Abilitazione porte hardware MIDI.
Qui possiamo vedere due porte attivata. Il pulsante più a sinistra ON permette che la porta da utilizzare per l'output MIDI. La parte centrale ON tasto viene utilizzato per inviare il segnale MIDI di clock a quello di uscita che è utile per gli eventuali strumenti che possono sincronizzarsi al clock, come ad esempio drum machine.
Creazione di dispositivi personalizzati
Ora che tutto l'audio pertinenti e porte MIDI sono abilitati, consente di dare un'occhiata a un paio di dispositivi Live semplici ma estremamente utile, che otterranno tutti gli strumenti e gli effetti esterni che lavorano all'interno di Live. La bellezza di questi due dispositivi è che, quando correttamente l'impostazione, che permetterà strumenti hardware e gli effetti di essere caduto in un progetto esattamente nello stesso modo di un dispositivo nativo Live, o VST / AU plug-in.
Il dispositivo External Instrument
Il primo dei due dispositivi è il dispositivo Instrument esterno. Dirigetevi verso il Device Browser Live, aprire la cartella Strumenti e trascinare il dispositivo esterno strumento per una nuova traccia MIDI.

Vive Dispositivo esterno Instrument.
Il suo lavoro, come forse avrete già indovinato, è quello di gestire il routing di audio e
- In the “MIDI To” chooser, select the MIDI port to which your instrument is connected.
- With the port selected a new chooser will appear underneath to select the MIDI channel.
- In the “Audio From” chooser, select the audio input channel(s) to which the instrument is connected.
- The “Gain” knob can be used to adjust the level of the signal. I recommend leaving this at 0.00dB and adjusting the Gain on the instrument itself to get the perfect level.
- Use the “Hardware Latency” slider to compensate for any latency introduced by the instrument.
Il relativo che semplice. Record-braccio la traccia MIDI e il suono dello strumento, sia dallo strumento stesso, o da un controller MIDI collegato.
Poiché l'audio dallo strumento viene elaborato attraverso il canale Live, essa può essere trattata come qualsiasi altro canale audio. Prova ad aggiungere effetti insert o utilizzando bus Invia per aggiungere un effetto di riverbero o delay. Si può anche congelare la pista, proprio come uno strumento software!
L'ultimo passo è quello di salvare il nuovo dispositivo. Colpite l'icona Salva Preset nell'angolo in alto a stretto del dispositivo e il nome nel browser Lives. Ora ogni volta che si desidera utilizzare tale synth e drum machine di nuovo, si può semplicemente trascinare una traccia MIDI vuota.
Il dispositivo esterno Effect Audio
Il secondo dei nostri due dispositivi magici, il dispositivo esterno Audio Effect è per le unità esterne di effetti come riverbero, delay, chorus, distorsione ecc Testa al browser del dispositivo Live, aprire la cartella Effetti audio e trascinare il dispositivo audio esterno Effects per uno traccia audio o la traccia di ritorno.

Vive dispositivo audio esterno Effect.
Ci sono alcune opzioni in più per passare attraverso il dispositivo esterno effetto audio, ma ancora una volta la sua facile da installare:
- In the “Audio To” chooser, select the audio output channel(s) to which your effect is connected.
- In the “Audio From” chooser, select the audio input channel(s) to which your effect is connected.
- The two “Gain” knobs can be used to adjust the level of the signals coming in and out of the soundcard.
- Use the “Dry/Wet” to mix between the Dry signal (before it goes to the effect) and the wet signal (after it comes back from the effect).
- Use the “Phase Invert” button to invert the phase of the signal coming back from the effect.
- Use the “Hardware Latency” slider can be used to compensate for any latency introduced by the effect.
Ricordati di salvare il nuovo dispositivo creato in modo che si può utilizzare in futuro, senza passare attraverso questo nuovo l'installazione.
Quindi ora abbiamo una unità esterna hardware che si comporterà esattamente come un effetto di software. Metti il tuo dispositivo appena creato su qualsiasi traccia audio da utilizzare come un effetto insert o metterlo su una pista ritorno di usarlo come effetto di invio.
L'unità di effetti hardware spesso hanno una wet / dry parametro sull'unità stessa. E 'meglio quindi impostare questo valore a 100% wet e quindi utilizzare il Wet / Dry manopola Lives dispositivo esterno Effect Audio per il controllo della miscela.
Come potete vedere, integrando strumenti esterni e gli effetti in Live è relativamente semplice. Theres niente come suonare uno strumento reale e manopole tweaking reali, l'immediatezza e l'interfaccia tattile è qualcosa che il software solo replicare cant. Migliore di tutti, si può essere sicuri che Ableton Live ad integrarsi senza problemi.

Discussion
thanks a lot
Hope these 2 articles for Logic help:
http://www.macprovideo.com/hub/logic-pro/setting-up-external-midi-instruments-in-logic-part-1
http://www.macprovideo.com/hub/logic-pro/setting-up-external-instruments-in-logic-part-2
:)
Just connect your instrument to either a mono or stereo input and follow the instructions for the External Instrument Device.
Here's a video that shows you how to make an aggregate audio device.
http://www.youtube.com/watch?v=g348K6aSCmk&feature=related
Once you've created the aggregate device, just tell Live to use it in the audio preferences.
I use this feature of OS X to wire together two firewire interfaces for 32ch i/o
I have the Duet 2 with 4 outputs and replaced my Apogee One with the Duet2 specifically so I would be able to route audio and soft synths from Ableton, etc. through external hardware and pedals to warm them up, have more natural delys, et. al. It seems like this should be possible with the Duet2's 4 outputs, but I have not been able to figure it out after hours of trying, google'ing, and following this article. Please let me know if you have any insight into how I might be able to do this. Am I doing something wrong, or is it not possible?
Thanks and Best,
Michael
The Duet 2 should be just fine. Connect outs 3 & 4 to your hardware effects and connect the output of the effects to Duet inputs 1 & 2.
Assuming that the Duet is sending and receiving signals ok from the effects unit, the only remaining step should be to setup the Ableton External Effects device as described in this article. Oh, and don't forget to enable all the Duet's inputs and outputs in Live's Audio preferences.
Hope that helps.
- Rory
Want to join the discussion?
Create an account or login to get started!