Most DAWs come with a decent collection of factory instruments and patches, covering all the standard instruments and often many specialty instruments as well. Often these are quite good, but most Virtual Instrument users tend to turn to third-party collections, especially when it comes to sampled instruments, which typically offer greater variety, better detail and realism and more comprehensive programming for more natural, musical response in terms of dynamics and articulations. Even users of programs like Logic, with its very comprehensive instrument library, still frequently seek out the greener pastures offered by outboard sound libraries.
But sometimes factory instruments have more potential they they might seem to at first glance. While they might not incorporate as many nuanced performance variations in their sample sets, and often a quick playing test may suggest a lack of dynamic variation or tonal variety, users willing to get their hands a little dirty may find that often a few relatively simple tweaks can really open up what appears to be a limited instrument patch, giving it a much more musical response. Admittedly, digging around in the inner workings of virtual instruments (VIs) is not for everyone, but players and producers willing to have a go at it can sometimes be regarded with a much more playable patch. Here are a few suggestion for ways to tweak instrument patches to address some of the shortcomings typical of factory VIs.
Multi-Output, Multi-Timbral
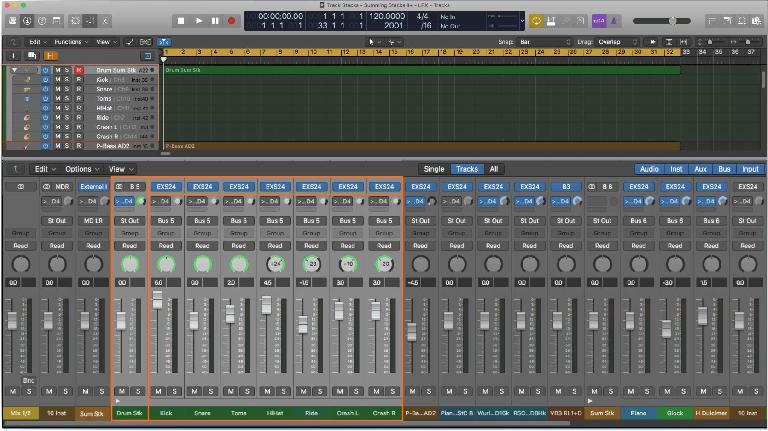
One of the simplest and most obvious ways to extend the flexibility of a virtual instrument is to utilize its option (if provided) for multiple outputs . Naturally, this is most useful for drum patches, but any VI that consists of multiple components (percussion ensemble, string ensemble, brass section patch, etc) will benefit from separating those components for individual mixing. Third-party drum instruments for example usually include onboard mixing capability and effects, but often a factory drum kit doesn’t—splitting out the kitpieces to separate channel strips gives the producer/mixer the ability to EQ/compress/effect those pieces individually, which can be the key to getting the big drum sounds expected.
Taking this idea a step further, sometimes the individual drums may need more that individual mixing tweaks—a snare might require a different attack or release; toms may demand a different velocity or filter cutoff setting than kick or snare; cymbals may need different velocity curves, etc. While multi-outputs may not solve this, a multi-timbral version of the patch very well might. A good example is Logic’s Track Stack feature, which allows multiple instances of a VI to be opened in different channel strips, but all triggered and saved from a master track. A feature like this provides both programming and mixing independence, and a tweaked kit can be saved as a unit for easy recall.
Simple Synth Settings
Virtual synths that provide full programming panels (as opposed to simple sample-based models) offer plenty of opportunity for the user to take a slightly lackluster patch and beef it up to their heart’s content. Dedicated synthesists, of course, would already know all these basic programming tricks, but even the less-experienced player/producer who’s more used to simply choosing from different presets can easily take a sound that’s almost-but-not-quite there and dial up exactly what’s needed for a fuller, richer tone.
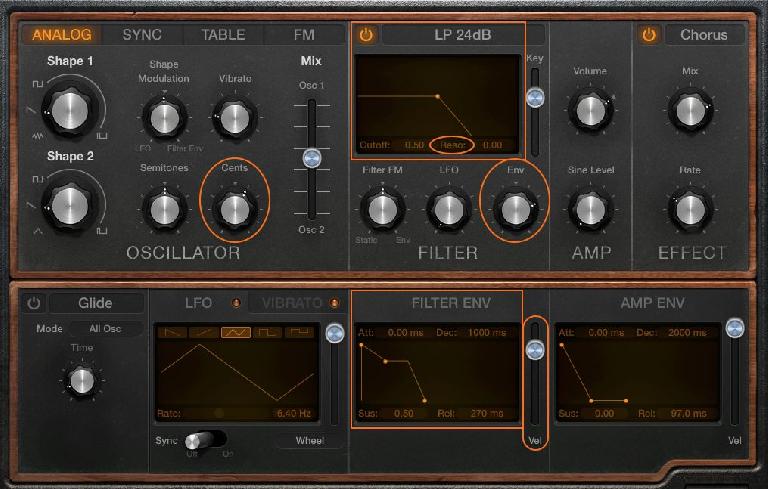
Virtual analog synths, like their hardware counterparts, typically provide two or three oscillators (sound sources). If a patch seems a little static, the basic synth programming technique of detuning one or more oscillators by a few (±5-10) cents or increasing whatever detuning may already be applied can add some animation and richness to the sound. If a lowpass-filtered patch is a bit too dull and drab, but opening up the filter makes it too bright and harsh, adding a little resonance can alter the harmonic balance enough to add some tonal character.
For a more dynamic version of this, the LPFilter cutoff can be set to be controlled by an EG (Envelope Generator), which can be set to create some degree of the classic resonant filter sweep (a.k.a. wah-wah effect, so popular on synth bass and other sounds). And of course, tweaking the other ADSR Envelope settings (Attack, Decay, Sustain, Release) can drastically alter how the notes “speak”, for more dramatic musical differences, easily turning one sound into another.
Velocity Variations
Many simple sample-based factory versions of acoustic instruments suffer from a somewhat one-dimensional velocity response, typically due to a minimal number of samples being used per instrument. After all, they are just free throw-ins, as opposed to the multi-GB collections of most high-end third-party offerings. The instrument may get louder and softer as the player plays dynamically, but often the tonality doesn’t change as much as it would in the real thing. Or the tone may change, but not gradually as the player plays a crescendo but suddenly, making for an unnaturally abrupt dynamic transition that can make even a good subtle player sound clumsy. There are a couple of ways to deal with this.
Most VIs nowadays achieve dynamic tonal variations by sampling the entire instrument key range at multiple strike levels (pp, p, mp, m, mf, f, ff), with the different dynamic layers selected based on MIDI Velocity (how hard the player hits the keys). A factory instrument may only have two or three layers, making those transitions too abrupt in subtly dynamic passages - think of a piano being played dynamically. As an alternative to relying solely on multiple velocity layers for dynamic tonal variations, a full-featured sampler’s LPFilter and EG can be pressed into service as they would be with a synth, to create a smoother tonal transition between the loudest and softest playing levels.
The LPFilter Cutoff would be set to a lower frequency appropriate for the softest notes, and velocity control would open it up gradually over the full velocity range (0-127), making the tone get gradually brighter with gradually harder playing rather then suffering from a sudden jump in tone somewhere in the middle of the velocity range. For percussive instruments (piano, drums) a similar technique can be used with the EG’s Attack time—slightly slower, softer attacks at lower velocities gradually giving way to the samples’ original recorded instantaneous attacks for the loudest hardest-played notes.
Velocity Curves
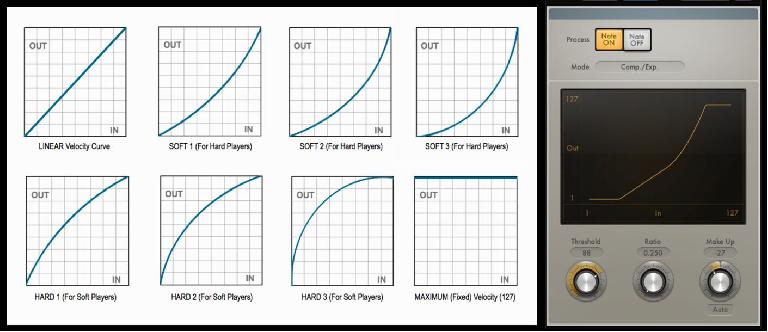
Often, even when a sample-based factory instrument has a sufficient number of velocity layers to provide a more natural gradual tonal transition from soft to hard-played notes, the points at which those transitions occur may not feel right to a particular player. This can be the case with real instruments too—every instrument has its own particular dynamic response, and players often have strong preferences for one or the other—but with samples instrument there’s a solution: adjusting the Velocity curve.
The most common reason a particular instrument (say, a sampled piano) isn’t comfortable for a particular player is the physical response of the MIDI controller keyboard. Weighted keys are ideal for harder players, but may result in player with a softer touch having undue difficulty achieving full volume and brightness; conversely an unweighted keyboard may be comfortable for a soft-touch, but a harder player will likely be unable to play at quieter levels (p, mp) with suitable control. Third-party instruments often include a velocity curve adjustment, but many factory instruments don’t.
The hardcore way to change the response of an instrument (at least a full-featured sampler) with multiple velocity layers would be to dig into the sample assignment programming pages and change the velocity levels of the transition points between each velocity layer and the next. This could be a little hairy even for more experienced tweakers, and can certainly be a bit tedious. Fortunately, there’s often a easier way.
Many DAWs have MIDI tools or plug-ins that can re-map the velocity values between 0-127, creating a different velocity curve, for a more comfortable response with a particular combination of player, keyboard and patch.
This would be most useful in the form of a realtime MIDI plug-in that can alter the velocity curve as the player plays, until it feels just right—if the mapping is done on MIDI input, then the MIDI recording will need no further processing. But if the recorded performance is reassigned to a different VI with a different internal velocity response, then a similar playback tool can be applied to match the velocity response to the new instrument without having to replay the part. This can—and should!—give players pause, but if done with a musical ear it can be a real life saver in a session.
Mono/Legato
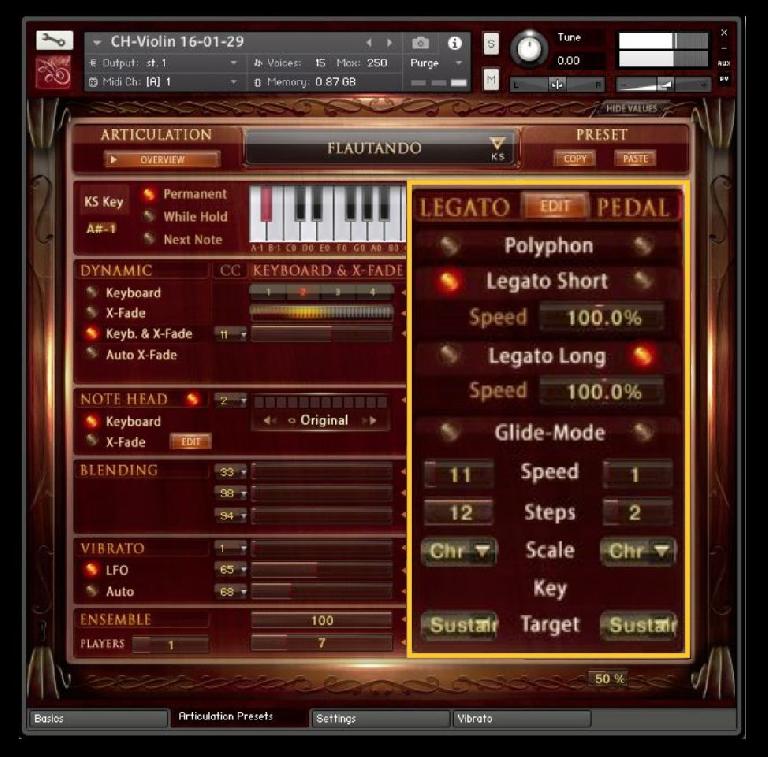
Another response tweak can be helpful for monophonic factory instruments like bass or solo brass/winds/strings—that’s the mono/legato setting. For an instrument like, say, bass, which is typically played monophonically most of the time, hearing artifacts like overlapping adjacent notes on the same string can be a subconscious distraction, robbing the performance of realism and the kind of subtle phrasing that makes for a good bassline. Obviously this can be even more prominent with solo mono instrument patches. If the VI has a mono playback setting, turning this on will prevent unrealistic overlaps, but there still may be a new attack for every note. Now this could be fine, but if the player intended to utilize phrasing to make for a more distinctive bassline or a more distinctive melody in a solo instrument, then the constant percussive attacks may sound clumsy. Enabling legato mode would be the solution.
Legato playing is where the player attacks a note but then changes the pitch of the next several notes in the phrase without re-attacking them. The resulting phrases can help the bassline or melody stick in the listener’s ears more readily. To achieve Legato playing in a monophonic VI patch, the player must play overlapping notes when he wants legato notes, and let a note up before playing the next one when he does want to re-trigger the attack at the beginning of each phrase. This can go a long way to creating more natural-sounding melodies and phrases, and it’s a particularly easy tweak to implement as well.
Last Word
Of course, not every factory instrument will be able to provide the kind of quality and response needed, but when there’s no alternative readily available, often a few simple tweaks can make the difference between a recording session grinding to a halt for lack of a suitable sound and a contented player laying down some nicely expressive parts, which can still be reassigned to a fancier instrument at a later date if desired. Taking a few minutes to get familiar with some of these relatively simple programming adjustments can potentially make life a bit easier when it comes time to lay down virtual instrument parts.


 © 2024 Ask.Audio
A NonLinear Educating Company
Discussion
Want to join the discussion?
Create an account or login to get started!