

Nobody likes a noisy recording. You know, whether it be a recording of guitars, drums or most of all spoken word... the hiss or hum of background noise, traffic, computer fans, etc are a real turn-off for the listener. Every recording musician or recording engineer at some point sits back and wishes they had used a different microphone, different room or simply turned off the A/C while recording! Short of re-recording in a different location or with a noise isolating microphone, Soundtrack Pro has a very useful feature called Noise Reduction. In this How-To blog post we'll explore the in's and out's of reducing unwanted noise on a simple voice over sample without making it sound too artificial. So grab your headphones and let's start cleaning up some audio.
Step 1 - Open the File in Soundtrack Pro
Soundtrack Pro is included with Logic Studio and Final Cut Studio but is not available to purchase separately. If you have Logic Pro or Final Cut Pro then you can find Soundtrack Pro lurking in your Applications folder.
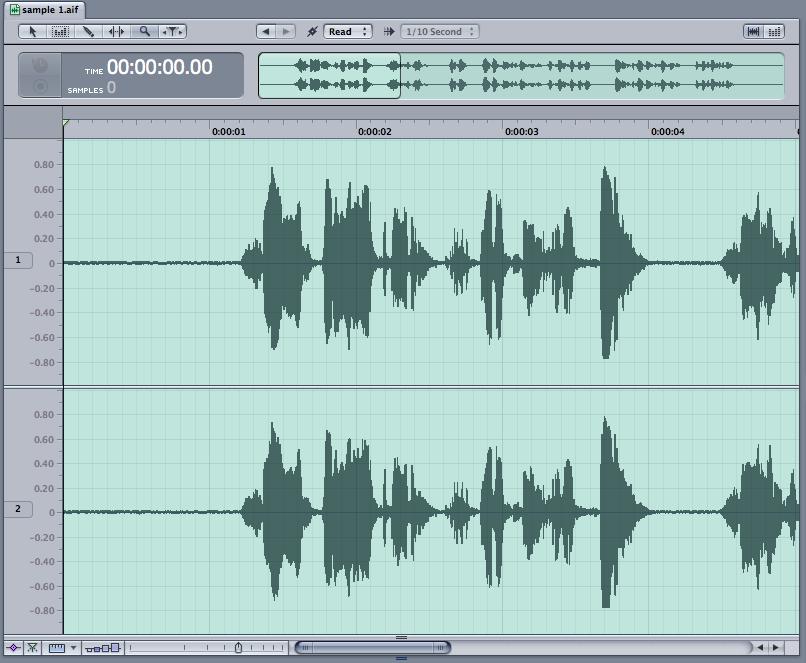
We're going to remove some of the background noise from this rather over enthusiastic voice-over where the input gain was too high during recording. I'd recommend you record your own voice. There doesn't need to be a lot of background noise or hum. The less you have in your recording the better the end results will be!
Launch Soundtrack Pro and close the default project.
Next, choose File > Open and select & open your audio file.
Step 2 - Find the Noise
Listen to your clip in Soundtrack Pro. Just like in Logic and Final Cut, the spacebar will play/stop the transport. Here is the clip I'll be using in this example. I'd highly recommend using headphones!
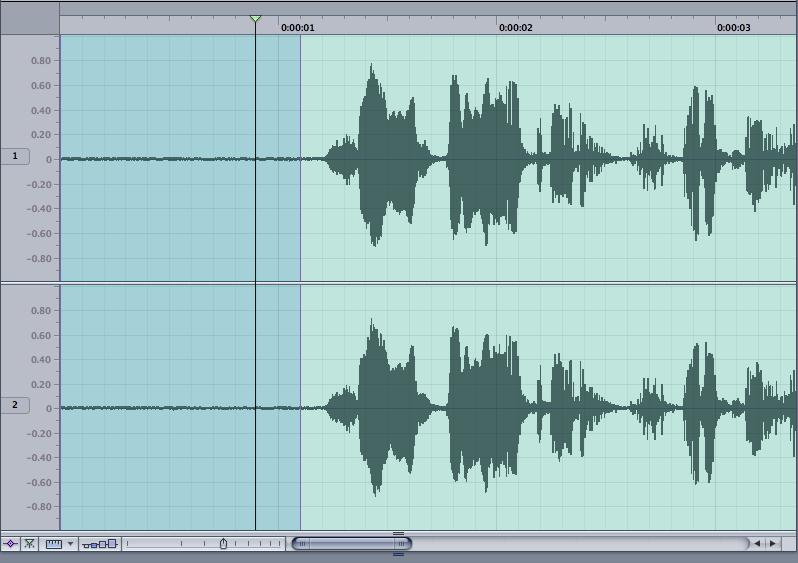
In order to remove the background noise we need to find a portion of the clip that contains only the noise. That's right, nothing else... just noise. We are going to tell Soundtrack Pro what to define as noise so it can accurately remove it. Don't include anything that you wish to remain in the audio clip.
The beginning of the clip has about a second of only background noise so that's perfect. Drag over that area of the clip to create a selection. Play it back to check a few times.
Step 3 - Set the Noise Print
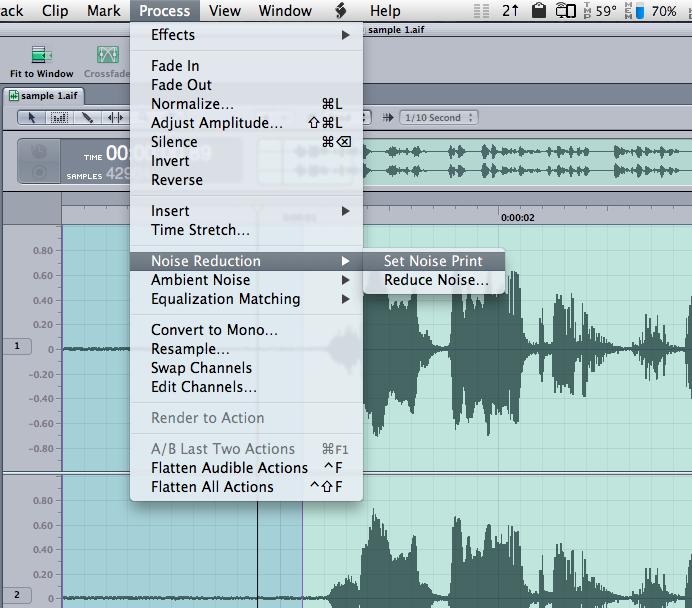
Now we're ready to tell Soundtrack Pro to set the noise print. Make sure the noise is selected and choose:
Process > Noise Reduction > Set Noise Print
Step 4 - Reduce Noise
Once Soundtrack Pro knows what we feel is noise, we can begin to reduce the noise. First though we want to select the entire clip (or whatever section you wish to remove noise from). Choose: Edit > Select All
Open the Reduce Noise window by choosing:
Process > Noise Reduction > Reduce Noise...

Press the Play button in the bottom left corner to begin playback of the audio.
Step 5 - Everything in Moderation
When reducing unwanted noise, it's tempting to try and remove all the noise and process the file with extreme settings... Really, I'd recommend against this. Taking a moderate approach will usually result in a better end result. It's important to note that it's often not possible to remove all unwanted noise completely without the recording sounding artificial and lifeless.
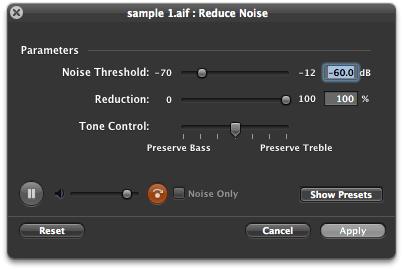
Use the Noise Threshold Slider works in tandem with the noise print you have already created. For example, you can use this to set the level when the noise print will begin to reduced. A lower threshold means that lower (quieter) signals will be reduced and a raised threshold means that more louder or higher level signals will be reduced.
In this instance I've used the Bypass button to toggle between listening to the clip with and without noise reduction. I find this helps me to get a good idea of whether the affected clip is losing much compared to the original.
Step 6 - Experiment with Threshold and Reduction
Getting the right balance between removing noise and maintaining the sound you need to keep can be tricky. I'd recommend setting the Noise Threshold at a moderate level, for example, between -50 and -70dB. In this instance I've opted for -50.7dB.
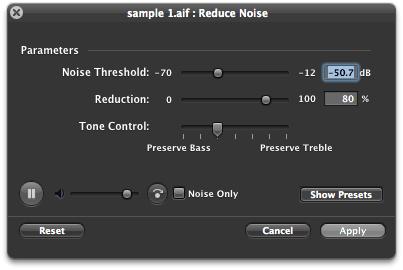
Notice also that I've altered the Reduction too. Instead of reducing all the noise print below -50.7dB I'm reducing it by 80%. Although this means there will be some audible background noise, it will also allow the frequencies shared by the noise print and my voice to not be reduced as much. Thus, my voice should sound more natural and less like it's been slammed through a noise reduction plugin!
Step 7 - Noise Only
Use can the Tone Control to preserve more of the low-frequency or high-frequency content while reducing noise. I've decided to preserve a little more of the Bass (low-frequency) content.
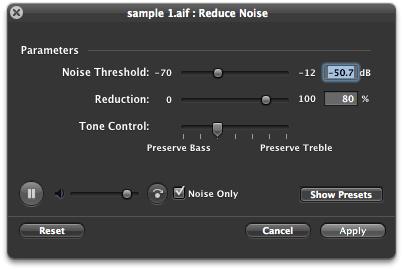
Finally, before I'm ready to apply this to the clip, I like to listen to only what is being removed from our sample. Click on the Noise Only checkbox to preview this. Don't be surprised if it sounds like a garbled alien dialect. But, if you can hear any intelligible words, then I'd recommend reducing the Threshold and/or Reduction sliders.
Step 8 - Apply, Flatten and Save
Once you're happy with the nose reduction click the Apply button.
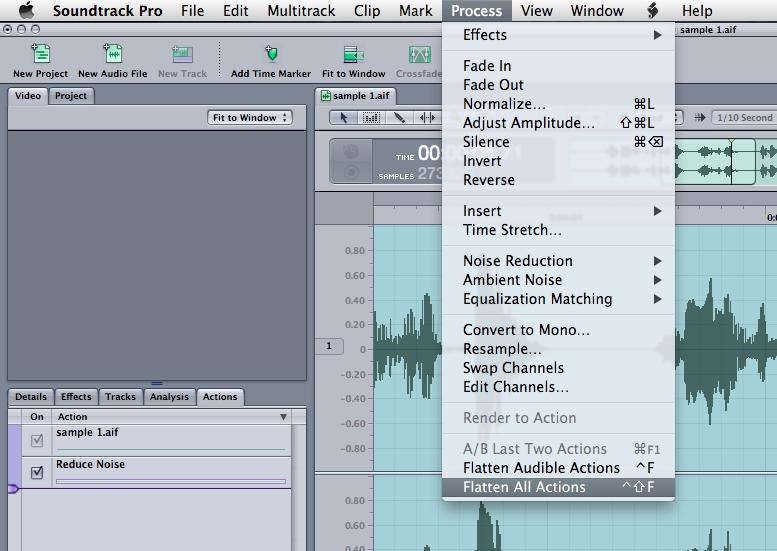
In the left pane you'll notice that Reduce Noise is added under the Actions tab. Although it has been applied to the audio sample, by simply clicking the check box you can toggle bypass it.
In order to save the actions to our audio file we first need to flatten these to the file. Choose: Process > Flatten all actions
Now we're ready to save the file. I'd recommend File > Save as... so as not to overwrite the original file. You never know when you might need it! Choose the file type, bit depth and sample rate as required and hit OK.
Here's our final audio after being gently processed by Soundtrack Pro:
(Please use headphones)
Remember that removing all background noise from most recordings will result in an unnatural sounding recording. However, after applying moderate noise reduction settings, there's no reason why you can't repeat setting the noise print and further apply further noise reduction by repeating steps 3-8. Alternatively, you can gently attenuate volume using automation to remove noise in the gaps before and after the voice over to further clean up the audio.
While Noise Reduction in Soundtrack Pro is not a magical tool that will restore or clean up any recording no matter how bad, it is an extremely useful tool that can turn an average recording into a decent one. To learn more about how Soundtrack Pro can become your audio editor of choice check out this tutorial.

Discussion
Thanks. You can't use these specific "Noise reduction" tools during or prior to recording. They take a noise print from the recording in order to remove "noise" - so need to be applied in post production as you can specify what "noise" is.
However, you can use the noise gate plugin during recording and while monitoring your audio signal to reduce 'noise' in real-time.
Hopt that helps
Rounik
In the past I've not used Flatten All Actions, but have just saved the file and returned to FCP7 and generally chosen Include Source (these projects go between drives) to send back as a (Sent) file.
If I choose Flatten does that mean I lose edit-ability later on if I want to readjust?
Also do you know of any shortcut keys for Set Noise Print and Reduce Noise?
Want to join the discussion?
Create an account or login to get started!