1. Load Up A Project And Create A Device
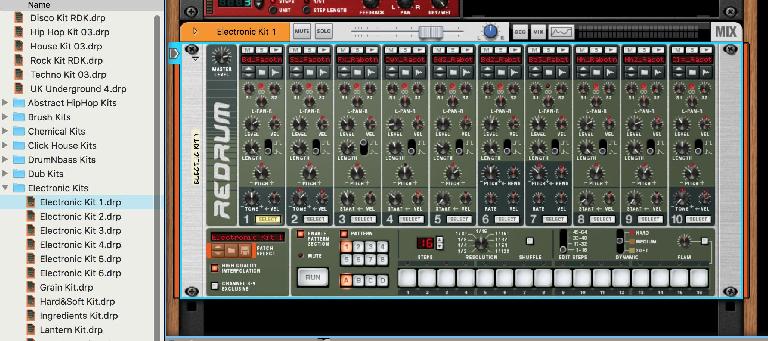
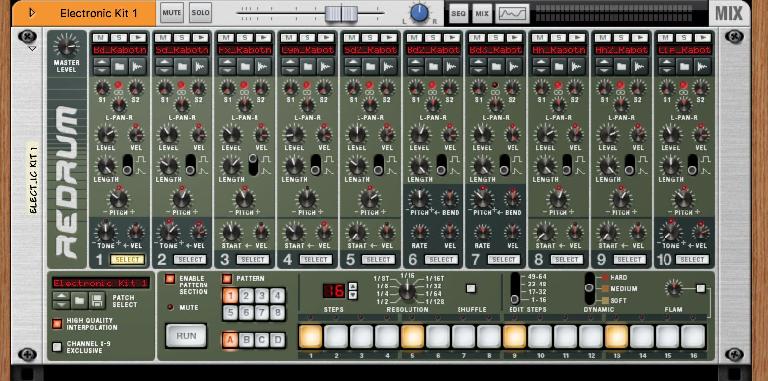
Set your project tempo and load a device that you want to generate your beats. We’ll look at a few, starting with the ReDrum. One of Reason’s oldest modules, this actually has a proper step sequencer already built into it, so you can start making beats even if you’re not a skilled keyboard player. Load up a patch and then press the button labelled “Enable Pattern Section”, which will make the step sequencer active.
2. Master The Pads
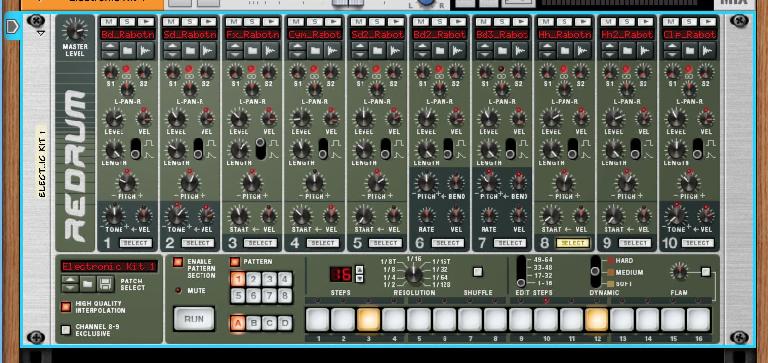
The 16 pads that you see running along the bottom can now be used to enter beats for any of the device’s ten drum channels. Selecting a new sound by selecting its channel will switch the pads to displaying the pattern for that channel. A typical way to start might be to select channel 1 which is usually the kick drum, then punching in the first beat of a four-bar pattern by hitting the 1, 5, 9 and 13 pads. Play back and you should hear a four to the floor kick part.
3. Change The Dynamic
By using the Dynamic knob towards the bottom right you can change the force with which a hit sounds. It can have a soft, medium or hard dynamic. The most common use for this is to add force to the first hit of a bar, so try switching this to Hard and then pressing the first kick pad again. You should find that the first beat of the bar now sounds a little louder than the others. You can always undo this or change any dynamic of any pad to create more variation within your patterns.
4. Build The Beat
As the pattern plays back, select further drum channels and add more parts to build up a beat. You can deselect a pad to remove a hit and also use the preview arrow on any channel to audition a sound without actually recording it. Use the controls on each channel to tweak and submix the sounds. The most useful controls are pitch, level, length and sample start. You can use these to fine tune the sound of any kit. You can also select the channel name of any channel to swap out any individual sound for a new one to customize your kit.
5. Use Advanced Controls
Along the base are some important controls for creating more interesting patterns. Starting at the right you’ll find Edit Steps, which lets you use up to 64 steps per pattern rather than the standard 16, for longer and more creative patterns. In the center is a Resolution setting that lets you change the shuffle and feel of the beat. This affects the whole module, so many people choose to leave it on 1/16 which is a standard electronic resolution. On the left you sill see four banks and eight pattern slots. This gives you 32 patterns per instance of ReDrum that can be sequenced using the onboard step sequencer. Copy and paste patterns using Reason’s Edit menu.
6. Copy As MIDI
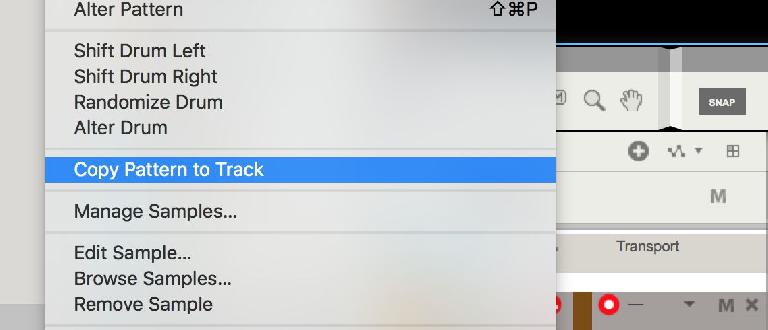
With any pattern slot selected in ReDrum, go to the Edit menu and choose Copy Pattern to Track. This will create a MIDI version of the part in between the left and right markers. After this is done, be sure to deactivate the pattern section on the ReDrum as otherwise the part will be doubled up and sound odd. You can select any other pattern slot and repeat this process to place a version of that pattern into the ReDrum’s sequencer track.
7. Use The Pattern Lane
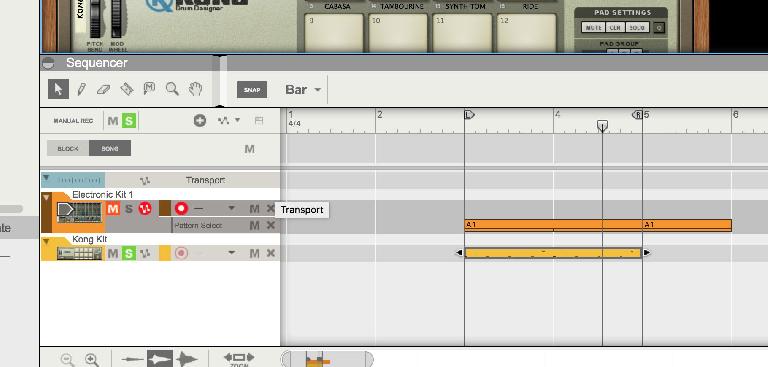
Another way to step sequence is to use the Pattern lane. Right-click on the ReDrum’s sequencer track and choose Create Pattern/Loop Lane, which will reveal a pattern automation subtrack in the sequencer. Now select the pen tool and draw in a block of pattern automation, which will obey the sequencer’s snap settings. What you have done here is not create a MIDI part but a block of data telling the main sequencer to play the ReDrum’s step sequencer and a specific slot, at a specific point.
8. Sequence By Pattern
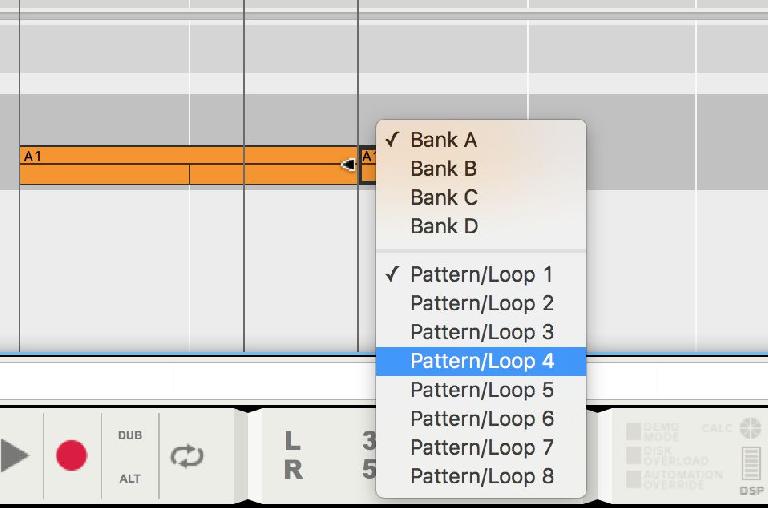
Draw in a second block of data to the pattern lane and this time, switch back to the pointer tool and click on the block’s name. From the menu that pops up you can choose an alternative bank and slot to play back. The fact that the menu shows a “loop” option reflects the fact that this lane can also be used for sequencing the Dr REX. So you can go through a whole project simply drawing in blocks of pattern automation data like this and build up the backing beats for an entire song.
9. Layer Up Drum Machines
Kong is an excellent drum machine, but it doesn’t have its own step sequencer built in. However in addition to the regular technique of simply programming beats from a MIDI keyboard or pad, you can also do the following: Use the previous trick of copying a ReDrum part from its onboard sequencer to the main sequencer with the Copy Pattern to Track option in the Edit menu, then drag or duplicate this MIDI part to Kong’s sequencer track. Voilà! What you now have is a direct copy of the step sequenced part playing Kong as well as, or instead of, ReDrum. Of course you can edit these parts completely independently to tailor and layer up beats more creatively.
10. Add An Acid Bass Part
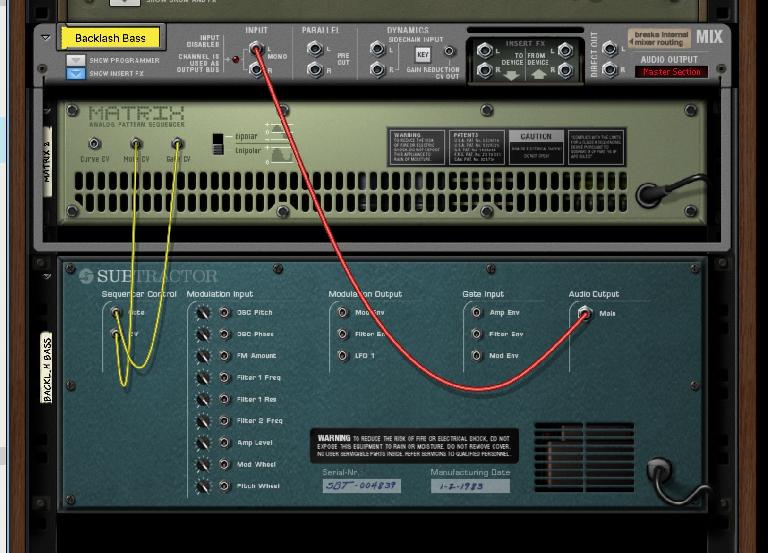
Another cool tip for adding monophonic acid basses to beats using old school techniques is to create a synth—say a Subtractor—and then attach a Matrix Pattern Sequencer to it. Make sure the Note and Gate CV outputs are connected as shown in the picture here, and then enter note data into the Matrix’s grid, using the octave and resolution controls to determine the pattern. It’s a great way to quickly generate old fashioned monophonic acid bass parts with minimal input and no real keyboard skills required.





 © 2024 Ask.Audio
A NonLinear Educating Company
Discussion
Want to join the discussion?
Create an account or login to get started!