Audio Basics
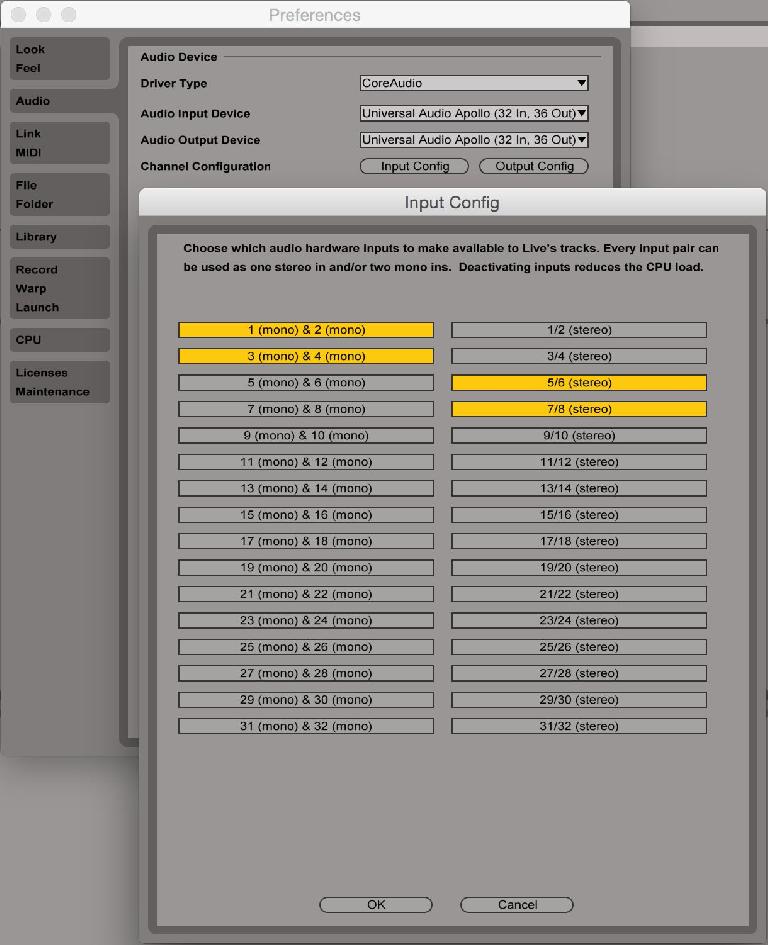
First thing you’ll need to do is connect your hardware to your audio interface so you can pipe sound from your new gear into Live. Open Live’s preferences, click on the Audio tab, and then click the “Input Config” button. A pop-up pane allows you to specify which stereo and/or mono inputs will receive audio. Go ahead and enable the ports corresponding to where you’ve got your kit jacked in—though it’s recommended not to enable ports you’re not currently using, as doing so can add unnecessary CPU strain.
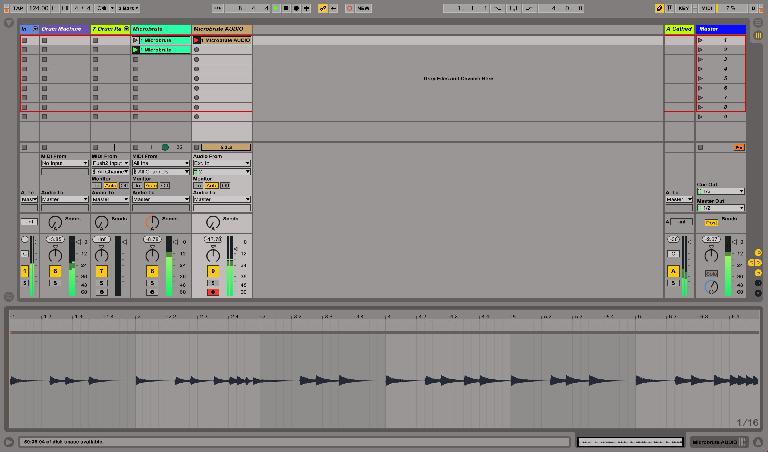
Once this is set up, you’ll want to create a new Audio track, and, via the In/Out routing menu, tell it to receive audio from Ext In, then select the appropriate input(s) in the drop-down menu below that, and set the track to either Monitor In, or Auto—though setting it to Auto may only allow it to be audible when the track is armed to record, in which case, do so.
MIDI Basics
Next, you’ll need to connect your hardware to your computer via MIDI. Many sound cards have MIDI ports built in, while newer hardware drum machines and synths tend to offer MIDI over USB. Either way, you’ll need to install the appropriate drivers and get connected. Don’t have a MIDI interface for your computer? There are plenty of options starting at around $40 and up for a basic MIDI/USB converter, such as an M-Audio Uno or iConnectivity MIO.
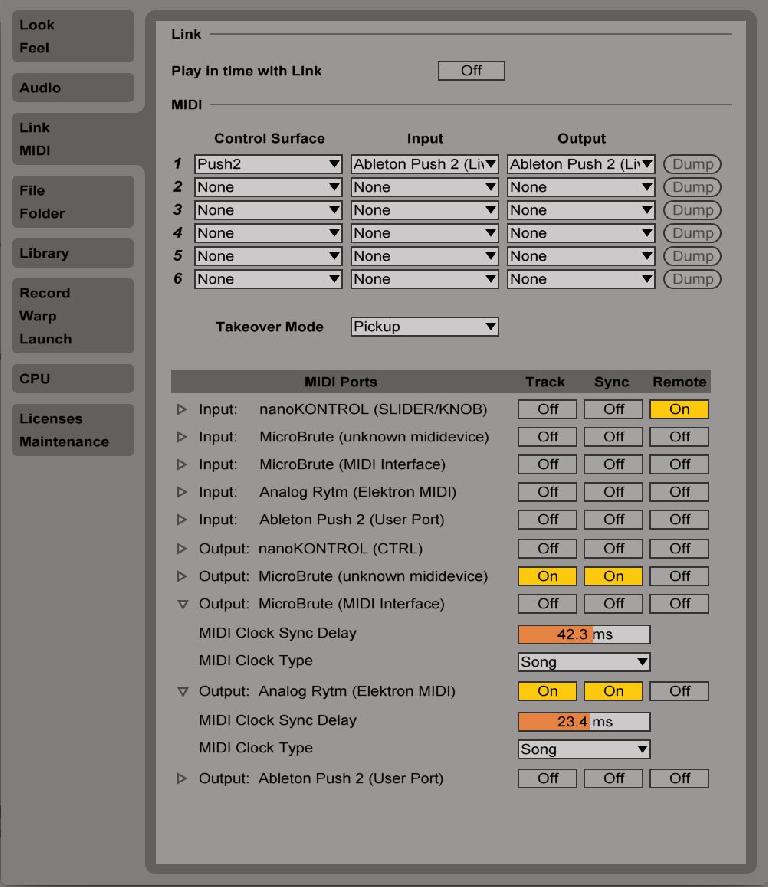
Once you’re connected via MIDI, you’ll need to open Live’s Preferences and go the Link/MIDI pane to configure it. In the pic below, I’ve got my Arturia MicroBrute and drum machine connected. I’ve enabled the Track button for Live’s Output to both machines, so I can trigger notes on both machines from Live clips. I’ve also enabled the Sync button so I can synchronize the internal sequencers of either device to Live’s master clock. Finally, I’ve disabled Remote control, as I personally don’t intend to use either device to control MIDI parameters of other devices in Live, though this is optional—so leave that enabled if you want to explore the option of twisting, say, a sampler’s filter cutoff along with the cutoff on your external synth.
Since every device will have a slightly different timing based on a number of variables, you’ll want to click the triangle to the left of the corresponding MIDI slot (as pictured above) to access the Clock preferences. Clock Sync Delay is the one you’ll want to adjust to get everything lined up.
For this to work, you’ll need to make sure your gear is set up to receive external MIDI clock. Then you can activate Live’s Metronome (the button with two circles to the left of the Global Launch Quantization in the Transport area) and start global playback with a pattern programmed into your device; chances are it’ll be off by at least a few milliseconds. Now you’ll want to adjust the clock delay slider for your device until it’s perfectly synchronized—and you’ll be all set to program your patterns.
Synthesizers
With the exception of clock-pulse CV step-sequenced synths and those with extensive built-in arpeggiation or sequencing, you’ll likely want to trigger external synthesizers from clips and devices in Live. To start, disable any relevant Clock sync you’ve enabled for your synth in the MIDI Preferences.
Next, you’ll want to go into your synthesizer’s on-board preferences and determine which MIDI channel it’s set to receive on. If you’re sending MIDI to multiple devices out of the same port (using MIDI Thru to daisy chain them), it’s crucial to make sure they’re all receiving on separate MIDI channels from one another—unless, of course, you want them playing the same notes. In many cases, you’ll be able to specify the MIDI channel within the hardware, while more modern devices, such as my MicroBrute, come with a software interface that allows you to edit these “under the hood” parameters on your computer via USB.
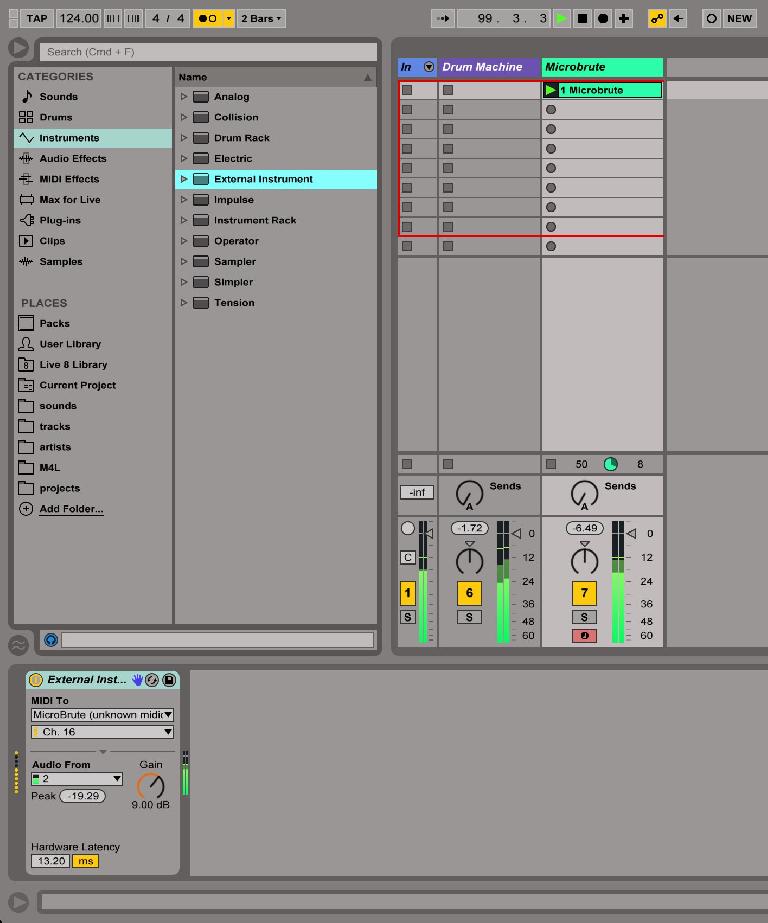
Now you should grab an External Instrument device from the Instrument browser and add it to a new MIDI track. Set the MIDI To drop-downs to the correct port and channel, respectively, and then set the Audio From to the correct input on your sound card. To compensate for any sluggishness from the device, adjust the Hardware Latency as needed—and boost or reduce the Gain knob to dial in your levels.
With the External Instrument device in action, you should now be able to send MIDI and receive Audio on the same channel, which means you can arm it and play notes via Push or another external controller, trigger it via MIDI clips, or trigger it via MIDI devices, such as the arpeggiator, or via any of the creative MIDI sequencers made available through Max for Live.
It’s true that you could replace an External Instrument device with a combination of a MIDI and an Audio track, set up with the equivalent outputs and inputs—but then you’re missing out on the discrete Hardware Latency and Gain controls of the External Instrument, which I think you’ll find quite handy.
Triggering Drum Machines
Now that you’ve got your drum machine sync’d up as needed, what about triggering it from Live’s Drum Racks? Before going further, you’ll again want to disable the Clock sync option from Live’s MIDI inputs and outputs for the desired device, if you haven’t already, and set up the gear to receive MIDI on a particular channel.
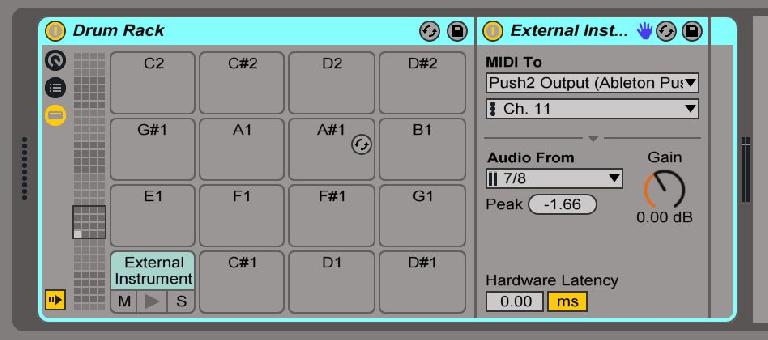
Next, add an empty Drum Rack to a new MIDI track. Bring an External Instrument device onto a Drum Rack pad, and configure it for MIDI, Audio, Latency, and Gain, according to your gear. Then, Option-click (Mac)/Ctrl-click (PC) and drag the External Device to another Drum Rack pad to copy it; you can do this multiple times. Then, open the Drum Rack’s In/Out settings in the Chain view, and set the Play note of each Pad to the MIDI Note associated with the drum sound you want to trigger with it; if a Pad receives C3, but the Snare you want it to trigger is located on D#4 on your drum machine, you would change that via the corresponding Play note here.
PRO-TIP: Numerous pieces of hardware have already had corresponding Live devices designed by the Max for Live community to control them—for example, check out this TR8 device from Nerk: http://www.maxforlive.com/library/device/2247/roland-aira-tr-8-drum-rack-and-remote
In special cases, you may need to specify a different MIDI channel for each pad’s External Instrument, but in most cases, matching the pads with the correct Playback MIDI Note in the Chain view’s In/Out routing should be sufficient to trigger the correct drum sound. Make sure the entire track is set to receive MIDI from the desired controller, such as Push, and with it armed, you should be able to program with the full functionality of Live’s MIDI sequencing powers—a blessing when it comes to drum machines that only allow, say, two-bar or four-bar patterns otherwise.
Final Capture
It’s great to trigger your devices from Live, but in the studio at least, that only gets you so far. While it’s true you can automate and even render external tracks as part of a real-time bounce on Export, recording takes in advance frees up your hardware for fresh uses, allows for new processing in the audio domain, and provides some peace of mind—at least for anyone who’s spontaneously lost an epic synth patch.
To do this, you’ll want to create a new Audio track, set it up to receive from the desired Audio port, arm it for recording, and then record into a clip in either view.
Doing a “take” like this allows you to go wild and experiment with different parameters and settings on your gear as you record, generating dynamic recordings that can then be edited, spliced, tweaked, and effected in your arrangement. Best of all, once you’re sure you’ve got what you need laid down in your take(s), the gear can be repurposed for another sound—just rinse, record, and repeat.
Integration Station
Particularly due to the External Instrument device, Live makes it fairly painless to integrate digital and analog hardware. Even if you’ve just got a couple pieces of gear, be sure to save tracks including them configured in your Default Template (which can be saved via Live’s File/Folder preferences), so there’s no need to repeat all the drop-down set-up whenever you start a new project—all you’ll have left to do is get creative.
Learn more about Ableton Live here!



 © 2024 Ask.Audio
A NonLinear Educating Company
Discussion
I'm using Ableton with a Roland System-1 and a TB-3.
But I'm having troubles to use the automation of as an example the LP Cutoff Filter or any other midi knob / fader.
I hate it that i only can change it in the clip and not in the session view like a VST automation.
Or another thing I want to control those parameters thru the use of Push 2.
Is there a way to do this things and how?
Want to join the discussion?
Create an account or login to get started!