
Are your synth sounds not quite cutting it in your EDM productions? If you want to create really big synth sounds, the key is to layer your synths and know what type of synths to layer together. It's important to choose two sounds that will complement each other and sound great when they're played as one. Here's a tutorial that will help you create two awesome synths sounds using Sylenth. Ready to get started? Let's go!
Synth One: The Electro Undertone
The synth we're going to create will end up sounding like this:
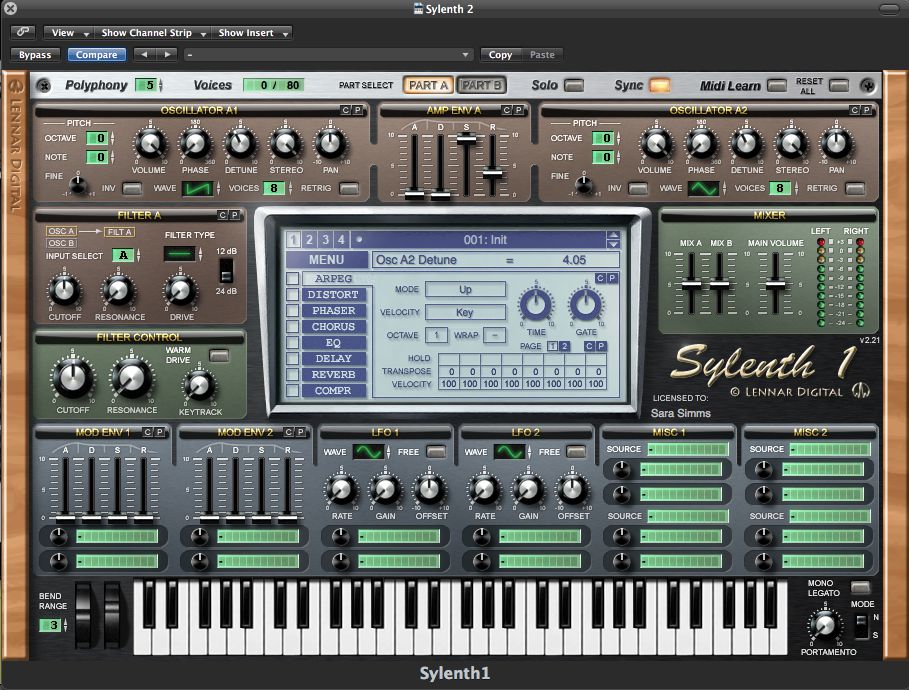
Start off in your DAW by loading up Sylenth.
The first synth we're going to create is a simple synth sound that's based around a one oscillator saw wave. It's a good standard sound to have in your arsenal that can be layered and will complement a variety of synth sounds. It sounds particularly good played with the second synth sound in this tutorial.
In Sylenth, click the 'Menu' button and then 'Init Preset' to initialize Sylenth.
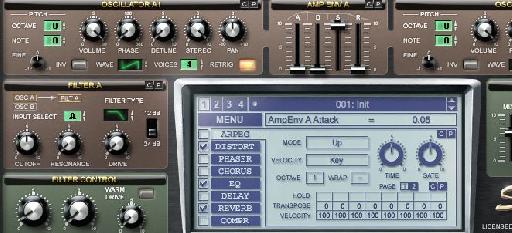
In Oscillator A1, keep the waveform to a Saw Wave and turn the Voices to 4. Keep Retrig turned on.
In the Filter A section, change the Filter Type to a Lowpass Filter and set the Cutoff to 146.16 Hz.
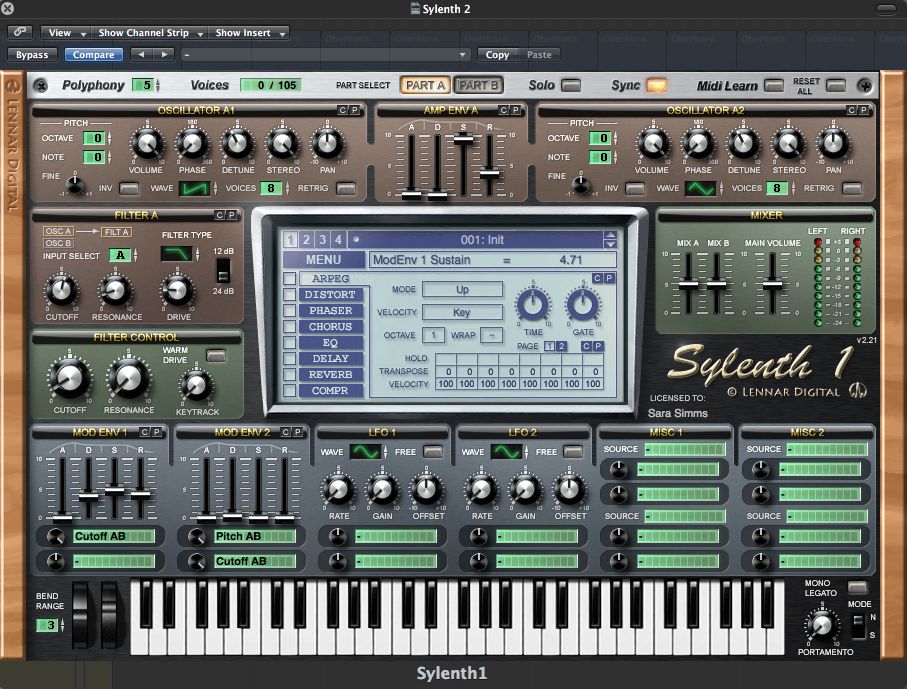
In the Mod Env 1 section, click on the first modulation slot (the green area) and set it to Cutoff AB. Turn the modulation knob all the way up to 10. Set the Decay to around 2.7 and the Sustain to 1.44.
In the Mixer Section, turn up Mix A to just above 6.
Here's a snapshot of what Sylenth should look like:

Next we're going to add further processing in Sylenth and EQ the sound so it will complement the second synth.
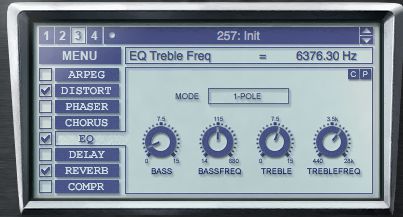
Start by checking the EQ box and turning the Bass to 1.21 dB. Turn up the Treble to 8.5 dB and the Treble Frequency to 6376.30 Hz.
Turn on distortion by checking the Distort box and then turn down the Dry/Wet to around 13.33%.
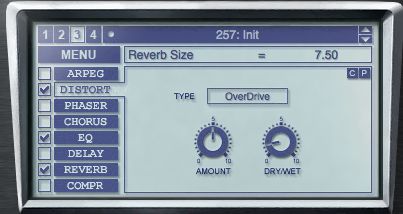
Add Reverb to taste by checking the box next to Reverb. I set the Reverb Size to 7.5, the PreDelay to 94.29 ms and the Dry/Wet to 18.57%.

Synth Two: The Lead
The second sound is the lead synth sound, which sounds good on its own but is a little thin without the first synth underneath it.
Together they'll be a perfect match! Create another MIDI track in your DAW and load up Sylenth onto it. Here's how to create the second synth sound.
Part A
Start by Programming Part A and ensuring Part A at the top of Sylenth is displayed as a yellow button. Turn the Polyphony up to 5.
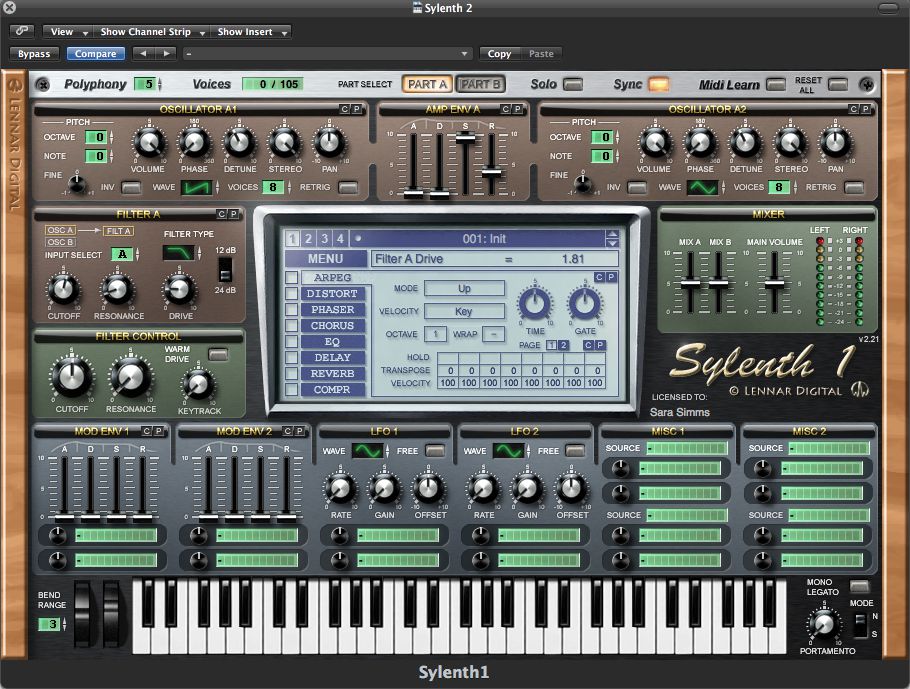
In Oscillator A1, keep the waveform as a Saw wave. Turn up the Voices to 8, and uncheck Retrig. Turn the Detune to 4.00.
In the Amp Envelope A Section, set the Sustain to 9.54 and the Release to 3.7. Next move on to Oscillator A2. Change the wave form to a Triangle wave and turn the Voices to 8. Uncheck ReTrig, and turn the Detune to 4.05.
Here's what Sylenth should look like:
Part B
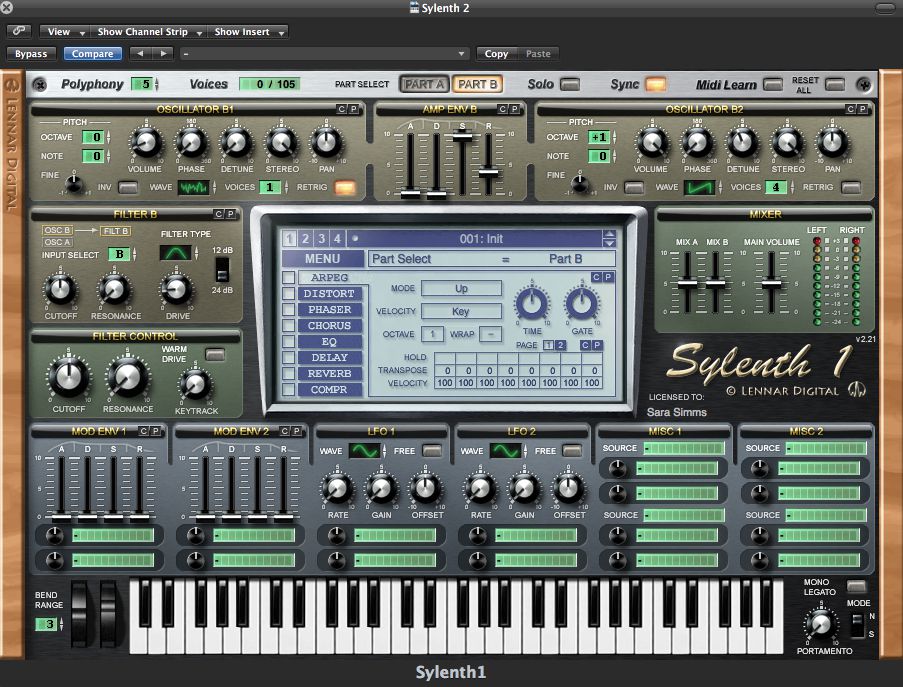
Navigate to Part B by clicking on the button at the top of Sylenth.
Oscillator B1 will become an oscillator that generates noise. Change the waveform to noise and the Voices to 1. Keep Retrig checked and turn the Volume down to 0.86.
Moving onto Amp Env B, turn the Release up to 3.72.
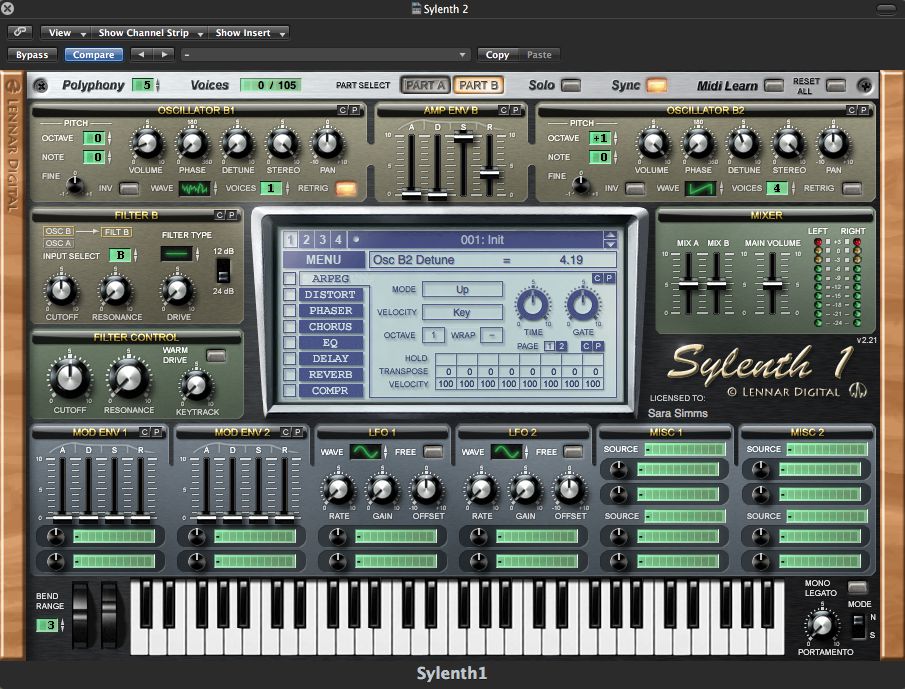
Oscillator B2 will be used to introduce a higher octave into the sound. In Oscillator B2, in the Pitch Section turn up the Octave to +1. Change the wave form to a Saw wave and uncheck Retrig. Turn the Voices to 4 and the Detune to 4.19. Sylenth should look like this;
Navigate to Part A by clicking on the Part A button. In the Filter A section, change the filter to a Low Pass Filter and change the Cutoff to 234.94 Hz. Change the Resonance to 1.05 and the Drive to 1.81.
In Part B, in the Filter B section, change the filter to a Band Pass filter. Set the Cutoff to 146.16, the Resonance to 0 and the Drive to 1.48.
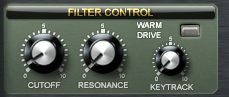
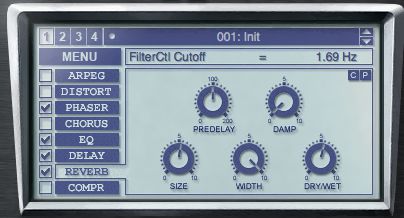
Navigate back to Part A by clicking the corresponding button. In the Filter Control section, turn down Cutoff to 1.69 Hz.
Modulation Envelopes
In the Modulation Envelope 1, set the first modulation slot to Cutoff A/B and turn the control knob all the way up to 10. Set the Decay to 3.62, the Sustain to 4.71 and the Release to 4.02.
In Modulation Envelope 2, set the modulation slot to Pitch AB and turn the control knob all the way up to 10. Set the second modulation slot to Cutoff AB, and turn the control knob up to 10. Turn the Decay slightly up to 0.23.
We're done with sound design! Next we'll shape the sound using Sylenth's effects.
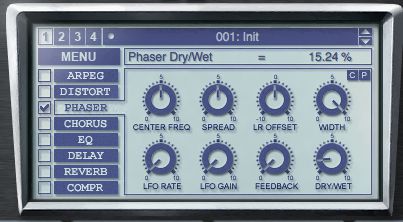
Start off by turning on the Phaser by checking the box next to it. Set the LFO Rate to 8/1D, the LFO Gain to 0.14, the Feedback to 0.95 and the Dry/Wet to 15.24 percent.
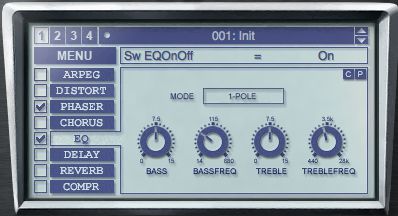
Engage the EQ by checking the corresponding box. In the EQ section, set the Bass to 49.81 Hz and the BassFreq to 50.81 Hz. Keep the Treble where it is, but set the TrebFreq to 2945.34 Hz.
Delay and Reverb can both be added in your DAW, but its just as easy add them in Sylenth.
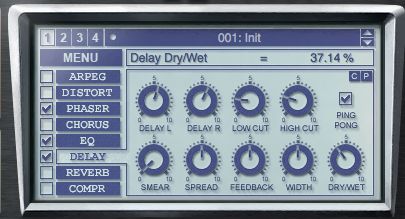
Turn on the Delay by checking the box next to it, and set the Delay L and Delay R to 1/8. Set the Low Cut to 17.99 Hz and the High Cut to 5791.24. Keep Ping Pong selected, and keep the Smear turned down. The Width and Feedback should remain at 50% and the Delay Dry/Wet should be set to 37.14%.
Turn on the Reverb section by checking the box next to it. Reverb should be set entirely to your taste; I set the Size to 5.31 and turned up the Dry/Wet to 54.29%.
To make this synth really shine in a track, try adjusting the Filter Cutoffs and Decay in Mod Env 1 or automate these parameters. Try layering these two sounds together and composing a short melody with them. Here's how the two synths sound together when layered:
Although it's a lot of work to create your own sounds, good sound design will help your productions to stand out from the crowd. Now go write some cool music with this new layered synth sound!

Discussion
Want to join the discussion?
Create an account or login to get started!