
If you want to control more than one parameter at a time, a great tool to do this is FL Studio's XY Controller plugin. I'm going to show you how you can use this effect to control multiple parameters plus how you can assign this to an XY pad on an external controller, for example like an XY pad on your MIDI keyboard.
Adding the XY Controller
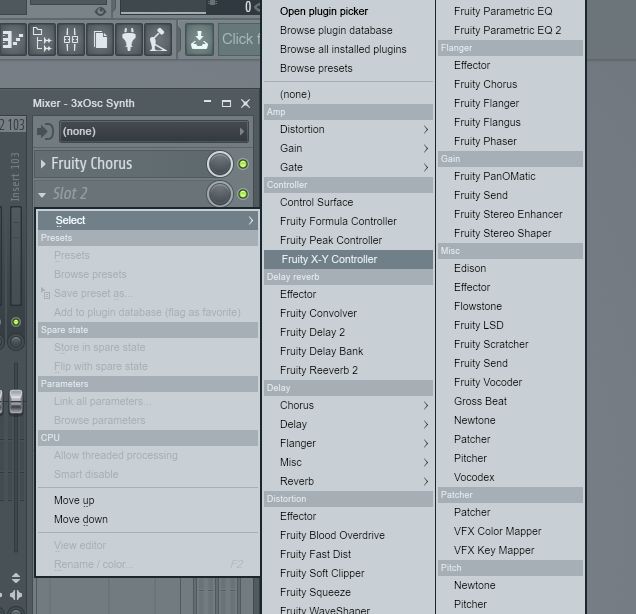
What I have is a 3xOsc synth on my one track channel. I have dialed in some settings with the oscillators.

I have also added an instance of the Fruity Chorus effect.

What I'd like to do is change the Chorus depth and the volume of the second oscillator at the same time. Now this is where the XY controller comes in handy. Add this effect into your signal chain on the 3xOsc channel.
Using the XY Controller
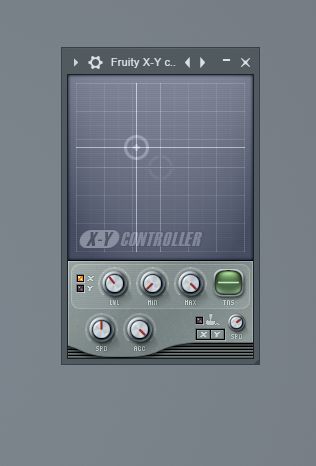
So how does this XY Controller work? Well, it has an X-axis and Y-axis and you can assign each of these axes to a different parameter. So what I want to do is assign the X-axis to the chorus depth and the Y-axis to the 3xOsc 2nd oscillator mix level.
To do this, open up the Fruity Chorus and right-click on the Depth parameter. From here choose Link to Controller.
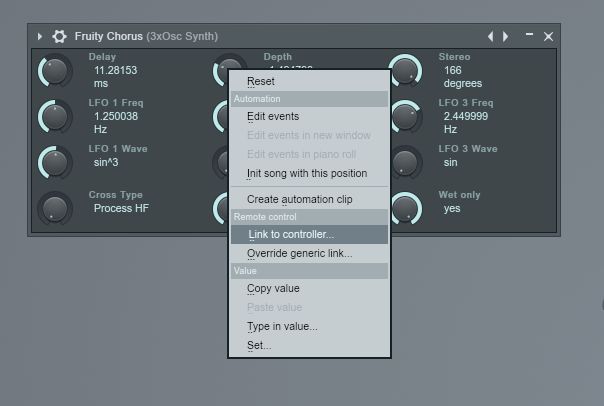
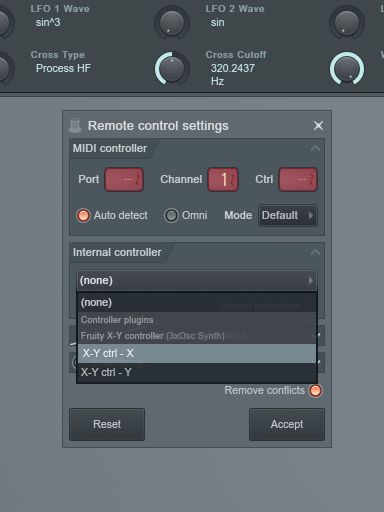
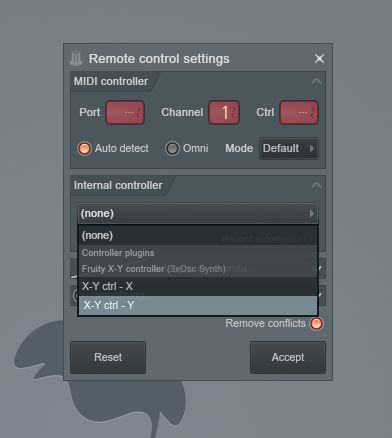
When the Remote Control Settings dialog box comes up, scroll down to the Internal Controllers. From here choose the X Axis for the Fruity XY Controller.
Linking to the 3xOsc Synth
But you don't have to only link the XY Controller to effects, you can control any parameter on your Instruments. Open up the 3xOsc interface by clicking on it on the playlist panel.
Now follow the same steps. Let's assign the volume control for 2nd oscillators' mix level to the Y axis of the XY controller. Right-click on this and again choose Link to Controller.
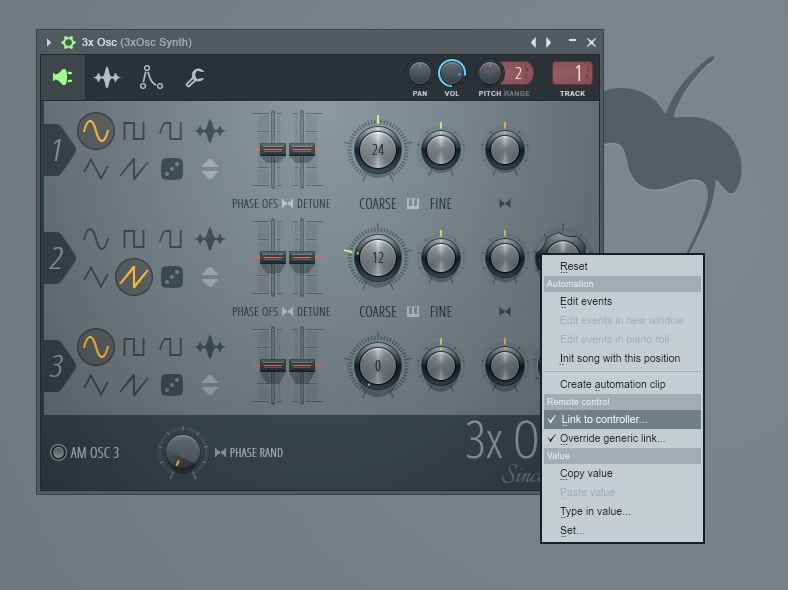
Now this time assign it to the Y-axis on the Remote Control Settings dialog window.
Playing the XY
Let's listen to this effect in action. Click on the Fruity XY Controller in your mixer view. Play a chord on your MIDI keyboard or program in a chord on the piano roll. Now while the chord is playing back move the circle around in the Fruity XY Controller XY view.
What you can also do is click anywhere in the XY window, and the circle will move towards that location. You can even set the speed and acceleration that the circle moves here. Tweak the Speed and Acceleration parameters and hear how you can jump the circle to this location with a fast speed or how you can get it to start off slowly with a slow speed and them accelerate and move towards the location with a fast acceleration amount.
Automating the XY Controls
What's even better is that you can record in or automate the XY tweaks. To automate these do the following:
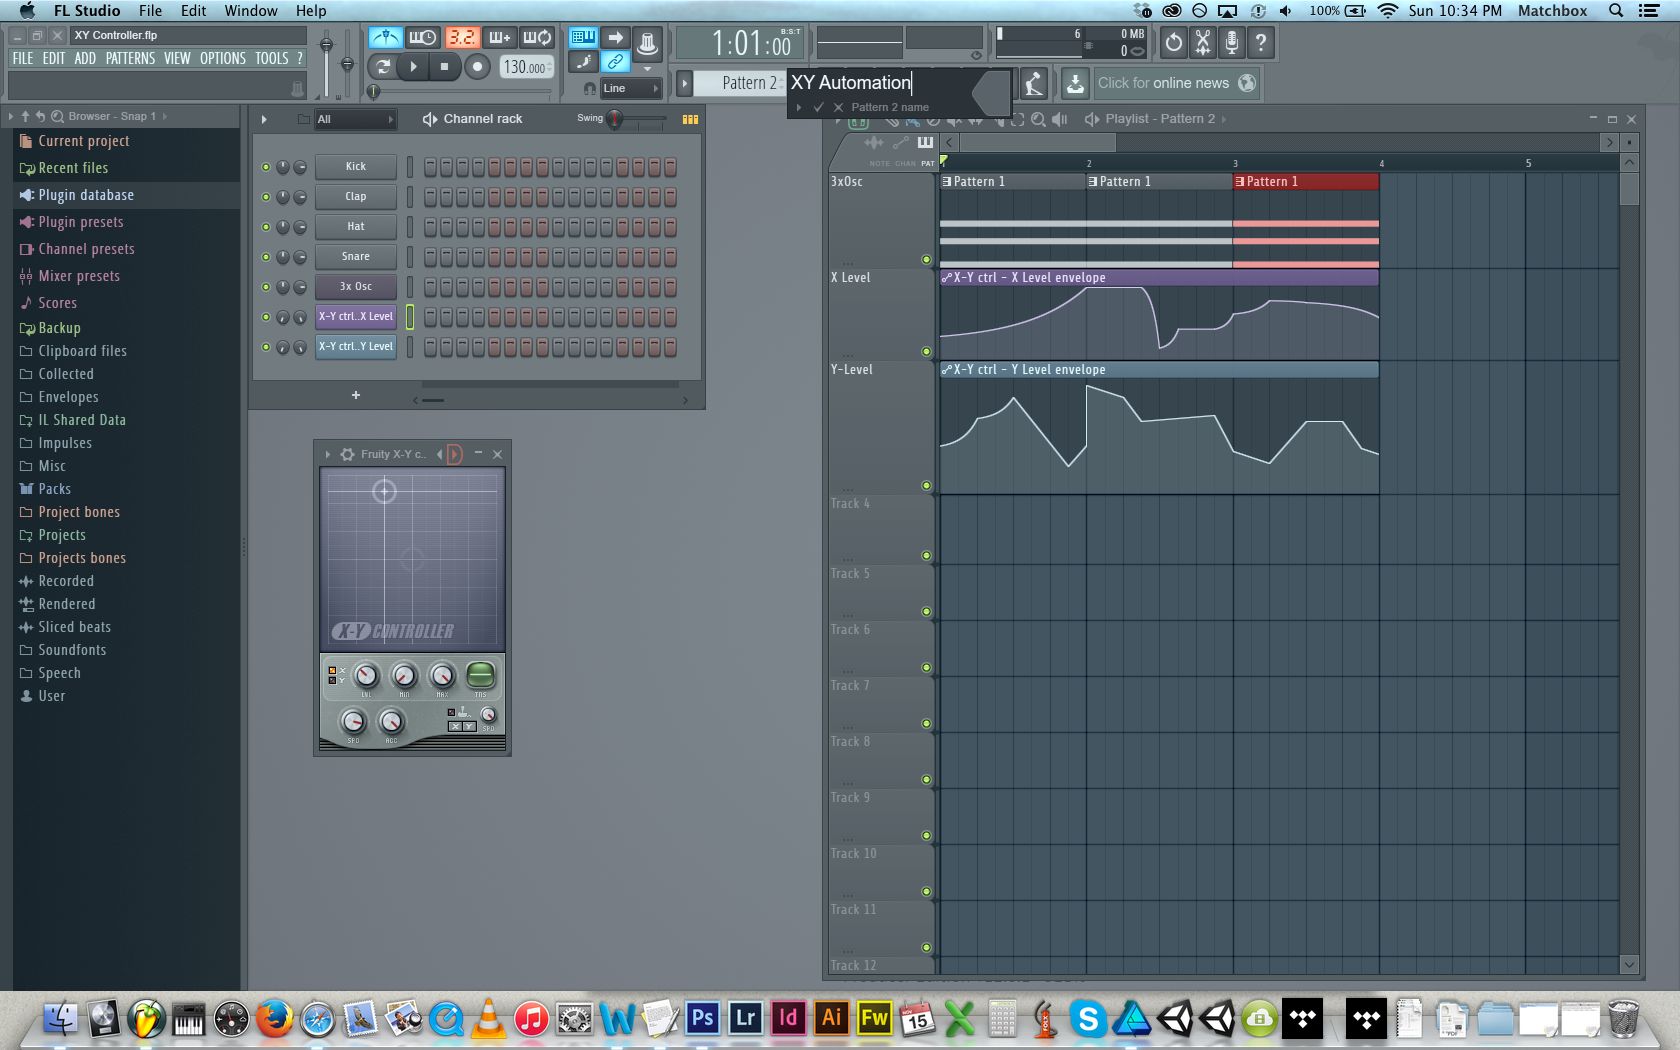
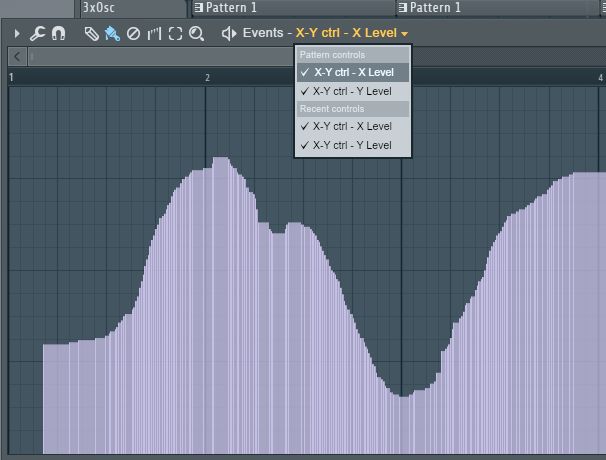
Open the Fruity XY Controller interface. On the bottom left make sure the X parameter is showing. Now right-click on the LVL (Level) parameter, and choose ‘Create automation Clip.'
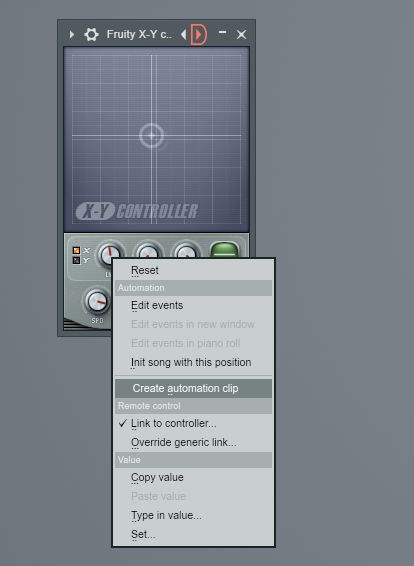
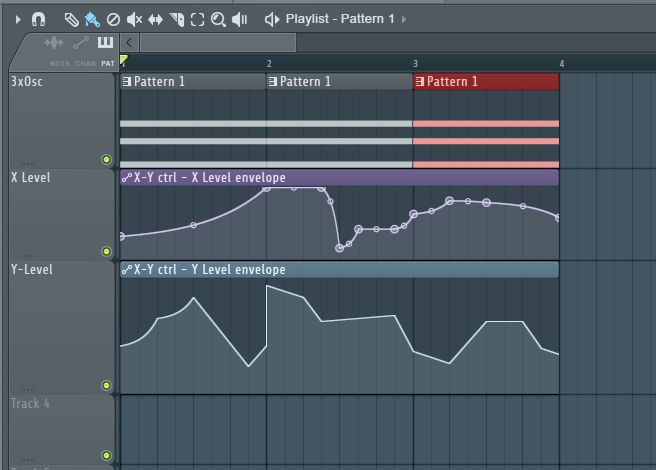
This will create an automation clip for this parameter on the Playlist view. Then click on the Y to show the Y parameter and do the same. Right-click on the LVL button and choose ‘Create automation Clip.'
Now you can draw in automation for each lane. Press the playback and hear how it automates the X and Y axes.
Record in XY Automation
You can also record in the movements of the XY axes in real time playback. This is how you do it:
First create a new pattern in the pattern editor.
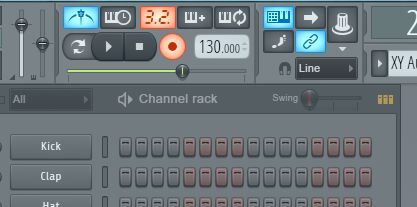
Then set it to Record enable mode by clicking the record button in the transport control bar.
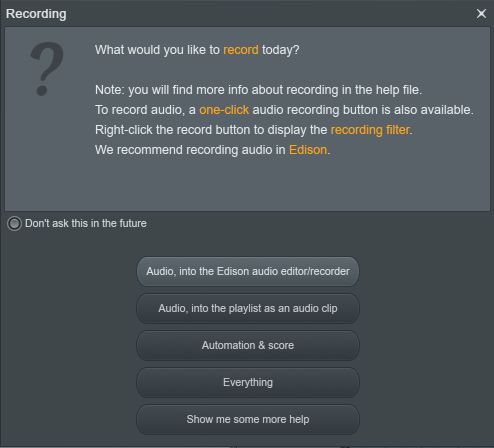
Then in the recording dialog box that launches, choose Automation and Score to track the automation of your XY movements.
Now hit the play button and as the track plays back, move the XY circle around on the XY Controller plugin. Then when you stop playback, you'll see how the XY automation was recorded to a track in the playlist view.
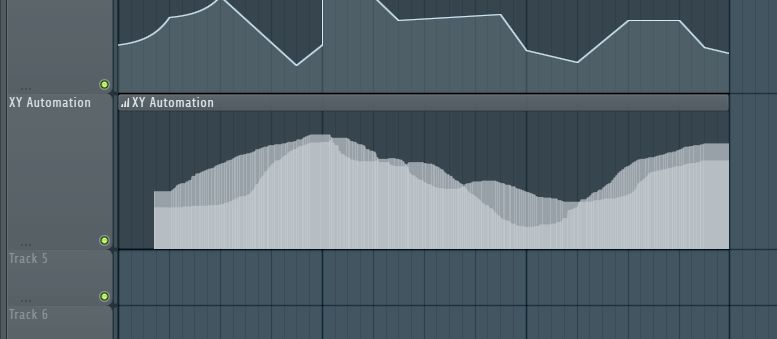
If you double-click this clip, it will bring up the automation data that you can edit if you want to, and in the top panel you can edit the X-axis or Y-axis automation data for the track.
Connecting to a MIDI Controller
The final step of the puzzle is to be able to connect this XY Controller to a MIDI Controller. This can either be to two dials (one for the X and one for the Y), or to an XY Pad on your controller if you have one on your MIDI controller.
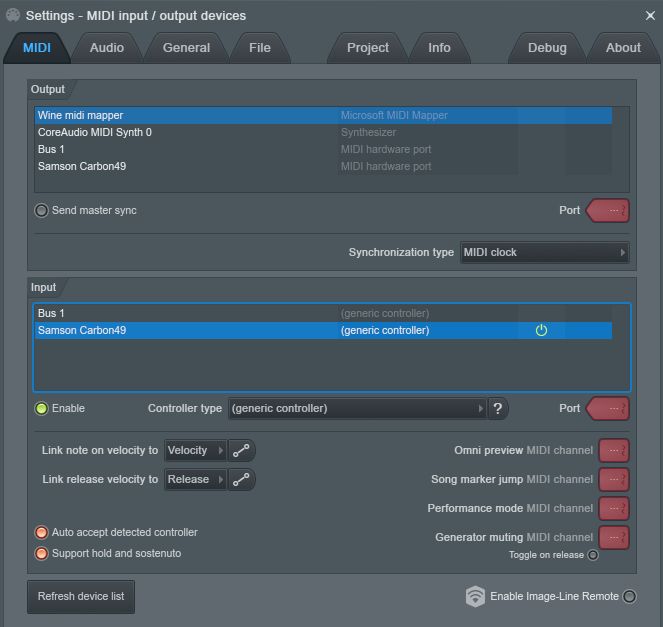
First you need to make sure that FL Studio recognizes the MIDI Controller connected to your computer. To check this, go to the Options Menu, and then choose MIDI Settings (or use the shortcut F10).
Now under the input section make sure that it sees your MIDI Controller and that it's enabled.
Now go to the top section by the Transport control. On the right of this, look for an icon that looks like a rotary knob. This is the multi link to controllers button (or you can use the shortcut Ctrl-J). When you enable this, you'll see a message come up in the info bar to ‘Please click the controls you want to link.'

Click and move the X-axis level rotary knob, and after this move the control on your MIDI controller that you want to assign it to. Do the same for the Y-axis level rotary knob. Now the X and Y-axis are linked to your MIDI controller, and you can now control this XY pad externally. And you can even record in your movements as an automation clip. How cool is that!
Conclusion
That's how to use the Fruity XY Controller to link two parameters to one track in FL Studio. So go in and assign parameters to this XY Controller and create interesting morphing textures and sounds in your future productions.
Watch our FL Studio video courses to learn more.
Discussion
Want to join the discussion?
Create an account or login to get started!