
With the release of Hans Zimmer’s score for the film Dunkirk, one of the most talked about parts of the score is the use of the ever-climbing sound that you can hear throughout the soundtrack but most prominently in the first song ‘The Mole’. It’s a technique that has been around for a while and you have probably seen it mentioned before. It’s his use of the Shepard Tone technique. It’s a clever way of writing multiple parts, that when played together feel like a piece is continually rising or descending. In this article let’s take a look at how to achieve this sound.
The Basics of the Shepard Tone
It really is a simple technique to achieve. It has been used on numerous occasions in media and games, but Hans Zimmer has definitely taken it to the next level. Let’s take a look at the basics first and how the technique works.
Let's say you have a sine wave descending in pitch from C4 to C3 over 4 bars. To make it feel continuous you need another sine wave going from C5 to C4 over those same 4 bars. But to make it feel like a seamless transition between the two you need the first sine wave to decrease in volume while the other sine wave increases. This way it will feel like the sound is continuously falling, even though its looping over these 4 bars.
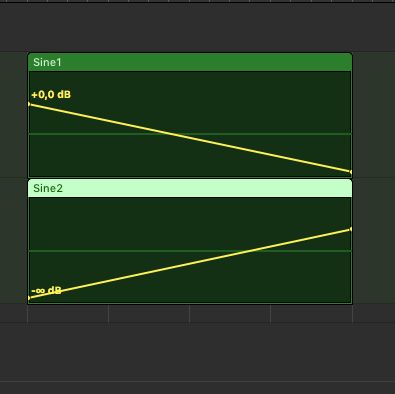
It’s a sound illusion because as the one sound drops in the volume during the pitch descent the other higher sound rises in volume to match up with the sound making it sound like it never stops. So that’s the technique in its most basic form. Now let’s see how you can achieve this in a more cinematic manner with different instruments to create some suspense and tension.
Using Sine Waves
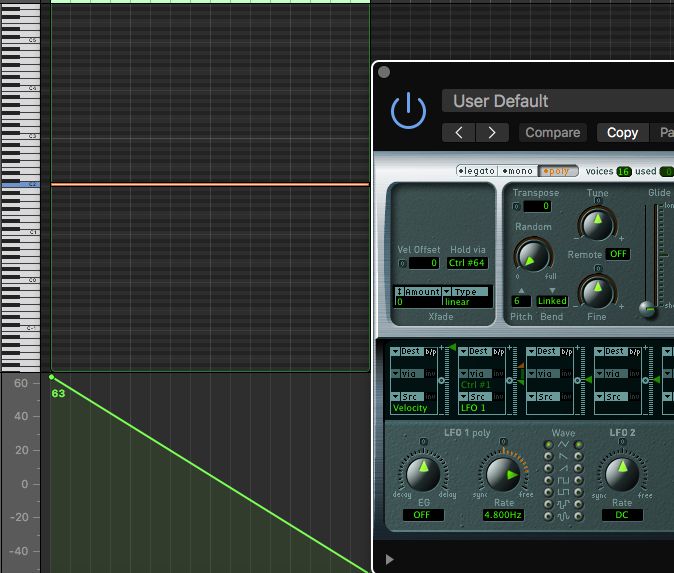
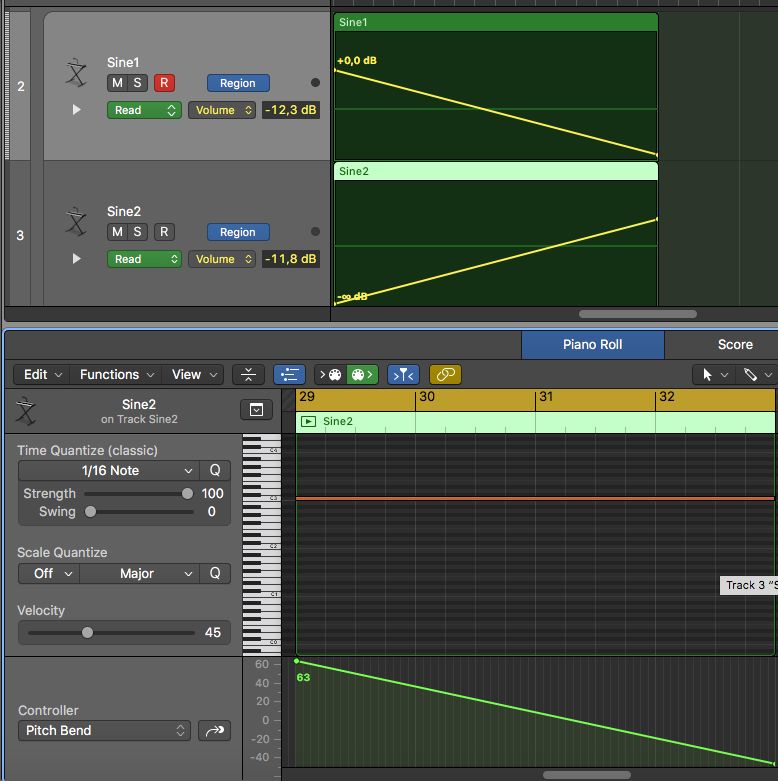
For this Shepard tone demonstration I’m going to use pure sine waves as there won’t be extra harmonics in the sound. This way it will be easy to transition between each loopable section. I’ll add an instance of Logic’s EXS24 instrument, as it loads up a sine wave instrument as its default patch. I’ll draw in a C3 note over the 4 bars. Then I’m going to pitch it up +6 semitones, and then pitch it down -6 semitones at the end. This way it will be pitch bending down a whole octave over the 4 bars
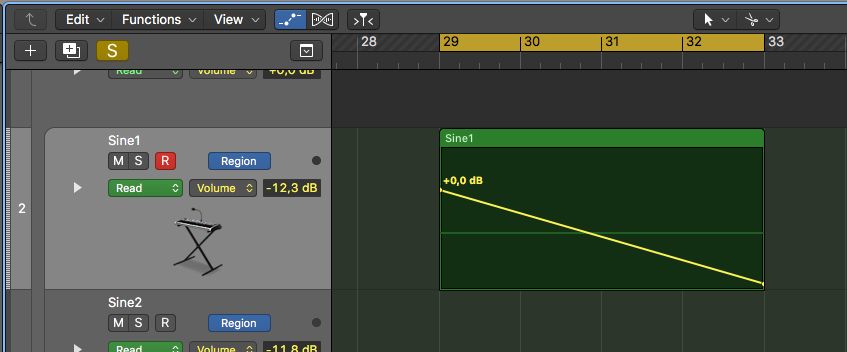
Then automate the volume from 0db all the way to the lowest volume at the end of the 4 bars. I’ve switched the volume over to region based instead of track based, as it will be easier to copy across when I want to loop it.
Adding the Next Sine Wave
Now let’s work on creating the next sine wave for the transition. Repeat the same steps with creating another EXS24 instrument with the Sine wave patch. Then on this instrument create the note on C5. And also do the same pitch bending down automation. But this time for the volume automation, draw it in the opposite way from the lowest volume all the way up to 0dB. And this will also be region based automation.
Now take both these regions and make some duplicates of it so it loops across the timeline for a while. I have looped the parts 4 times. Now play back and hear how this Shepard tone is coming together.
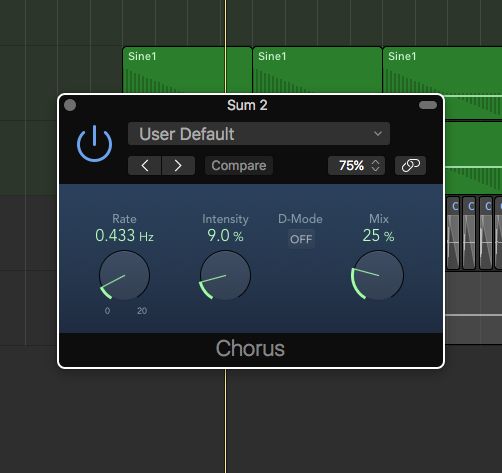
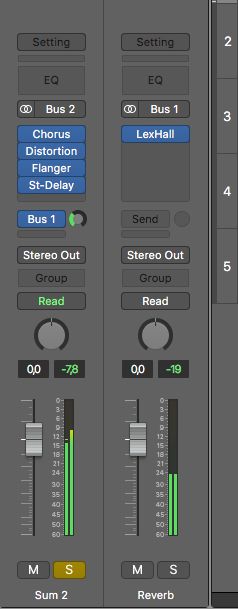
You might have some clicks and pops when it loops again to the next part. So we can even this out with some effect processing. Take both these tracks and group them into a stacked track folder. Now on this track stack let's add some processing as this will be applied to both tracks. First add some chorus, to thicken up the sound. I’ve used a rate of 0.433Hz, an intensity of 9% and a Mix value of 25%.
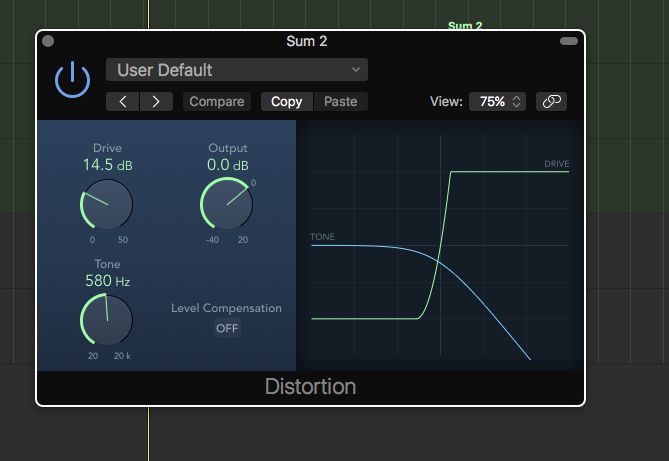
Following on from this add some distortion to add in some extra harmonics to the sound, and beef it up. Dial in a drive of 14.5db, and a tone of 580hz.
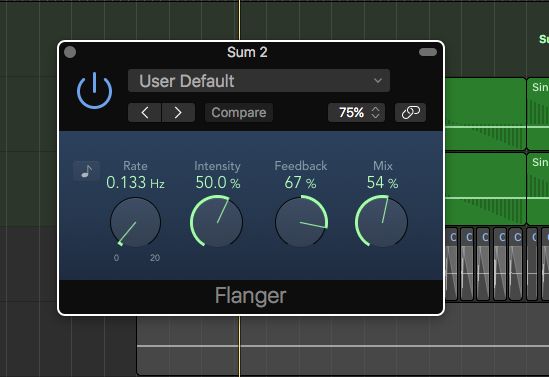
A Flanger can help add in some extra modulation interest. Try a rate of 0.133Hz, an Intensity of 50%, Feedback of 67% and a 54% Mix value.
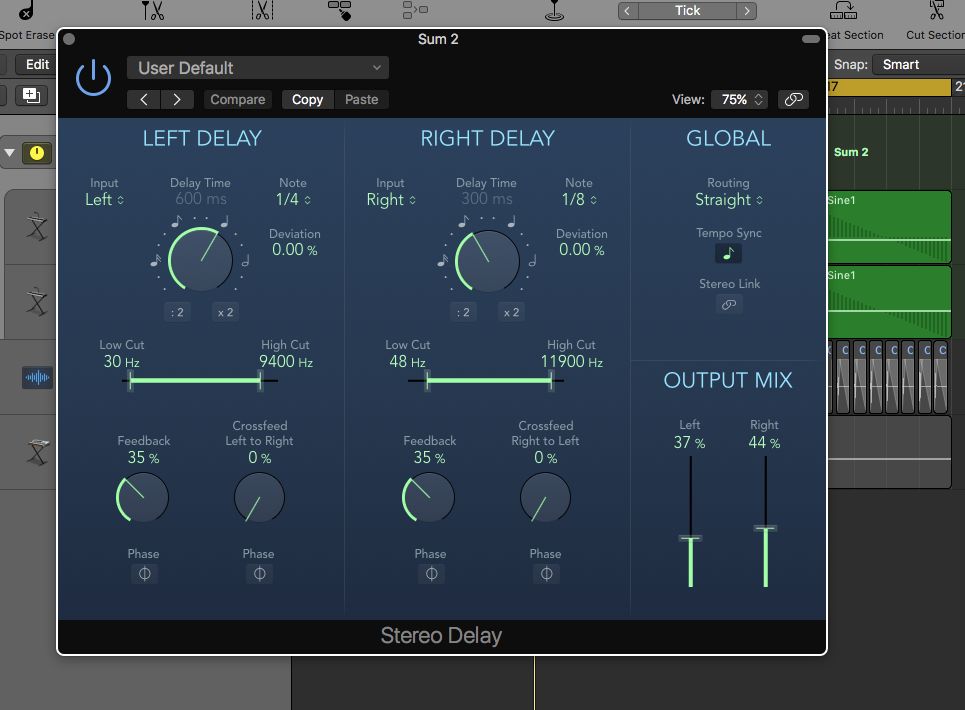
And then a Stereo Delay to help bounce some of the reflections around the stereo field.
And to help even out the transitions more between the looping points, let's smooth it out with some bus reverb. I’ve added an Algorithmic Reverb with a Hall patch on Bus 1, and then have sent an amount of this from the Sine Wave Track stack to the reverb.
Now take a listen and hear how this Shepard Tone is shaping up. It’s really coming together now and is sounding quite eerie!
Clock Ticking
What you’ll notice a lot with Zimmer’s production is the occurrence of clock ticking sounds, often representing a change or importance of time in the movie piece. So to replicate this I’ve added a ticking clock sample on each quarter beat. And then I have added a dash of the hall reverb as well to push it back in the mix.
Adding in Atmospheric Pads
Finally to add some more mood and tension to the piece I have added in an atmospheric soundscape pad. For the soundscape sound I have added in an instance of Absynth (but you can probably also find some appropriate soundscapes in Alchemy). I’m using the ‘Church in Hell’ patch and this is just playing a single sustained note over the course of the 16 bars. Plus, I have added a dash of reverb as well to help gel all the sounds together. You’re wanting a long droney sound that can form the backdrop for the song.
Now, if you play back and listen to all these elements over the 16 bars you really get a sense of tension and falling. How cool is that!
This can work really well in a whole bunch of different scenarios. Maybe a break down in your song or to create some mood and tension in a TV, Film or Video game music composition.
Conclusion
That is how you can achieve your own cinematic, suspenseful Shepard tones. These are super handy techniques to use to add in some tension in your music productions. So definitely try this out in your next cinematic piece and see what extra suspense it adds.
Discussion
Want to join the discussion?
Create an account or login to get started!