
1. Use Surgical EQ
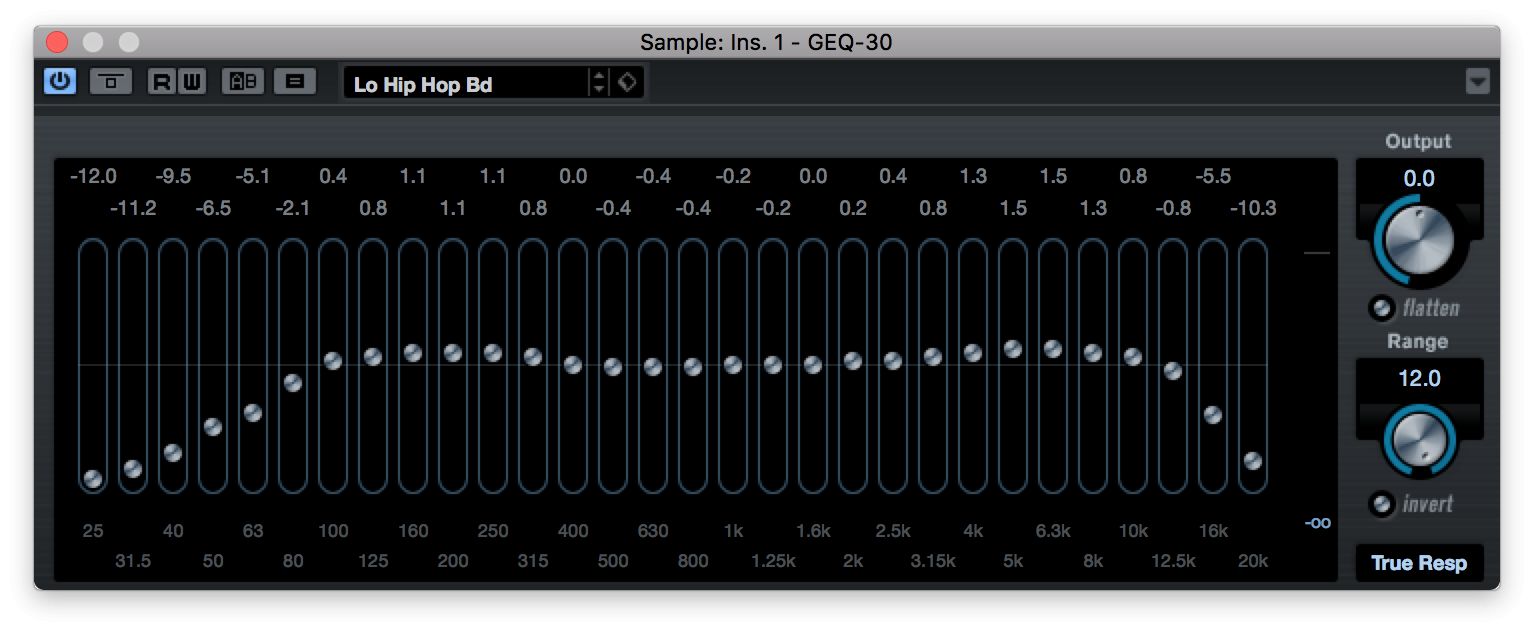
Equalization is a common way to get rid of specific frequencies inside a problem file but it’s most effective when these are located at the very upper or lower ends of the frequency spectrum. These kinds of frequencies are the easiest to attenuate without adversely affecting the overall sound of the clip, unlike, say, knocking out the mid range would do. Rumble and hiss also tend to be where a lot of the issues with poor recordings can arise. Using Cubase’s GEQ30 with its 30 bands of graphic EQ is a good way to get surgical with identifying the parts of the sound that need removing or lowering. If you have the Pro version of Cubase you’ll also get the Frequency EQ plug-in bundled, which is even more precise and can do a lot of the legwork for you when cleaning up sounds.

2. Deep Wave Editing
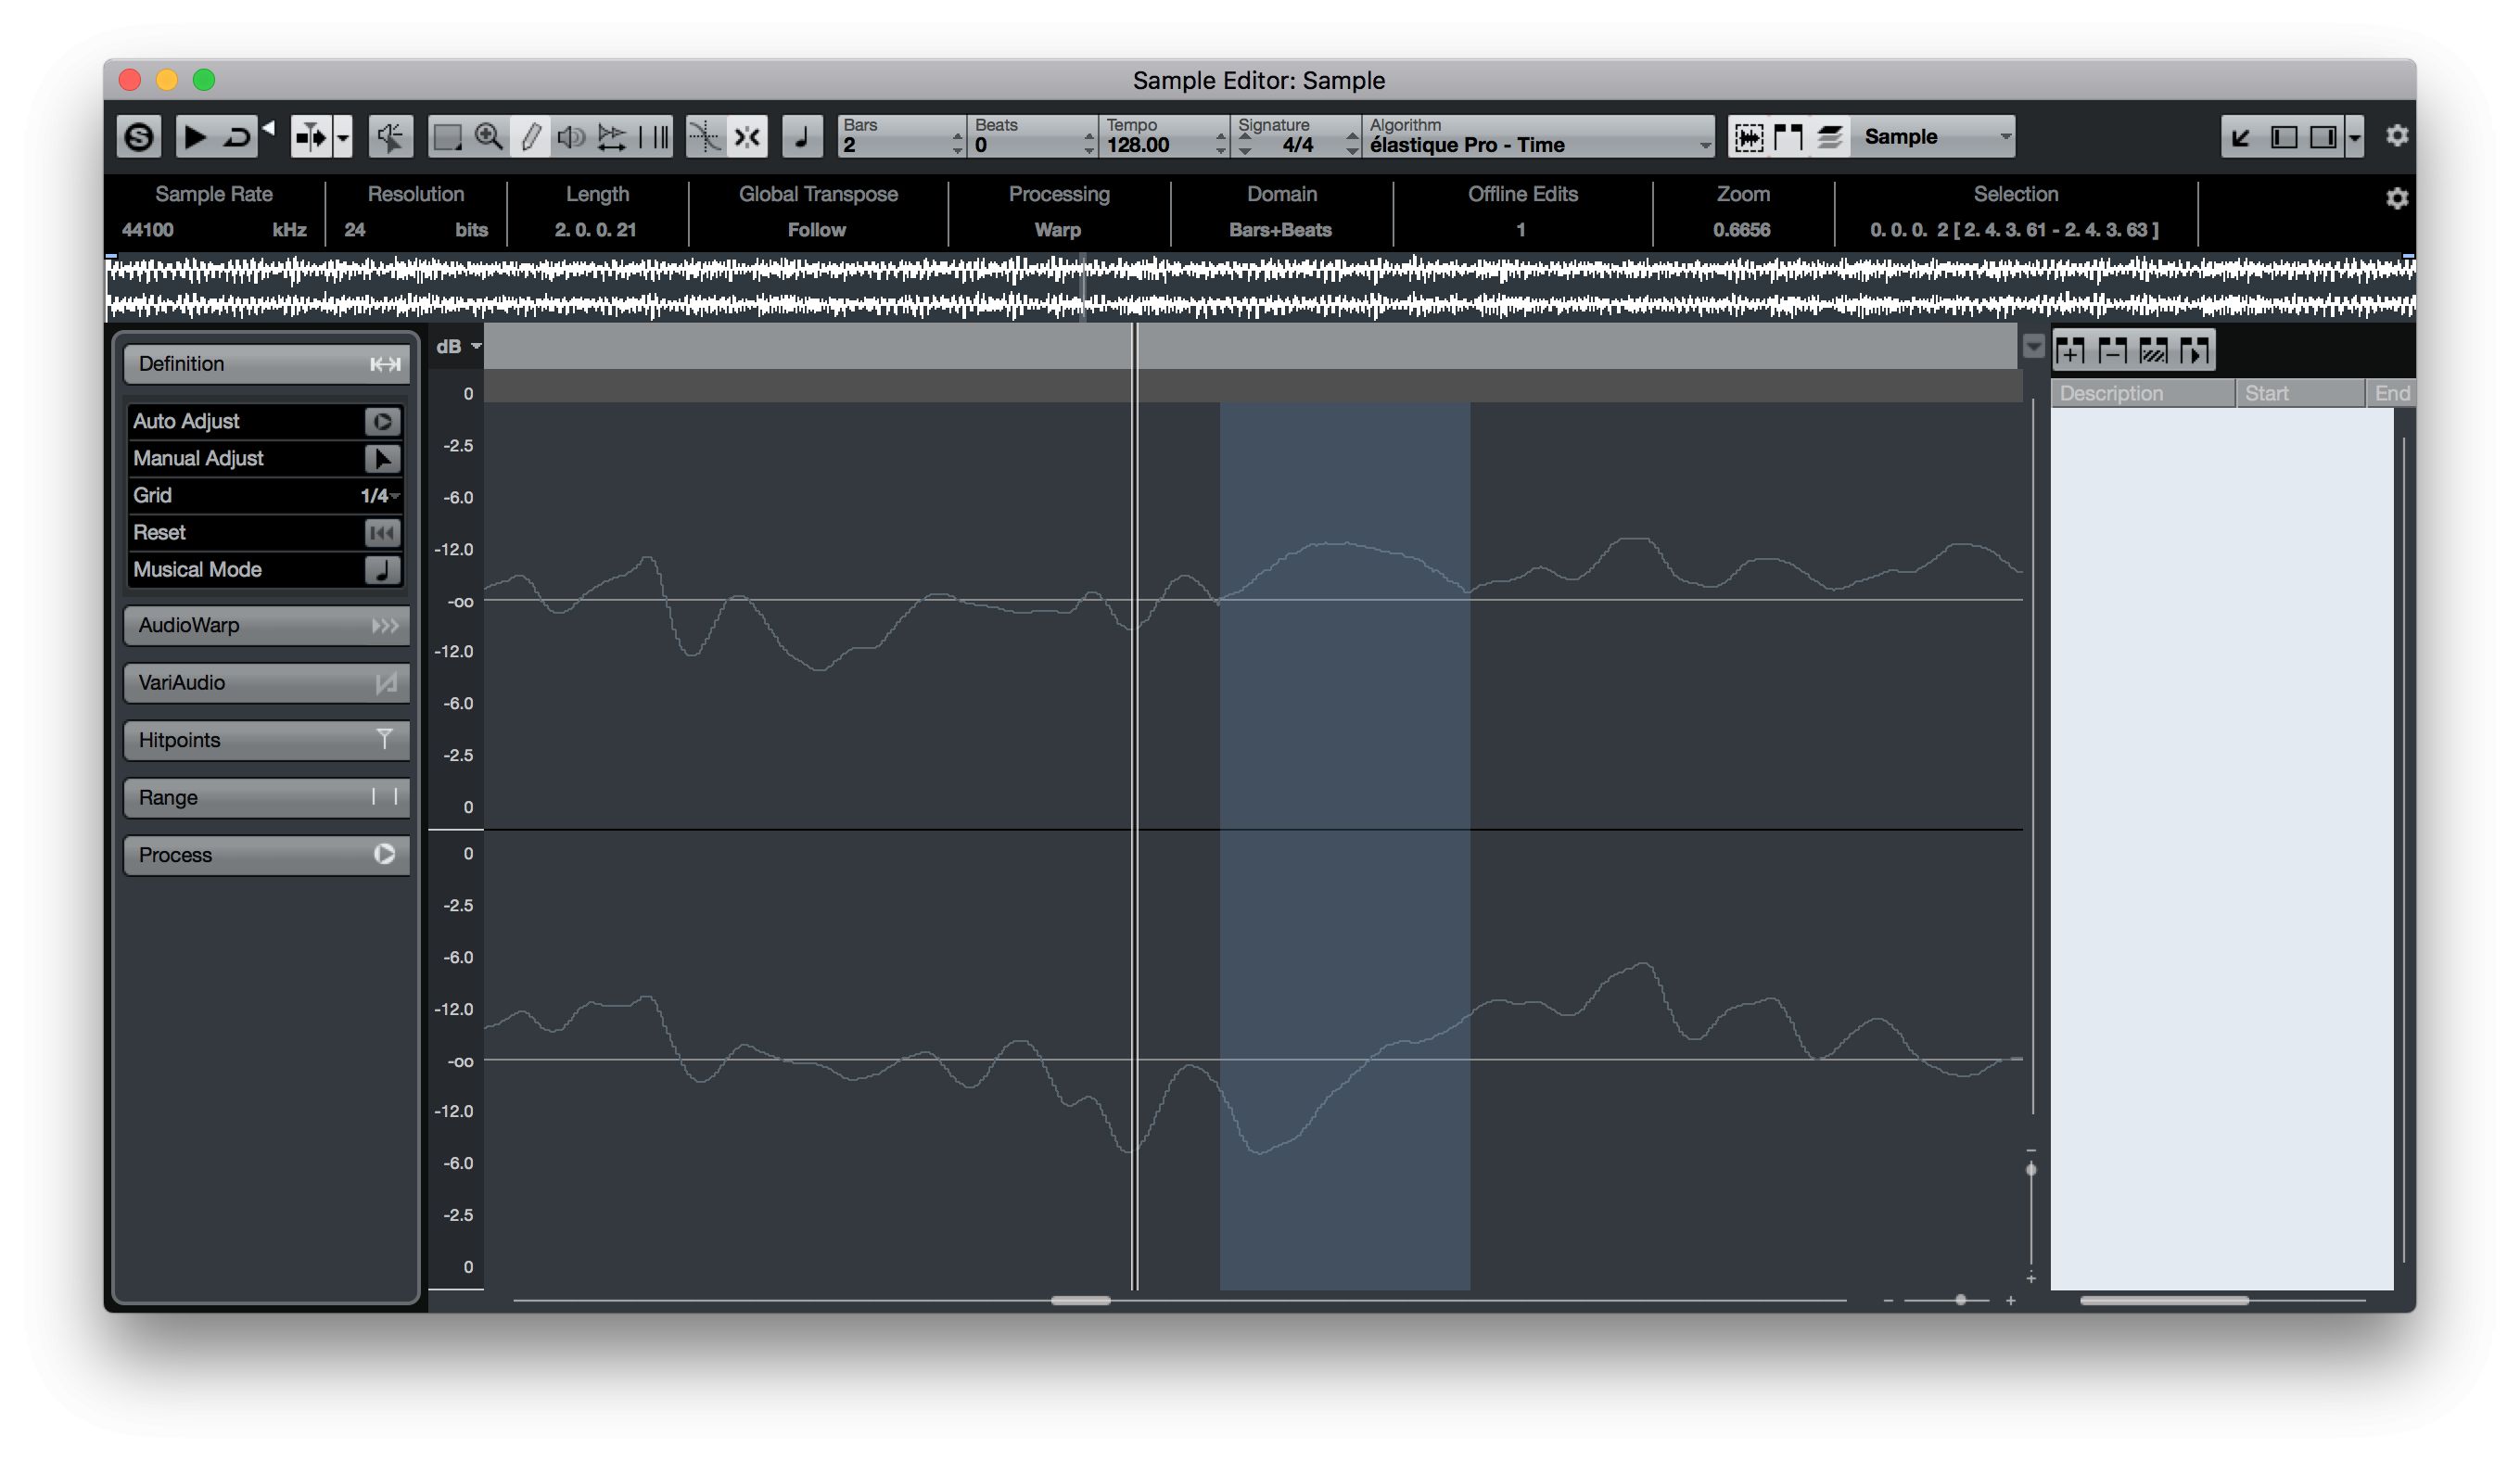
The Sample Editor is a great way to edit audio and it’s now integrated into the main Project window. To open the dedicated window for greater detail, right click on a clip and choose Audio > Open Sample Editor. If your audio file has very short errors like digital clips or clicks, you might have to zoom down to a sample level in order to be able to see them. This can take some time but the clipping should be evident as it will look like a flattened-out section of signal against the top of the display. By using the Pen tool in the Sample Editor window, you can manually draw out an instance of clipping by simply smoothing out the sample waveform. This can take a few tries to perfect and it’s not efficient for audio that clips repeatedly, but it’s great for smaller errors.
3. Check The Gate

Gating is the process of only allowing audio signal through when it reaches a certain threshold - the idea being to allow through the sound of a vocal or guitar for example, but cut out the background noise that may have been captured when the performer was not making a sound. It’s a far quicker way to work than going through an audio performance and manually cutting out every period of background noise, which can take forever.
Using Cubase’s bundled Gate plug-in, you can set the threshold, attack and release controls for your specific clip or track so that the gate opens quickly when the threshold is crossed (attack) and then closes at a sympathetic speed (the release amount) based on how much natural sustain you want your sound to have as the gate closes. Using too quick a release value will mean an artificial cut off, but too long a value and some room noise might be heard.
4. Direct Offline Processing
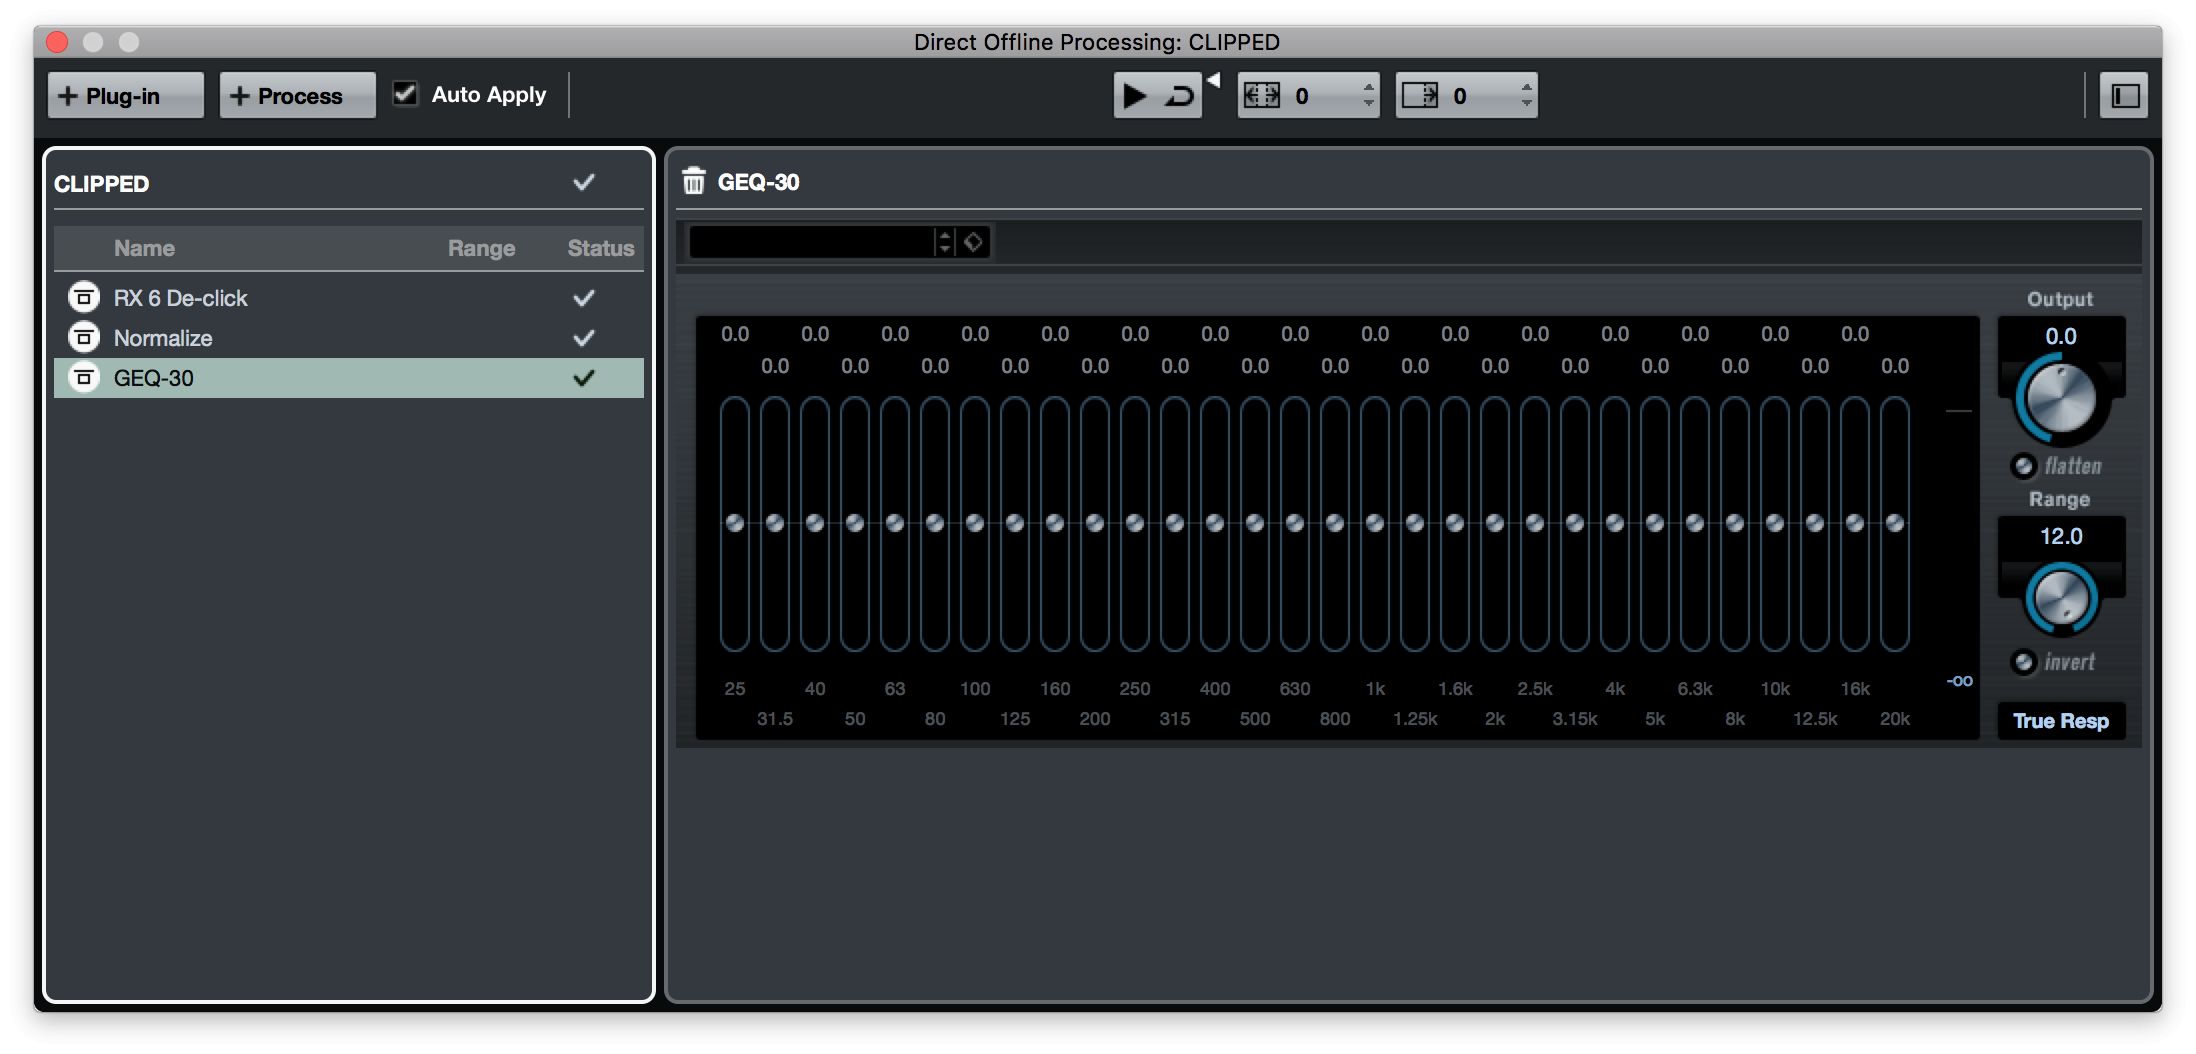
If you select one or more clips then go to the Audio menu and choose Direct Offline Processing or press F7, you will open the DOP window. This allows you to add multiple plug-ins and processing functions to clips in one go, making settings for each one individually. Obviously this includes all available plugs and not just Steinberg’s own. But it makes it easy to apply multiple processes to clips very quickly - it's much faster than repeatedly applying and bouncing. It also works across multiple clips and even tracks, so you can re-use chains of processing really simply. This would be useful for example if you had multiple channels of noisy dialogue that all needed the same basic processing applying to them.
5. Use Multiple Passes
Sometimes, audio might be in such a poor state - and yet it’s the only clip available to you - that more than one processing pass is necessary. If there’s no possibility to re-record it - maybe it’s old, or of a one-off live performance, then you will have to get through it. It’s conceivable that you might be pushing things like EQ really hard, maybe massively cutting very high frequencies as hard as the EQ will go. If you’re reaching the limit of what’s possible with a plugin, bounce down or render out the clip, then the effects are glued down. Re-import the processed clip and start applying EQ again, cutting more high frequencies as required. Purists may howl at this but if you’re really in a jam, it’s one way to try to rescue audio that is in a really bad state.
6. Pitch And Warp
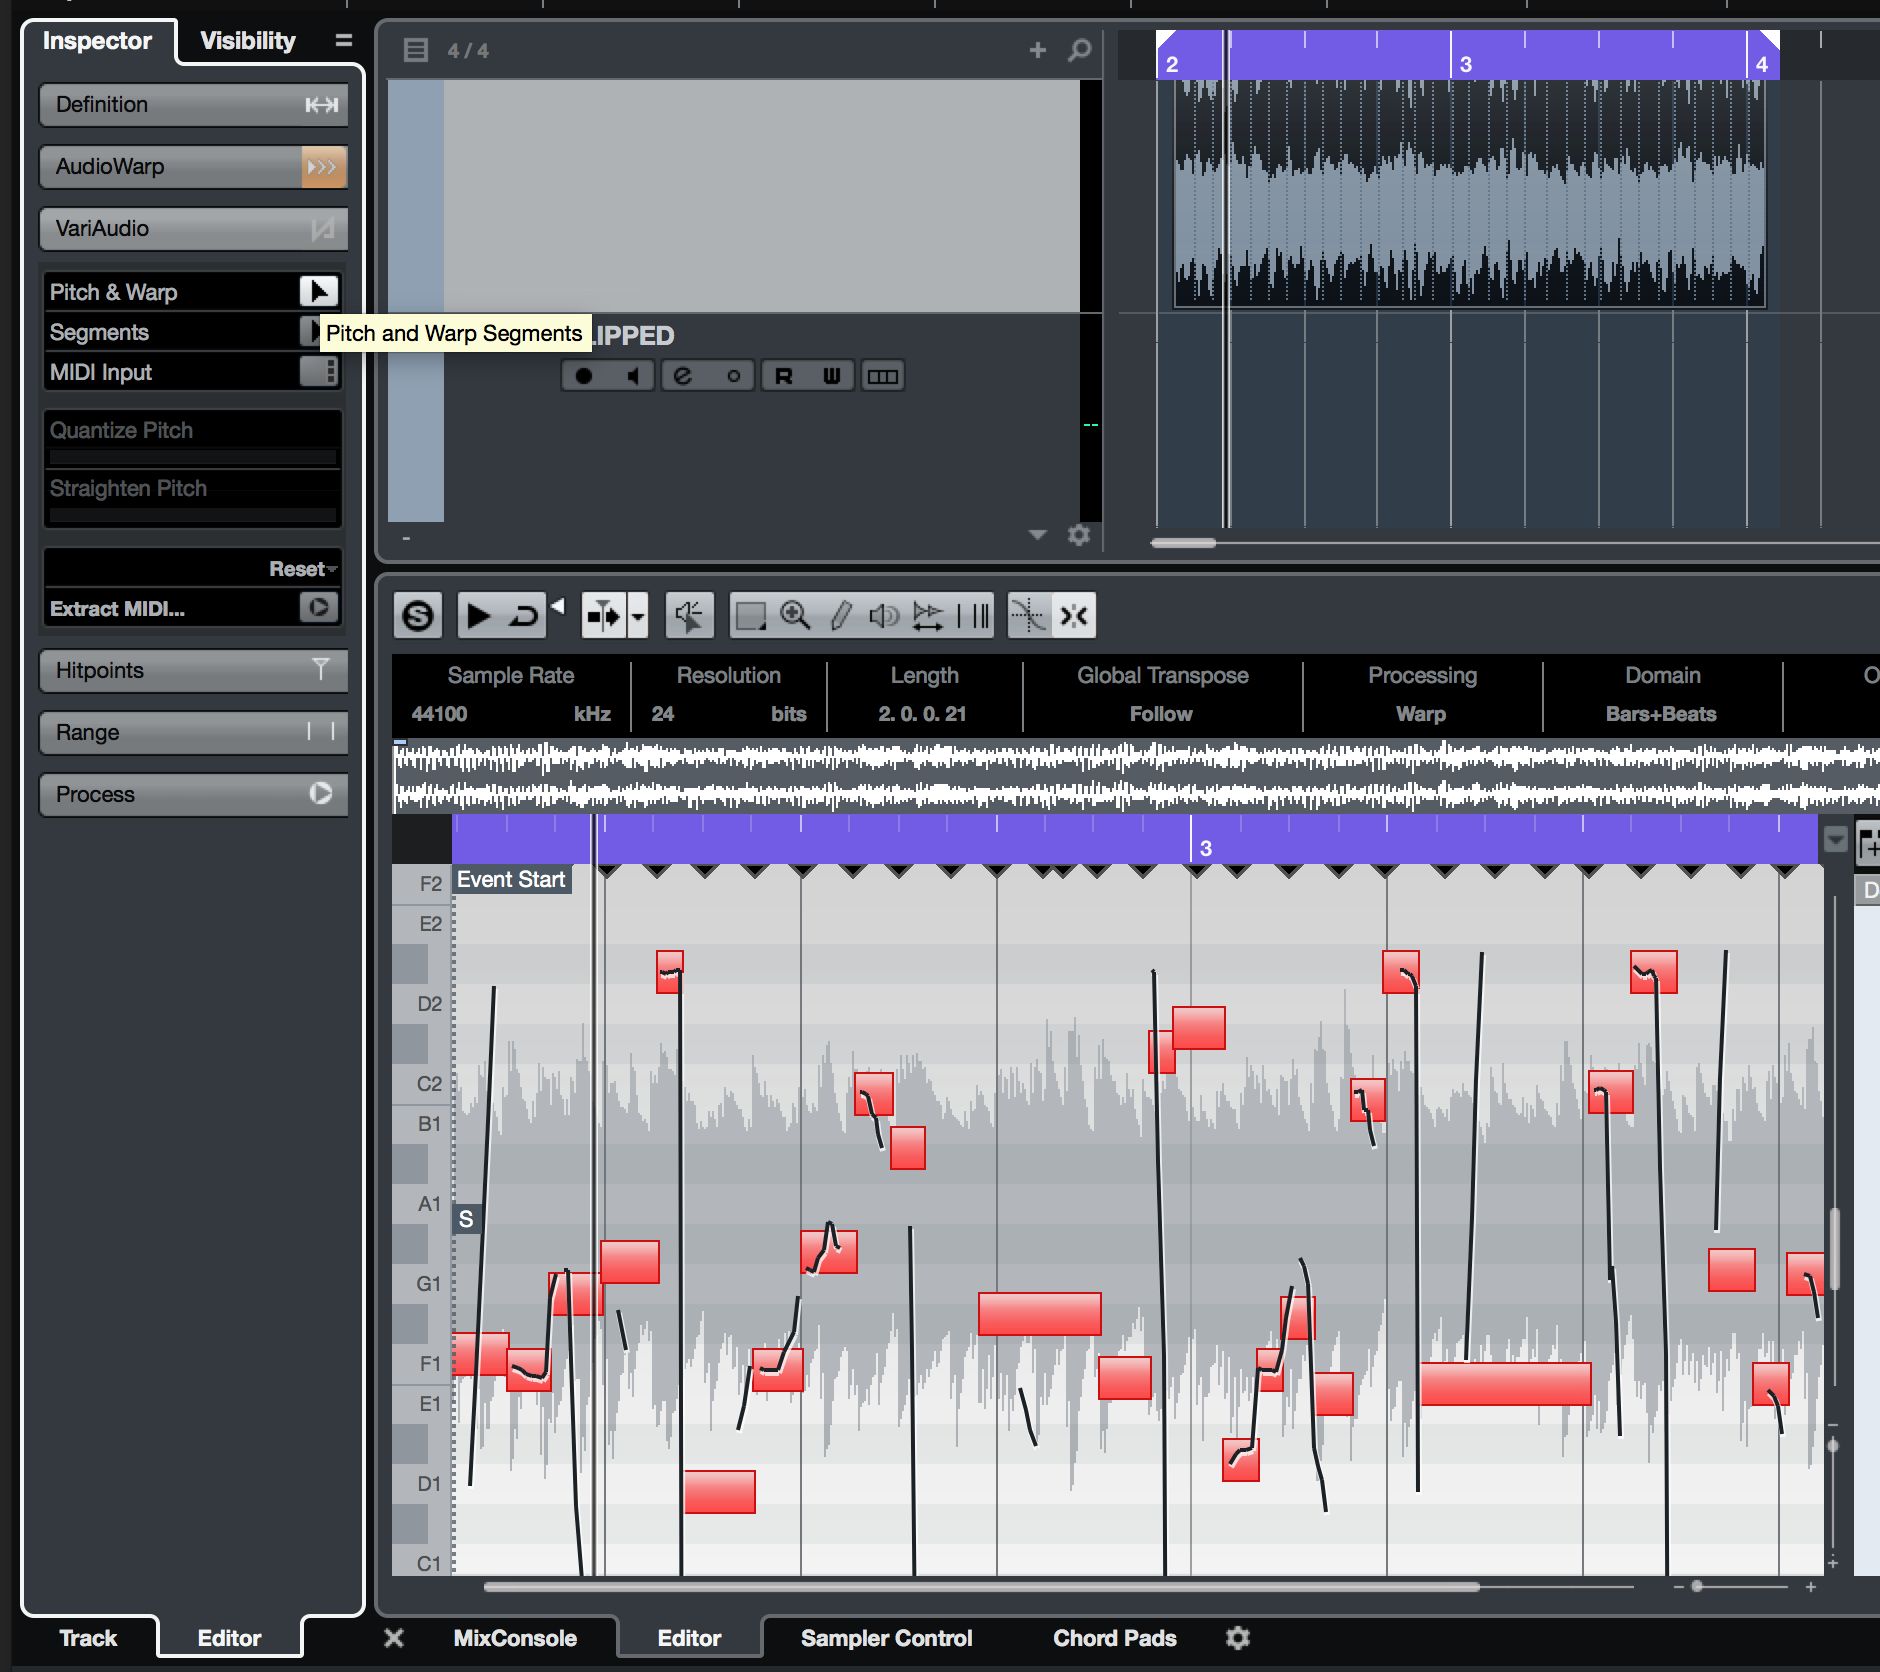
We’ve focused so far on audio quality, but what about timing and pitch? Rather than using a third party tool such as Melodyne, why not use Cubase’s own VariAudio tools, available from the Sample Editor, to manipulate the pitch, micropitch and timing of audio clips? This takes a little practice but the results can be great, letting you turn minor parts major, altering the way a part was played or sung long after recording and so on. And all without needing any extra tools than what Cubase provides.
7. Hitpoints And Free Warping

Also available from the Sample Editor or Audio menu are Hitpoints, which let you slice and quantise audio parts, and also the AudioWarp tools which allow you to manually add warp markers and then move these around to stretch an audio file within itself - changing its timing but without altering the overall length of the clip. This is great for correcting audio that has not been played to a beat for example, or snapping words or notes in audio format to bar markers, beats or other events. These tools can take a little practice to master but they are extremely powerful, making audio as flexible as MIDI in many ways, and once again built right into Cubase!

Discussion
Want to join the discussion?
Create an account or login to get started!