In almost every genre of pop/rock music, a guiding principle is that the bass player and the drummer's kick drum need to be locked in for the music to groove. Logic Pro makes this task really easy to accomplish.
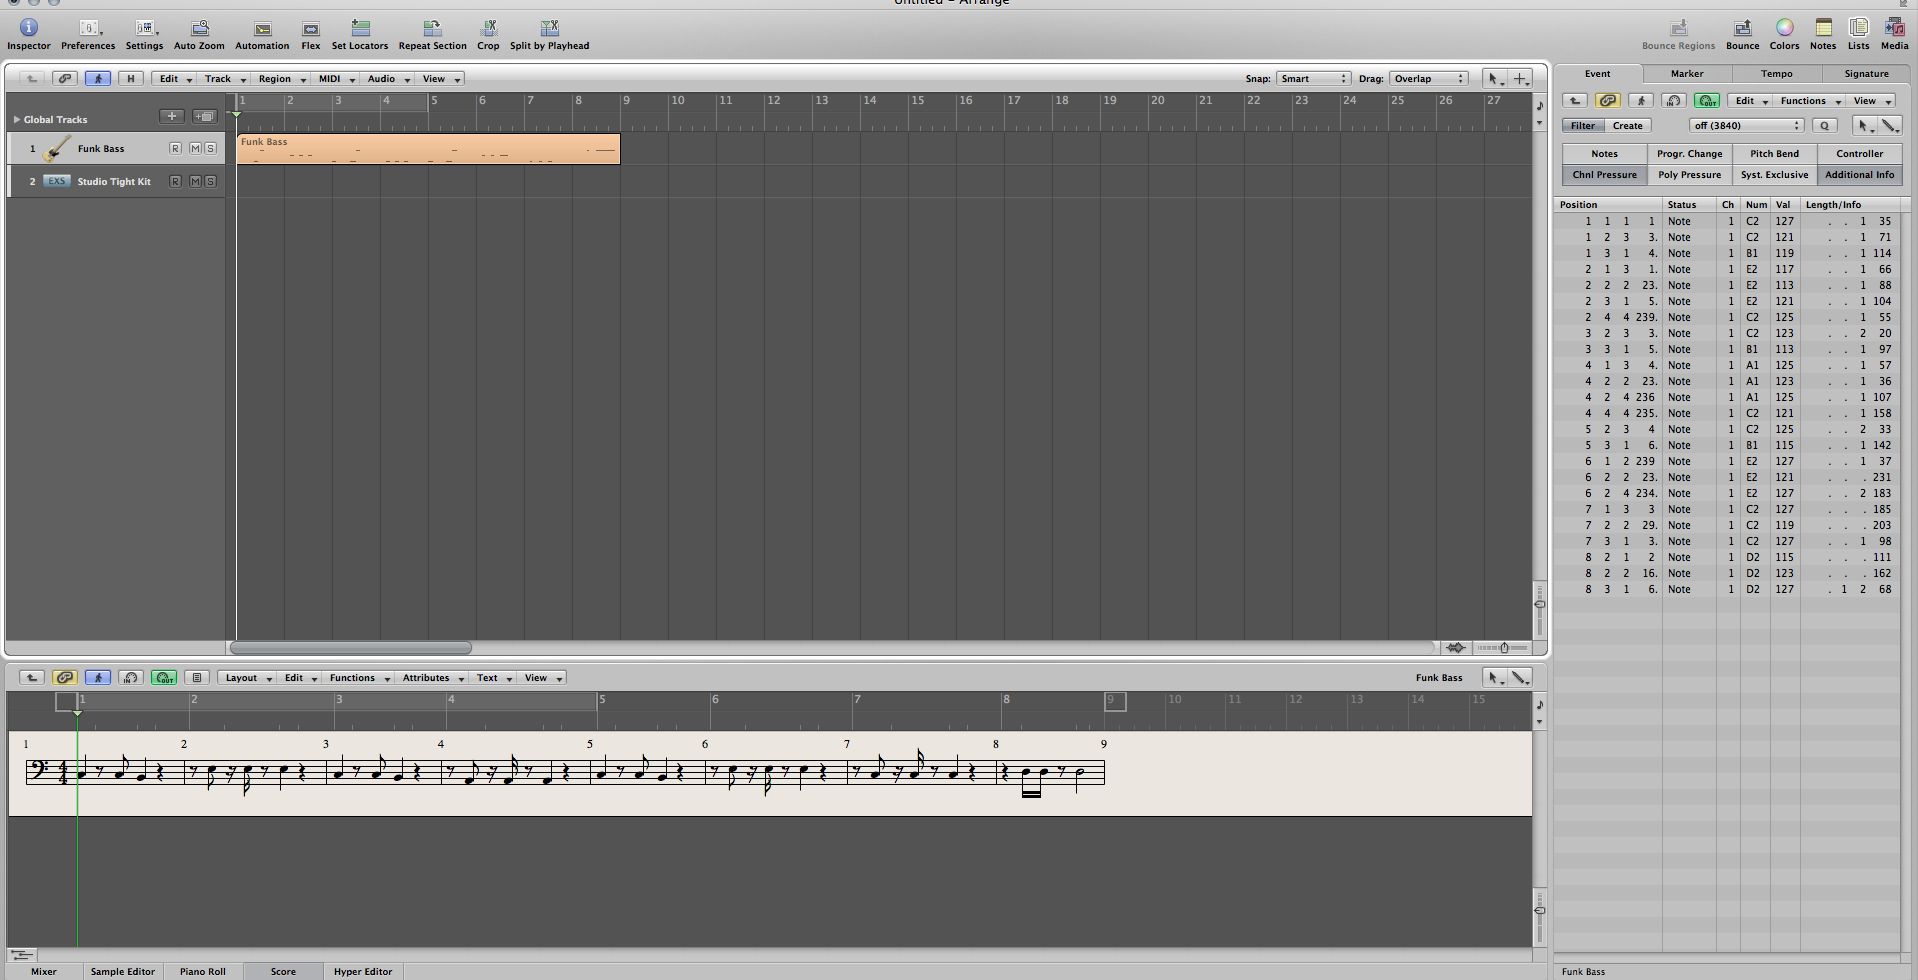
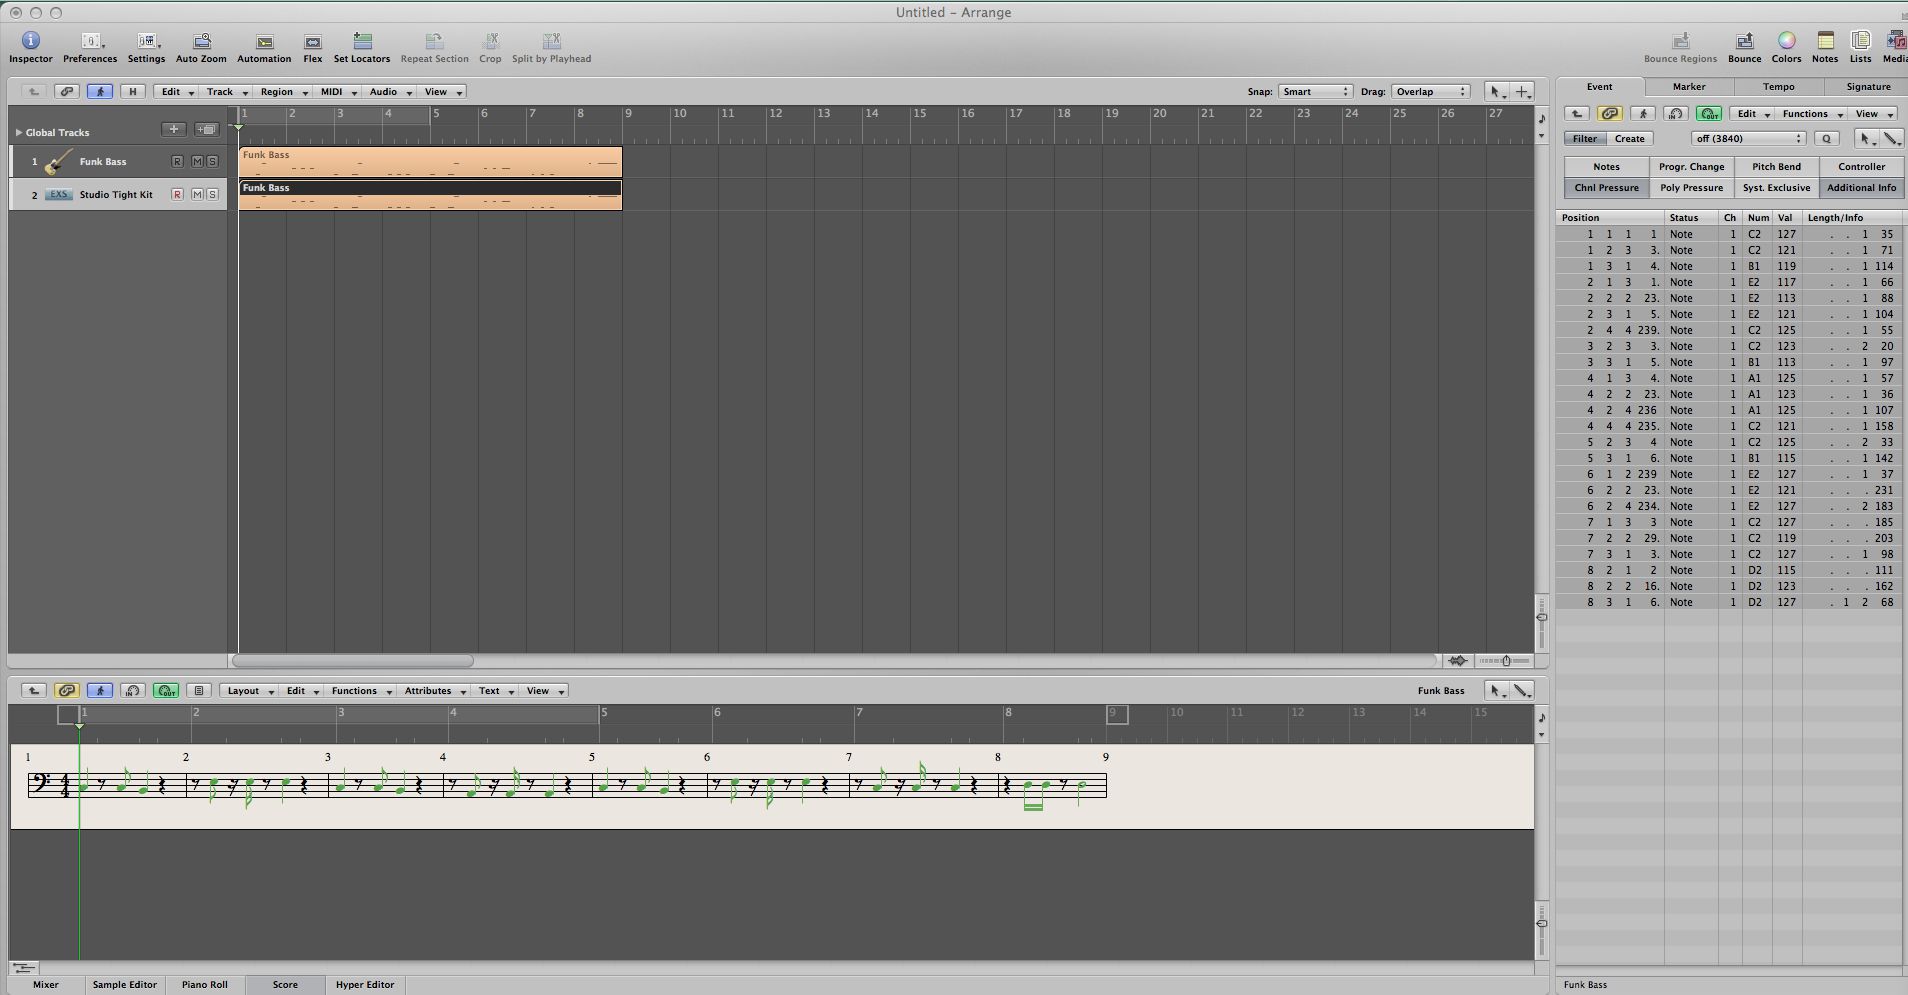
In Pic 1, you can see a funky little bass part in the Score Editor and the Event List that I have played in, similar to (ok, ripping off) the bass part on the great Natalie Cole record “To Be Real”.
Pic 1: A funky bass part.
Now this is only eight measures long, so clearly I could just play it on the kick drum of a drum path and be done with it, but if it were much longer, that would take a while and if the Logic user is not such a hotsy-totsy player, there might be editing time involved. So here is an easy method that you can do very quickly.
Select the bass region and Option-drag it to the drum track to copy it, and then select that region. Obviously, in the MIDI editors the data will be identical. As I have chosen a General MIDI kit, the kick drum is assigned to C1. So I need to make all my notes in this region C1s.
In the Event List, press Command-A to select all the notes, as I have done in Pic 2.
Pic 2: All notes are selected.
While holding down the Shift and Option keys, drag the note in the “Num” column down to C1.
Now do the same for velocity in the “Val” column, as the dynamic range of the bass is probably more than you want for a kick drum (or not, if you like it as it is.) See Pic 3.
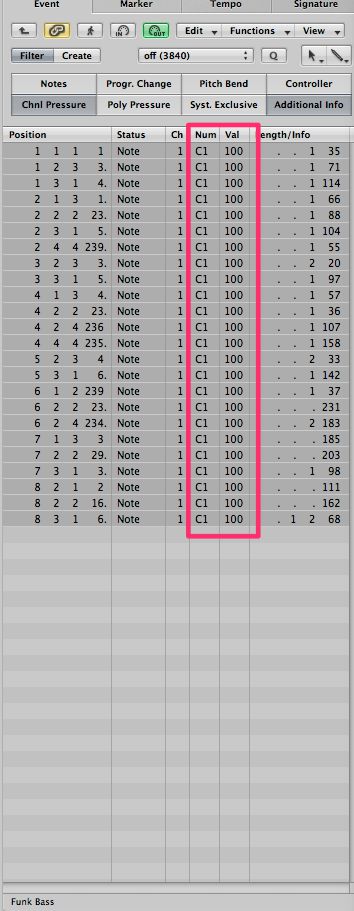
Pic 3: Do the same for velocity.
If you play the song back now, they are dead on locked in. Maybe a little too much so, as no human players would be quite that locked in. Let's do a little more work.
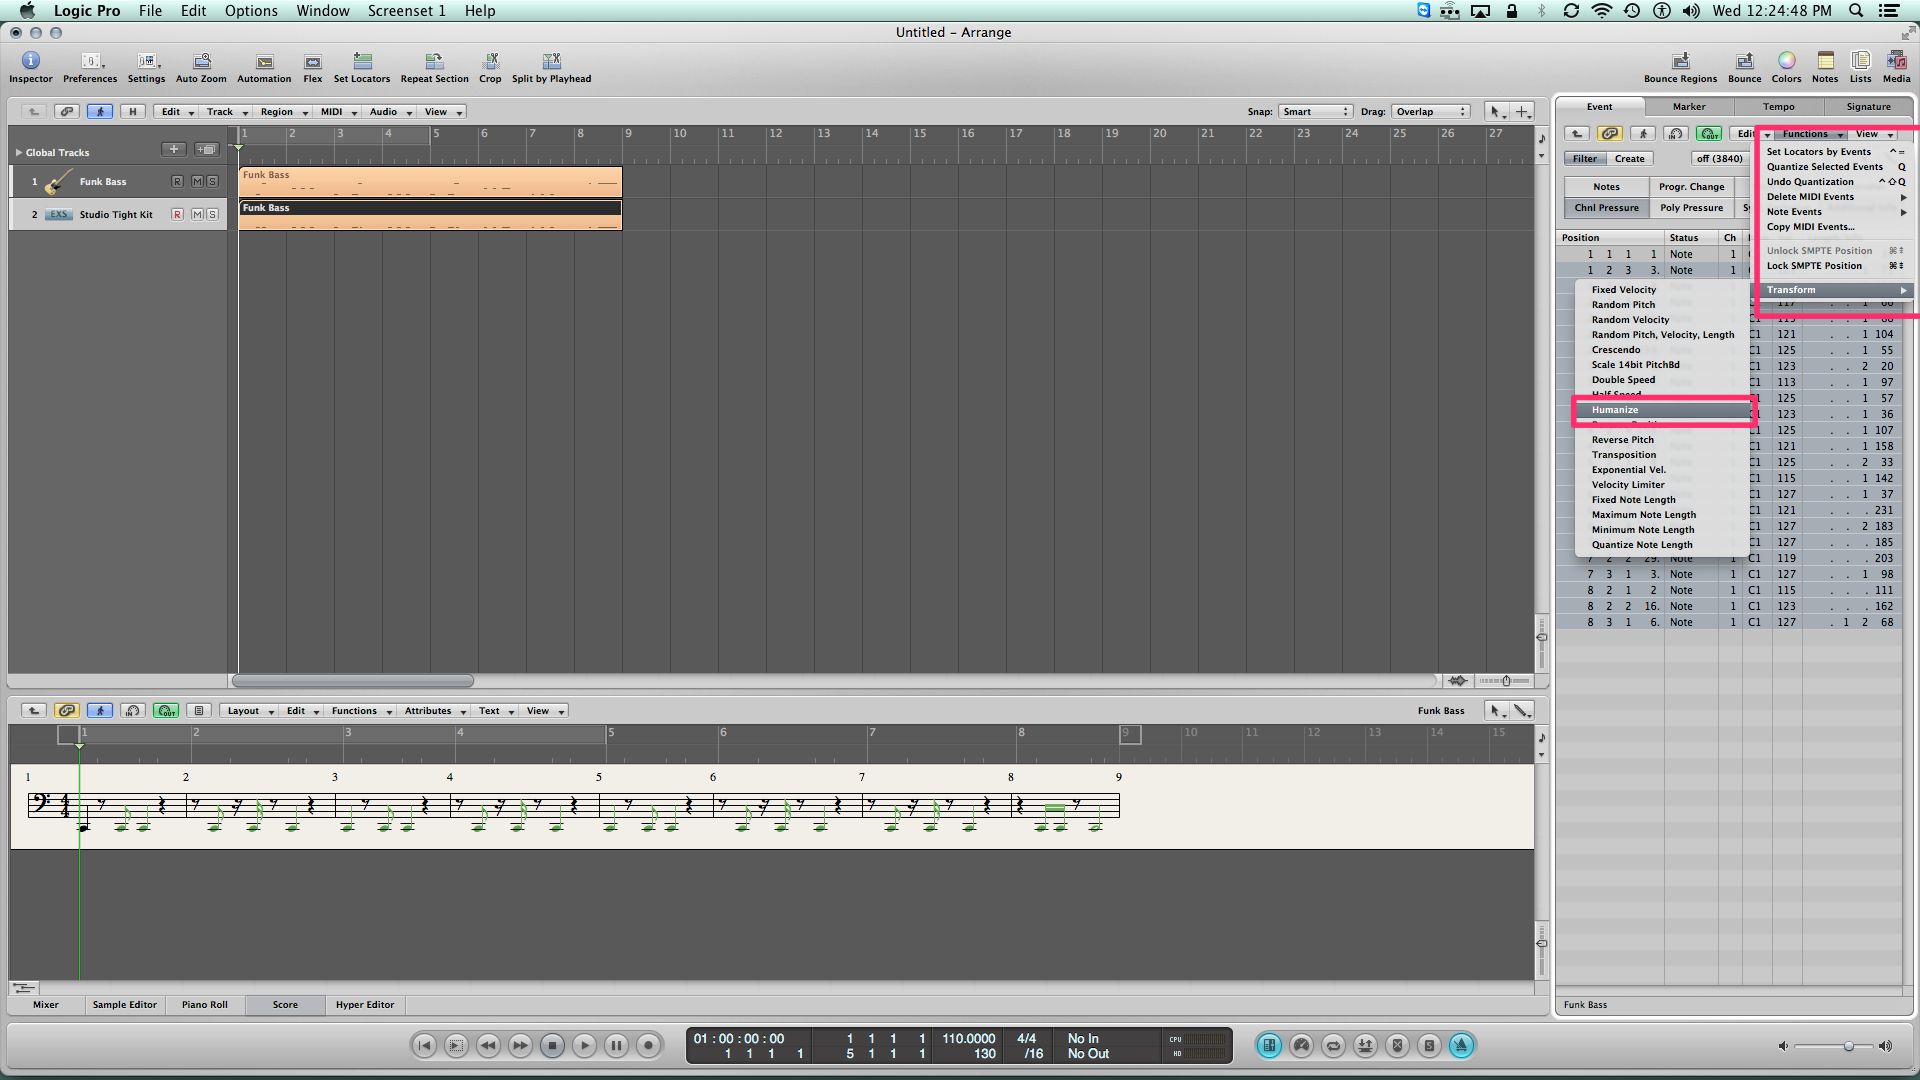
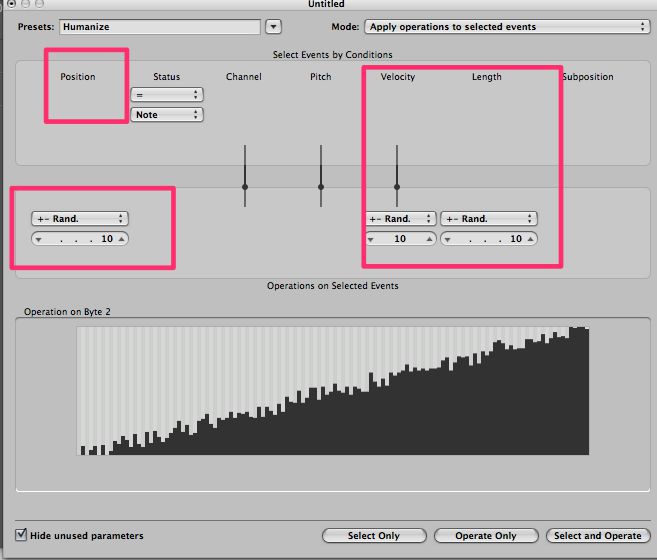
Shift-select the first note to deselect it, as what we will now do could move it before bar 1 beat 1 and then we would not hear that first note. See Pic 4. Under the Functions menu, navigate to Transform > Humanize This Transform set, as you can see in Pic 5, allows me to randomize the position, velocity, and note length plus/minus, or many other choices by a specific amount of tics.
Pic 4: Shift-select the first note to deselect it.
Pic 5: Transform > Humanize function.
The default of +/- 10 ticks is just fine for the position, but I want less velocity randomization perhaps. The length is frankly irrelevant with such short samples as a kick drum.
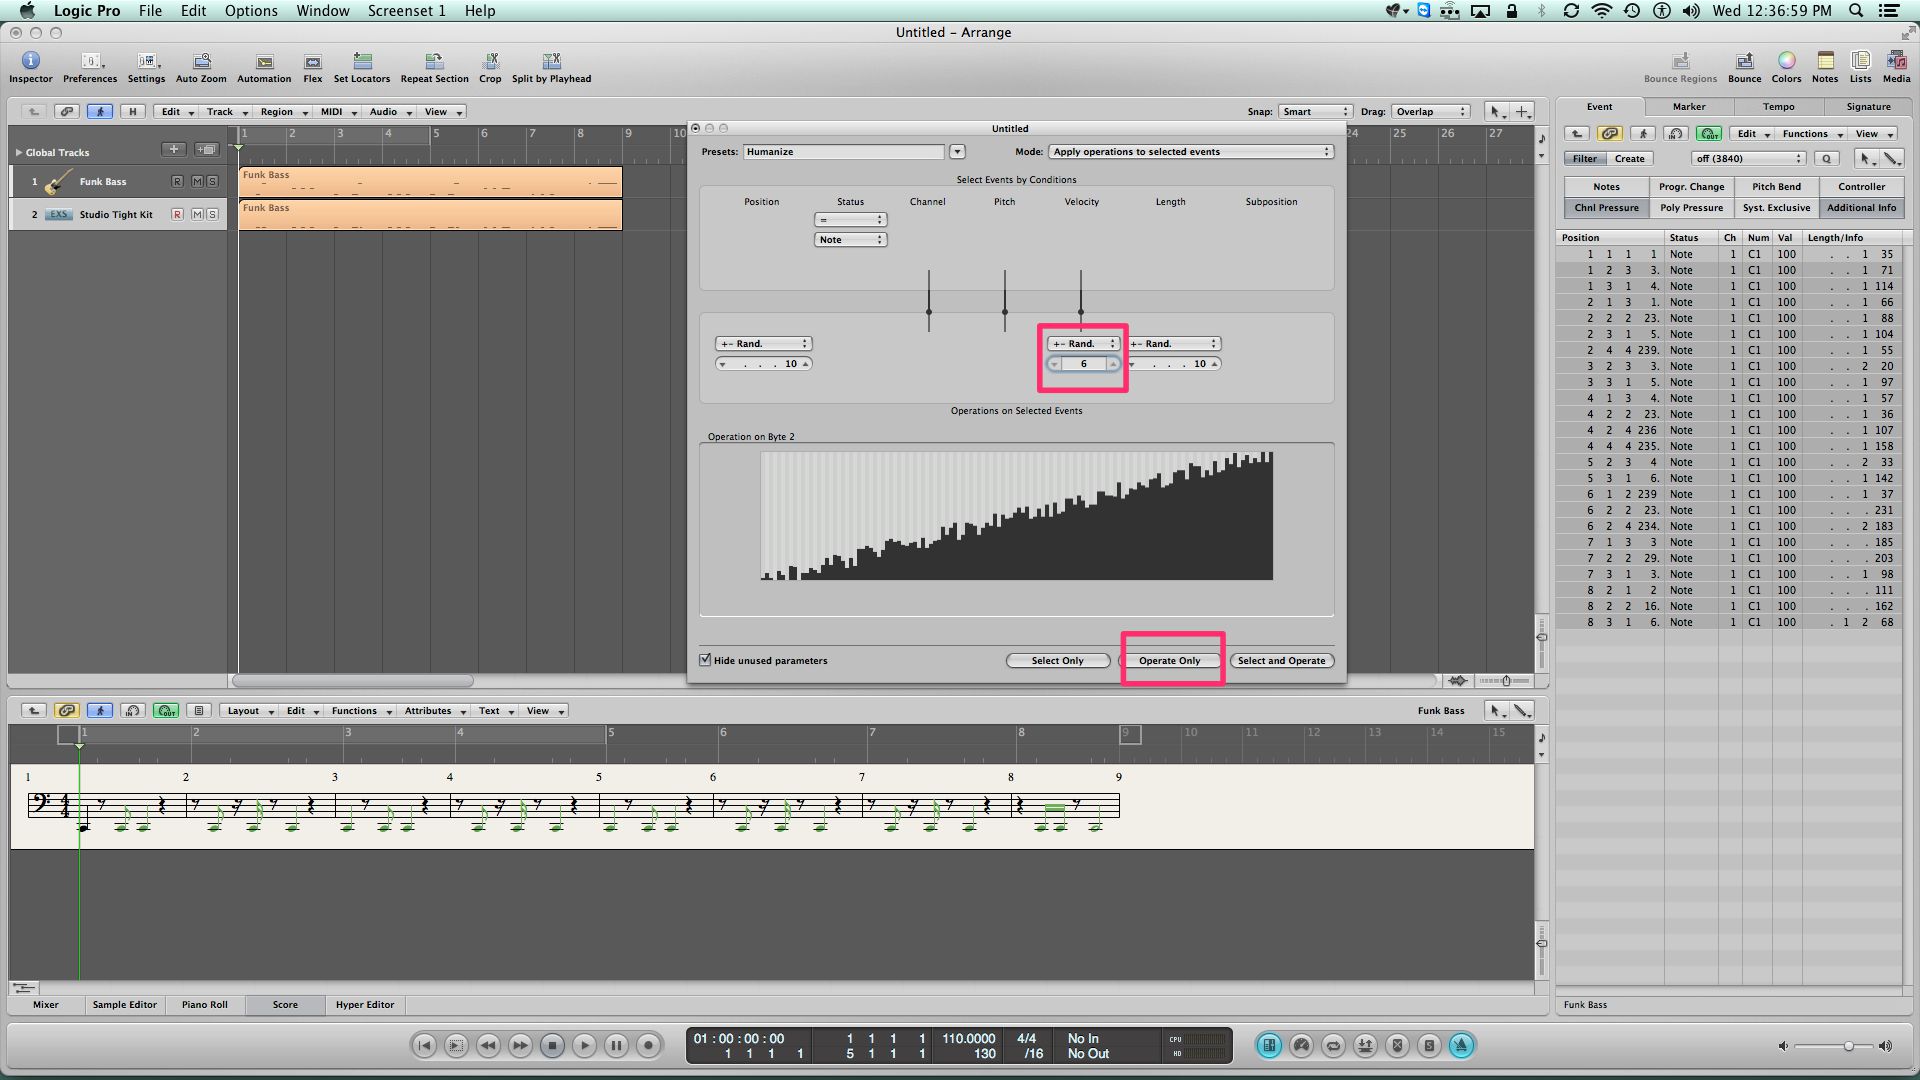
Double-click on the 10 in the Velocity field, making sure that you have the 10 selected and type in 6, as I have done in Pic 6.
Click the “Operate” button that is also highlighted in Pic 6 and in the Event List you can see that the note positions and velocities are slightly altered in Pic 7.
Pic 6: Click the “Operate” button.
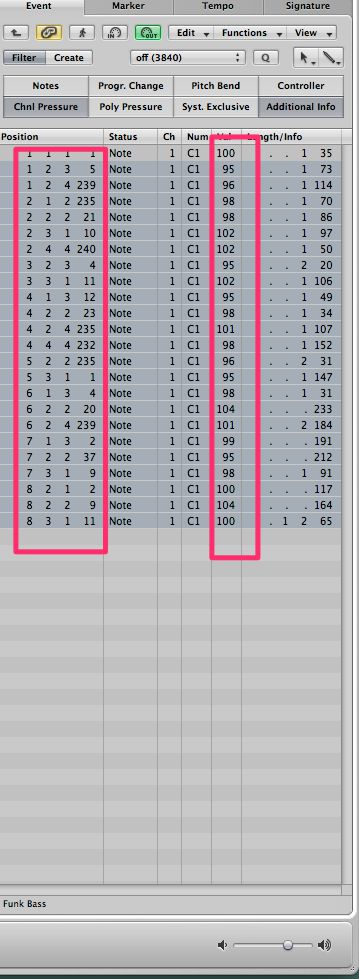
Pic 7: The note positions and velocities are sligthly altered.
Play the song back and now the bass and kick drum are really grooving together, nice and tight, but not mechanical sounding.
NOTE: If the bass part is a little too busy for the kick drum, simply delete the unwanted notes in the MIDI editor of your choice. Rock on!



 © 2024 Ask.Audio
A NonLinear Educating Company
Discussion
What you are telling Logic is if the note is off the 8th note by 10 or fewer ticks, leave it where it is, If it is more than 10, move it 90% towards the 8th note grid.
If you set it to +10, it is the opposite. Then you are telling Logic is if the note is off the 8th note by 10 or more ticks, leave it where it is, If it is less than 10, move it 90% towards the 8th note grid.
Hope that helps.
Thanks Jay!!
Want to join the discussion?
Create an account or login to get started!