
There are many dance musicians who are not yet musically trained, but are creative and rhythmical. In this article, I'll be showing a cool technique for generating some amazing complex and twisted MIDI parts from a simple musical scale without having to geek out in the Environment! Even if you are musically trained and play the keys, this is a cool technique that could spark an idea or two. It's like the MIDI equivalent to my Splice Editing article in some ways. The end result can create those cool syncopated house grooves where no two sounds play simultaneously.
So what is a musical scale? It's a selection of notes within a 12 note octave that you adhere to while composing or playing. Many scales are made up of 7 notes... the C major scale for example is C D E F G A B. The scale I'm using in my example is a D minor scale: D E F G A Bb C. The majority of pop, dance, hip-hop, and more will stay within a single scale and never deviate from it-- there, I said it! LOL. That means that every note played in a song, including the bass, melody, guitar, and more, only plays notes within the specific scale. However, you are not limited to play those notes in a single octave. As long as you play the same notes at any octave, they too are considered within the scale of the song. Some songs will move though different scales, but for the sake of this article, we'll keep it simple.
There are several Mac Apps and iOS Apps that will show you how to play certain scales. On the Mac, there's Scale Phobia, and on iOS there's iHarmony. Both of these Apps show you the actual notes, and allow you to hear what they sound like.
Step 1: Prepare the Sounds
Let's start by choosing some sounds. Open a new Logic Project, choose to make a software instrument, and from the Library, select Synthesizers > Sequence Elements > Night Spots. Press the + button or Option-Command-N to create another software instrument and from library choose Guitars > Electric Guitars > Crunchy Electric Pickings. Make one more software instrument (for a total of three) and choose Synthesizers > Synth Leads > Funky Octavia from the Li brary. Now open the loop browser by pressing O on your Mac keyboard. Search for House Potent Beat 01, drag it to the arrange window, and loop it by pressing L.

Step 2: Create the MIDI Region
We need to create the scale now in an empty MIDI region. Control-click (or right-click) bar one on the Night Spots sound, and select Create Empty MIDI Region. Stretch the region so it plays for 2 bars by dragging out its bottom right corner.

Double-click the region to open the Piano Roll. At this point, you can either follow along and enter the exact scale I'm entering, or enter your own. Using the Pencil tool, I'll click to create my first note at D1. Next, E1, F1, G1, A1, Bb1 (or A#1) , C2, and finally D2. Since there are 8 16th notes in a half bar, I simply added D1 at the end to round it out. Now I'll simply select all the notes with the Pointer tool, and Option-Click-Drag them three times to fill up the whole two bars. This is what it should look like:

Step 3: Copy the Region a Few Times
Close the Piano Roll now by pressing P on your Mac keyboard. Option-click and drag this region a few times now and place them forward in time. You might want several clean copies of it while you experiment with this.

Step 4: Divide Multiple
Now I'll chop up the first region by 16th notes. I'll zoom in a bit, hold Option while I click with the scissor tool exactly one 16th note into the region. Apple call this “Divide Multiple” as you see in the screen shot below.

I'll release the mouse before I release Option, and the region is now cut up into perfect 16th note length regions.

Step 5: Rearrange the Divided Regions
It's time to rearrange these regions now. From the Drag menu, I'll select Shuffle R, then I'll start to drag regions on top of one another.

They'll switch places! Experiment with this. Grab regions from the end and drag them to the beginning, flip adjacent regions, move the region at the very beginning somewhere to the middle.

Step 6: Punch Holes and MIDI Stretch
Let's switch back the Drag menu to No Overlap now.

Start to randomly delete some of the regions. This will create cool sounding gaps in the sequence. Now we'll time-stretch the regions that are to the left of some the deleted areas. While holding the Option key, drag out the bottom right corner so it now fills in the empty gap. Remember to release the mouse before releasing the Option key.

Tip: I use MIDI compression/expansion all the time in my own productions to search for new and unpredictable variations. You can use this on an entire MIDI region for example to make it play back at twice the speed or twice as long.
Step 7: Join the Regions Back Together
We'll now need to join all these regions back into one again. Select all the regions, and from the local Region menu, select Merge > Regions. The default key command for this is Control-=. Now double-click the merged region to open the Piano Roll.

Step 8: Randomize the Velocity and Length
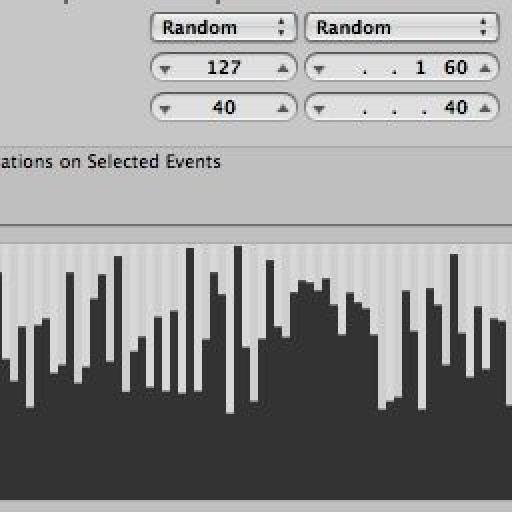
So this should sound pretty cool at this point, but all the velocities and lengths are the same. Let's fix that. From the Piano Roll's local Functions menu, select Transform > Random Pitch, Velocity, Length.

The Transform window will appear. Since we don't want to randomize the pitch, click the first drop-down menu that currently says Random, and select Thru at the top of list.

Now click the Select and Operate button several times... you'll see the length and velocity of the notes change. Close the Transform window now.

Some of the notes might be playing over one another, so we need to fix this. Press Command-A to select all the notes inside the region, then from the local Functions menu, select Note Events > Note Overlap Correction (selected/any). No two notes should ever play over each other now. Press P to close the Piano Roll.

Step 9: Swing Quantize to Match Beat
You may have noticed that the beat we dragged in has a swing feel on it. Let's quantize our MIDI region to match the beat. Make sure the MIDI region is selected, then from the Region Parameters Quantize menu, select 16D Swing.

Step 10: Cut Notes from Region
Now comes the fun part. Let's cut away various notes from this region for use on the sounds below. Double-click the region to open it in the Piano Roll. While holding the Shift key, select various notes in the sequence. Since there's 3 sounds, try and get about a third of the notes. Tip: There can be a method to this madness... think about the various sounds you're grabbing these notes for. If the sound is a bass, you might want to grab lower pitched notes, or ones that play the root key note. Once you've selected the notes you want, press Command-X to cut them from the region.

Step 11: Create an Empty MIDI Region
Click back into the Arrange window and select the Crunchy Electric Pickings track. Control-click the track at bar 1 and select Create Empty MIDI Region from the list.

Step 12: Paste Cut Notes Into Empty Region
Click back into the Piano Roll, or double click the empty region. From the Piano Roll's local Edit menu select Paste at Original Position. Go back and grab about half the remaining notes from the original region on the Night Spots track (Repeat Steps 10 through 12) for the Funky Octavia sound and press play!

Tips:
I love this technique and use it often. Even if you don't use it on a simple musical scale like we did, use it on your own stepped in/or played in MIDI regions. Choose more aggressive sounds that have no release or effect, and you'll get that awesome chopped dubstep/electro house feel. Do this two or more times to generate a longer groove. Try transposing regions by an octave up or down. Pick the right sounds (this is important). Hope you enjoyed the article!
Here's what I came up with:

Discussion
Want to join the discussion?
Create an account or login to get started!