
在北美国家冰球联赛季后赛正进行得如火如荼,也许“你灵感发挥有些摇晃的器官! 为iPad GarageBand中 ,我们得到一些漂亮的屏幕控制键盘的声音很大!我们不仅可以使用这些按键在我们的歌曲录制,但正如我在最近的教程解释,现场使用的也是一种可能!
需要安装和设备
有很多我们需要的几件事情。
- Controller Keyboard with power supply - There are many to choose from and I use an Axiom Pro 61. You will definitely need the power supply as the iPad does not provide power through it’s dock port. If you want to use the Korg Nano series, you will need a USB hub with power supply.
- Camera Connection Kit - Our keyboard controller communicates with GB through this device.

公理临61

苹果的相机连接工具包
控制
每台仪器有其自身的布局(拉杆,合成器与过滤器控制的器官),但也有一些功能只是在键盘上方,而这些选择仪器将随。例如,延将在钢琴,但没有器官,器官会为张国荣的旋转开关,所有这些都取决于仪器。
虽是将要使用的键盘控制器,如果你要使用屏幕上的键盘,你会得到你的屏幕键盘如何响应不同的控制。在最左边是一个八度的加号和减号。一个滑音,滚动,俯仰变化又取决于所选择的仪器和右侧中间的按钮,有规模,琶音器和键盘布局。
滑音让你像一个真正的键盘键滑过。想想钢琴玩家使用他的手背和滑动向上或向下键。
滚动,让你玩的说明,而抱着它,向上或向下滑动的键盘。有用的,如果你需要尽快到屏幕上的键盘不同的八度音。
间距是像一个弯音轮,但让你间距或音符之间只需滑动手指。老式合成器的伟大!
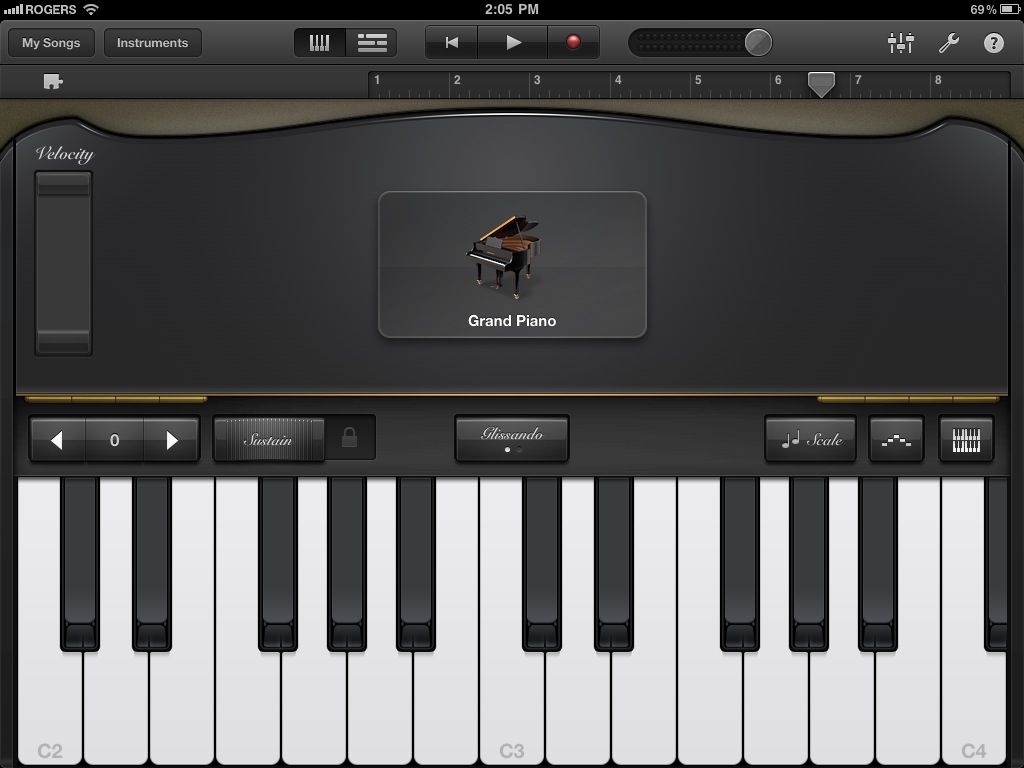
规模独奏伟大的,如果你想尝试不同的冠冕堂皇的尺度,在一首乐曲。当您选择您要使用的规模,键盘变得更像是一个单一行木琴减去#/ B键。如果您使用KB控制器,你将仍然有所有可用的音符,但你可以学到什么说明他们在iPad上播放和键盘上的匹配使用。你会很快被打Klezmer与轻松!
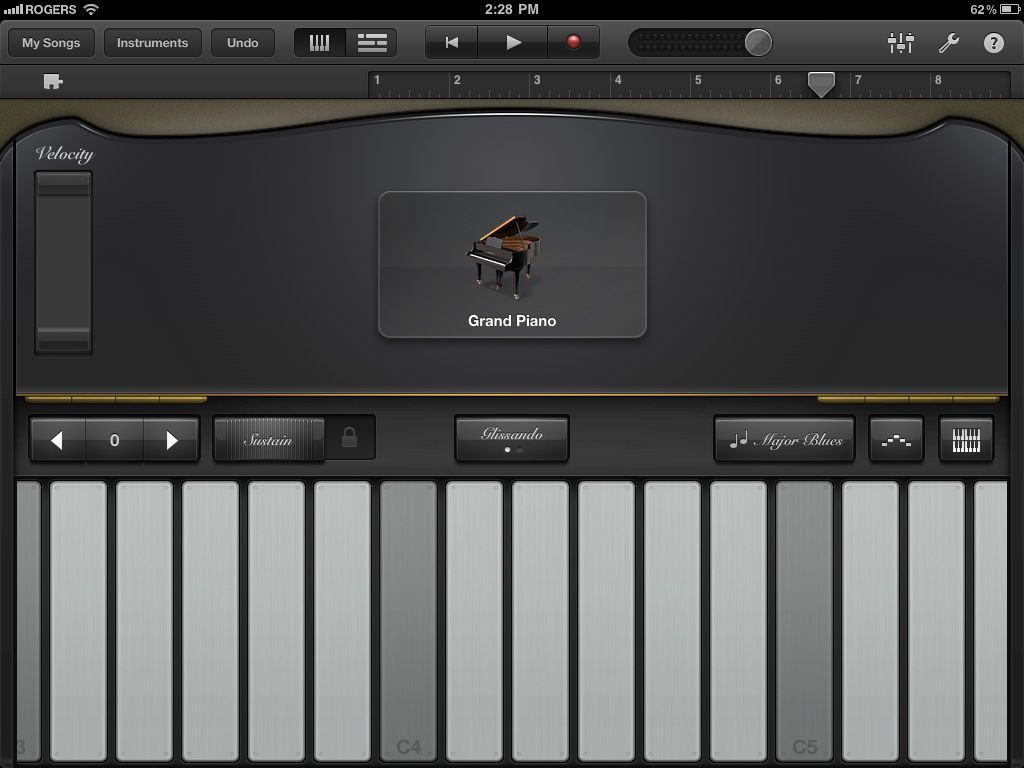
琶音是你的自由发挥按住一个和弦多个音符。您可以选择注意秩序,速率,和八度范围。舞蹈曲调或青少年荒原的版本太好了!不幸的是,琶音与KB控制器不工作。
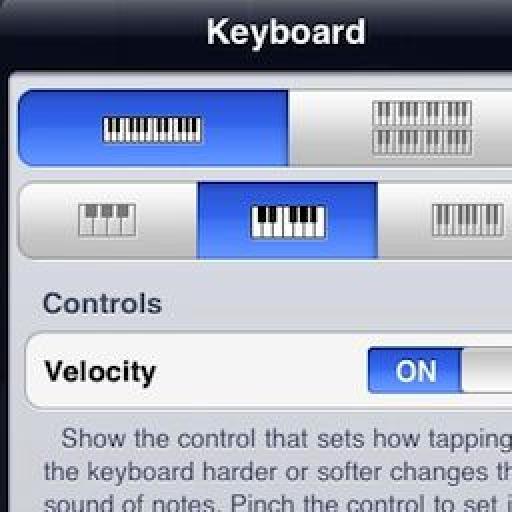
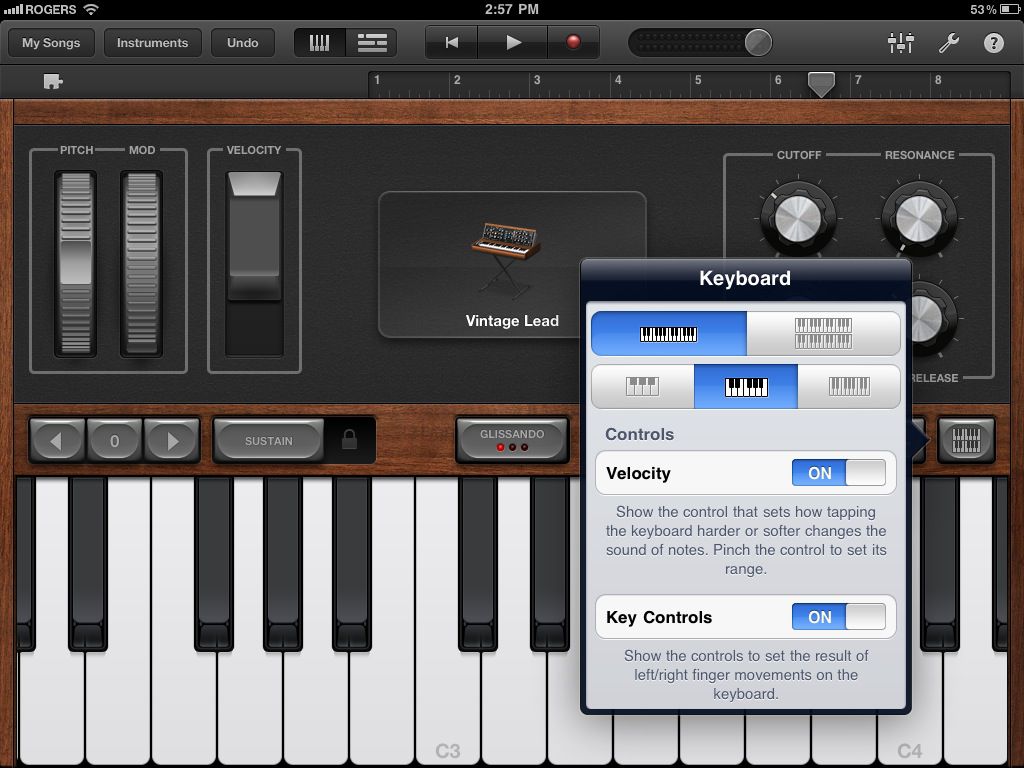
“Keyboard Layout/Velocity/Key Controls” - You can choose how you would like the onscreen keyboard to be set up with choices for one or two keyboards and octave range.
“Velocity” on and off is simple enough but you also can control the velocity range depending on the instrument (no velocity for organ since there is none!) left to the middle of the screen.
“Key Controls” simply turns on and off the view of the middle button for “Glissando”, etc.
There is also a hidden feature that is very cool and similar to an aftertouch on a KB controller. Load in the “Vintage Lead” preset under “Synth Lead” and strike a note. Now move your finger up and down that note... instant filter sweep!
键盘控制器
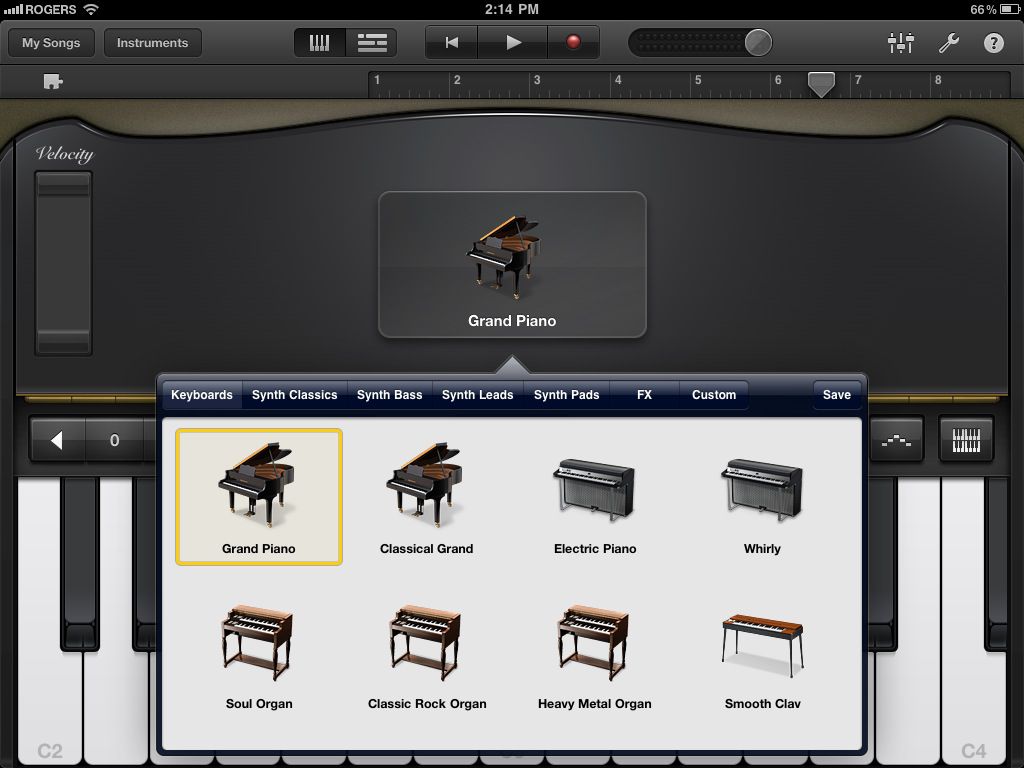
Plug your keyboard into your Camera Connection Kit and make sure it’s secure as I find it can pop out easily. If it does, you may need to restart your iPad to get control again. Open up GB and navigate to the “Keyboard” instrument. Once this opens you can then select from pianos,organs, synths, etc. by tapping on the instrument in the middle of the screen. You can even store your own presets.
Again, think of the iPad screen as the controls for the organs drawbars or synths filters. Unfortunately GB won’t record this data during recording. Pitch bend and Mod wheels will respond on your controller as will velocity and after touch. Also, there are no ways to assign a KB controller’s sliders or knobs to say, organ drawbars or synth knobs, although I did find my “master” slider with MIDI CC#7 controlled instrument volume.
使用智能仪表
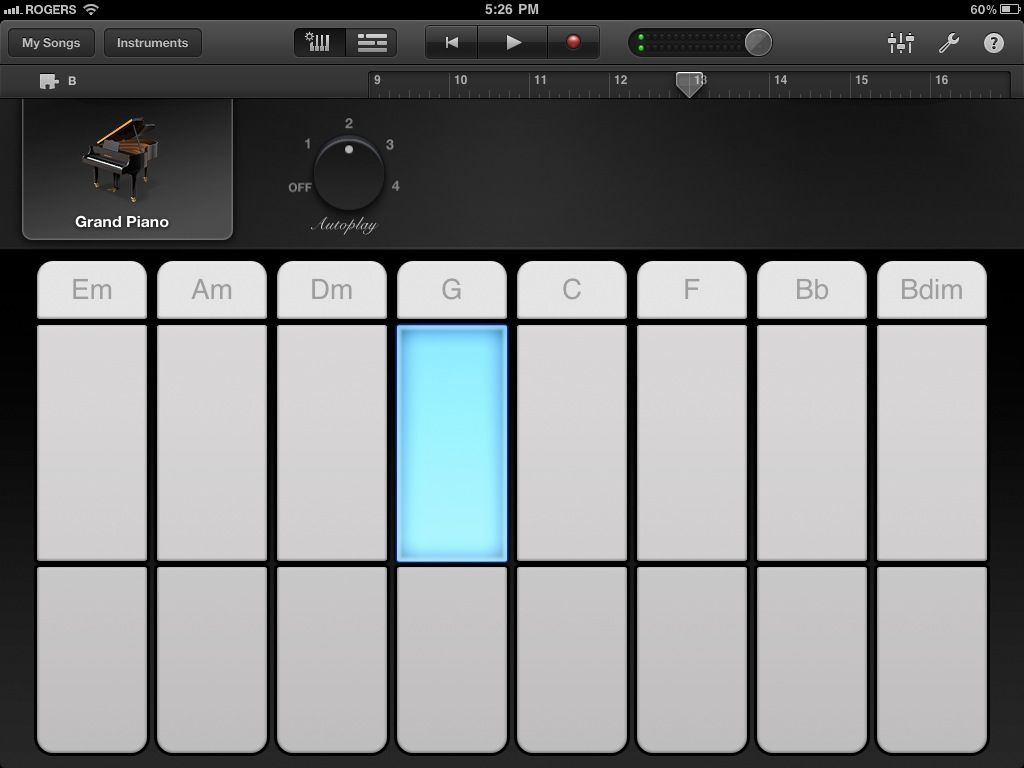
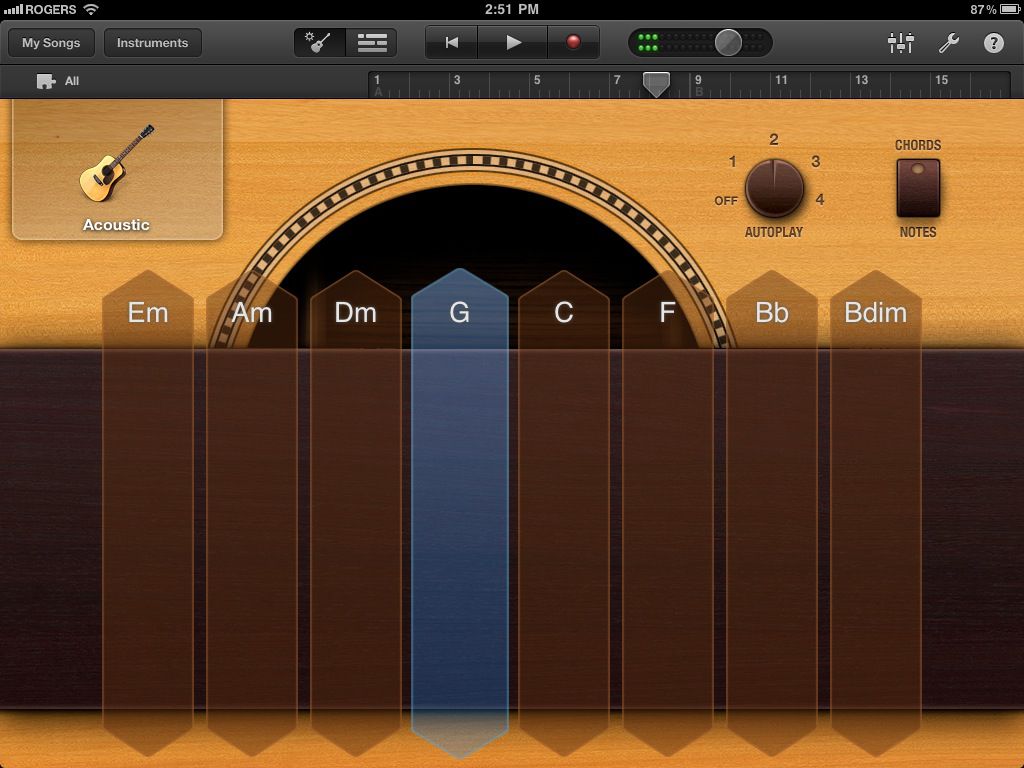
One feature I wish GB would allow is the use of “autoplay” but controlled via the KB controller. But there are some interesting ideas you can do by combining the “autoplay” feature and your keyboard. For example, select “Smart Keyboard” and choose one of the 4 “autoplay” modes. You then will see 3 bars with a chord on the top bar. The bar with the chord plays both left and right hand accompaniments, the middle bar is right hand only and the bottom is left hand bass. If you hit the top bar, you could solo on the KB controller. The middle bar could allow you to try bass combinations such as G-G/F-G/E or perhaps a piano bass line with a distinctive melody. Be careful though as the sustain is used most likely and can mush up your sound in the bass line. Using the bottom bar would allow you again more right hand solos or your own accompaniment.
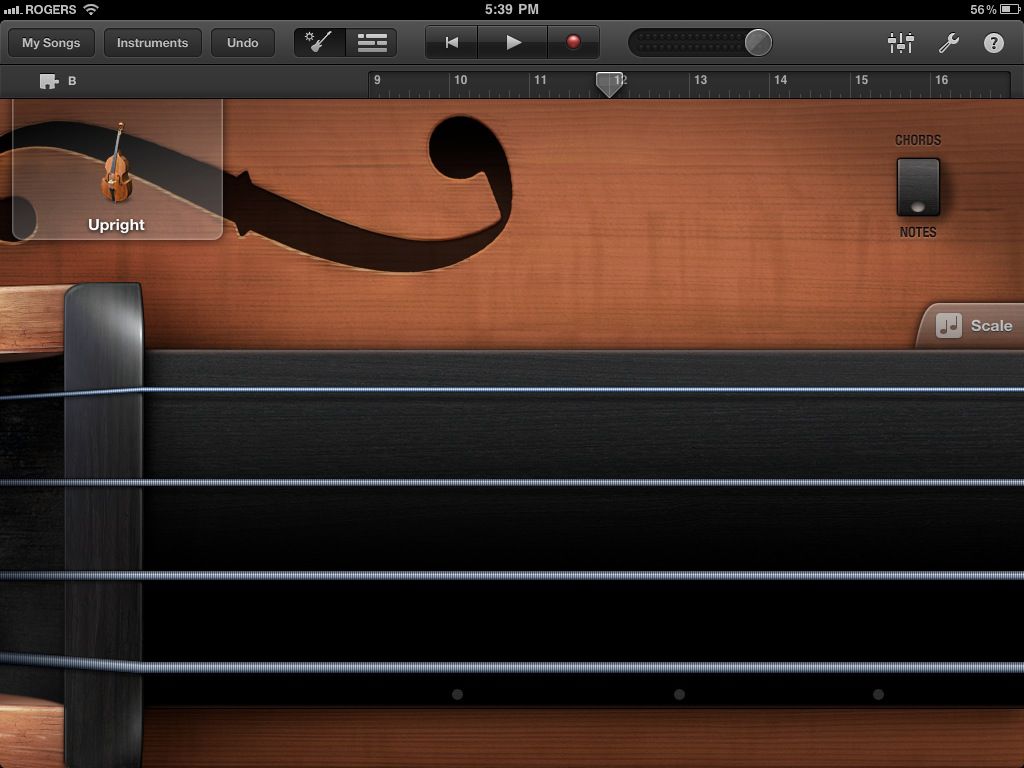
If you want any electric or acoustic bass instruments, you will need to use “Smart Bass”. Using the acoustic bass gives a feature that is hard to emulate on the KB controller unless you get good with the pitch bend wheel... sliding your finger along a fretless neck. Simply select Acoustic Bass, switch the “Chords” to “Notes” and tap on the screen. It adds some realism to the bass line and with some practice, can give some convincing results. Further editing can be done on GB on your Mac.
“Smart Guitar” is very similar to the smart keyboard and bass features with one additional feature. If you use your KB Controller, you can strike chords on your keys!Now you can use the “autoplay” feature for arpeggiated chords and “strum” chords on your keyboard. Great too for having ostinato picking patterns with multiple chord changes.
录音提示
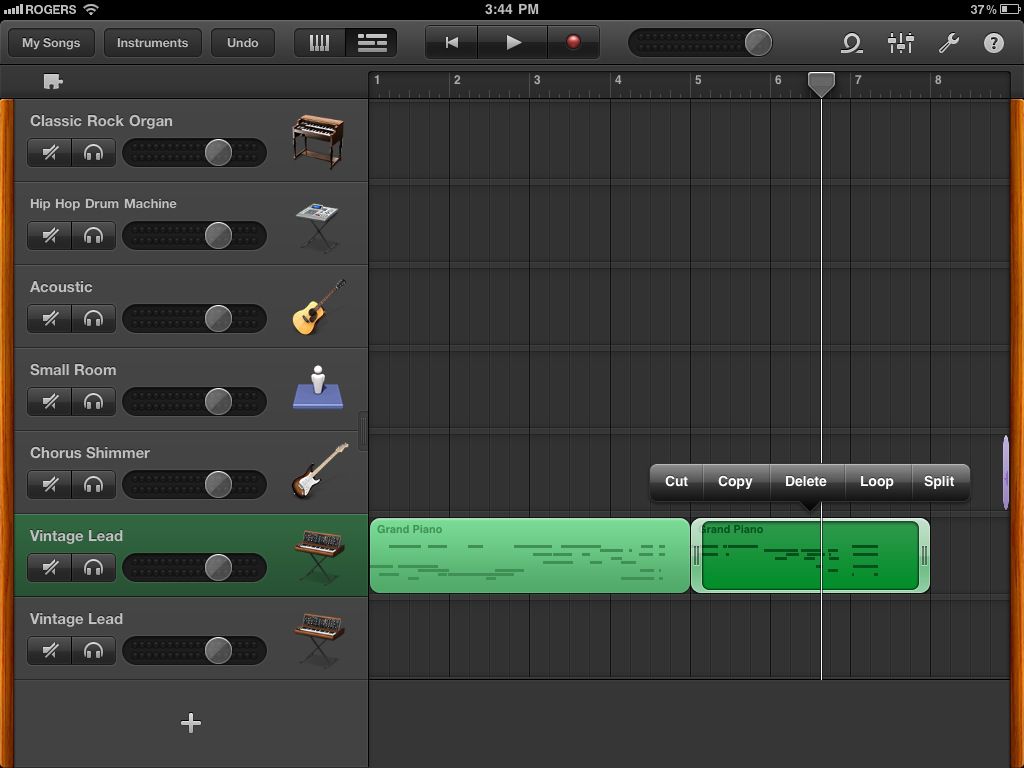
First and foremost... PRACTICE! Yes... I said that again as I did in the last tutorial. GB on the iPad does not allow editing like GB on a Mac . Not even MIDI editing for wrong notes. Maybe in version 2... BUT... you can slow down the tempo, unlike the Guitar/Audio recording section, and speed it up after. If needed later, you can open up the song on your Mac and edit it there. You also can save time by recording repetitive parts and then looping them. Simply record your part, double tap on the track region and select “Loop”.
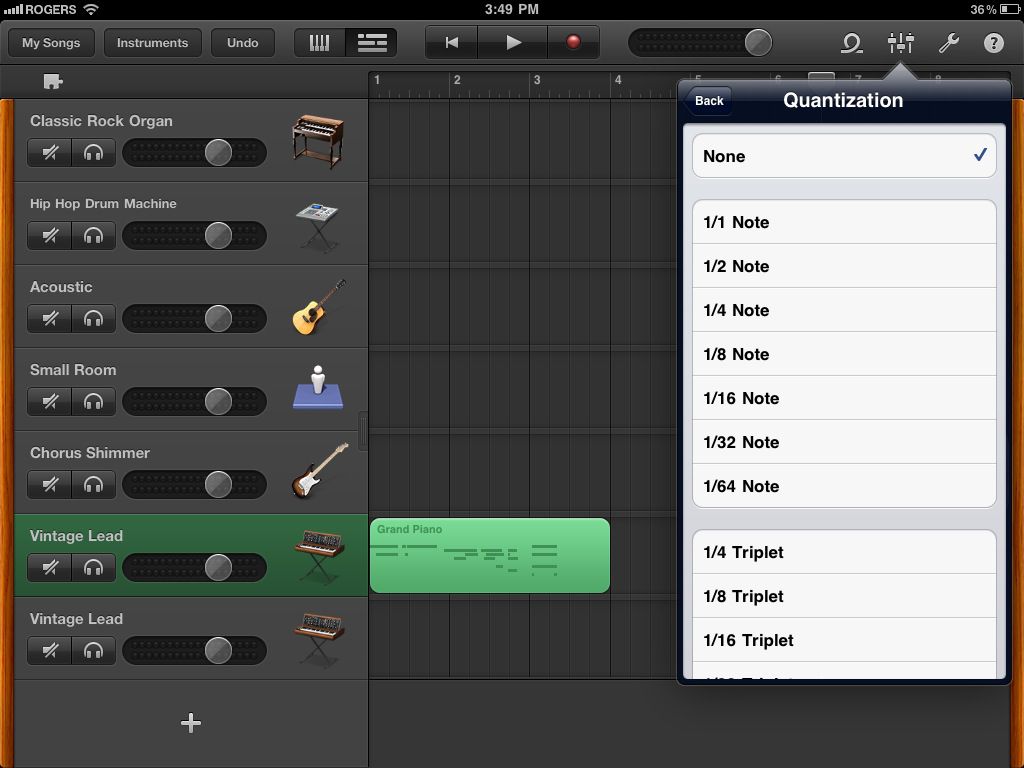
If your timing is not that great or you need to tighten up a section, “Quantization” will help. Simply tap on the top right “Mixer” in the Track view and select your quantization value. Use the fastest value you played. For example, if a lead synth line played as fast as 16th notes, use the 1/16 Note value. Quantization will also affect all of the tracks regions in a section! But... you can have different quantization on each section if a part gets moved from one section to another. Confused? Yeah... me too at first. If you quantize a part in Section A to 1/8 notes but then move it to Section B that is quantized to 1/16 notes, the new part will show “Multiple”. This is something I seriously hope Apple fixes as it’s frustrating if you need multiple quantizations within a section.
Also, don’t be afraid to record a part and try different instruments as your song may take on a whole new flavor choosing a clav instead of a piano for example. Try duplicating the track with a similar synth but with a different filter cutoff and panned hard left and right. Or use two totally different synths. Bass lines can get really fat with this idea! Slow your song down and play in your own idea of an arpeggiated pattern... speed up and loop!
Stay tuned for more GarageBand for iPad tips and tutorials. Till next time...don’t drive your neighbors nuts with the Minimoog playing Axel F or Tom Sawyer synth leads.

Discussion
Want to join the discussion?
Create an account or login to get started!