Здесь, в Северной Америке НХЛ плей-офф сейчас в самом разгаре и, возможно, вдохновил Youre играть в некоторые качалки орган! С GarageBand для IPad мы получаем некоторые большие звуки клавиатуры с изящной управления экран! Мало того, мы можем использовать эти ключи в наших песнях, которые были записи, но, как я объяснил в недавнем учебнике, живут использование также возможность!
Установки и оборудование, необходимые
Есть несколько вещей, которые нам нужны.
- Controller Keyboard with power supply - There are many to choose from and I use an Axiom Pro 61. You will definitely need the power supply as the iPad does not provide power through it’s dock port. If you want to use the Korg Nano series, you will need a USB hub with power supply.
- Camera Connection Kit - Our keyboard controller communicates with GB through this device.
Axiom Pro 61
Подключение камер от Apple Kit
Управление
Каждый инструмент имеет свой макет (орган с тяг, синтезаторы с фильтром контроля), но Есть некоторые функции чуть выше клавиатуры, и они будут меняться в зависимости от выбранного инструмента. Например, Sustain будет на пианино, но не орган, орган будет иметь Поворотный переключатель для Лесли, все зависит от инструмента.
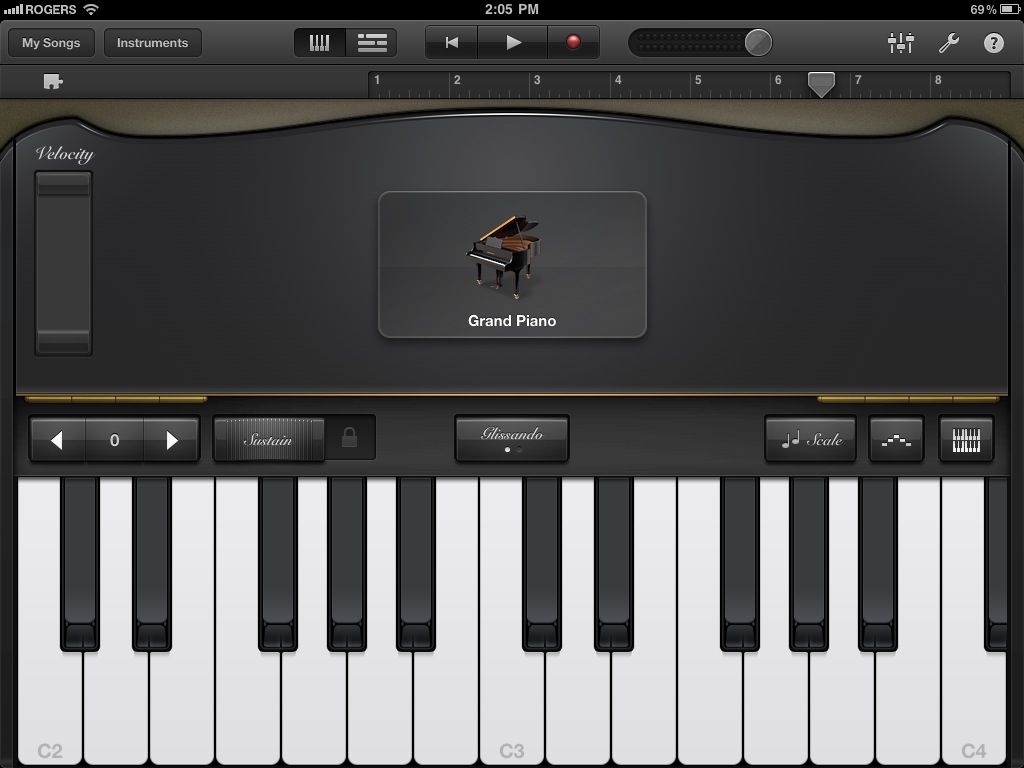
Хотя были собираетесь использовать контроллер клавиатуры, если вы хотите использовать экранную клавиатуру, Вы получаете различные управления для как ваша экранной клавиатуры отвечает. На крайне левых Октаве плюс и минус. Средней кнопки для Глиссандо, Scroll, Pitch которые изменяются снова зависимости от инструмента отобраны и правой сторона Шкала, Арпеджиатор и Keyboard Layout.
Глиссандо позволяет скользить по клавишам, как бы реальной клавиатуре. Подумайте, пианист использованием тыльной стороной ладони и раздвижные вверх или вниз клавишами.
Свиток позволяет воспроизводить ноты и, удерживая ее, слайд-клавиатурой вверх или вниз. Полезно, если вам нужно, чтобы в разные октавы экранной клавиатуры быстро.
Шаг это как колесо высоты тона, но позволяет вам шаг вверх или вниз между нотами, просто двигая пальцем. Большой для старинных синтезаторов!
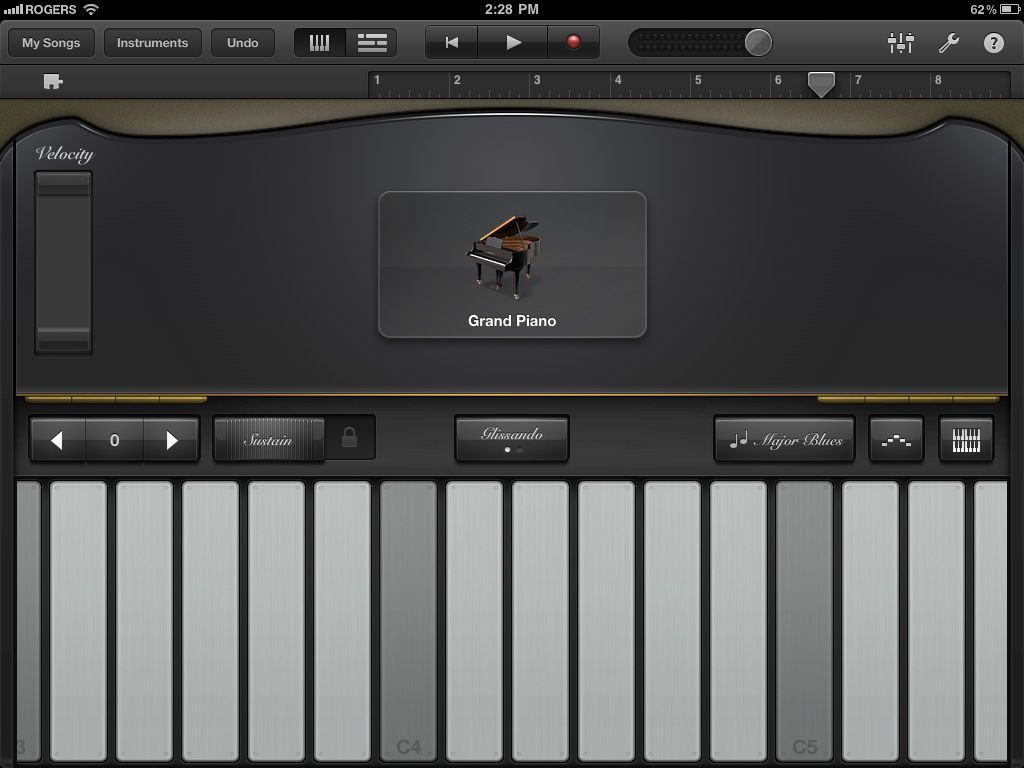
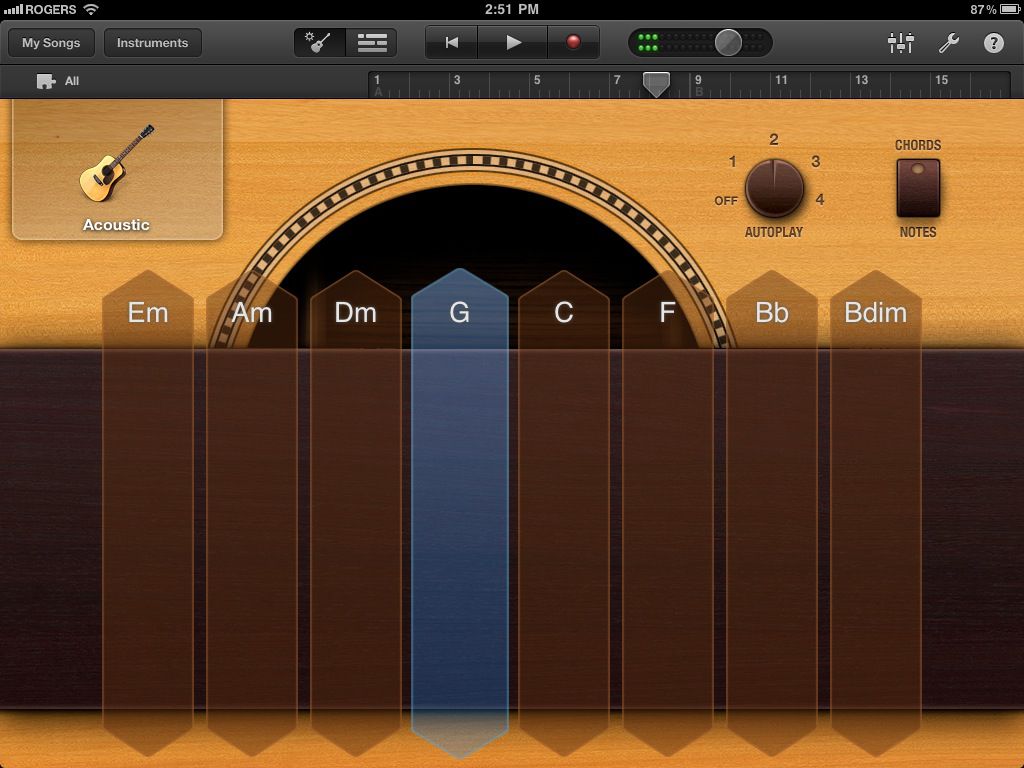
Шкала отлично подходит для соло, если вы хотите попробовать различные звучания весов в музыкальное произведение. Как только вы выбираете шкале вы хотите использовать, клавиатура становится больше похож на одну строку маримбы минус # / б ключи. Если вы используете контроллер кб, вам все равно придется все ноты в наличии, но вы можете узнать, какие ноты используются играть в них на IPad и сопоставления их на клавиатуре. Вы будете скоро играть клезмер с легкостью!
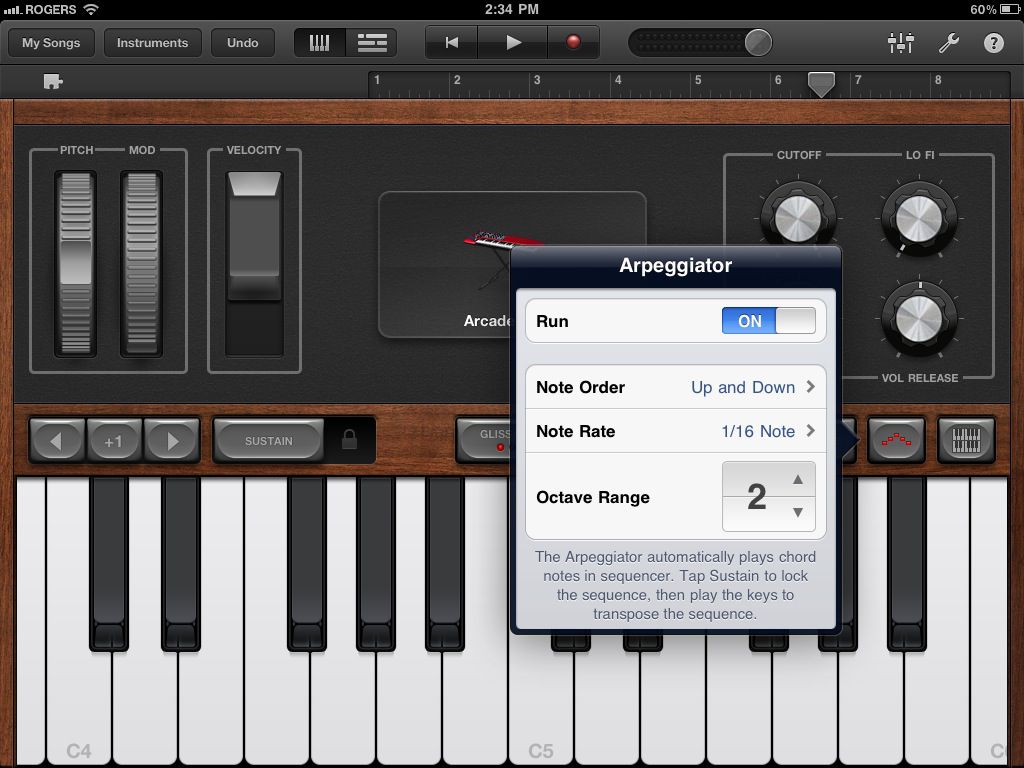
Арпеджиатор ваша свобода играть несколько нот с одного аккорда нажата. Вы можете выбрать отметить порядке, ставка, и октав. Отлично подходит для танцевальных мелодий или вашей версии Подростковый Wasteland! К сожалению, арпеджиатор не работает с контроллером КБ.
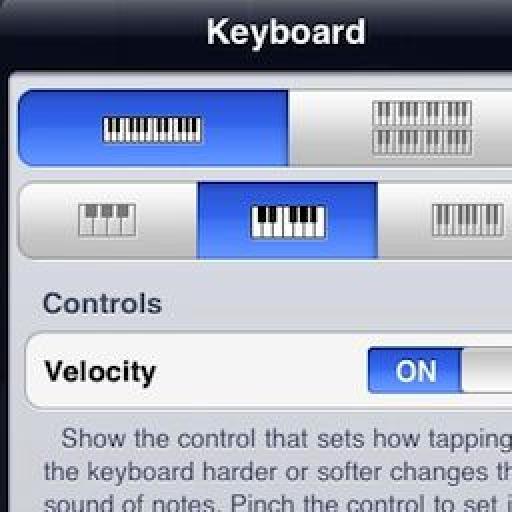
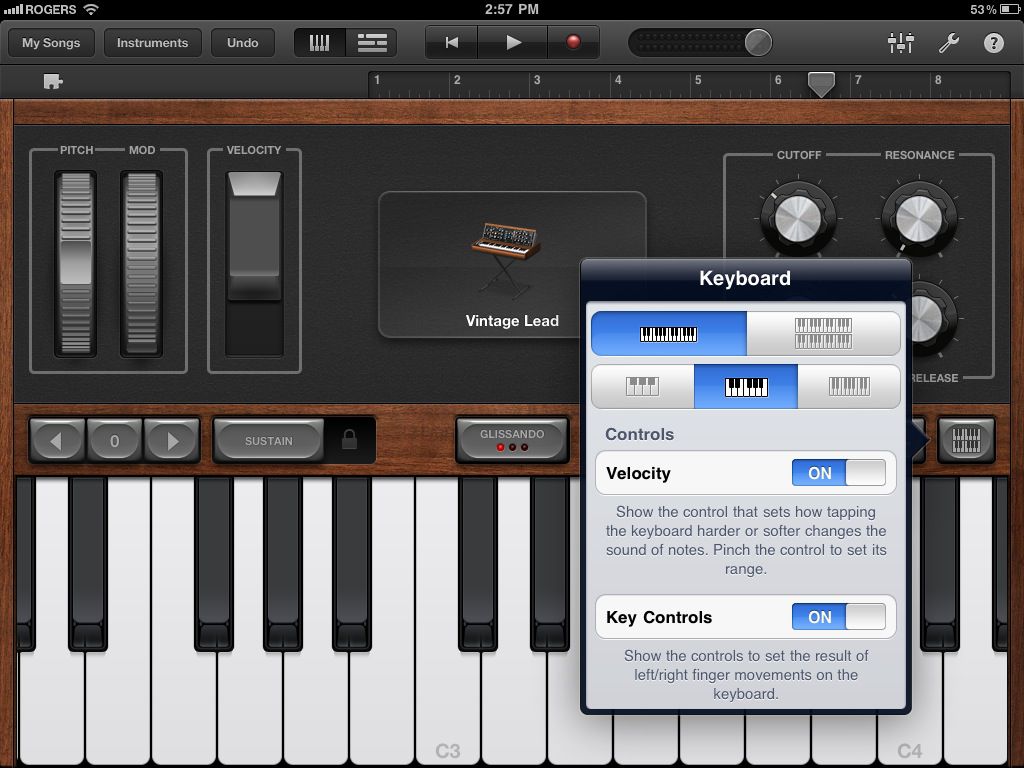
“Keyboard Layout/Velocity/Key Controls” - You can choose how you would like the onscreen keyboard to be set up with choices for one or two keyboards and octave range.
“Velocity” on and off is simple enough but you also can control the velocity range depending on the instrument (no velocity for organ since there is none!) left to the middle of the screen.
“Key Controls” simply turns on and off the view of the middle button for “Glissando”, etc.
There is also a hidden feature that is very cool and similar to an aftertouch on a KB controller. Load in the “Vintage Lead” preset under “Synth Lead” and strike a note. Now move your finger up and down that note... instant filter sweep!
Контроллер клавиатуры
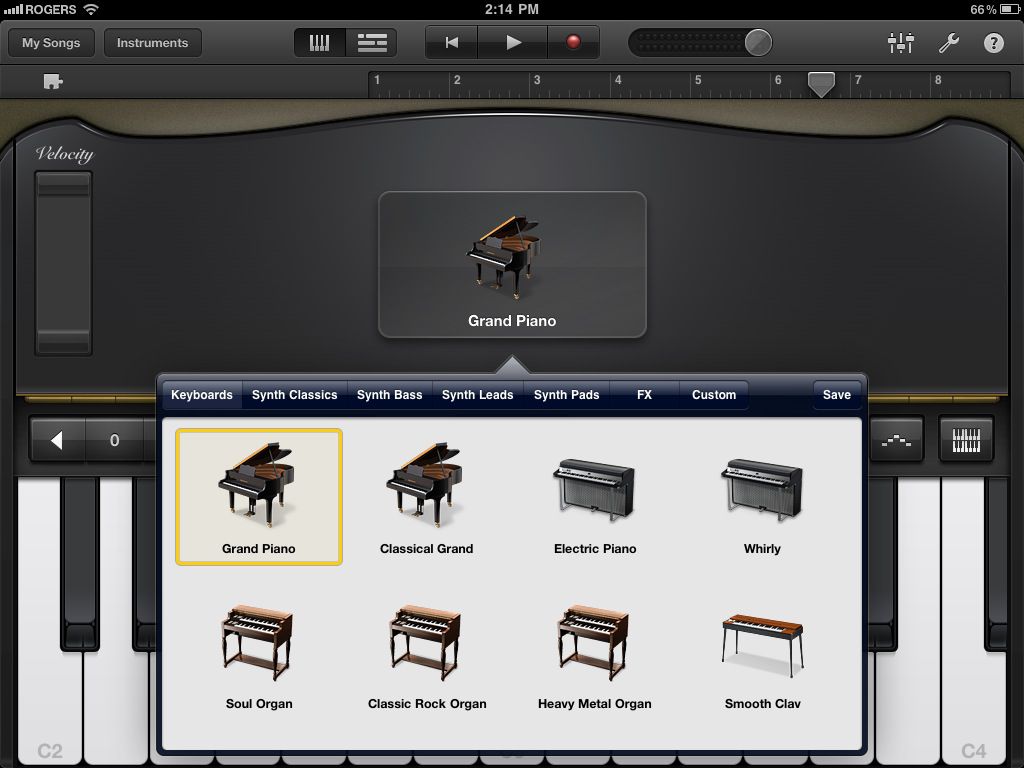
Plug your keyboard into your Camera Connection Kit and make sure it’s secure as I find it can pop out easily. If it does, you may need to restart your iPad to get control again. Open up GB and navigate to the “Keyboard” instrument. Once this opens you can then select from pianos,organs, synths, etc. by tapping on the instrument in the middle of the screen. You can even store your own presets.
Again, think of the iPad screen as the controls for the organs drawbars or synths filters. Unfortunately GB won’t record this data during recording. Pitch bend and Mod wheels will respond on your controller as will velocity and after touch. Also, there are no ways to assign a KB controller’s sliders or knobs to say, organ drawbars or synth knobs, although I did find my “master” slider with MIDI CC#7 controlled instrument volume.
Использование смарт-инструментов
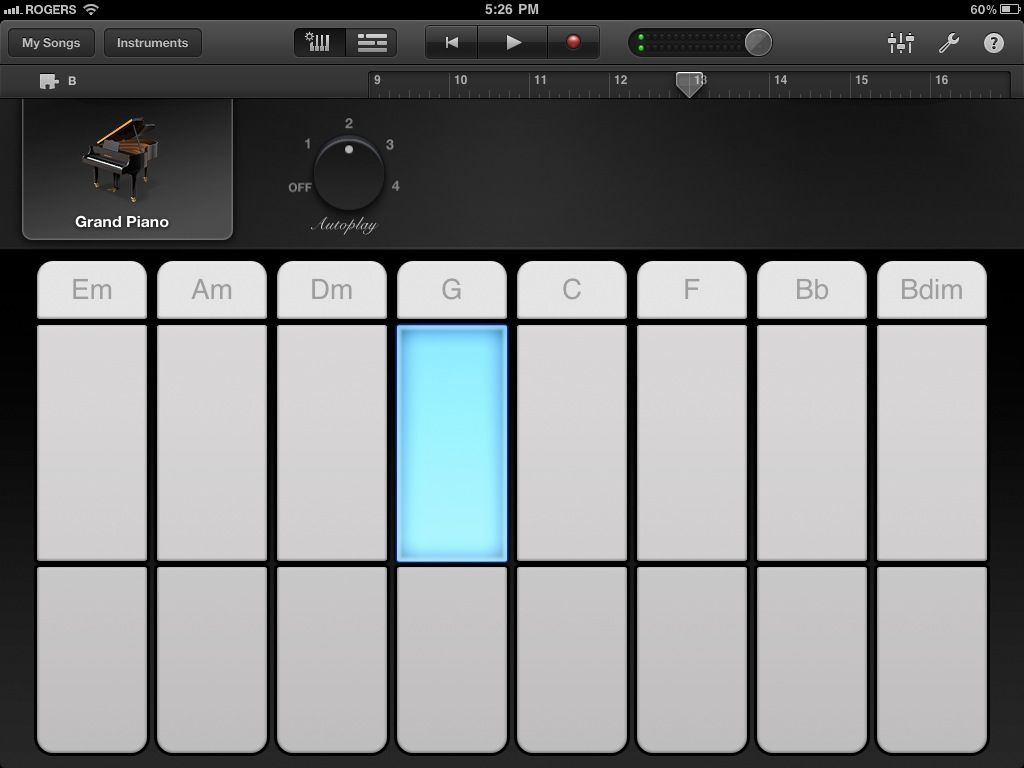
One feature I wish GB would allow is the use of “autoplay” but controlled via the KB controller. But there are some interesting ideas you can do by combining the “autoplay” feature and your keyboard. For example, select “Smart Keyboard” and choose one of the 4 “autoplay” modes. You then will see 3 bars with a chord on the top bar. The bar with the chord plays both left and right hand accompaniments, the middle bar is right hand only and the bottom is left hand bass. If you hit the top bar, you could solo on the KB controller. The middle bar could allow you to try bass combinations such as G-G/F-G/E or perhaps a piano bass line with a distinctive melody. Be careful though as the sustain is used most likely and can mush up your sound in the bass line. Using the bottom bar would allow you again more right hand solos or your own accompaniment.
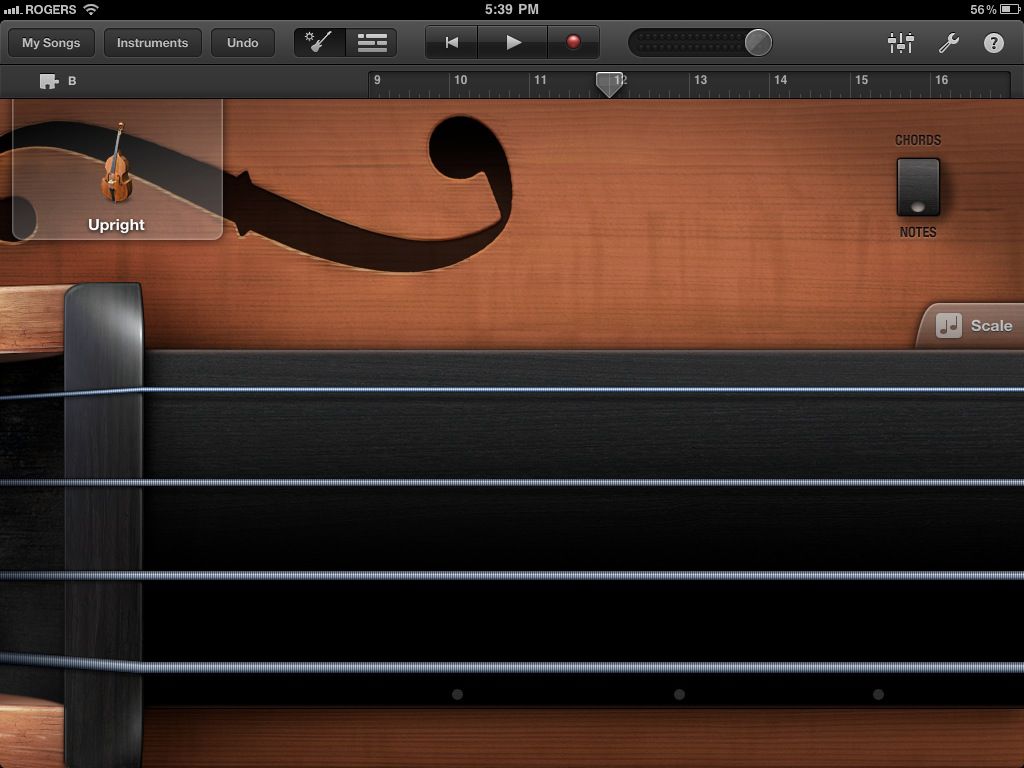
If you want any electric or acoustic bass instruments, you will need to use “Smart Bass”. Using the acoustic bass gives a feature that is hard to emulate on the KB controller unless you get good with the pitch bend wheel... sliding your finger along a fretless neck. Simply select Acoustic Bass, switch the “Chords” to “Notes” and tap on the screen. It adds some realism to the bass line and with some practice, can give some convincing results. Further editing can be done on GB on your Mac.
“Smart Guitar” is very similar to the smart keyboard and bass features with one additional feature. If you use your KB Controller, you can strike chords on your keys!Now you can use the “autoplay” feature for arpeggiated chords and “strum” chords on your keyboard. Great too for having ostinato picking patterns with multiple chord changes.
Запись Советы
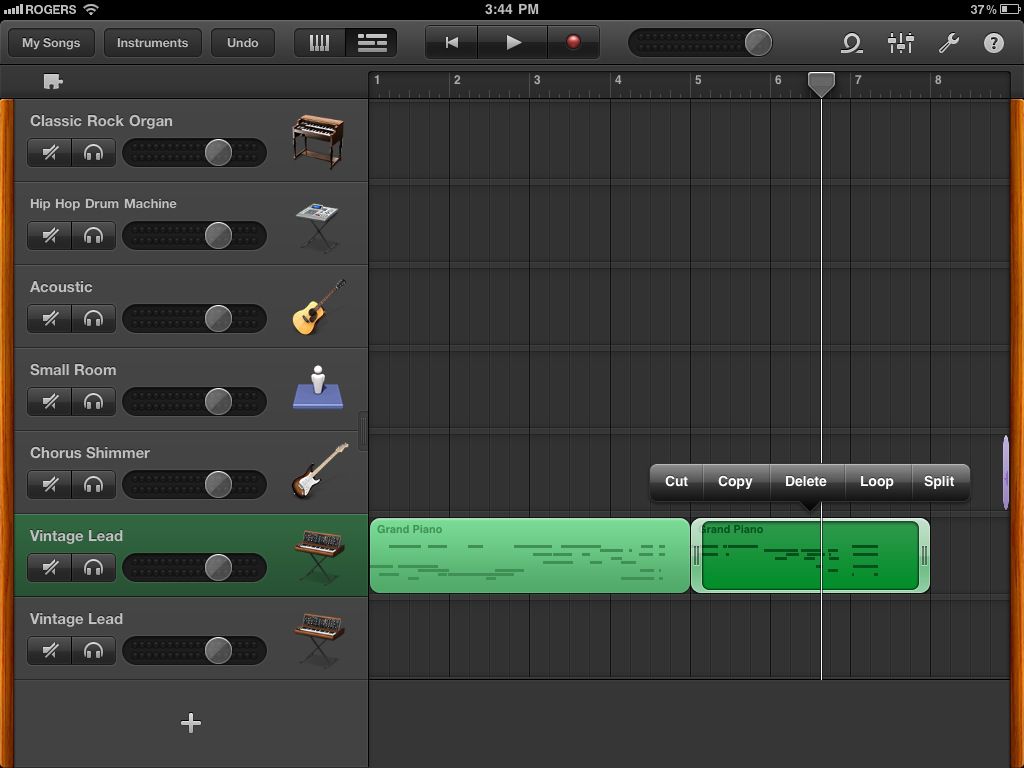
First and foremost... PRACTICE! Yes... I said that again as I did in the last tutorial. GB on the iPad does not allow editing like GB on a Mac . Not even MIDI editing for wrong notes. Maybe in version 2... BUT... you can slow down the tempo, unlike the Guitar/Audio recording section, and speed it up after. If needed later, you can open up the song on your Mac and edit it there. You also can save time by recording repetitive parts and then looping them. Simply record your part, double tap on the track region and select “Loop”.
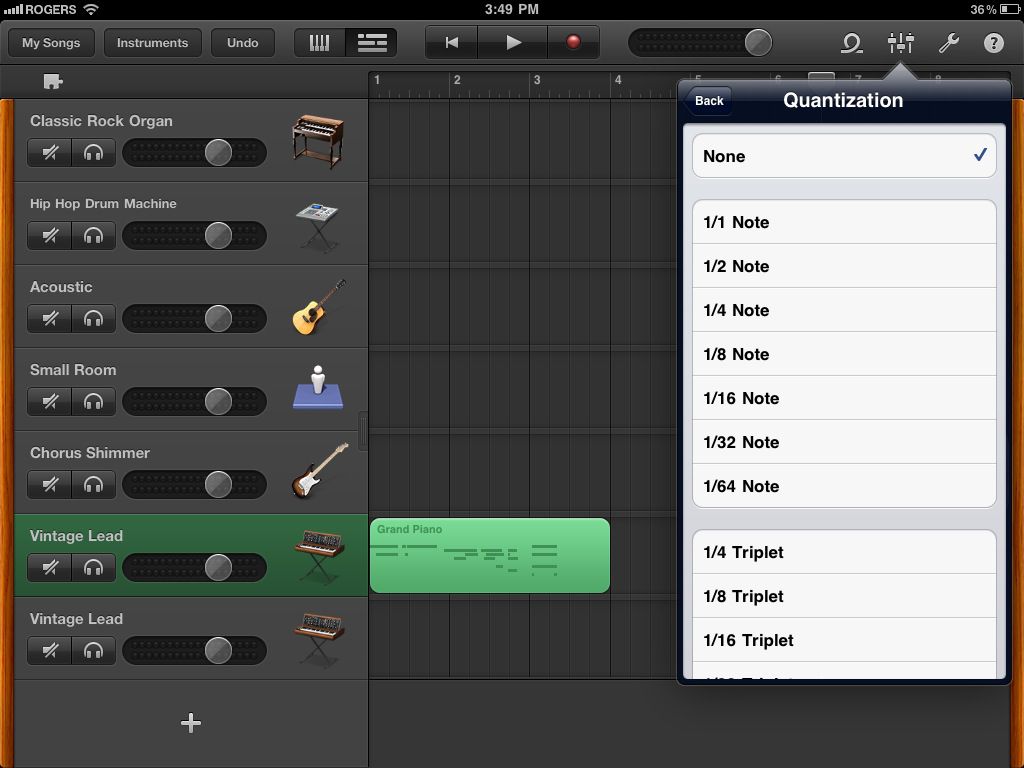
If your timing is not that great or you need to tighten up a section, “Quantization” will help. Simply tap on the top right “Mixer” in the Track view and select your quantization value. Use the fastest value you played. For example, if a lead synth line played as fast as 16th notes, use the 1/16 Note value. Quantization will also affect all of the tracks regions in a section! But... you can have different quantization on each section if a part gets moved from one section to another. Confused? Yeah... me too at first. If you quantize a part in Section A to 1/8 notes but then move it to Section B that is quantized to 1/16 notes, the new part will show “Multiple”. This is something I seriously hope Apple fixes as it’s frustrating if you need multiple quantizations within a section.
Also, don’t be afraid to record a part and try different instruments as your song may take on a whole new flavor choosing a clav instead of a piano for example. Try duplicating the track with a similar synth but with a different filter cutoff and panned hard left and right. Or use two totally different synths. Bass lines can get really fat with this idea! Slow your song down and play in your own idea of an arpeggiated pattern... speed up and loop!


Discussion
Want to join the discussion?
Create an account or login to get started!