Aqui na América do Norte os playoffs da NHL estão em pleno andamento e, talvez, você está inspirado para jogar algum órgão de balanço! Com GarageBand para o IPAD temos alguns sons de teclado grande com controles de tela bacana! Não só podemos usar essas chaves em nossas músicas que estavam gravando, mas como expliquei em um tutorial recente, uso ao vivo também é uma possibilidade!
Instalação e equipamentos necessários
Existem algumas coisas que precisamos.
- Controller Keyboard with power supply - There are many to choose from and I use an Axiom Pro 61. You will definitely need the power supply as the iPad does not provide power through it’s dock port. If you want to use the Korg Nano series, you will need a USB hub with power supply.
- Camera Connection Kit - Our keyboard controller communicates with GB through this device.
Axiom Pro 61
Kit da Apple Camera Connection
Controles
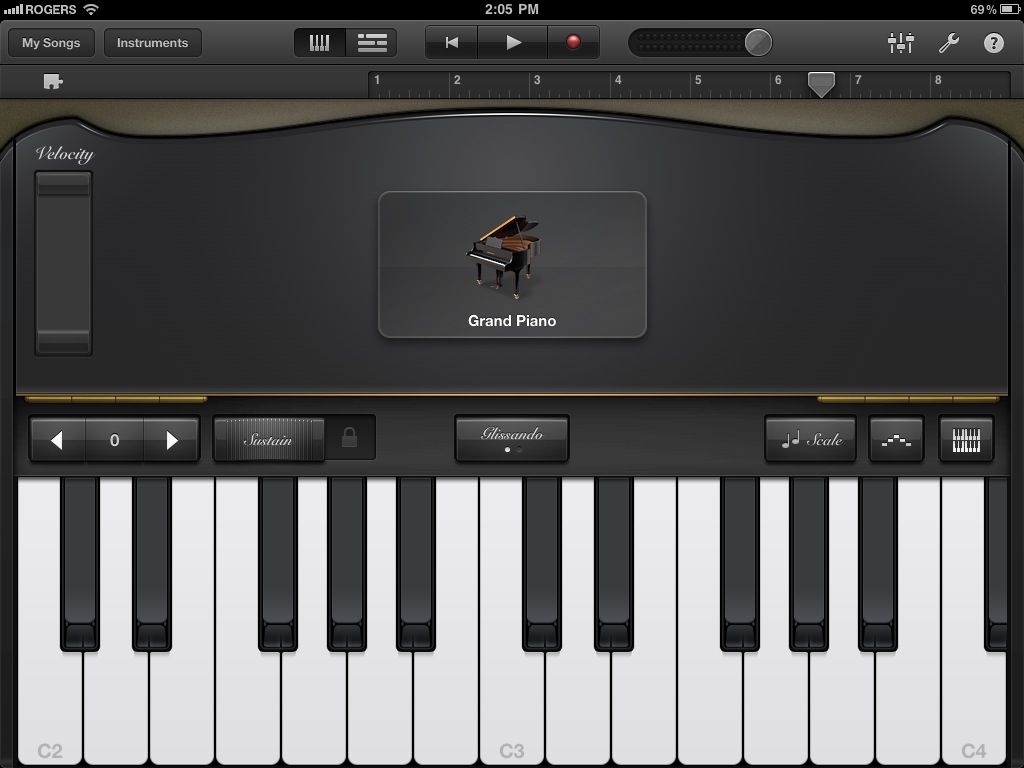
Cada instrumento tem o seu próprio layout (órgão com lança, sintetizadores com os controles do filtro), mas também existem algumas funções logo acima do teclado e estes irão variar de acordo com o instrumento selecionado. Por exemplo, Sustain será no piano, mas não de órgãos de órgãos, vai ter a chave para o Rotary Leslie, tudo dependendo do instrumento.
Embora se vai estar usando um controlador de teclado, se você quiser usar o teclado na tela, você tem controles diferentes de como o seu teclado na tela responde. Na extrema esquerda é um plus Octave e menos. Um botão do meio para Glissando, Pitch, Scroll que variam novamente, dependendo do instrumento escolhido e do lado direito tem um layout Arpeggiator Scale, e Teclado.
Glissando permite deslizar através das teclas como um teclado real faria. Pense o pianista usando as costas de sua mão e deslizando para cima ou para baixo das teclas.
Scroll permite-lhe jogar uma nota e mantendo-lo, deslize o teclado para cima ou para baixo. Útil se você precisar entrar em oitavas diferentes do teclado na tela rapidamente.
Campo é um como uma roda de pitch bend, mas permite que você passo para cima ou para baixo entre as notas simplesmente deslizando o dedo. Ótimo para o synths vintage!
Escala é ótimo para solos se você quer experimentar diferentes escalas soando em um pedaço de música. Depois de escolher a escala que você deseja usar o teclado torna-se mais como uma única linha marimba menos as teclas # / b. Se você usar um controlador de kb, você ainda terá todas as notas disponíveis, mas você pode aprender o que as notas são usadas por jogá-los no IPAD e combinando-os em seu teclado. Youll em breve estar jogando Klezmer com facilidade!
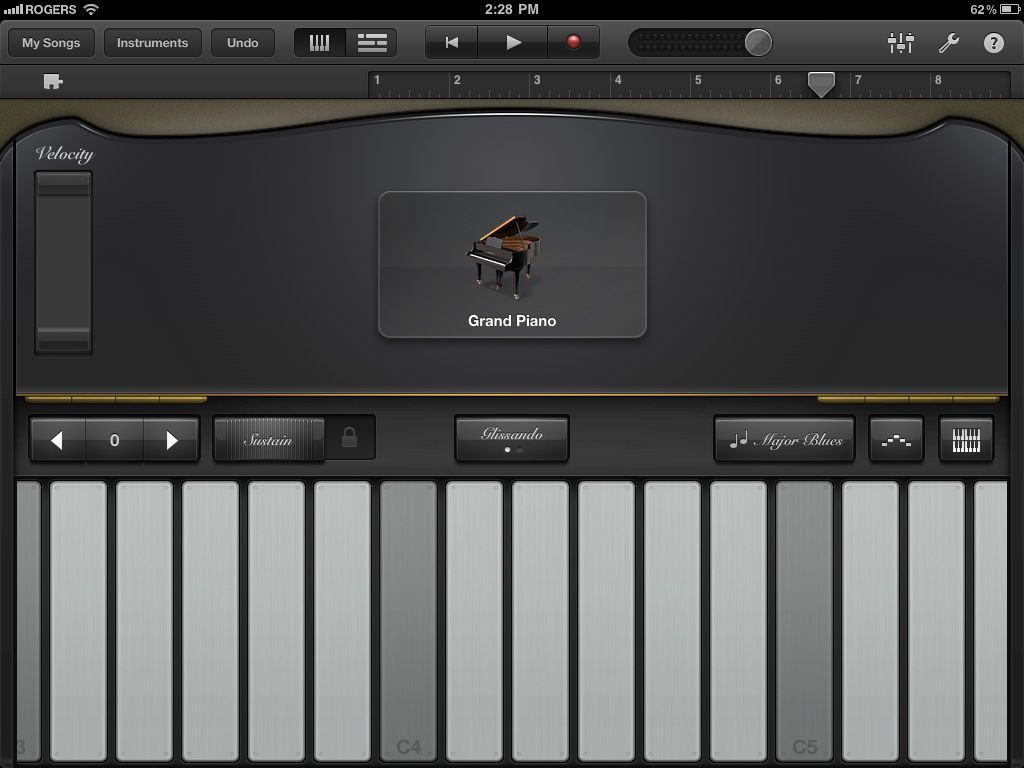
Arpeggiator é a sua liberdade para jogar várias notas com uma corda pressionada. Você pode escolher a ordem de nota, taxa e extensão de oitavas. Ótimo para músicas de dança ou sua versão do Teenage Wasteland! Infelizmente, o arpeggiator não funciona com um controlador de KB.
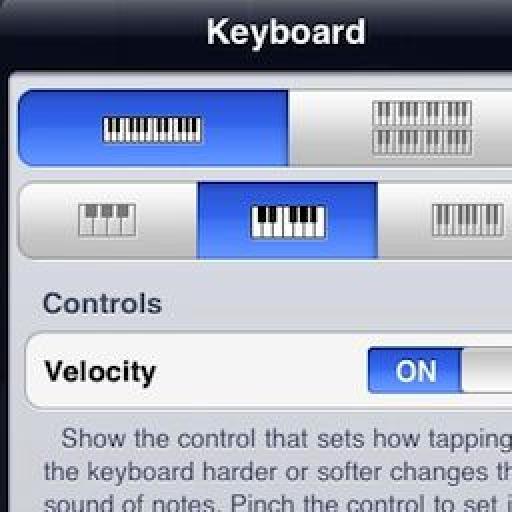
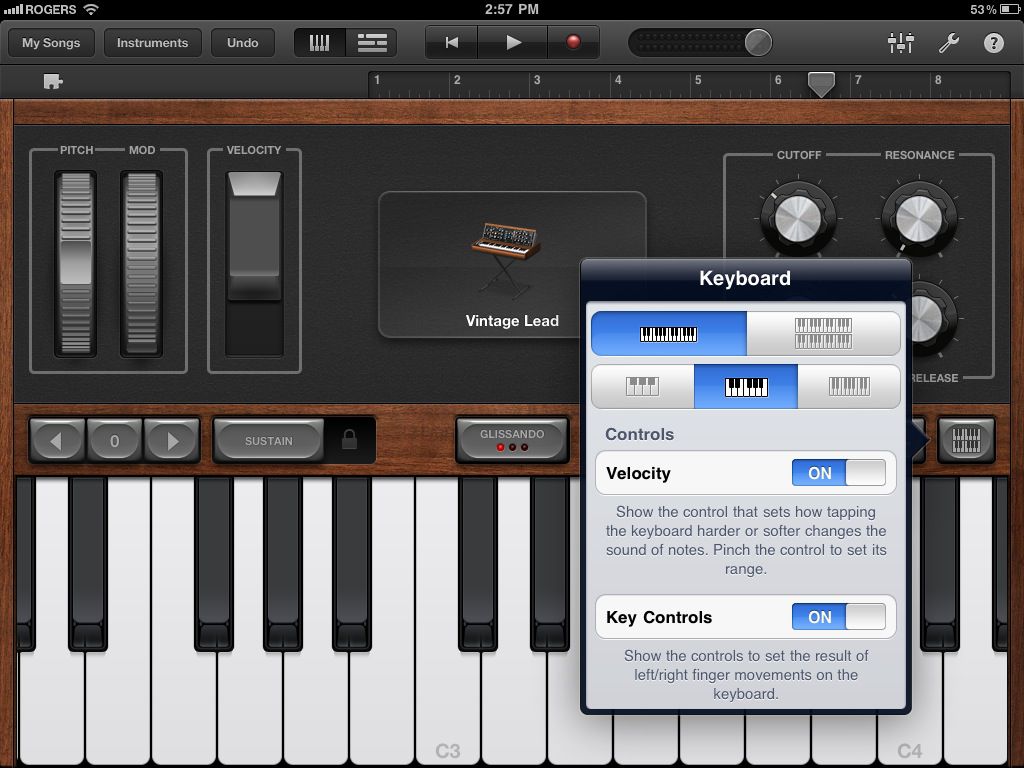
“Keyboard Layout/Velocity/Key Controls” - You can choose how you would like the onscreen keyboard to be set up with choices for one or two keyboards and octave range.
“Velocity” on and off is simple enough but you also can control the velocity range depending on the instrument (no velocity for organ since there is none!) left to the middle of the screen.
“Key Controls” simply turns on and off the view of the middle button for “Glissando”, etc.
There is also a hidden feature that is very cool and similar to an aftertouch on a KB controller. Load in the “Vintage Lead” preset under “Synth Lead” and strike a note. Now move your finger up and down that note... instant filter sweep!
Controlador de teclado
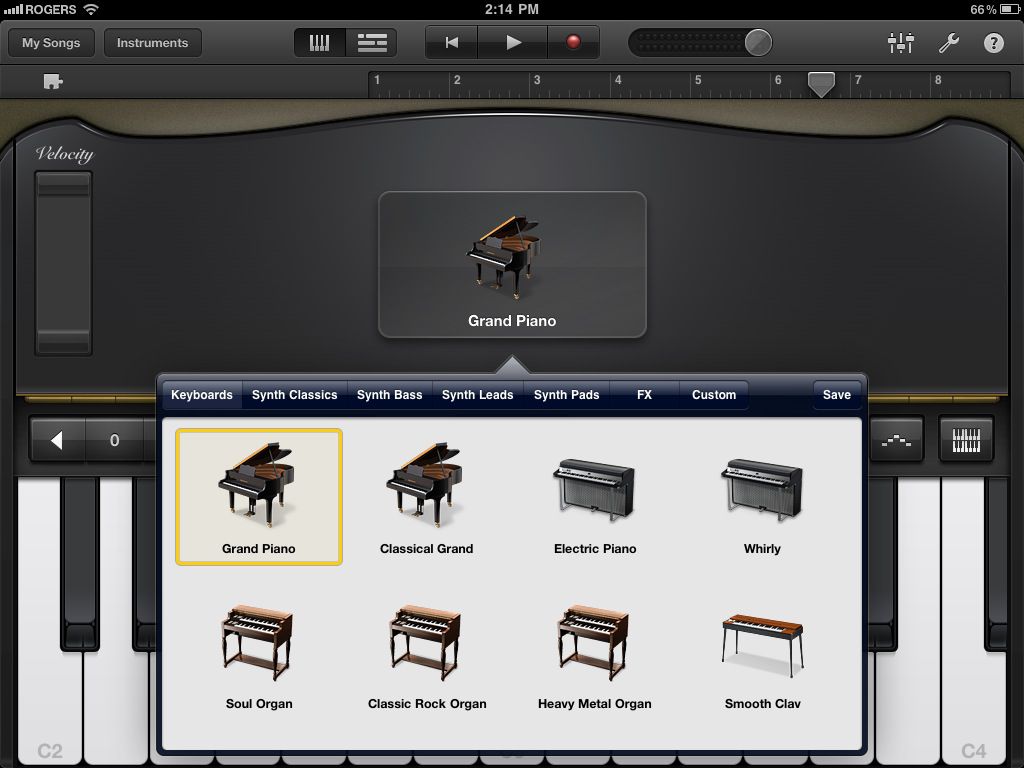
Plug your keyboard into your Camera Connection Kit and make sure it’s secure as I find it can pop out easily. If it does, you may need to restart your iPad to get control again. Open up GB and navigate to the “Keyboard” instrument. Once this opens you can then select from pianos,organs, synths, etc. by tapping on the instrument in the middle of the screen. You can even store your own presets.
Again, think of the iPad screen as the controls for the organs drawbars or synths filters. Unfortunately GB won’t record this data during recording. Pitch bend and Mod wheels will respond on your controller as will velocity and after touch. Also, there are no ways to assign a KB controller’s sliders or knobs to say, organ drawbars or synth knobs, although I did find my “master” slider with MIDI CC#7 controlled instrument volume.
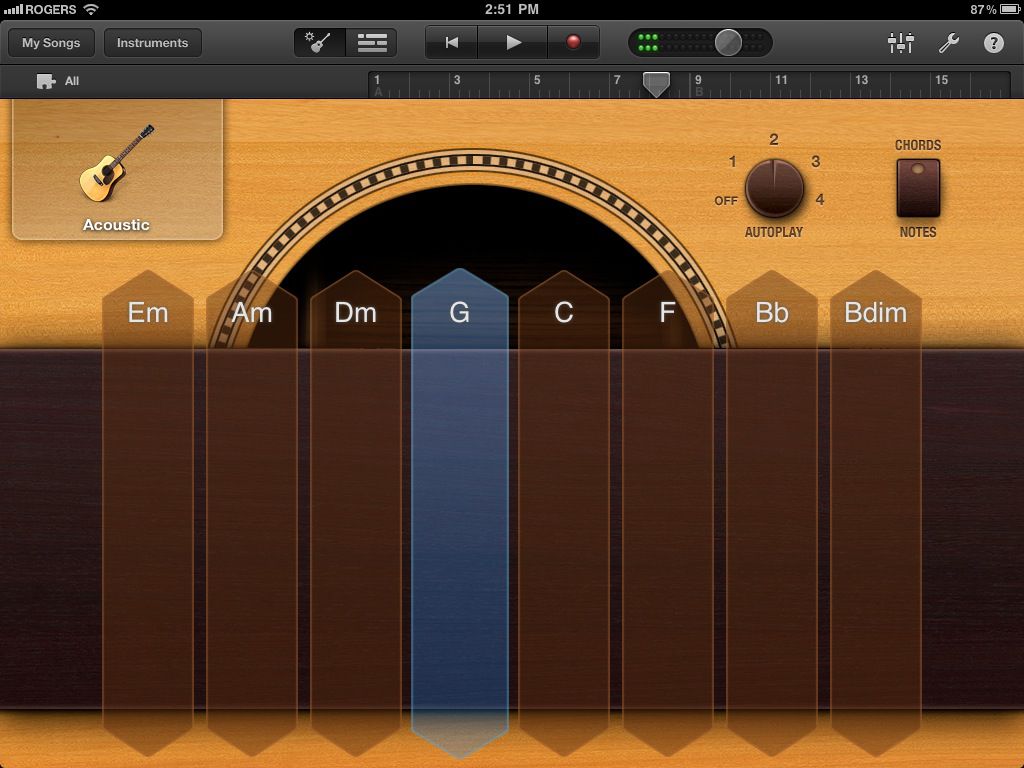
Usando instrumentos inteligentes
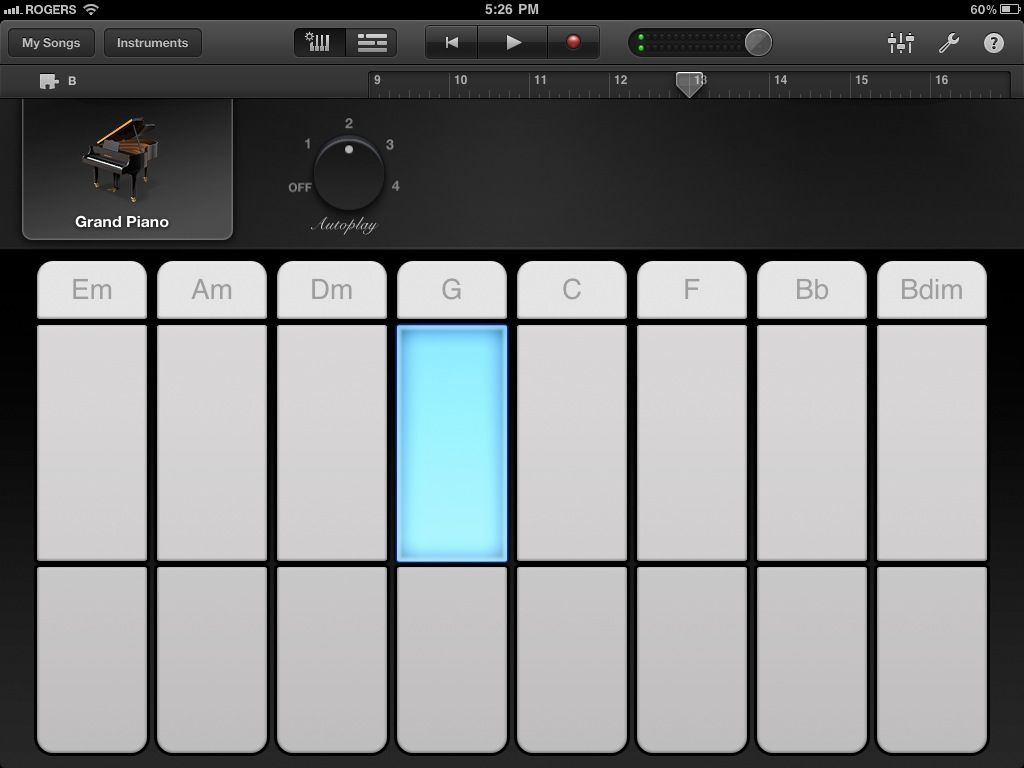
One feature I wish GB would allow is the use of “autoplay” but controlled via the KB controller. But there are some interesting ideas you can do by combining the “autoplay” feature and your keyboard. For example, select “Smart Keyboard” and choose one of the 4 “autoplay” modes. You then will see 3 bars with a chord on the top bar. The bar with the chord plays both left and right hand accompaniments, the middle bar is right hand only and the bottom is left hand bass. If you hit the top bar, you could solo on the KB controller. The middle bar could allow you to try bass combinations such as G-G/F-G/E or perhaps a piano bass line with a distinctive melody. Be careful though as the sustain is used most likely and can mush up your sound in the bass line. Using the bottom bar would allow you again more right hand solos or your own accompaniment.
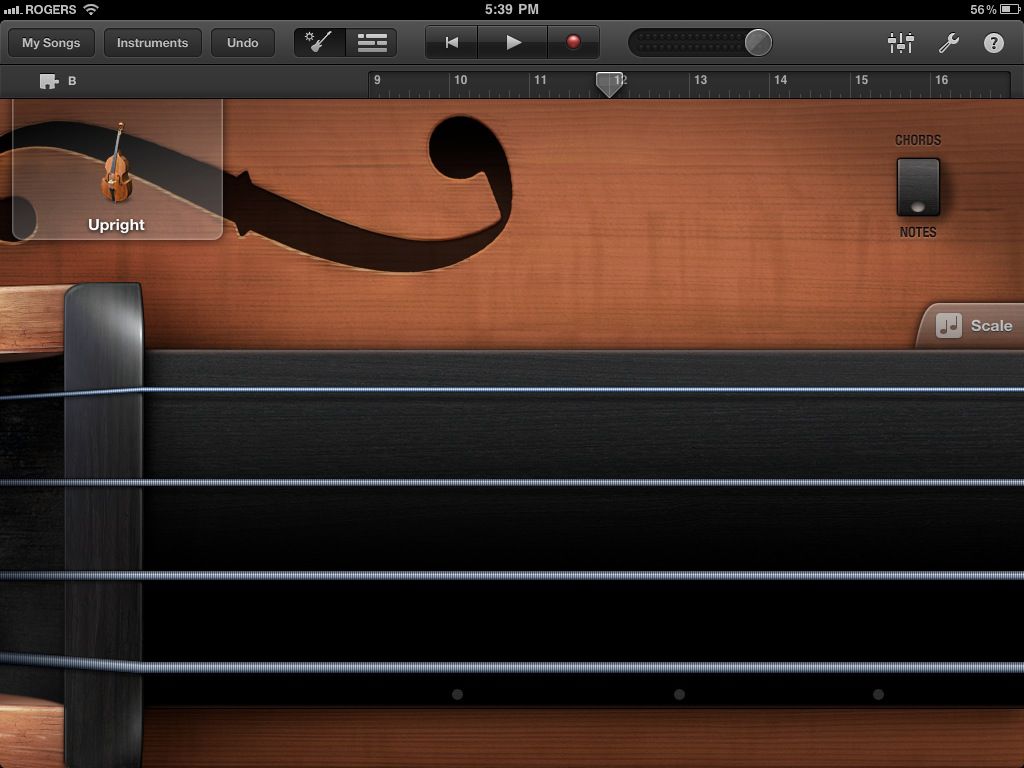
If you want any electric or acoustic bass instruments, you will need to use “Smart Bass”. Using the acoustic bass gives a feature that is hard to emulate on the KB controller unless you get good with the pitch bend wheel... sliding your finger along a fretless neck. Simply select Acoustic Bass, switch the “Chords” to “Notes” and tap on the screen. It adds some realism to the bass line and with some practice, can give some convincing results. Further editing can be done on GB on your Mac.
“Smart Guitar” is very similar to the smart keyboard and bass features with one additional feature. If you use your KB Controller, you can strike chords on your keys!Now you can use the “autoplay” feature for arpeggiated chords and “strum” chords on your keyboard. Great too for having ostinato picking patterns with multiple chord changes.
Dicas de gravação
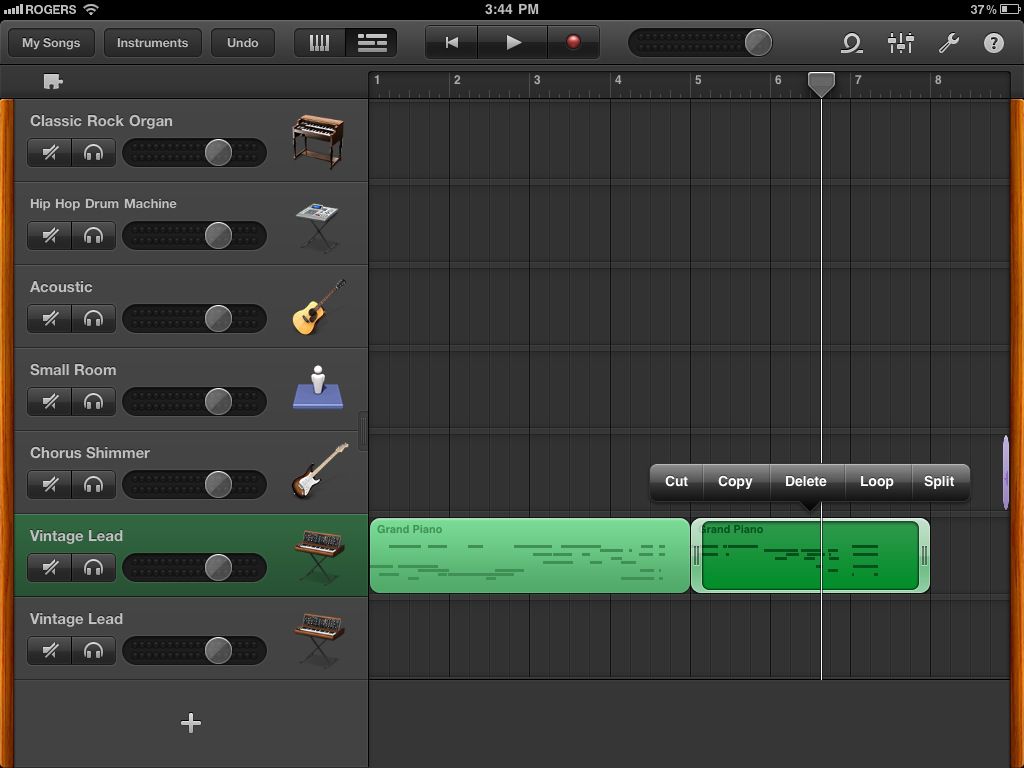
First and foremost... PRACTICE! Yes... I said that again as I did in the last tutorial. GB on the iPad does not allow editing like GB on a Mac . Not even MIDI editing for wrong notes. Maybe in version 2... BUT... you can slow down the tempo, unlike the Guitar/Audio recording section, and speed it up after. If needed later, you can open up the song on your Mac and edit it there. You also can save time by recording repetitive parts and then looping them. Simply record your part, double tap on the track region and select “Loop”.
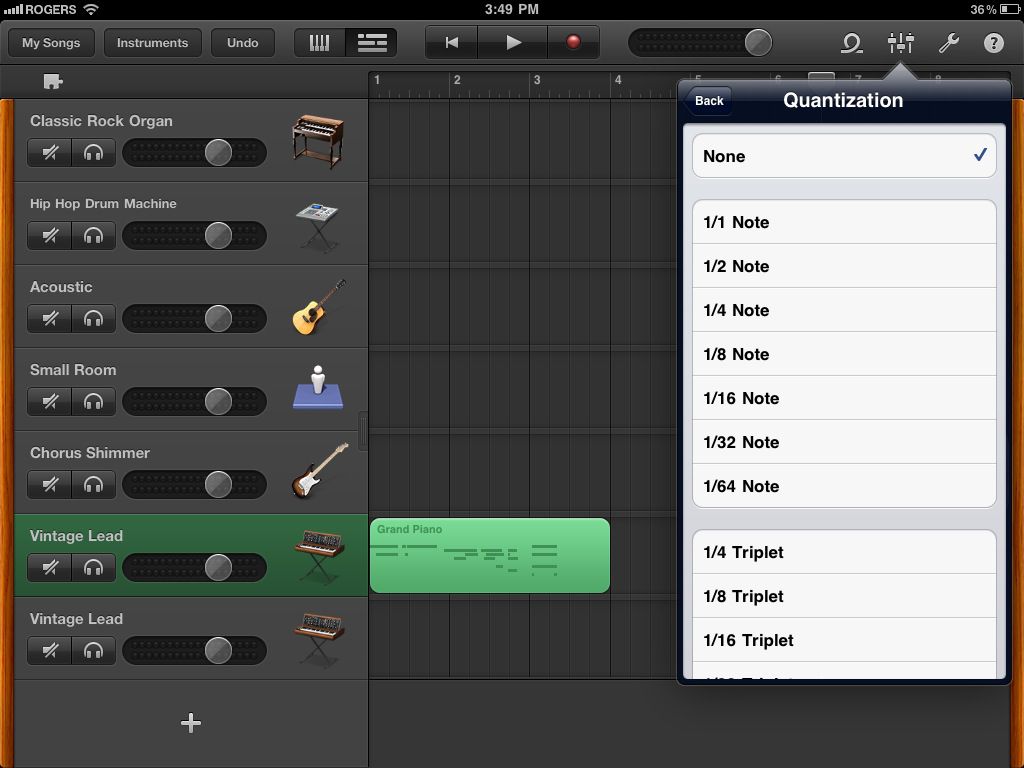
If your timing is not that great or you need to tighten up a section, “Quantization” will help. Simply tap on the top right “Mixer” in the Track view and select your quantization value. Use the fastest value you played. For example, if a lead synth line played as fast as 16th notes, use the 1/16 Note value. Quantization will also affect all of the tracks regions in a section! But... you can have different quantization on each section if a part gets moved from one section to another. Confused? Yeah... me too at first. If you quantize a part in Section A to 1/8 notes but then move it to Section B that is quantized to 1/16 notes, the new part will show “Multiple”. This is something I seriously hope Apple fixes as it’s frustrating if you need multiple quantizations within a section.
Also, don’t be afraid to record a part and try different instruments as your song may take on a whole new flavor choosing a clav instead of a piano for example. Try duplicating the track with a similar synth but with a different filter cutoff and panned hard left and right. Or use two totally different synths. Bass lines can get really fat with this idea! Slow your song down and play in your own idea of an arpeggiated pattern... speed up and loop!


Discussion
Want to join the discussion?
Create an account or login to get started!