ここに北米でNHLのプレーオフは、本格的に今あると、おそらくいくつかのロッキング臓器を再生するためにインスピレーションをYoureの!とiPad用GarageBandに我々は、気の利いた画面のコントロールを使用していくつかの素晴らしいキーボードの音を得る!だけでなく、我々は、レコーディングしていた私たちの曲でこれらのキーを使用することができますが、私は、最近のチュートリアルで説明したように、ライブで使用することも可能です!
セットアップと必要な機器
我々が必要といくつかあります。
- Controller Keyboard with power supply - There are many to choose from and I use an Axiom Pro 61. You will definitely need the power supply as the iPad does not provide power through it’s dock port. If you want to use the Korg Nano series, you will need a USB hub with power supply.
- Camera Connection Kit - Our keyboard controller communicates with GB through this device.
Axiom Proの61
Appleのカメラ接続キット
コントロール
各楽器は、独自のレイアウト(ドローバー、フィルターのコントロールとシンセとオルガン)を持っていますが、また単にキーボード上の一部の機能があり、これらは、機器が選択された状態で異なります。例えば、サスはピアノになりますが、ではない臓器、器官はすべての楽器に応じて、レスリーのためのロータリースイッチを持つことになります。
オンスクリーンキーボードを使用する場合は、キーボードコントローラを使用しようとしたものの、あなたのスクリーンのキーボードがどのように対応するためのさまざまなコントロールを得る。一番左にオクターブプラスとマイナスです。グリッサンドのための中央のボタン、再び選択したインストゥルメントと右側によって異なりますスクロール、ピッチはスケール、アルペジオとキーボードのレイアウトを持っています。
グリッサンドは、実際のキーボードと同じようなキーを介してスライドさせることができます。彼の手の甲を使用し、キーを上下にスライドさせたり、ピアノ奏者考える。
スクロールは、音符を再生することができますし、それを押しながら、キーボードを上下にスライドさせます。あなたがすぐにオンスクリーンキーボードの異なるオクターブに取得する必要がある場合に便利です。
ピッチは、ピッチベンドホイールのようなものですが、単に指をスライドしてノート間のピッチの上下することができます。ビンテージシンセのために大きい!
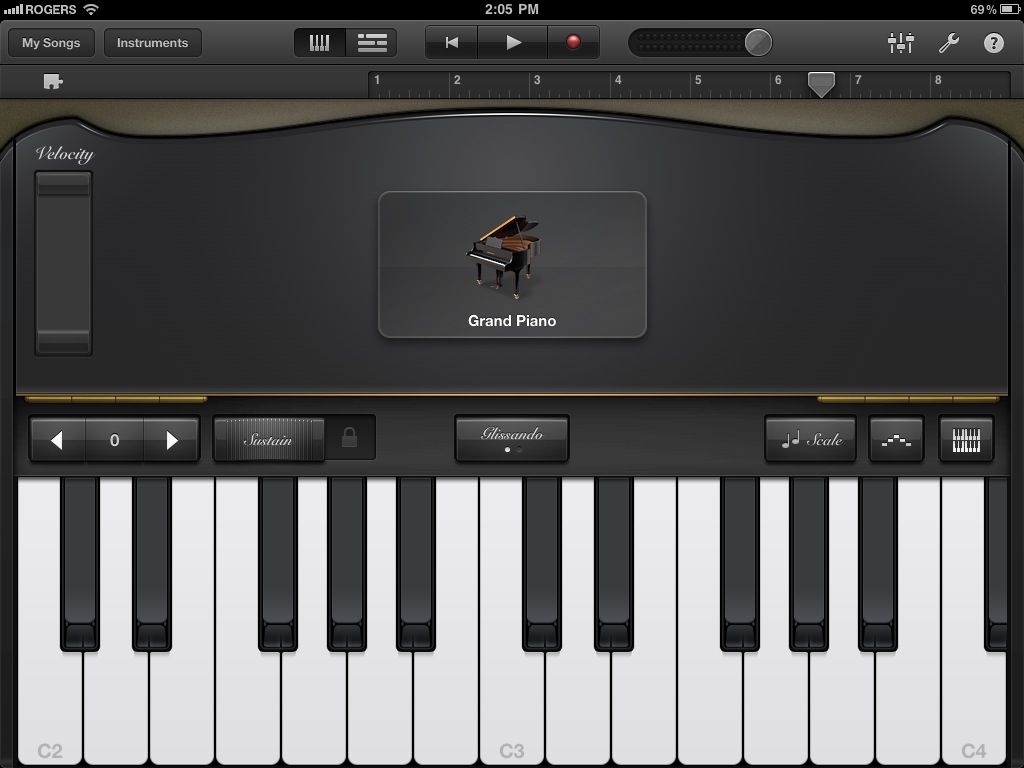
あなたが音楽の一部に異なる鳴らしスケールを試してみたい場合スケールはソロに最適です。一度あなたが使用したいスケールを選んで、キーボードは多くの単一の行マリンバマイナス#/ Bのキーのようになります。もしキロバイトコントローラを使用する場合でも、利用可能なすべてのノートを持つことになりますが、ノートはiPad上でそれらを再生し、キーボード上に照合することによって使用されているかを学ぶことができます。 Youllはすぐに簡単にクレズマーを演奏する!
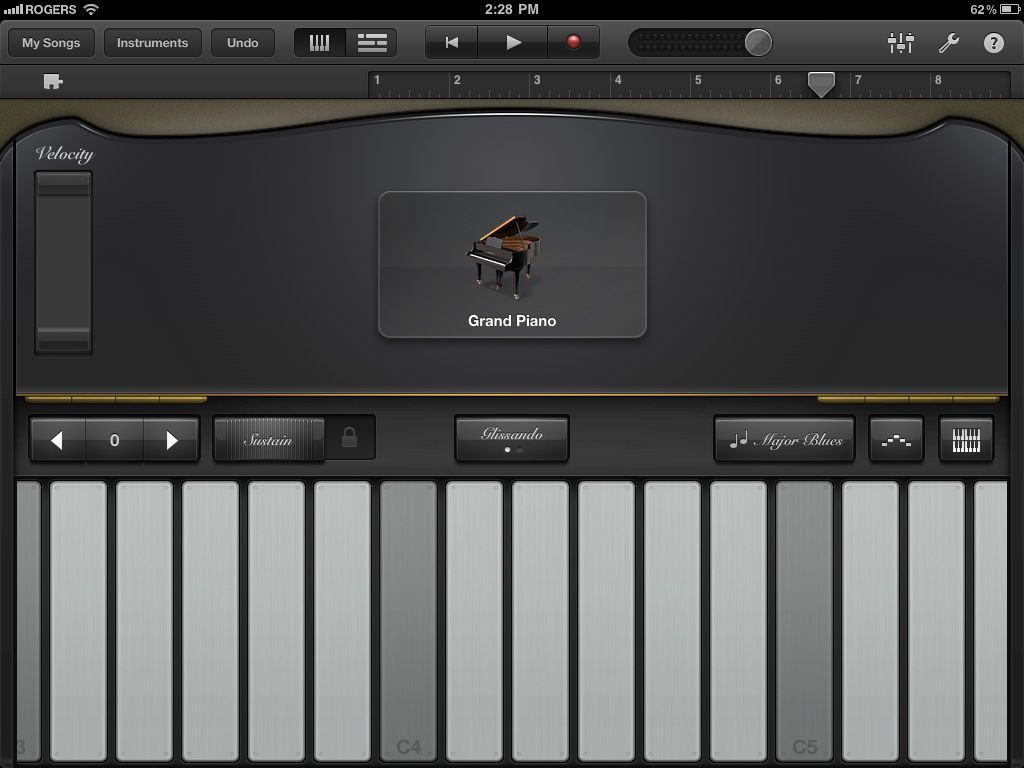
アルペジエーターには、押されone和音で複数のノートを演奏したりする自由です。あなたは、ノートの順番、速度、およびオクターブの範囲を選択することができます。ダンス曲やティーンエイジウェイストランドのバージョンのために大きい!残念ながら、アルペジエーターは、KBのコントローラでは動作しません。
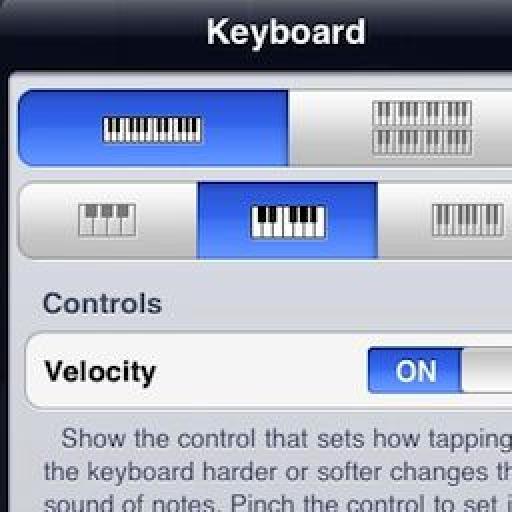
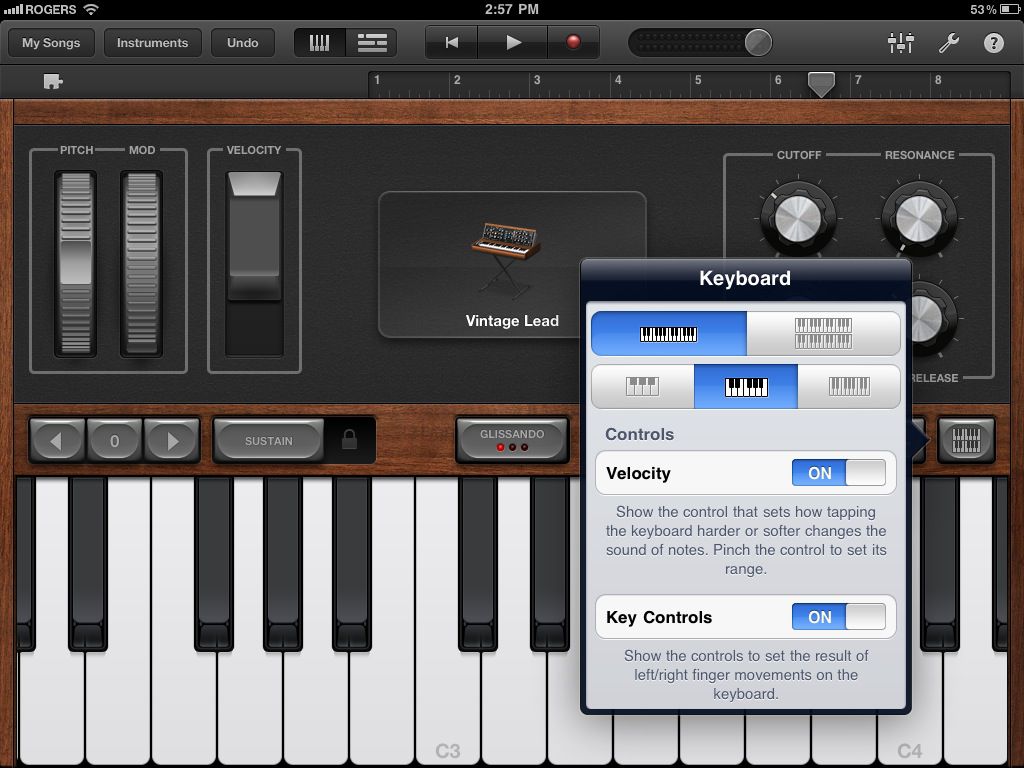
“Keyboard Layout/Velocity/Key Controls” - You can choose how you would like the onscreen keyboard to be set up with choices for one or two keyboards and octave range.
“Velocity” on and off is simple enough but you also can control the velocity range depending on the instrument (no velocity for organ since there is none!) left to the middle of the screen.
“Key Controls” simply turns on and off the view of the middle button for “Glissando”, etc.
There is also a hidden feature that is very cool and similar to an aftertouch on a KB controller. Load in the “Vintage Lead” preset under “Synth Lead” and strike a note. Now move your finger up and down that note... instant filter sweep!
キーボードコントローラ
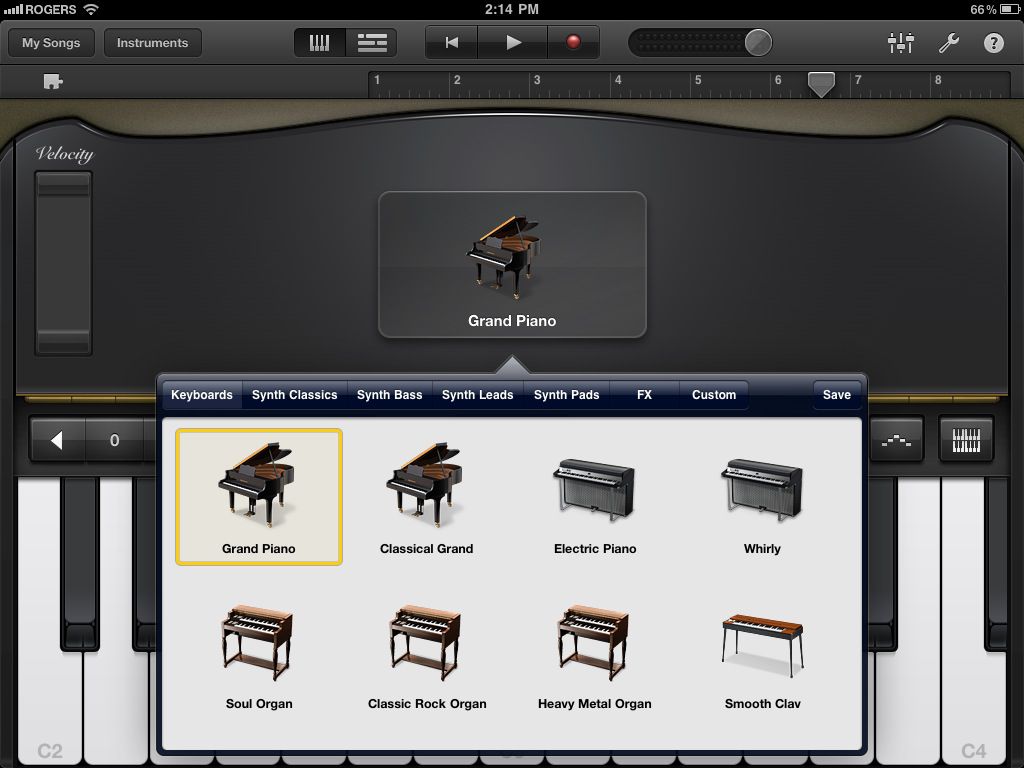
Plug your keyboard into your Camera Connection Kit and make sure it’s secure as I find it can pop out easily. If it does, you may need to restart your iPad to get control again. Open up GB and navigate to the “Keyboard” instrument. Once this opens you can then select from pianos,organs, synths, etc. by tapping on the instrument in the middle of the screen. You can even store your own presets.
Again, think of the iPad screen as the controls for the organs drawbars or synths filters. Unfortunately GB won’t record this data during recording. Pitch bend and Mod wheels will respond on your controller as will velocity and after touch. Also, there are no ways to assign a KB controller’s sliders or knobs to say, organ drawbars or synth knobs, although I did find my “master” slider with MIDI CC#7 controlled instrument volume.
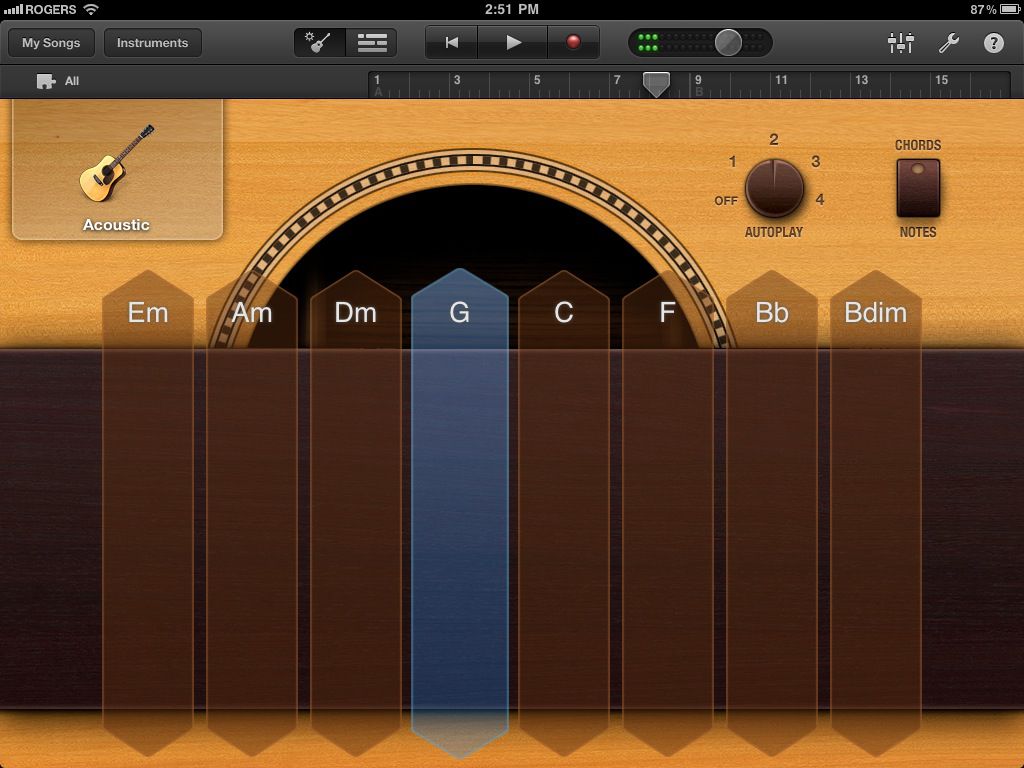
スマート楽器を使用する
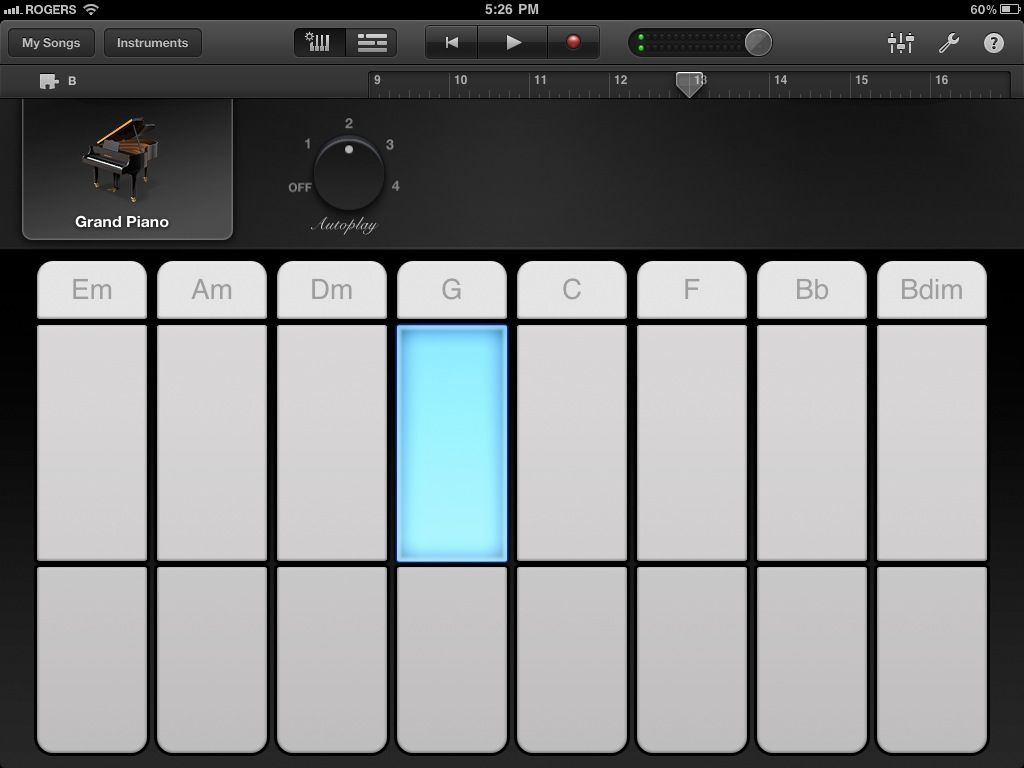
One feature I wish GB would allow is the use of “autoplay” but controlled via the KB controller. But there are some interesting ideas you can do by combining the “autoplay” feature and your keyboard. For example, select “Smart Keyboard” and choose one of the 4 “autoplay” modes. You then will see 3 bars with a chord on the top bar. The bar with the chord plays both left and right hand accompaniments, the middle bar is right hand only and the bottom is left hand bass. If you hit the top bar, you could solo on the KB controller. The middle bar could allow you to try bass combinations such as G-G/F-G/E or perhaps a piano bass line with a distinctive melody. Be careful though as the sustain is used most likely and can mush up your sound in the bass line. Using the bottom bar would allow you again more right hand solos or your own accompaniment.
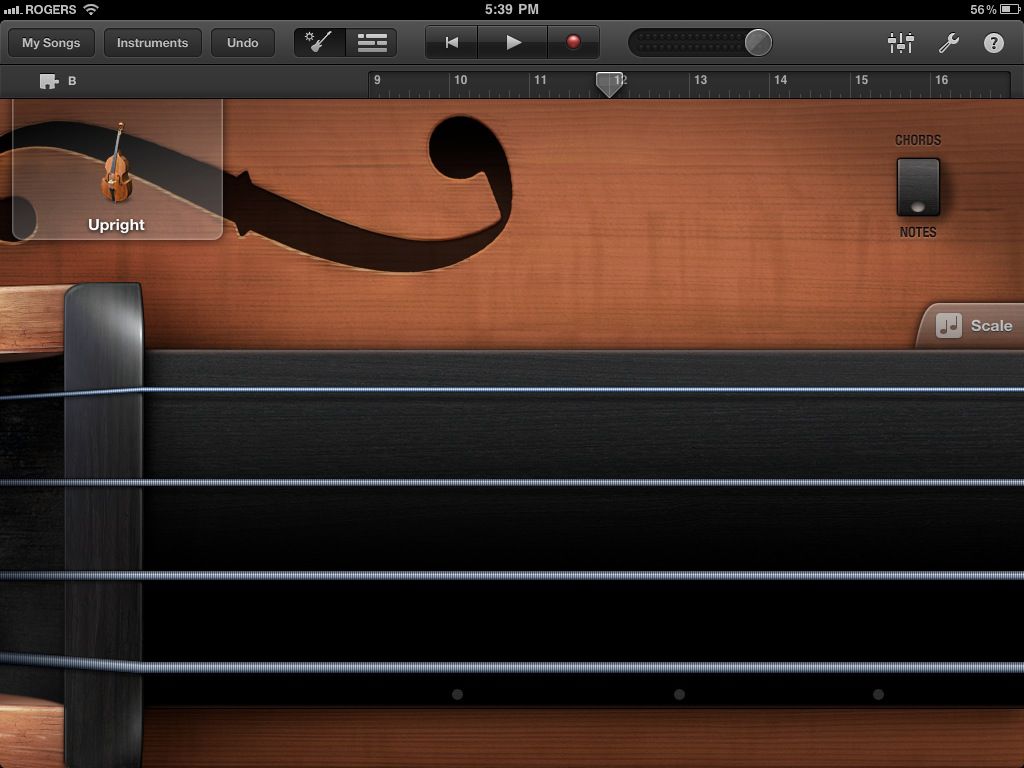
If you want any electric or acoustic bass instruments, you will need to use “Smart Bass”. Using the acoustic bass gives a feature that is hard to emulate on the KB controller unless you get good with the pitch bend wheel... sliding your finger along a fretless neck. Simply select Acoustic Bass, switch the “Chords” to “Notes” and tap on the screen. It adds some realism to the bass line and with some practice, can give some convincing results. Further editing can be done on GB on your Mac.
“Smart Guitar” is very similar to the smart keyboard and bass features with one additional feature. If you use your KB Controller, you can strike chords on your keys!Now you can use the “autoplay” feature for arpeggiated chords and “strum” chords on your keyboard. Great too for having ostinato picking patterns with multiple chord changes.
録音のヒント
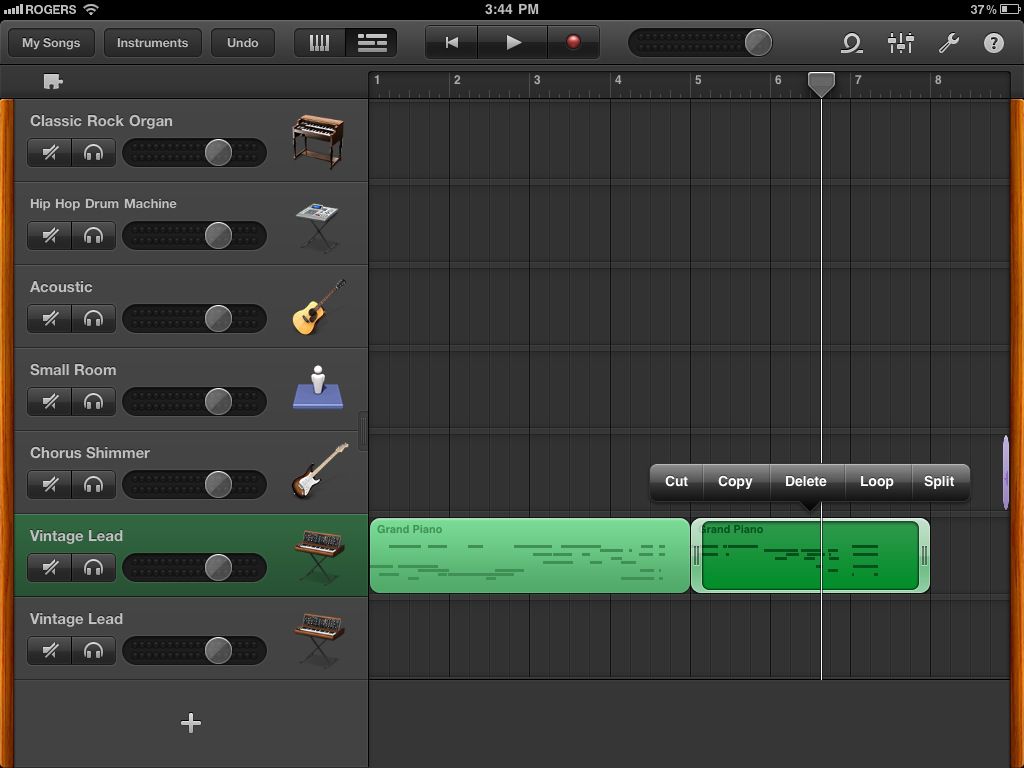
First and foremost... PRACTICE! Yes... I said that again as I did in the last tutorial. GB on the iPad does not allow editing like GB on a Mac . Not even MIDI editing for wrong notes. Maybe in version 2... BUT... you can slow down the tempo, unlike the Guitar/Audio recording section, and speed it up after. If needed later, you can open up the song on your Mac and edit it there. You also can save time by recording repetitive parts and then looping them. Simply record your part, double tap on the track region and select “Loop”.
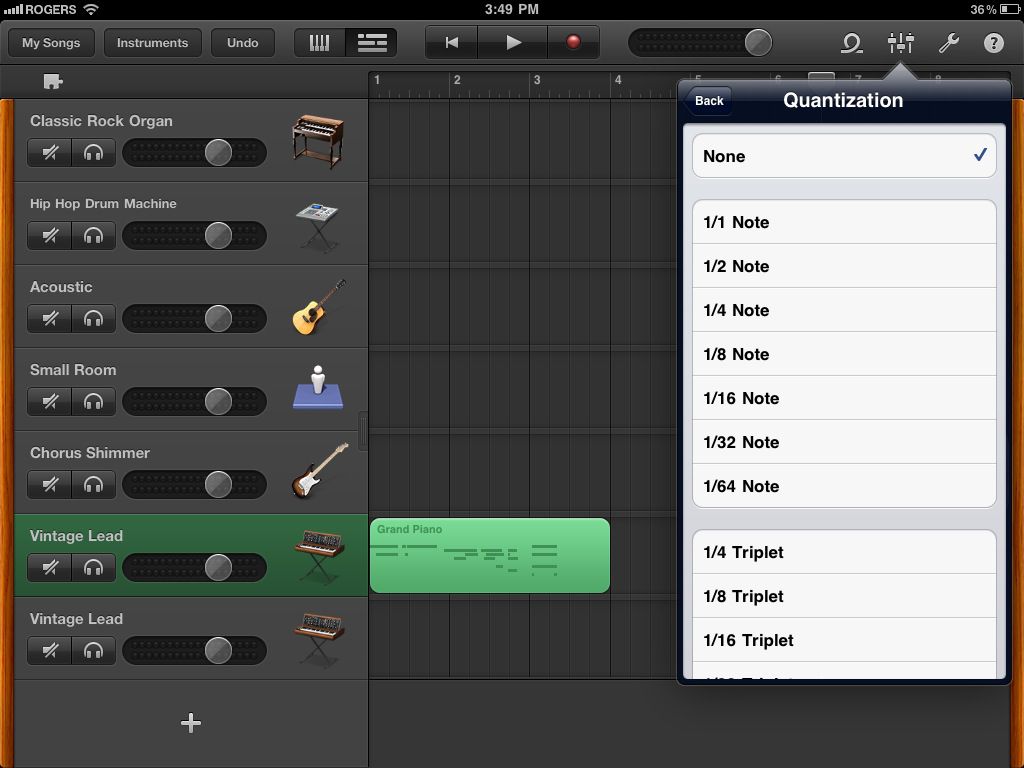
If your timing is not that great or you need to tighten up a section, “Quantization” will help. Simply tap on the top right “Mixer” in the Track view and select your quantization value. Use the fastest value you played. For example, if a lead synth line played as fast as 16th notes, use the 1/16 Note value. Quantization will also affect all of the tracks regions in a section! But... you can have different quantization on each section if a part gets moved from one section to another. Confused? Yeah... me too at first. If you quantize a part in Section A to 1/8 notes but then move it to Section B that is quantized to 1/16 notes, the new part will show “Multiple”. This is something I seriously hope Apple fixes as it’s frustrating if you need multiple quantizations within a section.
Also, don’t be afraid to record a part and try different instruments as your song may take on a whole new flavor choosing a clav instead of a piano for example. Try duplicating the track with a similar synth but with a different filter cutoff and panned hard left and right. Or use two totally different synths. Bass lines can get really fat with this idea! Slow your song down and play in your own idea of an arpeggiated pattern... speed up and loop!


Discussion
Want to join the discussion?
Create an account or login to get started!