Flex was introduced into Logic Pro in version 9, and allows the user to treat audio as if it were as flexible as MIDI information. This includes the ability to quantize, and makes it an ideal tool for fixing drums. In a previous tutorial we have looked at how this is done by separating each region at individual transients, but this method allows the user to keep all regions intact, dealing instead with the events inside those regions.
Workflow Choices
For shorter drum performances played reliably to a click track you can skip straight to the next section, but if the performance you are working with contains any events that you consider will get 'pulled' in the wrong direction by quantization (which will happen if the drummer has strayed more than half the quantize value away from the chosen grid) then you will need to do one of the following:
- For shorter performances that were performed to a click track whose tempo you don't know (say you have been sent the drum recordings as audio files):
- Select the whole performance
- Choose Option > Tempo > Adjust Tempo Using Beat Detection
- Check the resulting tempo and click OK
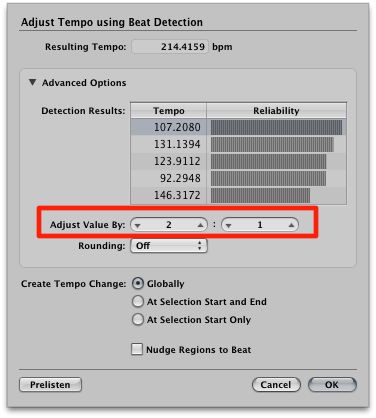
Using 'Adjust Tempo Using Beat Detection' may require some adjustments if the tempo found is not what you were expecting!
If the performance strays from the chosen tempo in the above example, or for longer performances where you don't have a click track, wasn't played to a click track, or if the drummer couldn't stay in sync with the click reliably, try the following:
Step 1 - Divide the audio into usable sections
This task is much easier to deal with if the project is divided into meaningful musical chunks (verses, choruses, etc.). Typically these are 4, 8 or sometimes 16 bars long. There are several ways of doing this in Logic Pro, perhaps the crudest being to select all regions (Command-A) and use the scissors tool, but here is a method that relies less on your eyesight:
Lock the SMPTE position of all regions. While this is not strictly necessary until step 2, it's a good idea to avoid the effects of careless mouse movements. So, select all (Command-A) and from the local menus choose Region > SMPTE Lock > Lock SMPTE Position.
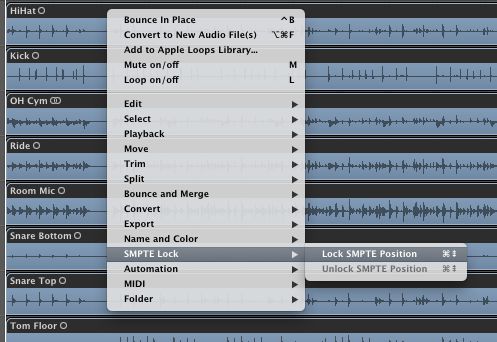
You can also access the Lock SMPTE position command by right-clicking on selected regions.
Click with the Marquee tool in a region and drag to extend the Marquee selection onto the other drum tracks. Use the arrow keys to move the Marquee to the appropriate transient.
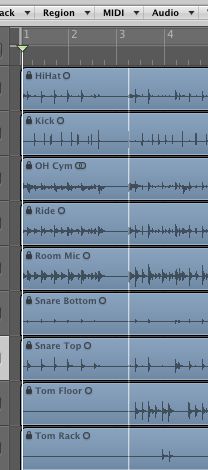
Navigating to transients.
Use Command- to 'Split Regions/Events by Locators or Marquee Selection').
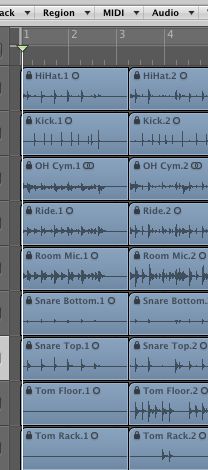
Split Regions by Marquee selection.
Note that if you locked the regions before dividing, all subsequent divisions will result in locked regions.
Step 2 - Set the tempo for each section
Whether or not the drummer played to a click track it is likely that the local tempo varies slightly (or a great deal) from the expected tempo. In order that the start of each section falls squarely on the first beat of the appropriate bar you will need to discover the tempo of each section, as follows:
Set the Cycle area to the intended length of the selected region (in bars and beats). It is very important that the cycle area is set to the intended length and not the actual length of each section otherwise all the tempos you create will be the same!
Choose Options > Tempo > Adjust Tempo using Region Length and Locators (normally, Command-T). If there is a region at the very beginning of the Project choose 'Globally'; for subsequent regions choose 'Create'.
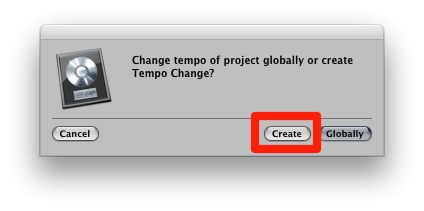
Adjust the tempo using region length and locators.
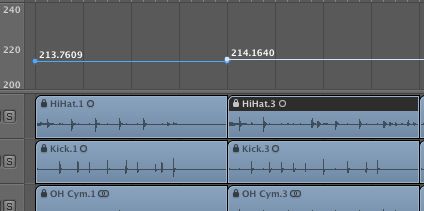
Tempo drift.
Step 3 - Phase-Lock the Audio
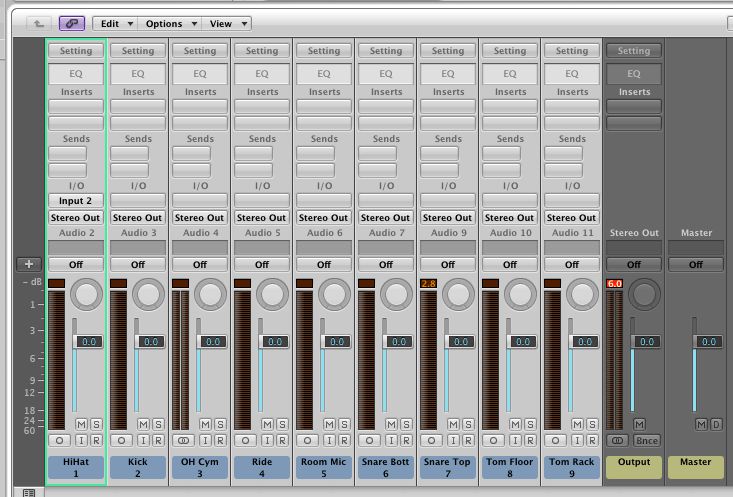
Before you start quantizing it's a good idea to 'phase-lock' the audio. You can do this by assigning all the drum tracks to a group in the mixer.
Select all the channels for the group.
Select all channels for the group.
Click on the Group slot on one of the selected channels and choose an unused group from the list that appears. In the Group Settings window, tick the 'Editing (Selection)' box and make sure the 'Phase-Locked Audio' box is ticked
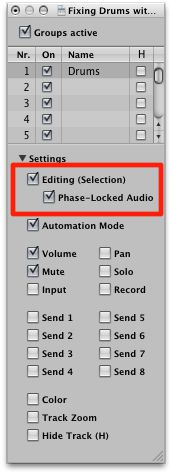
Phase-Locked Audio ticked.
All tracks in the group will gain a green 'Q', meaning that all regions in that track will contribute their transients as reference points during the quantization process. If you don't want regions on that track to be used as a Q-Reference, click the Q button on the track header. The timing of these tracks will still be adjusted, but with reference to regions on those tracks that are still selected as a Q-Reference.
Step 4 - Putting the Audio into Flex Mode
There are several ways to turn on Flex Mode for the tracks that belong to the group you have created, but perhaps the quickest is as follows:
Click the Flex button in the toolbar then select the appropriate Flex mode on the track header of one of the tracks in the group.
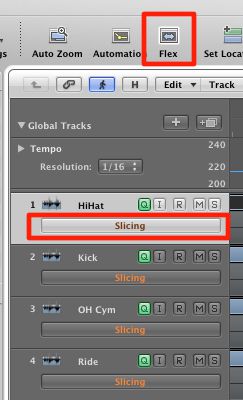
The Flex button in the toolbar and where to choose the Flex mode on the track header.
For drums, two of the choices appear to be appropriate:
- Slicing: this option slices the audio at transient markers but will not apply any time compression or expansion when it is moved, as happens when quantizing. If you open the Track Parameters for any track in the group you will find three parameters that the relate to this function:
- Fill gaps: this turns the decay function on or off
- Decay: this sets the longest time allowed for filling in the gaps that result from moving audio
- Slice Length: this can shorten slices to remove any pre-attack sounds present at the tail end of the preceding slice
Usually, the defaults work fine!
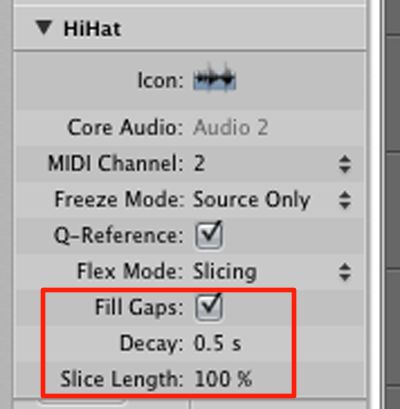
Flex mode options in Track Parameters.
- Rhythmic: although it sounds appropriate for drums, this mode is designed for things like rhythm guitars, and will apply time compression & expansion when events are moved, so is not as suited to drums as Slicing mode. The Rhythmic mode will tend to create phase-related artifacts between transients.
Step 5 - One Tempo
At this point you might decide that it will be easier to move forward with the Project (say the drum tack is the starting point for further recording and/or composition) by unifying the tempo:
Click the Lists button in the Toolbar and choose the Tempo tab. Select and delete all tempos except the first one.
Next change the tempo to the one you require. This might be an average of all the tempos you discovered, or the tempo that you know the Project is supposed to be running at (if you were returning fixed drums to the studio who sent them to you, for example).
Creating one unified tempo will time-compress some sections, and time-expand others.
Step 6 - Quantization
To apply quantization, simply go to the Region Parameters box in the Inspector for the selected regions and choose the appropriate value. Remember, this is a real-time process so you can change the Quantize value at any time or even turn it off to return your drum timing to its naturally recorded state.
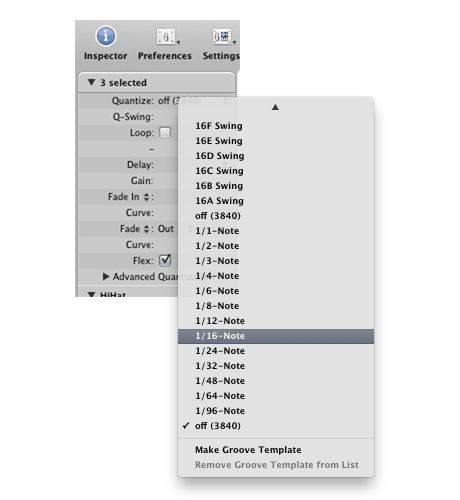
Quantize Audio as if it were MIDI.
Want more Logic timing tips? Watch Logic 104: Flex Time Editing and flex (sic) your musical muscles.



 © 2024 Ask.Audio
A NonLinear Educating Company
Discussion
Want to join the discussion?
Create an account or login to get started!