
Whether it be on the radio, or within a club, it’s hard to miss Flume’s hit “Never Be Like You”. The minimalist mix is dialed in, and I really love the way the drums sit. I thought it might be fun to go over how to build some of the synths in the arrangement, as well as some routings that will allow you to incorporate some of the modulation tricks that were used in this tight, tight track.
Listen/watch "Never Be Like You" by Flume here:
Step 1. Arp
Obviously, if you could take a couple of the instruments in this track, one of them would have to be the opening arp. It’s beautiful and adds an amazing feeling to the overall atmosphere.
A great beginning patch to build our arp from would be from one of the included Glockenspiels hiding within the bowels of the Reason Factory Soundbank. A quick way to uncover this patch is to use the Command-i (Mac)/Control-i (PC) shortcut to do a search, with the end goal of creating this instrument within your set. After pressing the Command-i (Mac)/Control-i (PC) shortcut, select the Reason Factory Soundbank, and type Glock.
Now, play a Glock in Reason, but to play the bells as fast as they are playing in the original Flume track, you’re going to want an arpeggiator, or you’re going to want to spend some time programming. In this tutorial, we’re using an Arpeggiator. Directly underneath your newly created NN-XT, go ahead and drag an RPG-8 directly underneath it from the Instruments panel, within the browser.
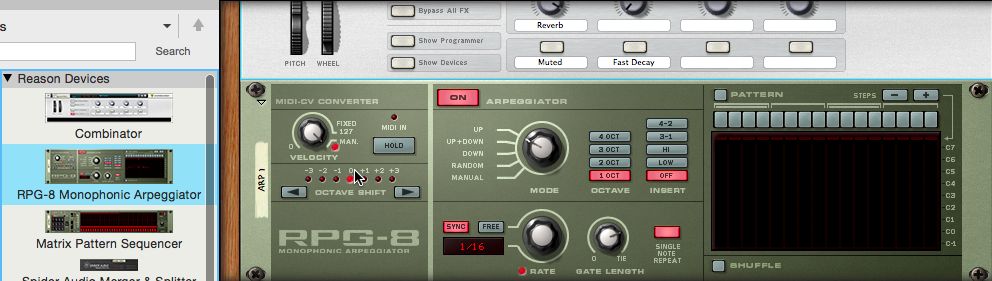
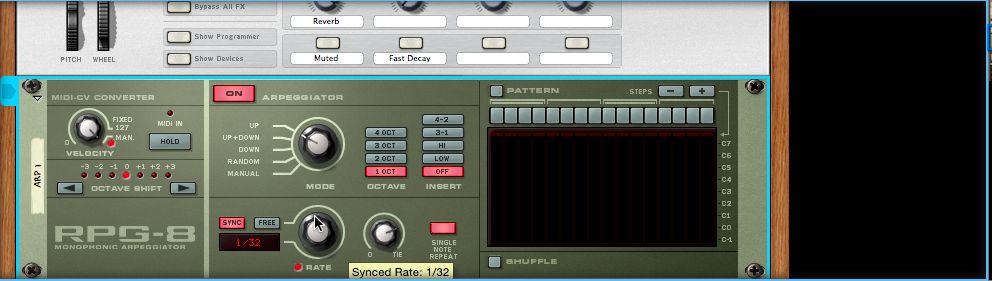
Okay, if you play the keyboard now, around C Maj, you’ll notice there are some great similarities. But the timing isn’t quite dialed in. Let’s go ahead and increase the Rate of RPG-8 to a 32nd note resolution...
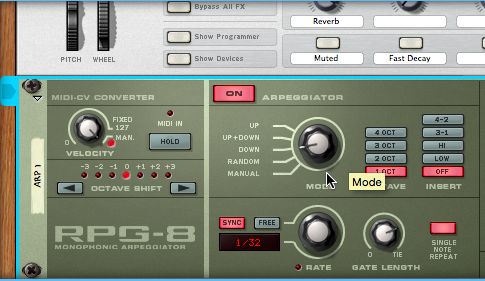
You’ll notice, when you play the beginning of ‘Never Be Like You’, that there are, in fact, a couple of bell arps going on at the front. To my ears, the bells sound like they are moving down, within the arp pattern. So, to increase the similarities, go ahead and adjust the RPG-8 Mode to Down, and take a listen...
Alright, we have a close cousin to the original, now. Let’s go ahead and build that...
Step 2. Pad
Directly underneath the RPG-8, go ahead and create a new Thor, by dragging it into the Rack, from the Instruments panel, within the Browser. Or, double-clicking Thor, within the Browser.

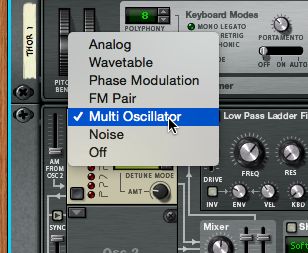
Within the Thor Programmer, switch your first Oscillator over to a Multi Osc. This particular oscillator is awesome for warm, thick pads because of its ability to detune, internally, between its own doubled tones. This means you don’t have to double 2–3 analog oscillators! Select this oscillator by clicking on the small arrow button, within the Oscillator 1 slot and select Multi-Osc.
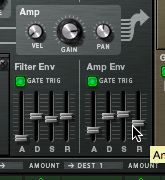
Next, to make it sound more like a pad, let’s increase the Attack, within the Amplitude Envelope section of Thor, to 69.8 ms, and the Release to 1.50 s. This gives you a pretty quick attack for definition when playing. And, with the extended Release setting, you’ll have enough release between notes, while playing to keep things smooth.
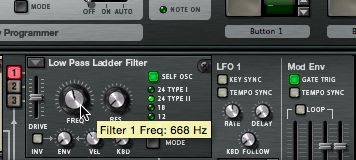
And, just to give our bells some space, let’s go ahead and lower the Low Pass Filter of Thor, down a hair, to 668 Hz.This will cut those high frequencies within our burgeoning warm pad so that our bells aren’t totally drowned out, and gives us room for vocals!
Alright, now let’s hear it in context...
Granted, it’s not exact. But it does fill in that frequency range. And, once you start adding effect, and EQing a little, who’s going to know the difference? Now, we just need those additional...
Step 3. Strings
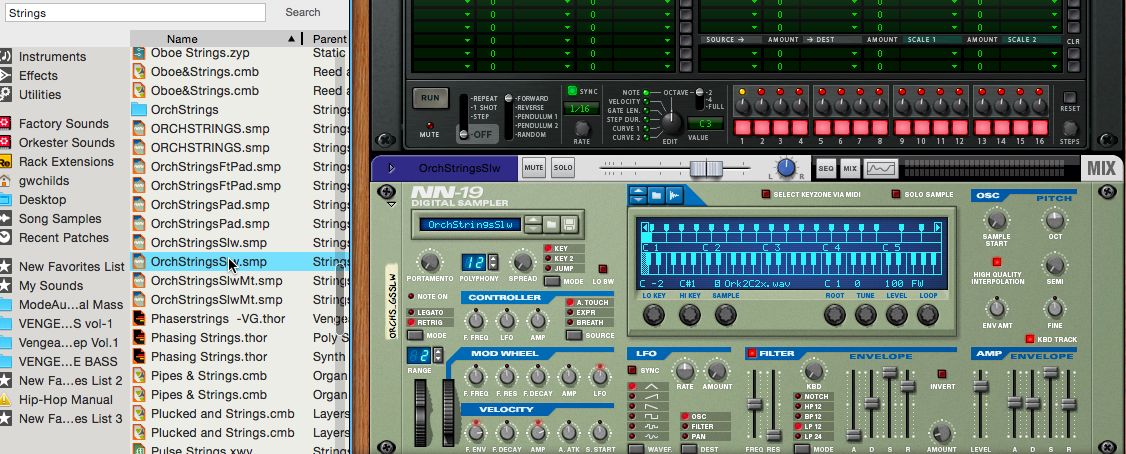
After the warm pad comes in with the bells, the next instrument to enter the picture would be that lovely string patch. Thankfully, Reason is full of sampled string patches. The one that I found sat the best, and closest to Flume’s is the Orchestral Strings Slow patch, from the old, NN-19 collection. To find this patch, use the Command (Mac)/Ctrl (PC)-I shortcut, and search the Reason Factory Soundbank for Strings. Choose OrchStringsSlw.smp, within the browser, by double-clicking!
Here’s an audio example, which is a little out of context, as I don’t have the vocals. But I think you’ll recognize the progression.
Okay, now for the fun part, that crazy filter modulation that goes on in the chorus of, Never Be Like You. Let’s check this out, now.
Step 4. Filter, yo!
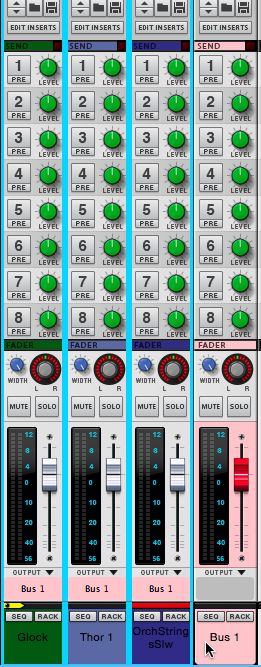
In the mixer, I’m going to group all the tracks I’ve created, thus far. I do this by holding down the Shift button, and then clicking each of the Mixer channels, within the mixer.
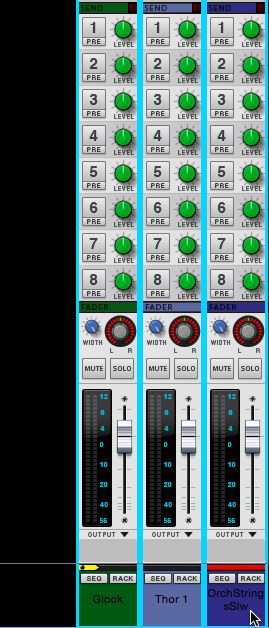
Then, I’ll use the Command-G (Mac)/Ctrl-G (PC) shortcut to group all of the selected tracks. This part is key, because what we really want to do is route all of the beginning instruments into one filter, so that we can modulate it, and tweak half of the arrangement’s frequency on a moment’s notice, just like Flume.
Okay, let’s create that filter. I’m going to actually use the Pulversizer for this operation, and it is both a filter, and a modulator. Within the Reason Rack, I’ll create a Pulversizer, by dragging it down under the new Mix Bus 1.

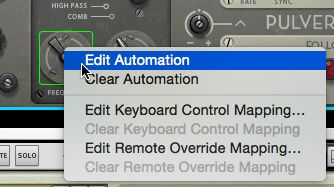
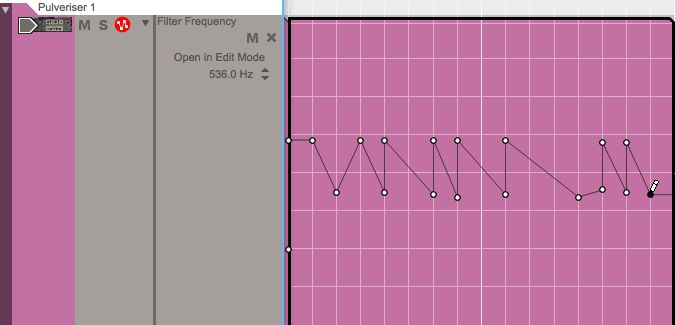
Now, when you lower the frequency, while all of these parts are playing, you’ll notice that filter sweep effect that takes place right after the chorus starts. And, of course the sweep effect is important. But the pattern is even more important. There are a lot of ways to create this kind of modulation. But the way that Flume did it is so organic that I just drew it in by right-clicking on the Filter Cutoff Knob of the Pulverizer and selecting Edit Automation.
And then, in the Sequencer pane of Reason, I’ll draw in a segment of automation that is rhythmic, and matches as close as I can get to Flumes.
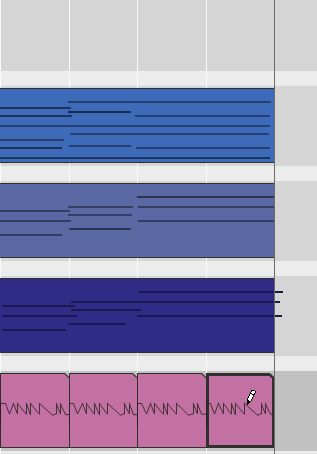
And, when I have close, rhythmic pattern, I'll option-drag this sequence of automation over a few times so that I have plenty of repetitions.
Let’s hear it in context now, with some extra drums I threw in, on the Main Output (different bus from synths).
See? Not that hard to do, at all! Granted, the modulation isn’t exact. But you get the effect. The ability to group tracks in Reason makes this kind of operation a cinch. And, don’t forget you can use other instruments to modulate Pulveriser, too. Just imagine what you could do with multiple busses going into filters, modulating all over the place?!

Discussion
Want to join the discussion?
Create an account or login to get started!