
Every once in a while, I hear someone defend the notion that Ableton Live “just doesn't sound as good” as other DAWs—despite numerous tests having proven that Ableton's summing engine delivers identical output to that of other top-end DAWs. However, it's true that many tracks produced in Live don't in fact sound quite as good as what might come out of other DAWs, but this has nothing to do with the program's summing engine: believe it or not, it's 100% user error.
How so? If you're using audio in Live, chances are you're warping it—if you don't, it won't play along with the project tempo. The problem is, for one reason or another, many Live users haven't wrapped their head around the different warping modes, and when to use which one. This tutorial aims to shed some light on an under-appreciated facet of Live's fundamental audio functionality with the goal of optimizing the fidelity of your productions—and showing off some handy sound design tricks along the way.
Warp Drive
Warping is Ableton's catchy name for their proprietary time-stretching system which analyzes the audio in your clips and aligns the peak impacts, or transients, with musical intervals so that it plays back “in time” with the other clips in your set, synchronized to your global tempo. If warping is deactivated for a particular clip, it will play back at its original tempo with complete disregard for the timing of the rest of your production—usually not a good plan, especially for rhythmic elements. In most cases warping is engaged automatically, in particular for shorter loops; in all cases, it's non-destructive: the original audio files remain unaltered.

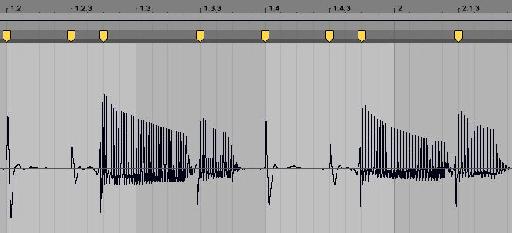
Drum Break—a perfect opportunity for Beats Mode. The Warp On/Off toggle, Warp mode selection menu, and Warp settings are located in the Sample editing area to the left of the Clip detail waveform.
There are currently six Warping modes in Live: Beats, Tones, Texture, Re-Pitch, Complex, and Complex Pro. By default, clips will be warped in Beats mode, though this can be changed in the Record/Warp/Launch tab of the preferences pane. With the advent of the Complex and Pro modes, many users assumed these were the best modes to use generally across the board, but that's actually not the case: these modes are designed to warp songs that feature dense harmonic and rhythmic content with minimum time-stretching artifacts, but may provide strange results when used outside that context.
Beat Poetry
Beats mode is more flexible than you might expect. Optimized for any audio with strong rhythmic transients—drum beats, percussion, and most electronic music tracks—it's based around preserving detected transients or rhythmic intervals and then handling the audio between transients in a few different ways.
Take a basic drum loop and warp it in Beats mode. Beneath the Warp button, there's a display, Segment BPM, that indicates the detected BPM of the original audio file. If this detected BPM is significantly higher than your project's BPM, you may notice digital artifacts that don't sound very natural.
To accentuate these artifacts for the sake of understanding the Warping mode, you can click the *2 button below the Seg. BPM display; this doubles the detected BPM, meaning the clip will play back in half-time, with each transient stretched twice as far; if you want to return to the original BPM later, just click the :2 button just to the left of that to cut the Seg. BPM in half and return it to normal playback speed. To highlight these artifacts even further, move the Transpose dial up 12 semitones—at this point your drum clip should sound at least a little bit odd.
Currently the drum loop is playing back in the default mode: preserving Transients, selectable from the Preserve drop-down menu (located just below the Warp mode drop-down menu), with each transient looped forward then backward in a continuous loop until the play marker reaches the next transient. At compatible BPMs, this results in smooth playback, but when you're warping something quite far from its original BPM, you'll want to adjust the transient preservation settings to avoid obvious digital stretching artifacts.
The other transient looping mode—shown in the menu just below the left side of the Preservation selection drop-down menu – is represented by two right-facing arrows and plays the transient forward over and over, without the backward playback in between, resulting in a slightly less smooth sustained tone.
However, the final mode, looping off—designated by a single right-facing arrow—is the most useful when Warping a loop far from its original tempo. If you've gone through the steps above, you'll now hear your drum shots play, then end with a bit of a stutter between them as the transients go full-stop. To the right of our transient playback mode selector is an orange box you might have noticed with the number 100 in it; this value refers to the slope of a decay envelope we can impose on our transients, meaning that as we click that box and drag down to reduce the value, our transients fade out more smoothly, leaving cleaner space between them. Bringing the value down to 0, we only hear the very first click-y onset of each transient—which can be employed creatively to generate minimalist, skeletal drum loops. Adjust to taste, and you'll have a much cleaner sounding drum loop than you could achieve leaving the default Beats mode settings untouched.
LISTEN: Drum Loop 1—slowed-down half-time drum loop transposed up one octave with default settings; digital and noisy sounding.
LISTEN: Drum Loop 2—slowed-down half-time drum loop transposed up one octave with adjusted transient playback settings; clean and natural sounding.

Drum Loop slowed-down, at half-time, with adjusted transient playback settings.
PRO-TIP: Rather than preserving transients, try selecting different rhythmic intervals such as 1/16 or 1/8 notes from the Preserve drop-down menu; to isolate the kick drums of a house or techno loop, select 1/4 note preservation and the play-once mode, then adjust the transient envelope decay as needed.
Tonality
For musical tones with a clear pitch structure such as basslines, keyboards, or vocals to name just a few examples, Tones mode is usually the ticket. Anything featuring sustained melodic or harmonic notes with less of an emphasis on strong rhythms is a prime candidate for Tones mode. This mode uses a basic granular time-stretching algorithm which slices the audio up into tiny “grains” and redistributes them as needed depending how much slower you're stretching from the audio's original tempo, or how much higher you're transposing from its original pitch.
There's only one control in Tones mode: Grain Size. You'll simply want to adjust this until it sounds right. If you bring the tempo of your project well below that of your clip and swing the Grain Size dial, you should hear a clear audible difference between the smaller (shorter) and larger (longer) grain sizes.

Bassline with Tones mode engaged.
Textural Inflection
The next mode is an extension of the granular time-stretching of the Tones mode, useful for ambience, drones, pads, noise and other sounds with little in the way of rhythmic structure or even discernible pitch contour.
Texture extends the Grain Size parameter to a far wider range, with noisy results at the smallest values and audible slices of audio overlapping each other at the largest values. This mode also comes with a Flux setting, which randomizes the order in which the fragments play back by an amount corresponding to the value here.
With larger grain sizes and extreme Flux settings, very dynamic atmospheric sounds can be generated easily—particularly when stretched slower than the audio's original tempo or played back at half-time via the *2 button, and accentuated even further when transposed above the original pitch.
PRO-TIP: Click the Rev button to reverse clip playback and create even smoother ambience while using Texture mode.
LISTEN: Wind Chimes 1—Wind Chimes played back at their original speed.
LISTEN: Wind Chimes 2—Wind Chimes played back at half-time, transposed up an octave, with a large grain size and full Flux value.

Wind Chimes stretched and warped in texture mode.
Re-Pitch
Rather than time-stretching the audio, Re-Pitch aligns transients to the global tempo by adjusting the pitch value, much like on a turntable. This is fine if you don't care whether harmonic content is in key with the rest of your project—as in, say, a DJ set—but if you do, you're best served using one of the other Warping modes.
However, drums and percussion don't tend to contain much harmonic content, and can often be warped using Re-Pitch with minimal consequences; in fact, this is how most old-school samplers adjusted loop timing, and it's the main reason why jungle and drum'n'bass loops tend to sound so pitched up.
Put a drum loop in Re-Pitch mode and bring the global tempo well below the original BPM and you'll hear it adopt a lazy, loping quality; bring the tempo well above the original BPM and you'll notice a tighter, tinnier sound as the drum sounds get pitched up. Experiment with this mode and find where it works best for you.
LISTEN: Drum Loop 3 – pitched way up.
LISTEN: Drum Loop 4 – the same loop, pitched way down.
It's (Not) Complicated
The Complex and Complex Pro modes use CPU-intensive algorithms designed primarily for full songs that include a combination of all the characteristics described above: strong rhythmic transients and clear pitch contours and ambient sounds with ambiguous pitch structures, all layered together. Unless you're DJing or working on a podcast, there's very little need for the complex modes in a typical studio context—but feel free to experiment with them, particularly at a range of tempos, in order to discern their impact on component parts and determine where they might come in handy for sound design.
PRO-TIP: When it comes time to bounce down, make sure all the audio clips in your arrangement have the HiQ button engaged for the highest quality pitch interpolation.
Maximum Warp
Warping is a context-dependent feature of Live: you need to understand the material you're working with and the available warp modes in order to squeeze the best sound quality out of your projects. If you're unsure, try a few different Warp settings to see which sounds the best—doing so may even spark some unexpected ideas along the way. Honing your Warp mode usage is a sure-fire method to enhance the audio fidelity of your productions while expanding your sound design palette along the way.
For more information on Warp modes and other secrets of Live's clips, be sure to watch Noah's course on macProVideo: Live DNA!

Discussion
Want to join the discussion?
Create an account or login to get started!