In this video tutorial, I am going to show you how to build your own unbalanced XLR to 1/4’’ TS plug which is great for guitar/speaker cables. However, these techniques can be applied to making or repairing most XLR configurations.
Common XLR cable configuration types include:
- Male to Female XLR
- Male XLR to ¼’’ TS Plug
- Female XLR to ¼’’ TS Plug
- Male XLR to ¼’’ TRS Plug
- Female XLR to ¼’’ TRS Plug
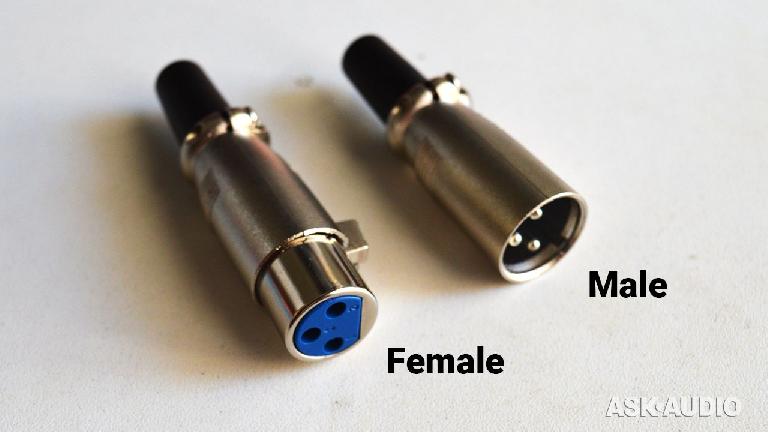
3 pin XLR connectors come in two flavors. A male and a female.
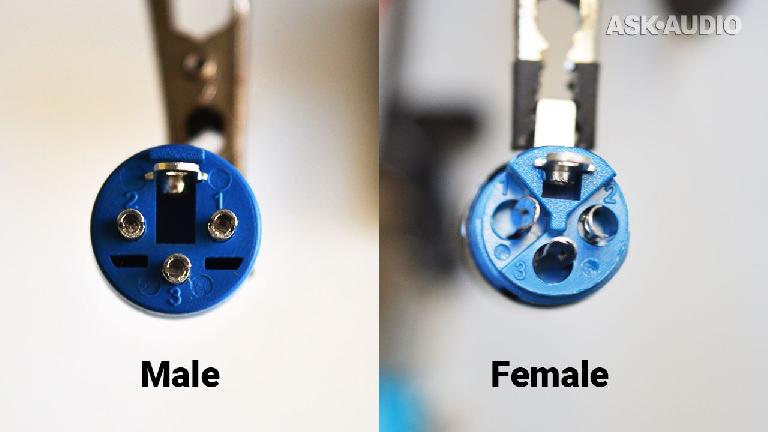
We are going to use a female XLR, but the pin scheme and bridging technique shown are the same for the Male XLR, though the 2 and 3 connector pins have inverted locations on the housings.
The XLR Pins
- Pin 1 – Shield. This is for the braided wire that surrounds the signal wire(s). Sometimes called the “drain”.
- Pin 2 – Hot. This is for the positive audio signal wire. Usually colored red.
- Pin 3 – Negative. This is for the negative audio signal wire. Usually colored black or white.
The Cord
The cord you buy will have one or two audio signal wires inside. Make sure to know which one you want. What are known as unbalanced cables will only have one audio wire and a shield, while the balanced cables will have two audio wires and the shield(s).
In the video I use unbalanced wire which is perfectly fine for small cable runs.
Check out my explanation of Balanced vs. Unbalanced audio cables.
If you are going from XLR to XLR, just solder the wires to the right pins. It’s like paint by numbers. However, in the video I go from XLR to a 1/4’’ TS plug. That makes things a little more complicated, but not much.
Bridging the XLR Pins
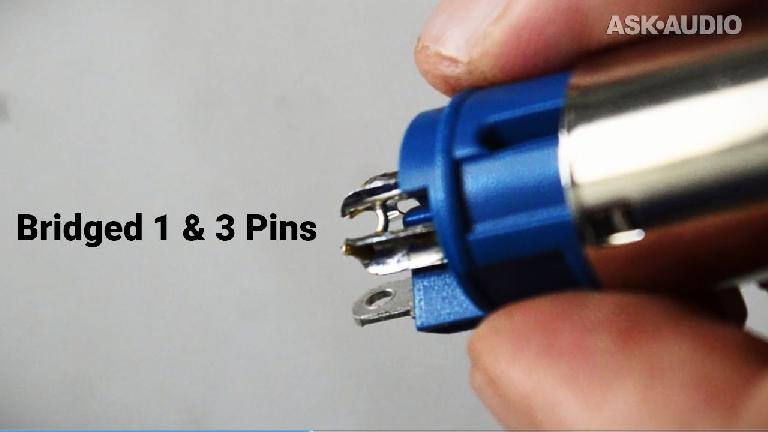
The only thing that isn’t straight forward with making unbalanced cables as opposed to balanced is that you have 2 wires (hot, shield) and 3 pins. That might seem confusing at first glance.
You need to do what is called “bridging”. That just means somehow connecting the 1 and 3 pins together on the XLR. I used single core wire, but a component lead will work too. Like a lead from an LED. Just solder the two ends to the 1 & 3 pins. That’s it.
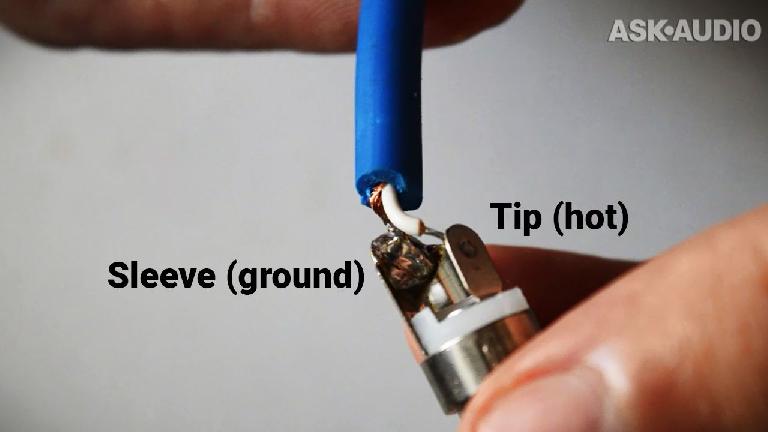
Now you connect the hot wire of the cord to the 2 pin of the XLR and the shield to the 1 pin. On the other end of the cord you will attach the 1/4’’ TS plug. Solder the hot wire to the “tip” connection. This is going to be the shorter of the two connection points. Then the shield wire gets connected to the “sleeve” which is the longer and larger of the two connection locations. This is going to act as the ground.
Pro Tips
Always remember to be careful when working with solder.
Remember to put on the runner pieces and housing of the components on the cable BEFORE soldering.


 © 2024 Ask.Audio
A NonLinear Educating Company
Discussion
Want to join the discussion?
Create an account or login to get started!