
1—Start with a Combi
Rather than starting with a single drum instrument we’re going to layer up a few different modules inside a Combinator to make something really special. Start by creating a blank Combi from the Utilities menu. Then inside this Combi, drop a Line Mixer 6:2. This will enable you to create subsequent devices and have them automatically submixed before being sent to the Combi’s outputs. If you didn’t do this step, only the first instrument you created would get its audio routed correctly.

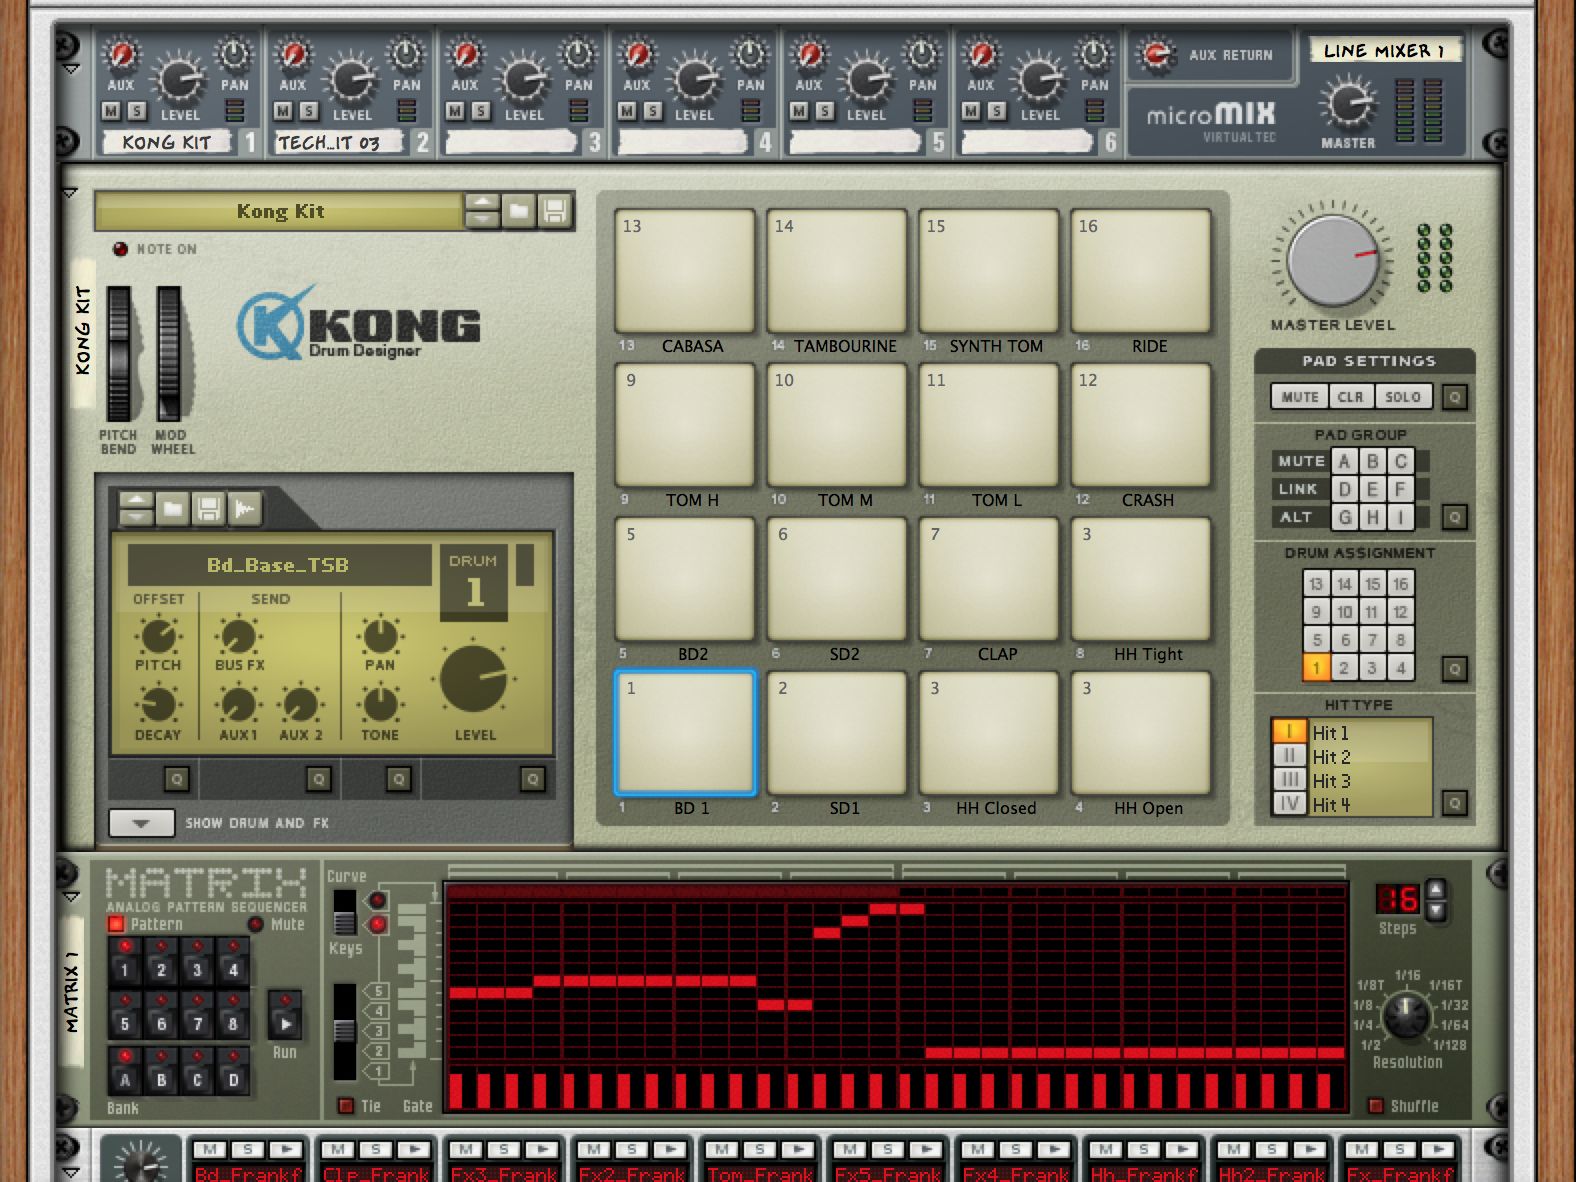
2—Go bananas with Kong
Now drag an instance of Kong into the Combi. You will see that it is routed to channel one on the mini mixer. From the Browser section go to the Kong folder and navigate to the Kong Sounds and Samples folder, inside which you will find a bunch of different samples sorted by type. In order to create a custom kit, you will need to select a pad inside Kong and then use the inspector area at the bottom left to choose a new sample. Beginning with pad 1, choose a kick sample you like. You can also easily assign any sample to any pad by simply dragging it from the Browser onto the pad.

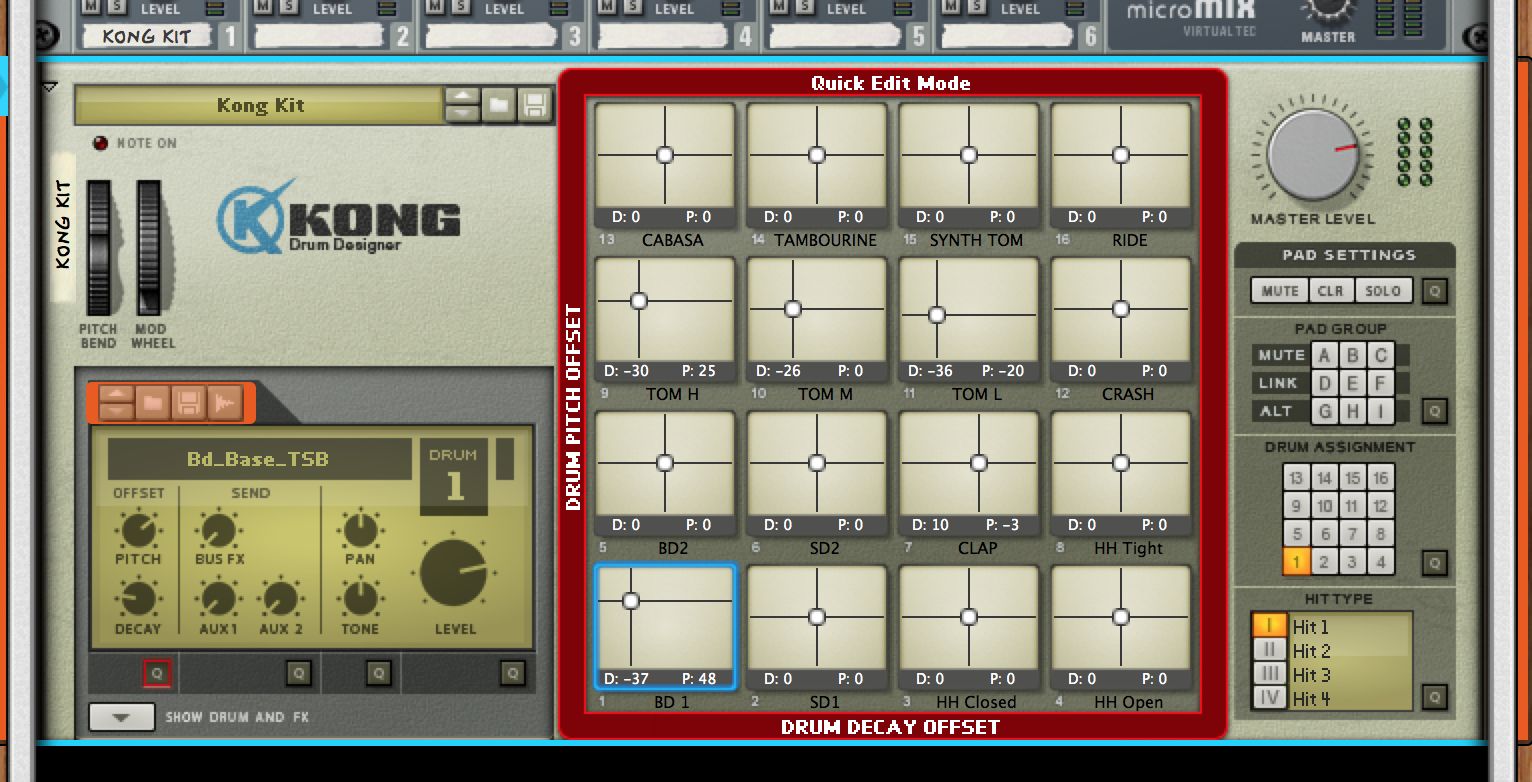
3—Inspect your gadgets
Using the inspector section for any pad you can make tweaks to the sample playback. The main controls are pitch and decay, pan, tone and level which enable you to easily shape any sound with a few simple tweaks. If you press the Q (quick edit) button under any of these sections, each pad gains an X/Y element that lets you quickly dial in a new setting for that parameter on any pad. This works best if you have a MIDI controller connected for triggering, since the pads temporarily stop functioning as triggers in this mode. Press the relevant Q button to return them to normal operation.
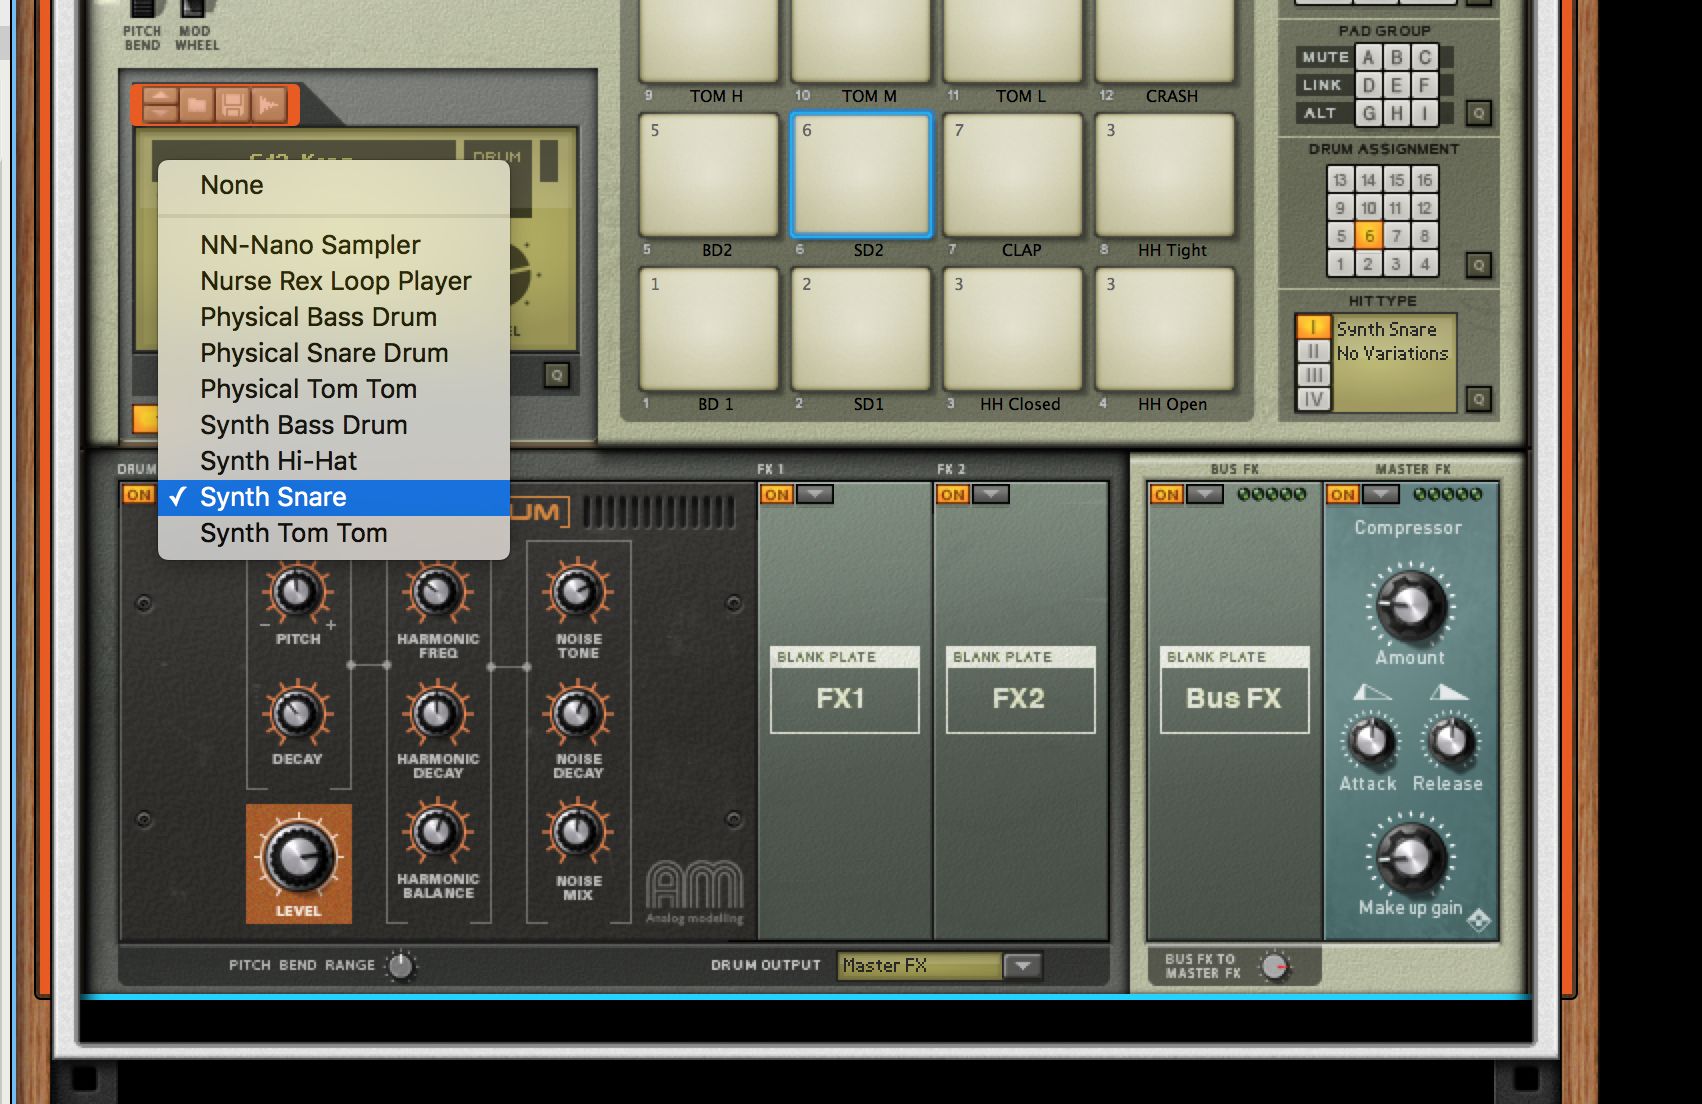
4—Reassign drum modules
By clicking the Show Drum and FX button on Kong you reveal the generators that make up each pad’s sound source, and tapping any pad will reveal either a sample-based playback module or a synth module. Click the menu button on any module to choose a different one for playback and within the chosen module, use the onboard controls to change the sound generation. The synthesized drum modules are approachable but powerful and easily tweaked. The Nano Sampler lets you create multi-layered sounds triggered by velocity and the Nurse REX can load REX loops and play around with their slices—all within a single Kong patch.
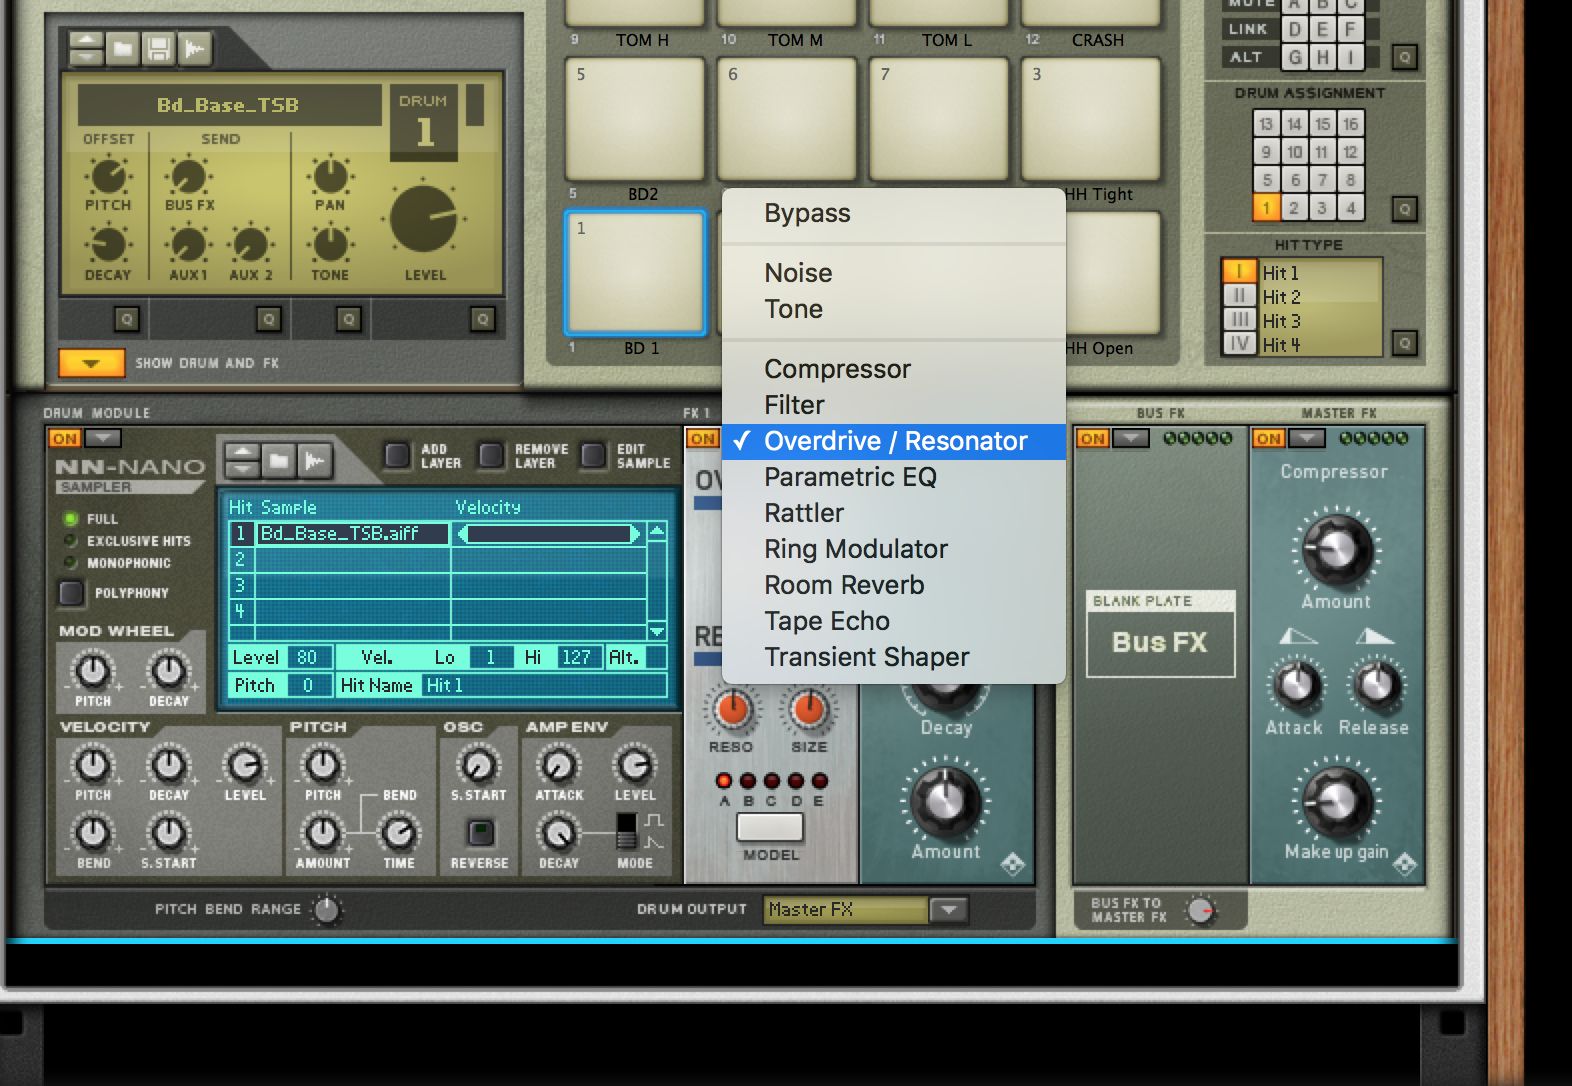
5—Whack up the FX
Each pad also has two insert effect slots associated with it as well as access to a Bus FX channel and the whole thing runs through a master effect. You can set these up per-pad and also control the bus and master effects to create a more interesting sound. Repeat the previous two steps for each of the pads: assigning samples or synth modules to a pad, tweaking in the inspector and setting up any effects for each pad. After a little work you should have a customized kit.
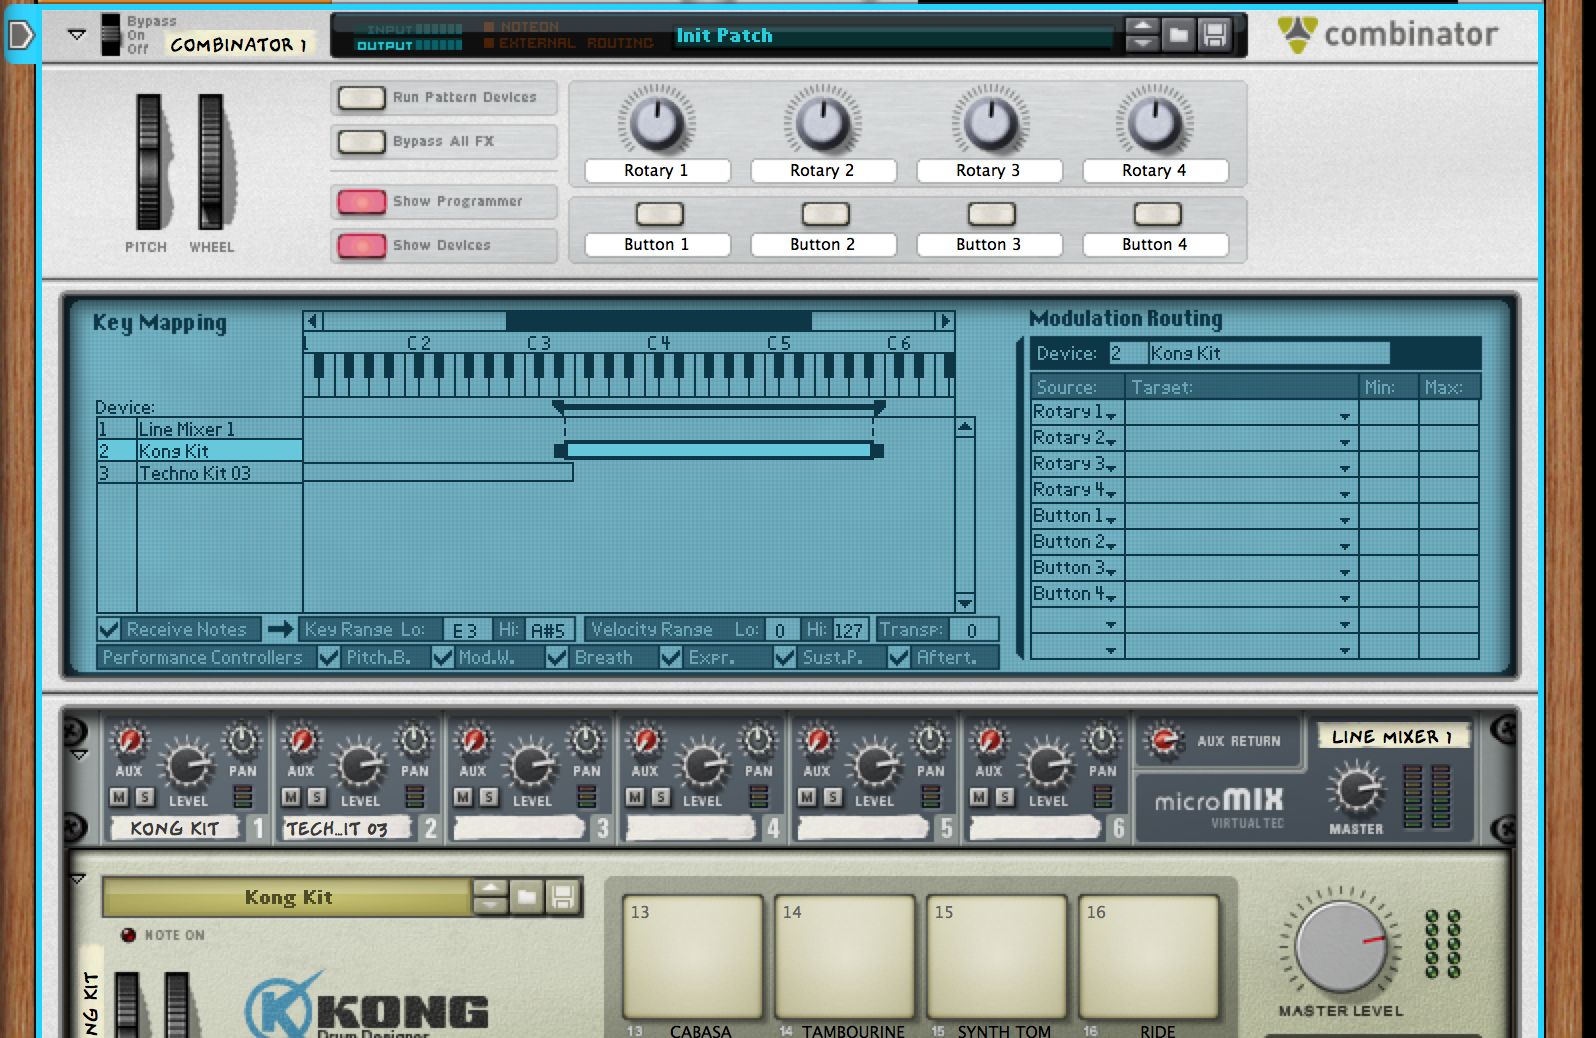
6—Create key splits
Now drag an instance of ReDrum into the Combi and you should find it is auto routed to the second mixer channel. Choose a kit patch or design your own kit using the channels. The technique is similar to that in Kong, but simpler as there are fewer controls. On the Combi’s front panel, click the Show Programmer button. What we’re going to do is split the two instruments across the keyboard to create a bigger kit. Locate Kong in the Key Mapping section and drag the left and right boundaries of its key zone area to match the notes you want it to conform to. Do the same with ReDrum.
7—Add some rhythm
Drag an instance of the Matrix Pattern Sequencer onto the Kong drum machine and its CV output will be automatically routed to the sequencer input of Kong. This doesn’t work with ReDrum as it’s a simpler device. Paint some note data into the grid of the Matrix and you will find that it generates an electronic-style pattern when you play back, using CV rather than MIDI notes recorded into Reason’s sequencer. You can enter up to 32 patterns in the Matrix using the 4x8 slots to its left, and automate pattern selection of these in Reason’s sequencer. This will give you pattern playback but also let you trigger and record MIDI parts live using an input device like pads or a keyboard. You can suspend pattern playback by clicking on the Pattern button on the Matrix.
8—Split the routing
Another fun trick using either the Kong or the ReDrum is to spin them around and take individual drum channels out for separate processing. Create a new Mix Channel in the Rack and connect the audio output of the chosen drum channel to its input to route it directly into the mixer. Into the Insert FX area of this Mix Channel module you can drop any effects you like. Now, that drum sound can be processed through any combination of effects you like including third-party Rack Extensions.
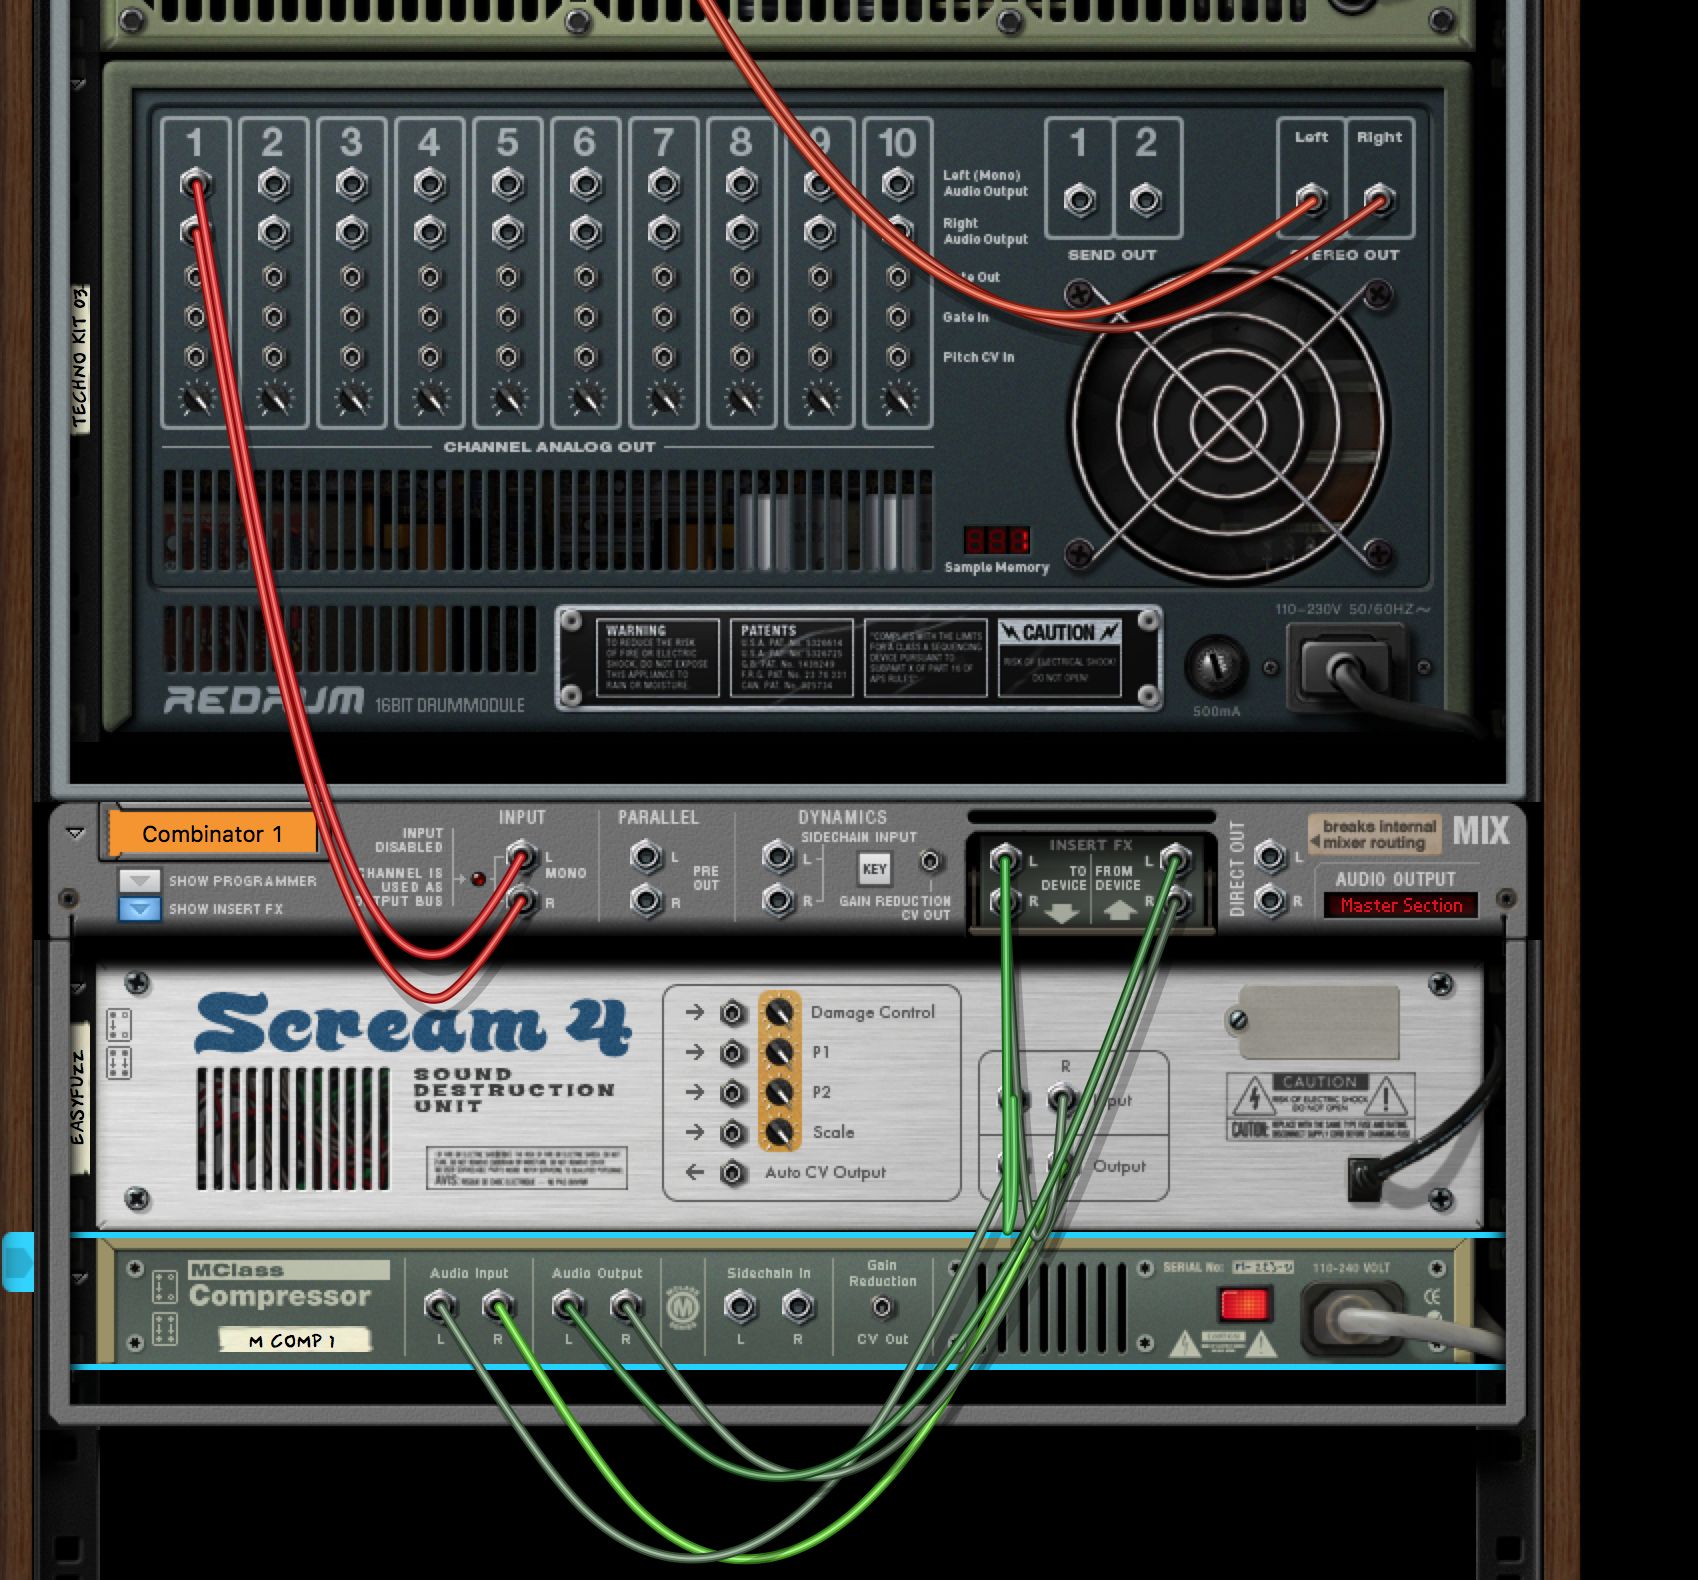
9—Keep going…
Repeat this as many times as you like to create complex chains of drum processing effects to get just the kind of sound you want. With Kong, you will need to go into the Drum section and for the pad you want to assign to alternative outputs, choose these from the drum assign menu. Otherwise all sounds go to the main outputs and you won’t hear the additional effects. Remember also to manually route the channels out from the rear panel, as with ReDrum.

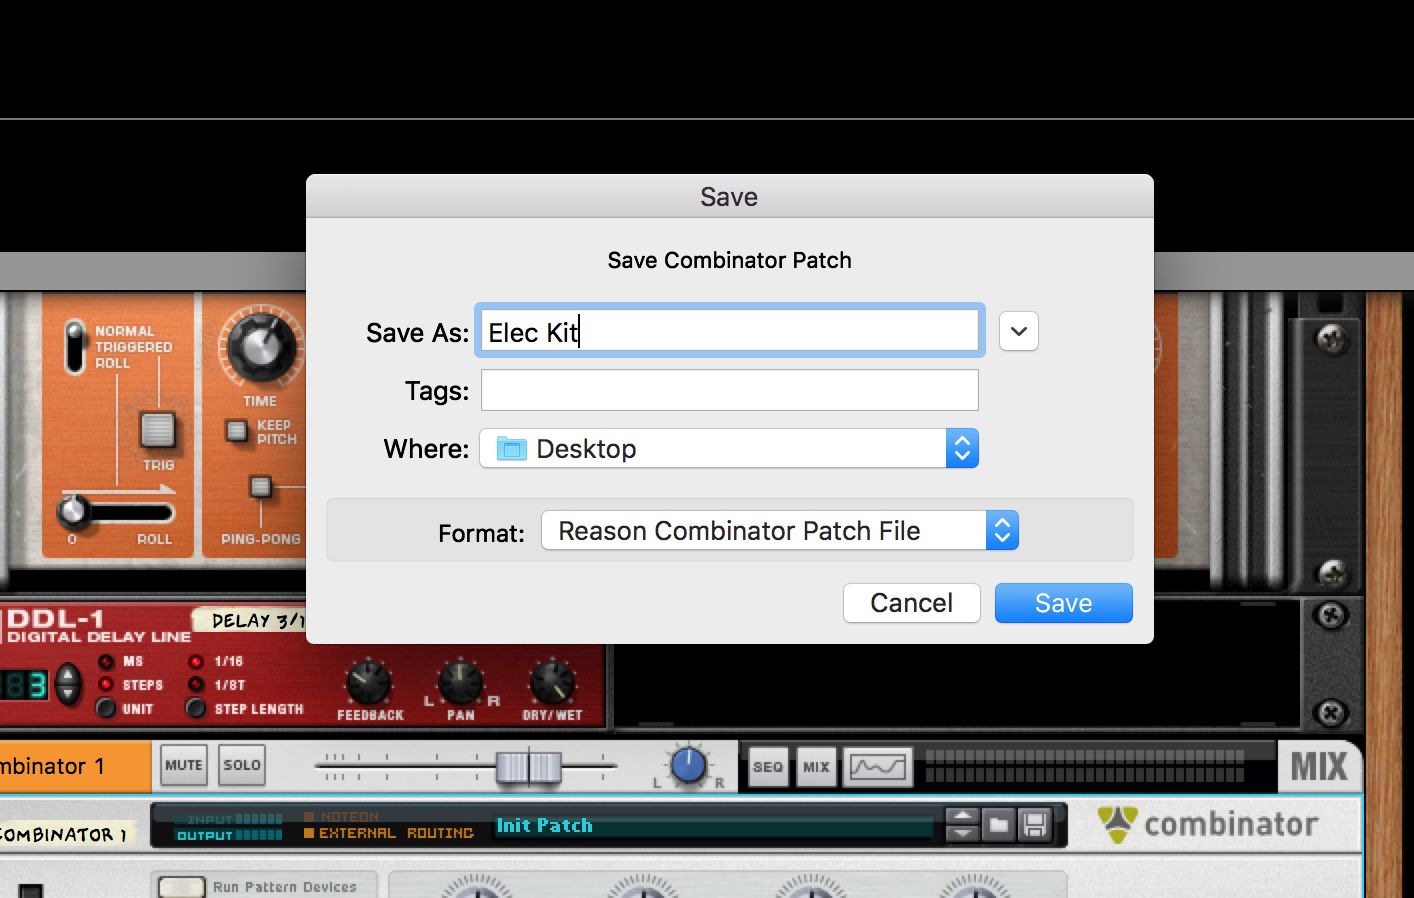
10—Save your kit
Don’t forget to save your Combi patch out if you want it to be available for use in other projects. Do this by clicking the disk icon on the front panel of the Combinator and choosing a name and destination for the patch. The whole thing will also be saved with the project so it can be easily tweaked.

Discussion
Want to join the discussion?
Create an account or login to get started!