
To get everyone in the Holiday spirit, let's create a Christmas track in Reaper. I'm going to attempt Deck The Halls. To fast track things, I'm going to find a freely available MIDI version of the track, from there I'll assign virtual instruments to the MIDI tracks. I'll also show you how to import loops into Reaper and timestretch them so that they fit to the rest of the elements in the arrangement.
Step 1 – Deck The MIDI
I found a good MIDI version of Deck The Halls at Rob's MIDI Library X. To get an idea of the track, you can preview it through Quicktime. Quicktime is a handy app to preview MIDI files through as it will replay them using the Quicktime MIDI Synth instrument. Now to get it into Reaper….
Step 2 – Import MIDI into Reaper
The easiest way to do this is to drag the MIDI clip into a new Reaper project. A dialog box will come up asking how you want to import the item in. This MIDI file contains nine source tracks. I want to expand the MIDI file over the nine tracks, so tick the first option. The MIDI file also contains tempo data, so leave the second box ticked if you want to retain the same tempo.

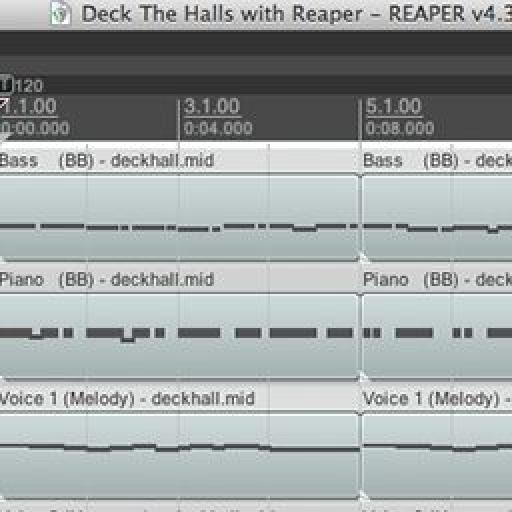
The tracks have been imported onto their respective tracks, and have been named. Now to assign instruments to these tracks.

Step 3 – Assign The MIDI to Virtual Instruments
I'm going to be using Reaper's ReaSynth to synthesize most of the MIDI sounds. Let's start with the bass. To insert a soft synth, click on the FX button in the Track Control Panel to bring up the FX window. Select the ReaSynth from the Cockos folder. This will set up all the input and outputs for the soft synth. With the ReaSynth, I have mainly used the Sine wave, with a bit of Sawtooth and Triangle waveforms to the mix. For effects I have inserted an ReaEQ, with a boost in the lower range, and a ReaComp to tame the bass sound slightly. To insert effects, simply click on the Add button and choose the plug-in you want to use.

Next Up, the Piano. Again, I have used the ReaSynth. On this I have tweaked the ADSR settings with a slow attack so the Piano sounds more like a Pad. Then I have tweaked the waveshapes till I have a sound I like. I have also added a couple of the bundled Reaper effects onto the track. These include effects from the Cockos folder and the JS folder.
- Cockos – ReaVerbate
- JS – Filters/resonantlowpass
- JS – Guitar/distort-fuzz
- Cockos - ReaEQ
The JS suite that comes with Reaper has some really interesting plugins. I'm a big fan of the guitar simulator effects.

I have done the same with the ReaSynth on the Voice 01 and Voice 02 MIDI tracks. Dial in a setting on the ReaSynth that you like, then go crazy with the Cockos and JS effects until you get something a bit different and less MIDI generated sounding.


For more information on setting up instruments and effects, take a look at my Reaper 101 tutorial.
Step 4 – Adjust the Mix
I'm only going to work with the Bass, Piano, Voice 1, and Voice 2 tracks. The rest of the tracks you can delete. The levels are a bit all over the place. Lets jump to the mixer to correct this. Bring up the Mixer window (Command-M on the Mac or Control-M on the PC). I have dropped the level of the Voices and panned them slightly apart to create some separation.
Also I don't want to work with the whole MIDI arrangement. I only want to work with the MIDI between 3.1.00 and 15.1.00. Create a selection here. Then right click the selection to bring up the Contextual menu and choose: Crop Project to Selection.

Now you are left with a smaller MIDI region that you can work with.

Step 5 – Loop The Decks
I want to add a drum loop to the current project. I think it will beef it up, and modernize it. I have a breakbeat drum loop that I want to bring into the project.
First create a new track. There are three ways you can go about doing this:
- Go to the Track Menu and choose: Insert New Track.
- Or you can use the shortcut Command-T (Mac) or Control-T (PC).
- Or my favorite way, double-click on an empty space in the track area to create a new track.
Now drag the drum loop from onto this track. You'll notice that this loop sits at a different tempo to the rest of the item. The project tempo is 120BPM and you can see that the loop doesn't fit to the grid.

This is how to stretch the audio in your Arrangement Window.
But there is a real easy way to timestretch audio in Reaper. Go over to the audio handle of the item, Hold down Option (Mac) or Alt (PC) and the mouse item will turn to a handle tool, this is the Timestretching tool. Also make sure that the Grid and Snapping are enabled on the toolbar.

Make sure the Grid And Snap Icons are enabled in the Toolbar.
Now drag out the item while holding down Option/Alt. The item will snap to the nearest item in the grid. I am going to stretch it to 3.1.00. Now the loop will conform to the grid. And to extend the loop drag the audio handle of the loop at the top right to extend it out for the remainder of the track.
If you want the loop to run a bit slower, drag out with the timestretch tool even more. I have now dragged it out to 5.100 to give it a more half-time feel. But you will notice when I stretch it out this far that audio artifacts are introduced into the signal. The good thing is that this Timestretching is not destructive to the audio, it isn't saved to the original file. So at anytime if you feel you have gone too far with the timestretching, you can also re-import in the original drum loop and start again.
You can see some more Timestretching and audio editing techniques on my Reaper 102: Working With Audio tutorial.
Step 6 – Render Out The File
Ok, so I'm happy with my Reaper Xmas track. Let's bounce it out (or in Reaper terms, render it) by going to File > Render. I still have my selection in place in Reaper so I am going to choose to export out the Selection. Under Render Bounds choose Time Selection. This will export out whatever is in the selection area.

I'm going to leave the rest of the settings as they are. It will be exported out as a WAV file at 44100 Hz and 24-bit. You can downsample to 16-bit if you want to burn it to a CD.
When you are happy with all the Render settings, click Render 1 File… This will render the file to disk. A dialog box will come up showing the waveform and you can click Show in Finder to reveal the location of the file. The location was specified in the Render settings. I chose to save mine to the Desktop, so I could easily find it.
Take a listen to my show stopping Christmas track:
Conclusion
And that's how to make Xmas tracks in Reaper. Have some fun this Christmas and make a mashups of your favorite Christams tracks. You can easily find the MIDI file and then assign your own virtual instruments to the tracks. Now you can impress your friends and family with your own Christmas remix album.
Merry Christmas everyone, I'll catch you in the New Year!
Take a look at the following tutorials to get further techniques with Reaper:
Reaper 101 - Introduction to Reaper
Reaper 102 - Working with Audio
Reaper 103 - MIDI, Instruments and Plugins
Reaper 104 - Mixing and Automation
Discussion
Want to join the discussion?
Create an account or login to get started!