Starting with Logic Pro 8, the Logic Pro developers revamped the Mixer and made significant improvements. We now have three views: Single, Arrange, and All, and each has the ability to filter what we wish to view. For non-complex projects it works just fine and many users are very happy with it.
But when you start to do a very complex project there are still significant issues for workflow, in particular when mixing. For starters, even with the Link button disengaged in both the Arrange Window and the Mixer window, selecting a track in the Track List selects it in the Mixer and vice-versa. While recording one track it is possible to grab the fader of another in the Mixer and make adjustments; if you accidentally click on the bottom of the instrument, you will find you are now recording to a new track.
Another (and in my opinion) more serious issue is that of Aux display in the Mixer. Auxes are used for different tasks in Logic: hosting outputs for multi-output software instruments, hosts for FXs, etc. Getting them to appear where you would really like them in the Mixer can be very challenging and involves a lot of moving in the Arrange Window's track list, which can only be done one track at a time. Also, the Mixer simply does not update the positioning accurately all the time.
Finally, it is also a fact that with a ton of tracks even on a large monitor, you cannot cherry pick what you want to see. In my template, for instance, I have a bunch of MIDI tracks addressing software instruments I have loaded in Vienna Ensemble Pro with the audio outputs in VE Pro coming into auxes in Logic Pro. So there are times when I want to see the MIDI tracks and auxes for that particular VE Pro instance in one window. Also, I have strings in my VE Pro instance on my Mac and strings in my VE Pro instance on my PC. What if I want to view only those MIDI instrument tracks and auxes? More commonly, what if I want to see only my drums and percussion, or only my strings, or brass, or woodwinds that are loaded directly into Logic Pro? There is simply no way to do so in the Mixer.
Since the principles are the same, I am going to illustrate them with a less complex template than mine, one which only involves Logic Pro. Once you get used to this way of thinking, you can use it to fit any combination of instruments, audio tracks, and auxes.
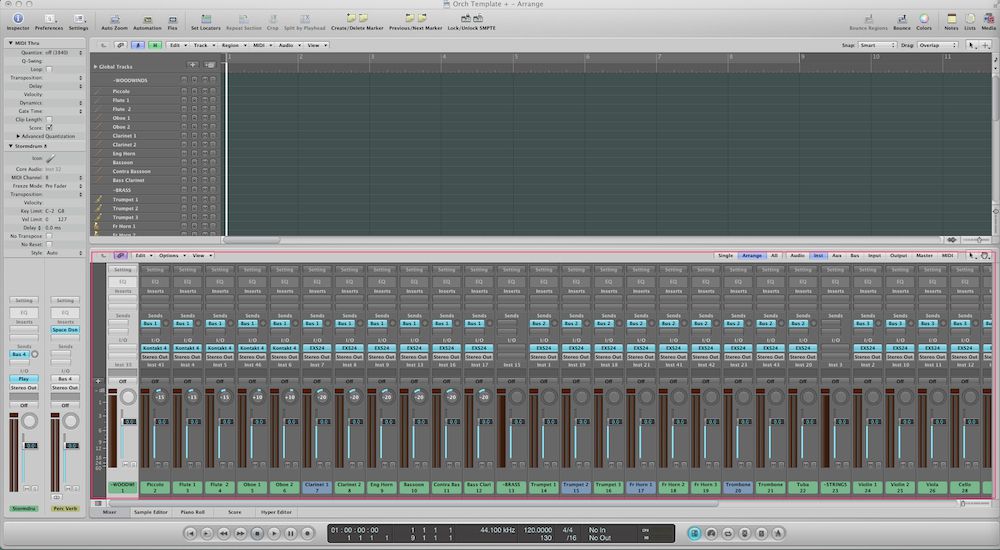
In this orchestral template, there are 42 tracks and 4 reverb busses, which is relatively modest for an orchestral template (see the Track List in Fig 1 below). Notice that in Fig. 2, even on my 27-inch monitor, I cannot see all the instrument tracks at a time, not to mention the reverb auxes that they may send to.

Fig 1. Track List
Fig 2. The view on a 27" monitor
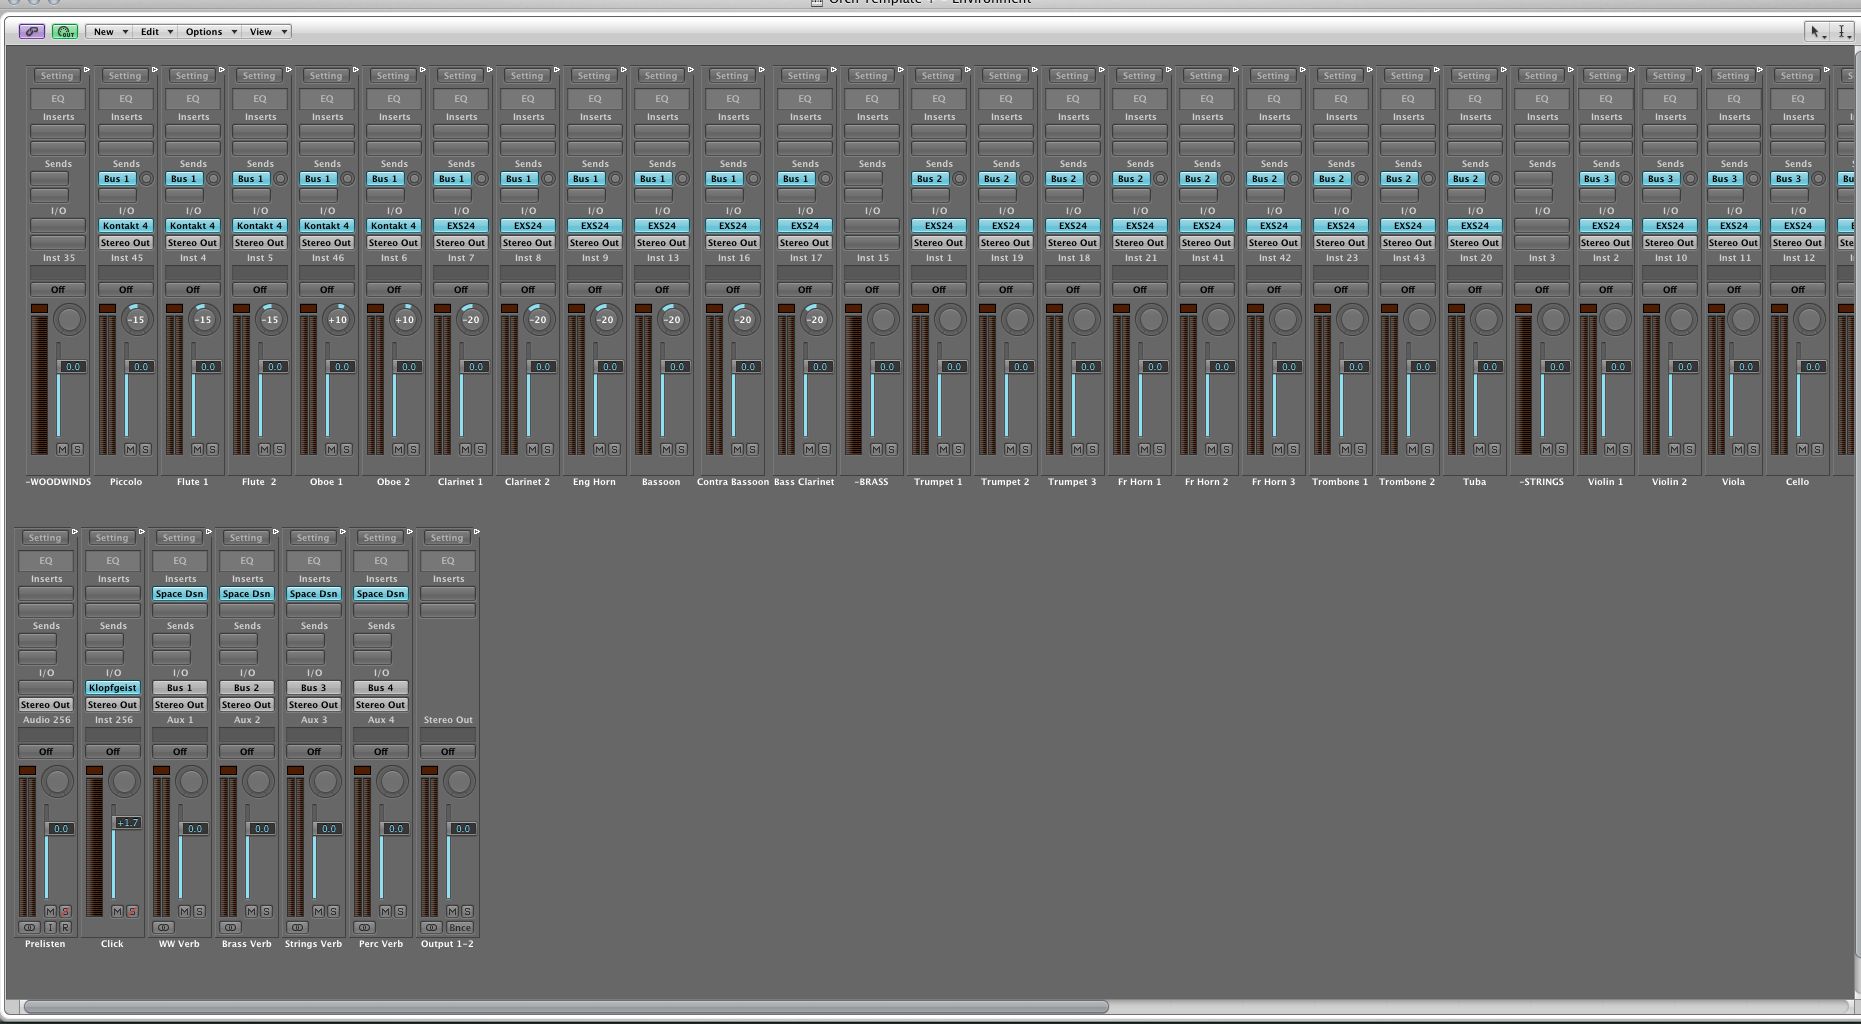
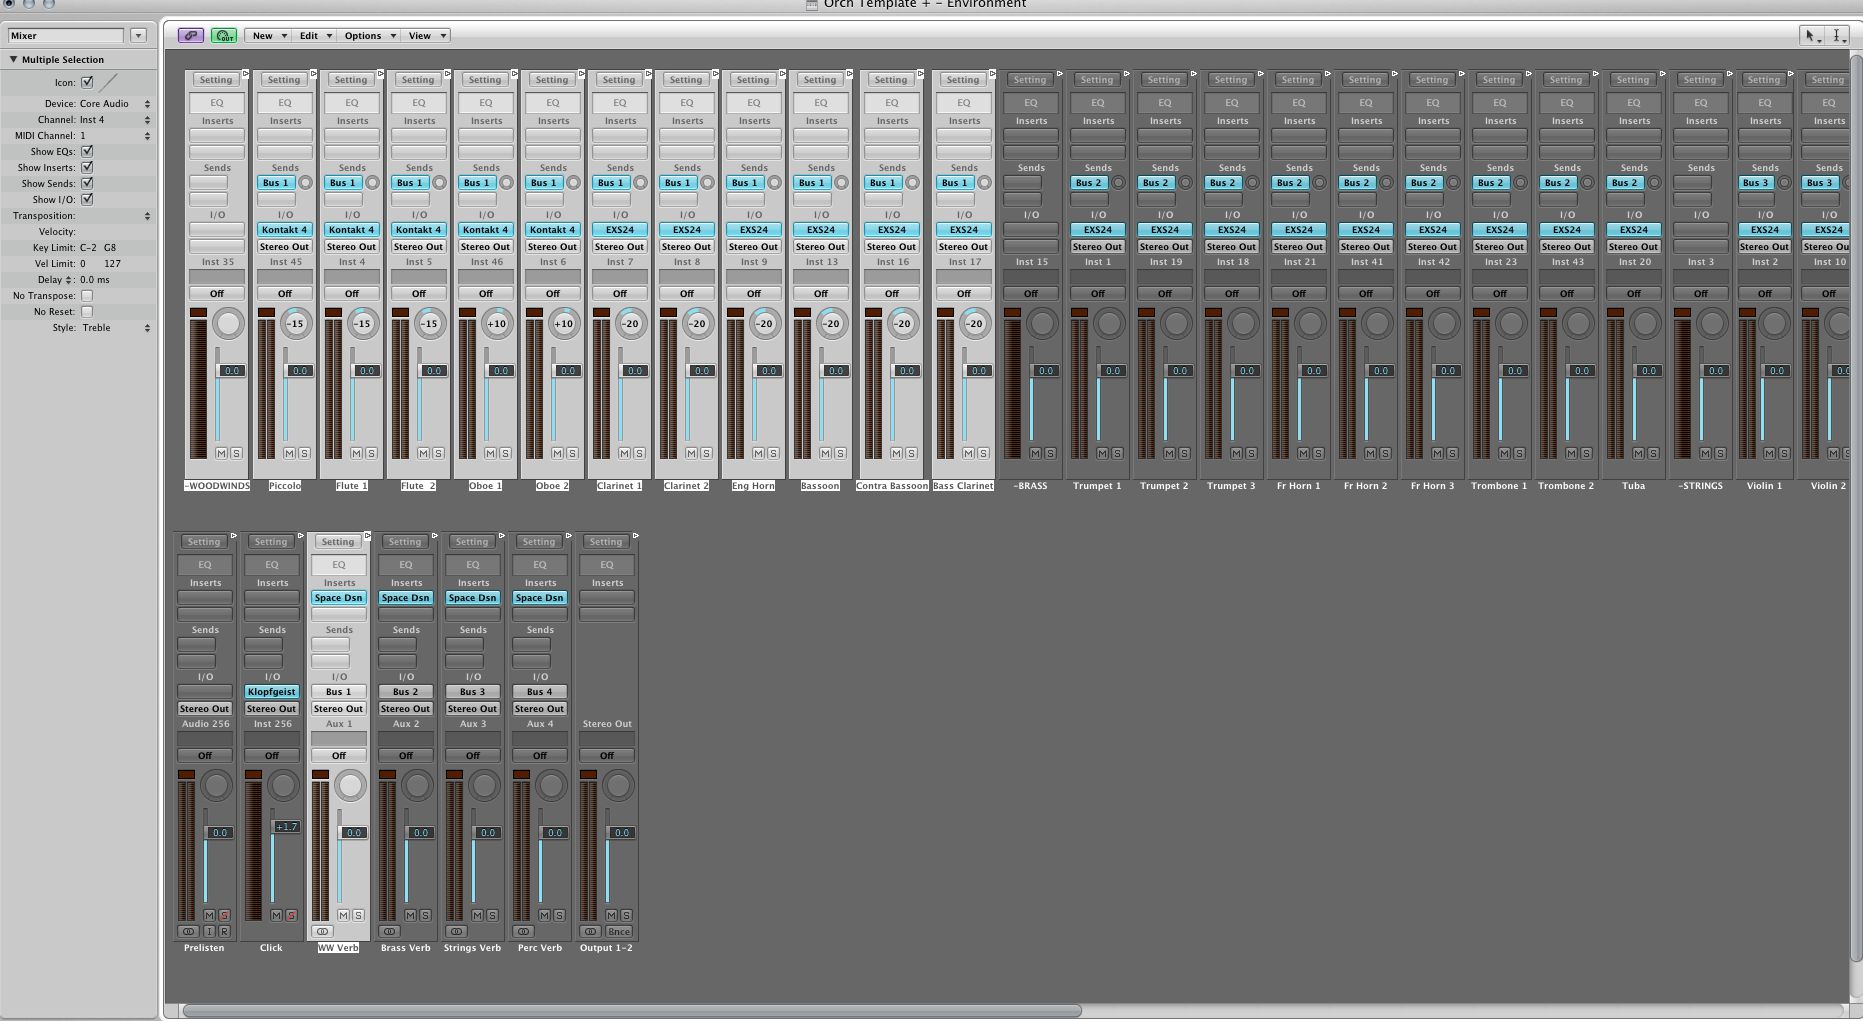
I press Command-8 to open the Environment and navigate to my Mixer layer: In Fig. 3, you can see that although I have cleaned it up nicely and hidden the Inspector, there is still no way to see everything and I still have no ability to view by orchestra sections.
Fig 3. Default Environment Mixer Layer
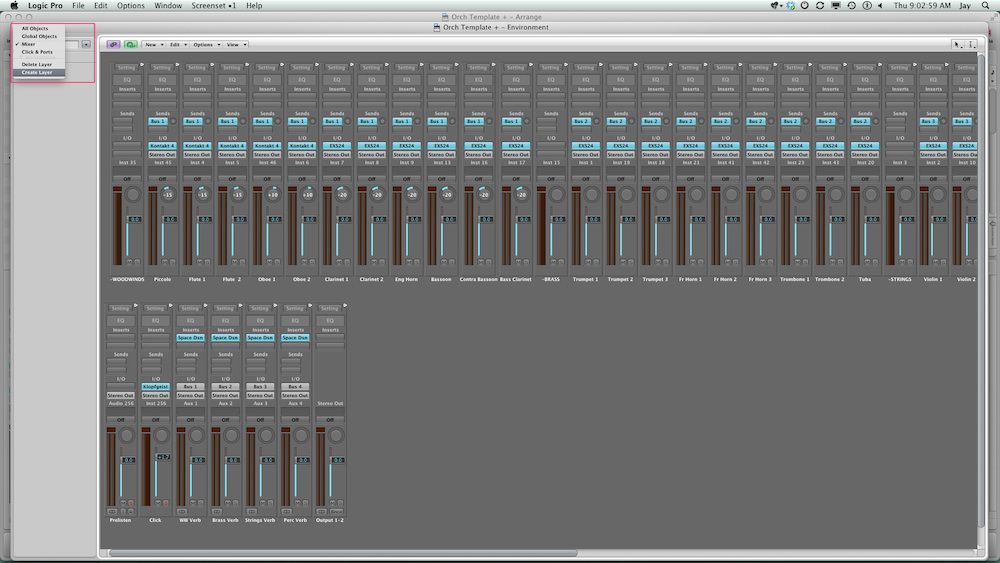
So I need to create Environment layers and move the instruments and auxes to them. I press i to view the Inspector and, holding down the mouse on the disclosure arrow to the right of the Mixer layer name, I choose Create Layer (see Fig. 4).
Fig 4. Create a new layer
Logic creates an Environment Layer named (unnamed). I double-click on the name and name the layer Woodwinds.
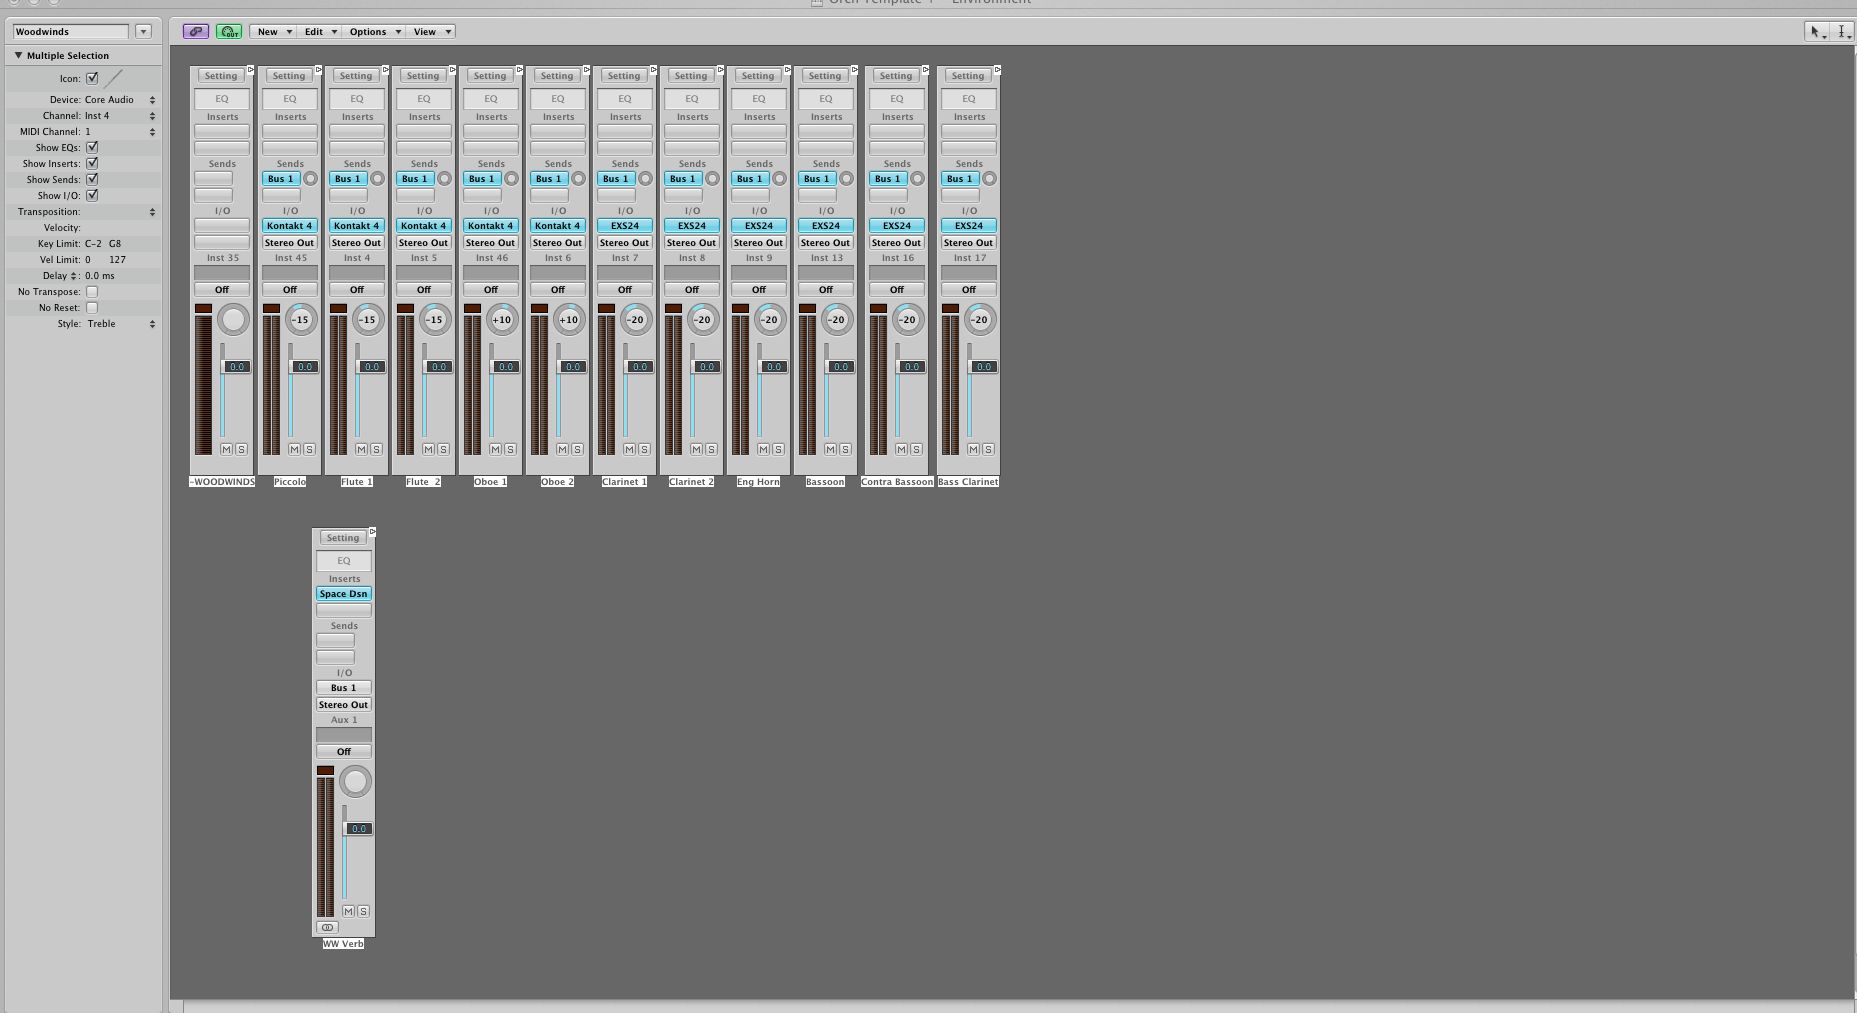
Now I want to move my woodwind instruments and their reverb aux to this layer. I return to the Mixer layer and in Fig. 6, notice that I have selected the desired instruments and aux.
Fig 6. Woodwind instruments and reverb aud are selected
All I need do is hold the Option key and navigate to my newly created Woodwinds Environment layer and badda-boop badda-beep, there they are. See Fig 7.
Fig 7. The selected channels on their own layer
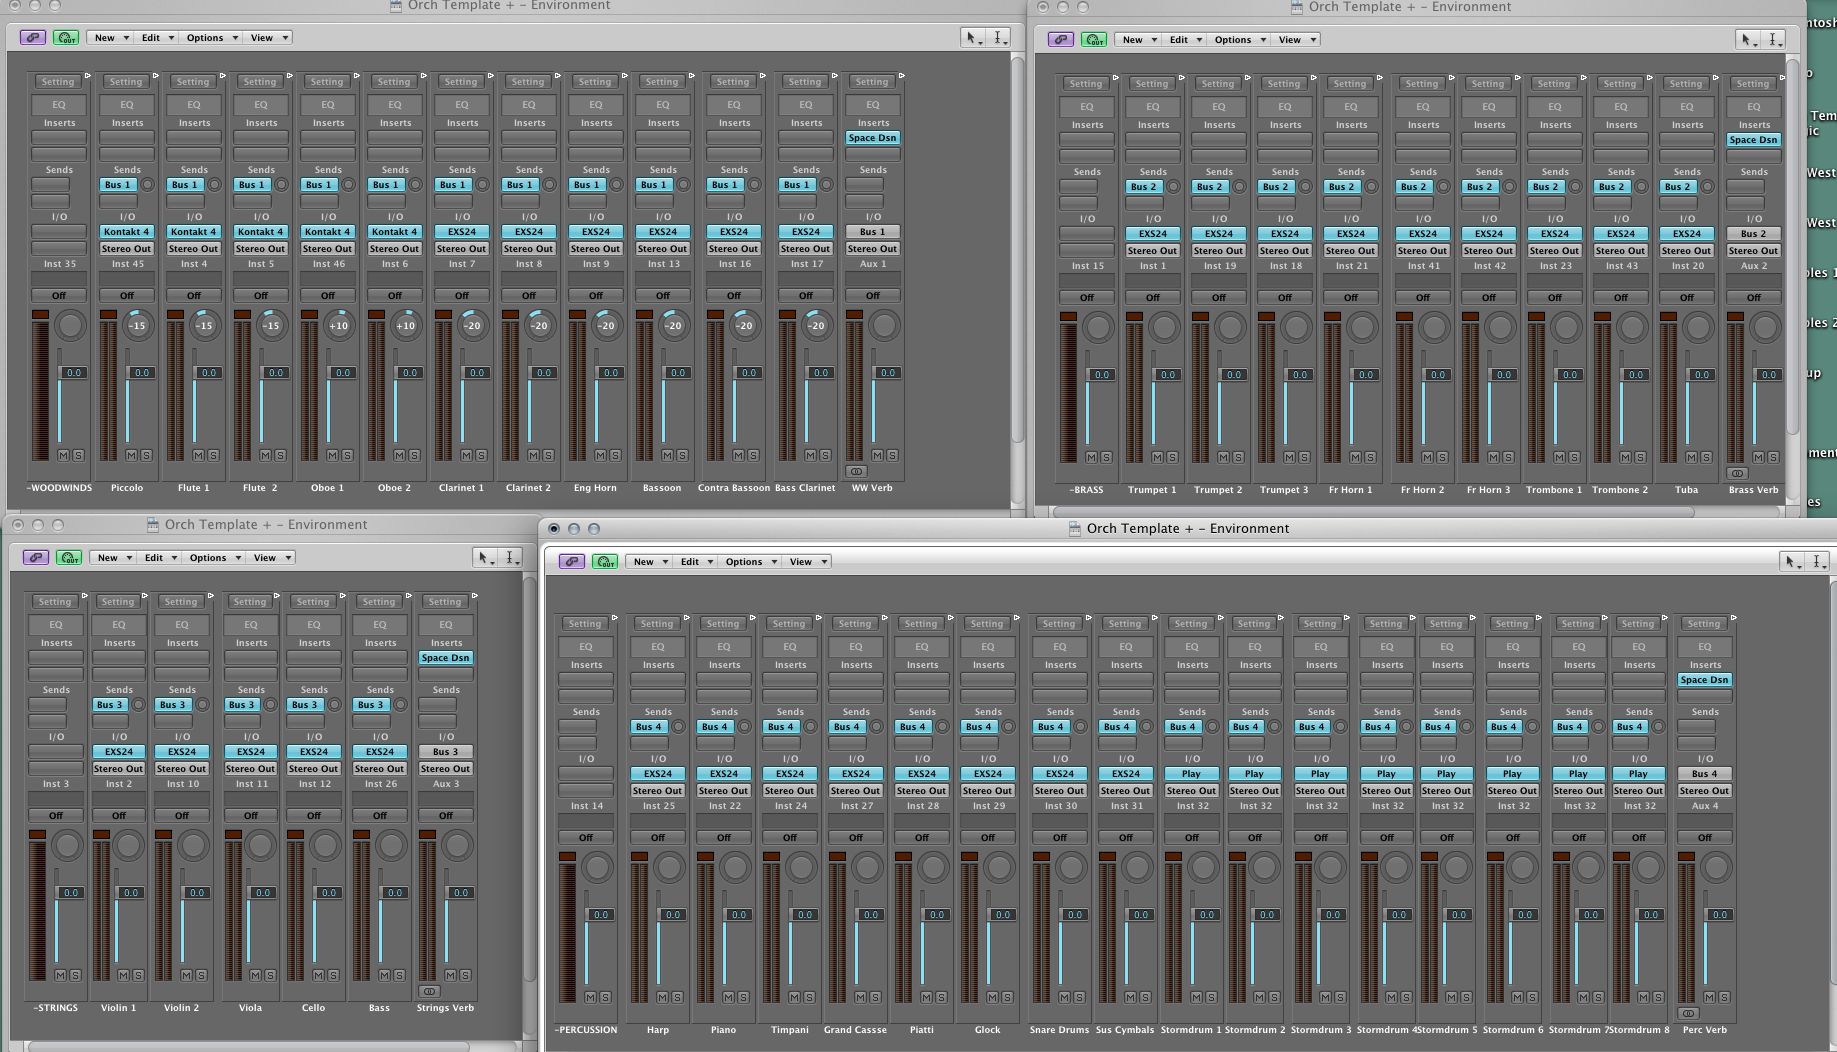
I simply repeat the process for the other orchestral sections, moving the objects within them to my liking. I then open the 4 layers of the Environment I created and assemble then in a single Screensets. The end result can be seen in Fig. 8.
Fig 8. The final custom mixer layout
This is a fair amount of work (although with practice you can do it remarkably quickly) but the good news is that you can import the layers and the Screensets from project to project. One caveat: beware of importing the auxes into projects where auxes have already been created as you can get some, err…., unusual results.



 © 2024 Ask.Audio
A NonLinear Educating Company
Discussion
i got a question, nothing to do with that subject but with logic ! does anybody know ( cause you are in the business already ) if apple is going to come out with a new logic and new macs pro or do we really have to be worried for the future of the music on a mac !??
thanks a lot for your answers
Want to join the discussion?
Create an account or login to get started!