Previous Articles in this series:
Part 2—Building Track Foundations with MIDI
So you’ve finally got the perfect arrangement and mix. Now all that remains is to master your track and it can be played to the world!
1. Prepare for export
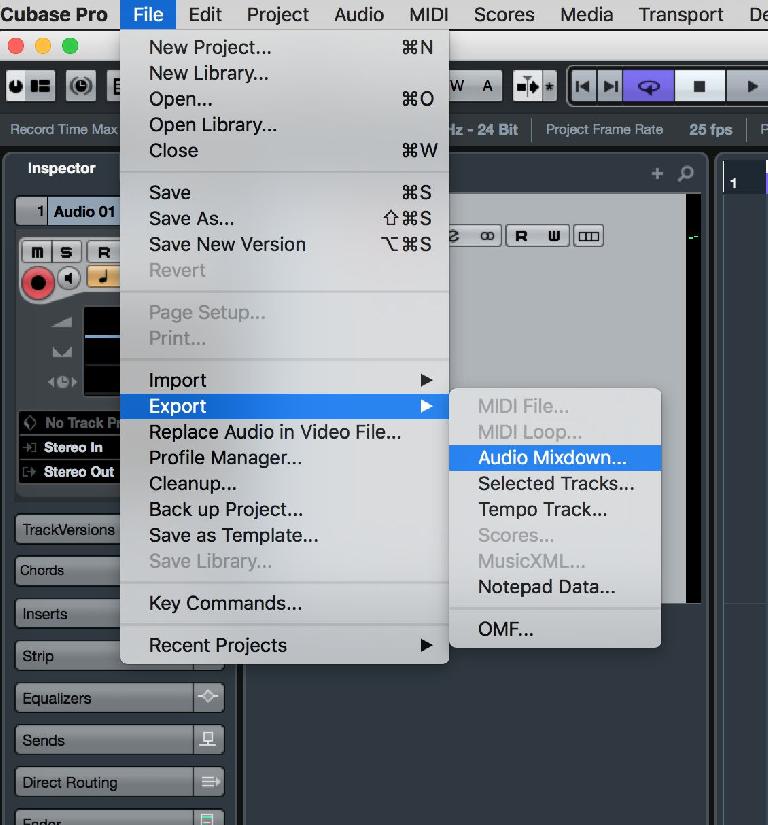
At this point in the production process you will have spent considerable time getting your arrangement and mix just right, so we’re going to assume no further tweaks to either of those things. We’re also assuming you’re not taking a bunch of stems to another studio for mastering, but rather staying on your own system. You can export stems later for backup or remix purposes, using the Batch Export function. For now, go through your project one last time and double check that everything that should be switched on is on, and what needs to be off is off. Make sure the left and right locators are set around the start and end of your track. Then go to the File menu and choose Export > Audio Mixdown.
2. Choose export type
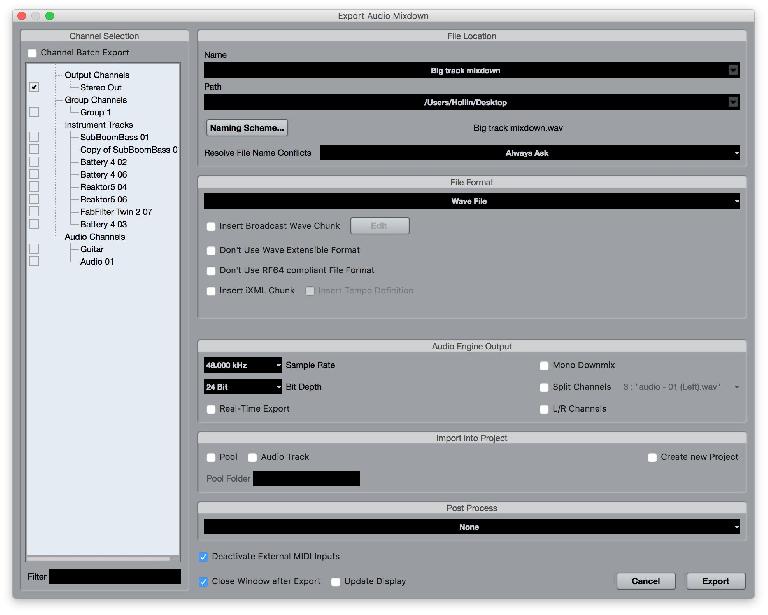
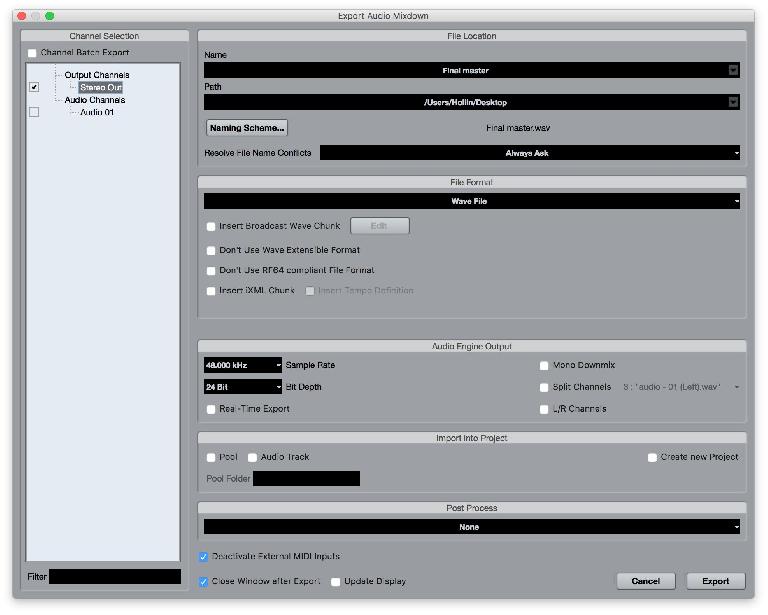
In this window you have various options. The most basic is to choose a stereo mixdown or a batch export. In this case, make sure Batch Export is not ticked and instead tick only the Stereo Output box in the channel export list. This will ensure that only the main output of Cubase—that which passes through the master channel—is exported. In other circumstances you can also activate individual channels or groups for export as well, but that’s not necessary for regular mastering.
3. Choose a format
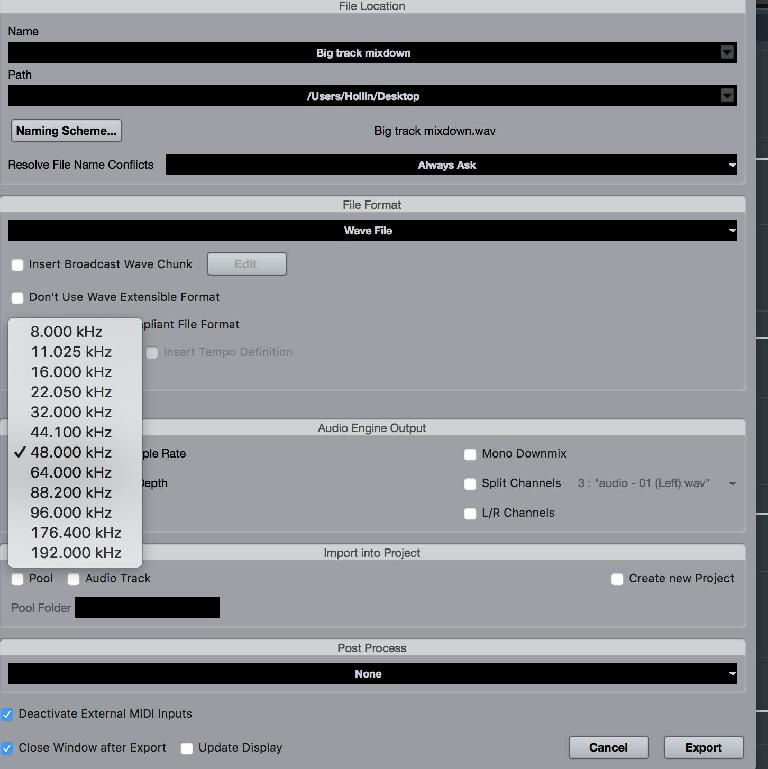
From the area on the right, first choose an export file type. Wave or AIFF is best here since they are not compressed formats. Essentially, you should match the export format to the quality settings that the project has been recorded at. So if you have recorded at 24-bit, 48 kHz, match these settings during export which will mean no loss of quality. You can choose a higher sample rate to export at, though this will not actually add any extra fidelity to your exported sound. You shouldn’t choose lower quality than the project exists at.
4. Export and reimport
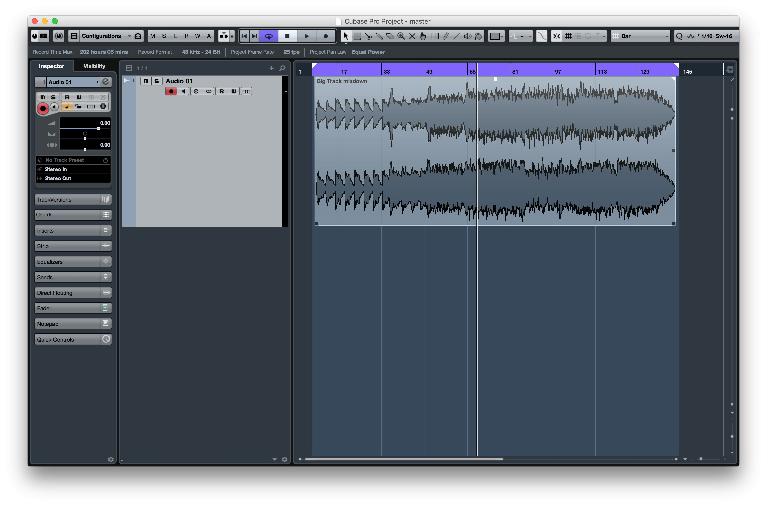
Hit the Export button and Cubase will output a full-quality stereo mixdown of your project. This might take a minute or two depending on the complexity of the project. Once it’s done, open up a new blank project and make sure the project settings match the quality settings of the file you just exported. Create a single audio track and import the file you just exported in the last step. The tempo doesn’t matter since you’re only going to be processing audio, not making time-based edits. Note that your waveform will probably have plenty of dynamic range – lots of peaks and troughs—because it hasn’t been limited yet.
5. Start to process
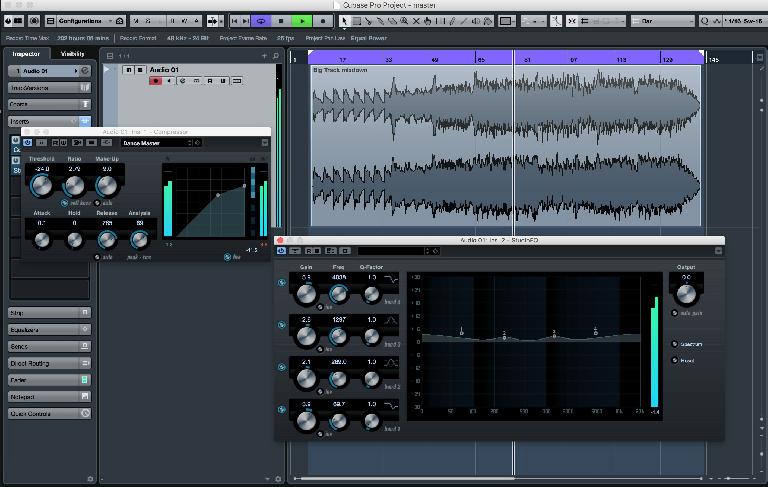
At this point you may want to use a dedicated mastering plug-in like iZotope’s Ozone or T-RackS, but we’re going to assume you’re sticking with Cubase’s own plug-ins or equivalents. Start with a compressor and perhaps seek out a preset for mastering that closely matches the style of music you’re working with. Here we have found a dance master preset and tweaked it to suit this particular track. Then load up an EQ module: again the choice of model is up to you and you could even use the channel strip EQ if you like. The idea here is to make subtle rather than extreme changes to the EQ curve of a track, since you are now working with the sound of a mixdown rather than individual tracks.
6. Add optional plugs and metering
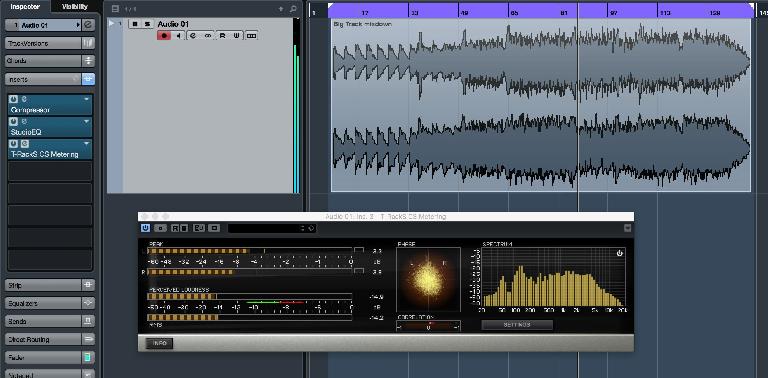
Before the limiting stage you may want to introduce some other more esoteric processors like stereo wideners or saturation/tape plug-ins, but that really depends on the type of material you are working with. The core mastering toolset is compressor, EQ and limiter so unless you have good reason it’s best not to stray too far from these. However, it is a good idea to meter in more depth than a simple master fader allows. You can buy a dedicated metering plug-in, or there are some good free ones available. These don’t process sound but merely represent it graphically. You can use a good meter or analyzer to see exactly what the gain of your signal is, how its phase is behaving, and whether the stereo image is solid.
7. Add a limiter
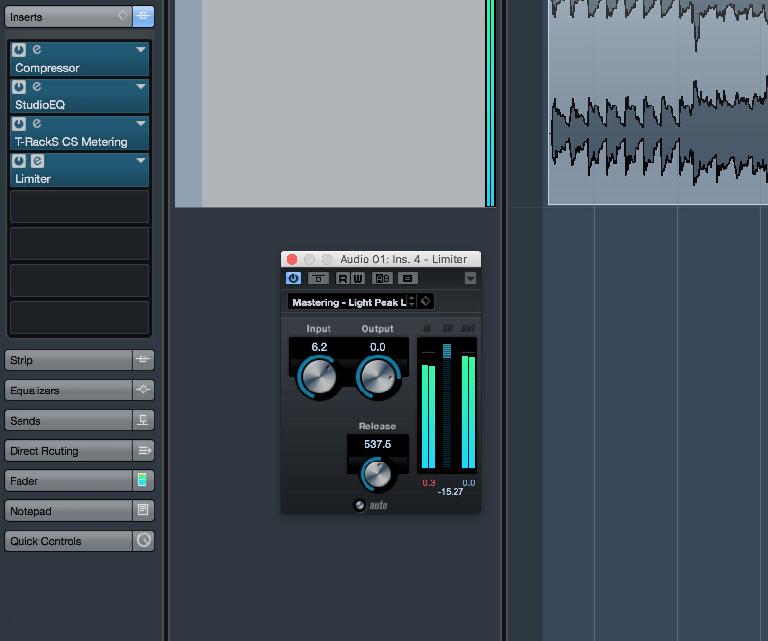
Limiting is the final stage of mastering processing and is used to increase volume without clipping. It’s the reason commercial records sound loud and punchy. Add a limiter to the insert path—Cubase has one. Set the Output dial to 0 or -0.1 dB and then use the Input dial to drive the volume, until you reach a point where the signal sounds nice and powerful but is not being squashed too hard, which kills the dynamics of a piece of music. The central blue meter on this plug-in shows how much gain reduction is being applied and this should ideally not be showing a huge amount since that would sound very squeezed. Try to find a good balance of volume without artificiality.
8. Export for the final time
With all your settings made, set the left and right locators over the start and end of the track and repeat the stereo export process from the previous workshop. Again, make sure to maintain the same quality and sample rate settings while exporting—you can compress copies later. What you will end up with is a full quality, mastered version of your track. Be sure to save this Cubase project because sometimes when you test a track on different systems, small imperfections in the master can be revealed like too much bass or vocals not being prominent enough. If you have saved the master project, you can come back and quickly make tweaks without having to set everything up again from scratch. You can even save a project as a template, then make tweaks for each subsequent piece of music you want to master.


 © 2024 Ask.Audio
A NonLinear Educating Company
Discussion
Want to join the discussion?
Create an account or login to get started!