Previous Articles in this series:
1. Look at what’s already loaded
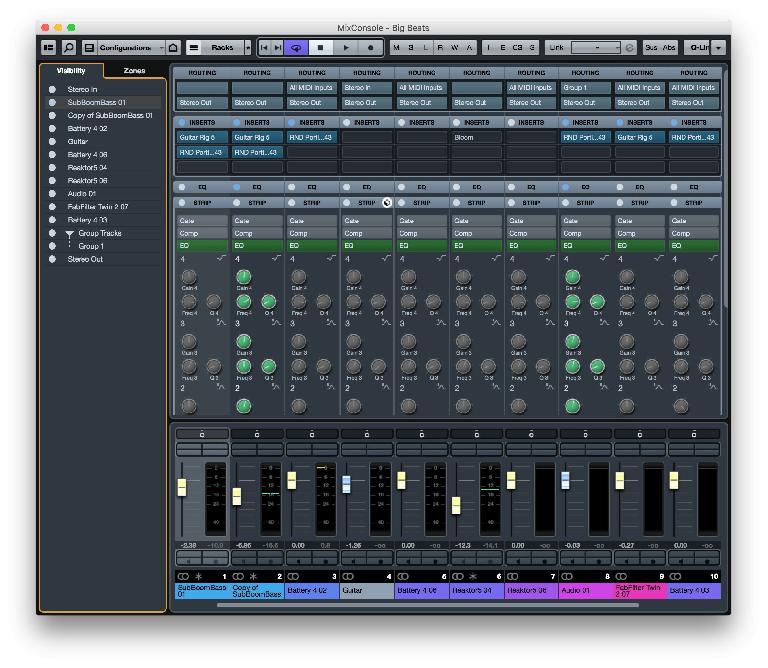
It’s very likely that you have been adding insert or send effects during the composition and arranging of your track. This is a good way to work as long as it feels natural to you personally, since it means by the time you get to the final mix you have a lot of the processing and settings already in place. It’s much easier to feel the vibe of the track with reverbs, delays and compressors up and running instead of everything being dry. So a good first step at mixdown is to re-examine what’s already loaded, adding or removing effects or changing settings to what they need to be in the finished product. This is easier to do at the mix stage, when all your parts and tracks are present.
2. You have multiple views available
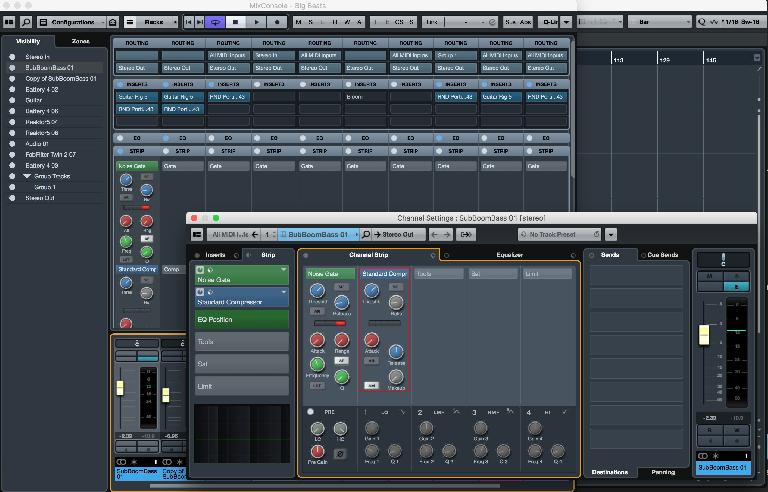
Cubase lets you access insert effects from various different locations. You can see a channel’s effects from the MixConsole view, from the track inspector in the Project window or from a track’s Channel Settings window. These all show the same set of effect slots for any track and you can access the effects easily from any of them. Bear in mind that Cubase also has channel strips for every track containing multiple plug-ins as well as EQ. Designed to replicate the way a real mixing desk works, the beauty of channel strips is that each one has the same set of effects available. So you can create an even and coherent sound across a project if required, rather than for example using ten different models of compressor across different tracks.
3. Dial in some channel settings
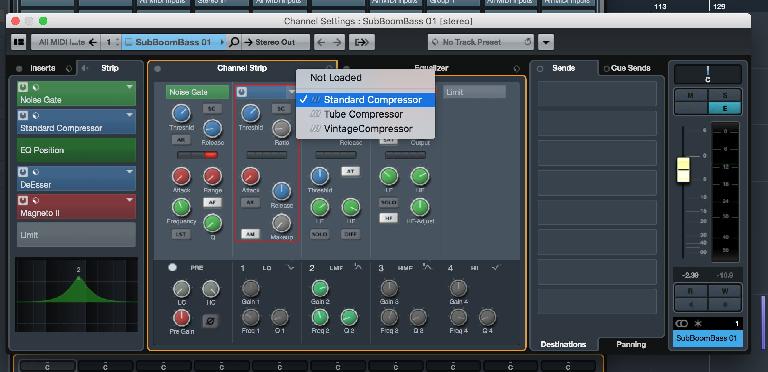
Open the Channel Strip either from MixConsole or a channel’s Settings window, as seen in this example. In the Channel Strip section, you can load up to five processors from Cubase’s own set, and make settings for that channel. These are dynamics processors: gate, compressor, de-esser, saturation and limiting, and some have different models available by selecting from their drop-down menu. These processors let you save and load presets by right-clicking somewhere on their interface and by clicking on the small cube icon in the Channel Strip title bar you can choose to save and load Strip Presets, which contain all the settings in a strip. This is great, for example, when you find a perfect vocal setup for your voice and want to reuse it later.
4. EQ is key
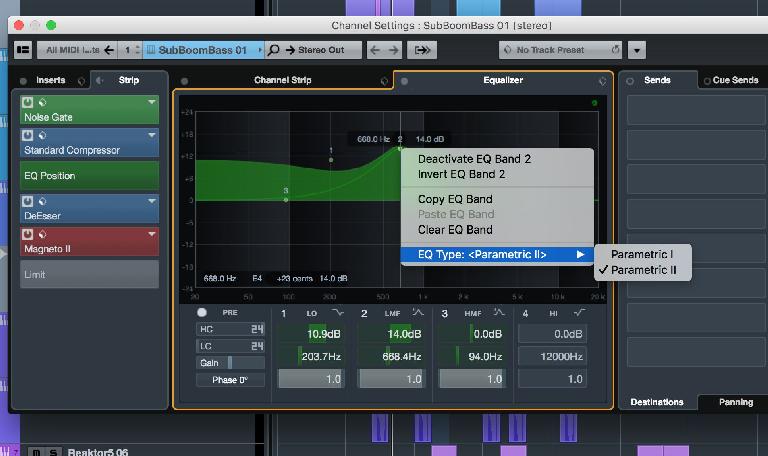
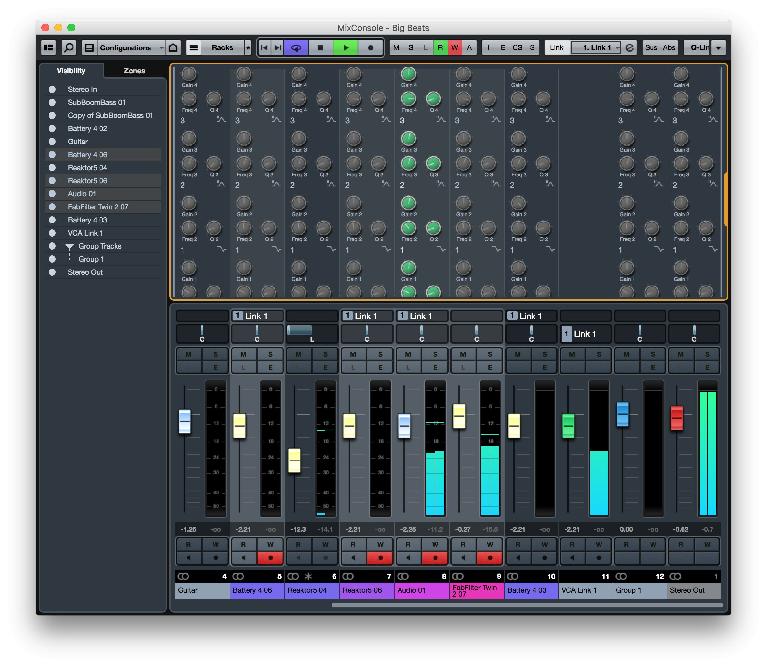
You’ll use EQ on almost every channel in a project, even if it’s only subtle. EQ is vital to balancing and shaping sounds and again you can access it from various locations for any given track in a project. The EQ view in the Channel Strip window is nice and large and as well as having presets available, you can right-click in the main area and change the EQ characteristics of individual points. Clicking on a point and holding the Shift key while dragging the mouse up or down will change the Q value of any point, and thus the amount of frequency altered to either side of that point. This is vital for making precise EQ tweaks to specific frequencies.
5. Consider automation
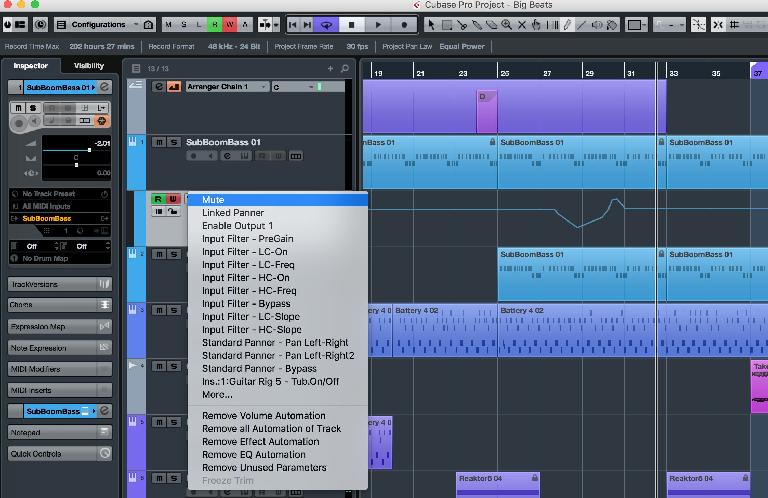
Cubase has an incredibly powerful automation system that works with many of its different tools. For starters, any plug-in instrument or effect can have its parameters automated over time, down to the smallest detail. The same goes for EQ and channel strip controls. When it comes to mixing, the most basic kind of automation is fader automation, changing levels over time so that for example a guitar is quieter in the verse so as not to compete with the vocal. You can activate automation write for any track and move parameters over time, and these changes will be recorded. Right-click on the track and choose Show Automation to see it, and click on the automation type menu to see what other parameters are available.
6. Edit automation in detail
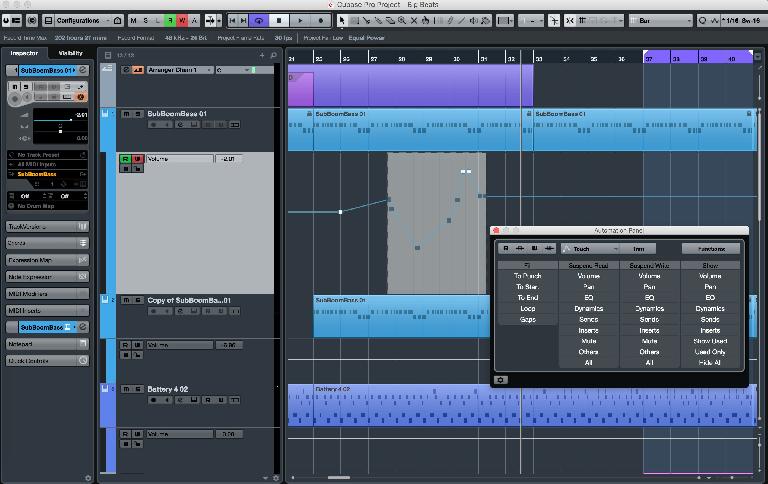
It can be that using the mouse to automate—or even a MIDI control surface—doesn’t quite achieve the precise changes you want. Luckily that’s easy to fix by zooming in on automation vector data under any track and using the pen tool, line tool or pointer to add, edit or remove automation points and ramps. If you open the Automation Panel from the project menu you will see a really useful window appear that lets you perform many automation actions targeted at certain parameters or devices.
7. Explore VCA faders
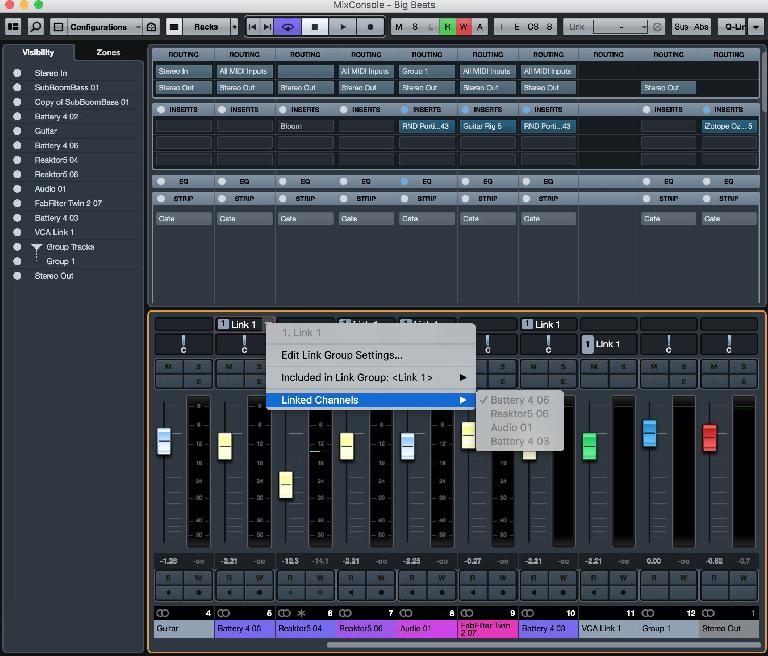
Some hardware mixers have voltage controlled faders which enable the movement of other groups of faders by the same amount while maintaining their relative differences—and Cubase has these too. So for example you might have a submixed drum kit with ten channels, but want to make the whole kit louder or quieter with a single fader. You could do this using a Group channel to group the drums, but VCA faders have the beauty of not restricting your audio routing choices, they simply control the target faders, not the audio path. VCA faders also don’t limit you to connecting only channels of a certain type. In MixConsole view, hold Command (Mac) or Control (PC) and multiple select the channels you want to link. Then right-click on one and choose Add VCA Fader to Selected Channels. The faders will then be linked to a new VCA fader and if you click on the Link field for any linked channel you can make edits to the link assignments.
8. Keep an eye on the master fader
When you spend so long working on a track it can be easy to lose track of the levels at the various different volume stages. As a good rule of thumb, keep your master fader at or just under 0 dB and then make sure the various tracks in the project are properly balanced within that limit. It’s easy to get “fader creep” where you keep pushing everything up and up, but this is not a good idea.
Stay tuned for Cubase Start to Finish, Part 6 coming next week.
Learn Cubase tips, tricks and more in The AskAudio Academy here.


 © 2024 Ask.Audio
A NonLinear Educating Company
Discussion
Want to join the discussion?
Create an account or login to get started!