Previous Articles in this series:
1. Making Edits on Tracks
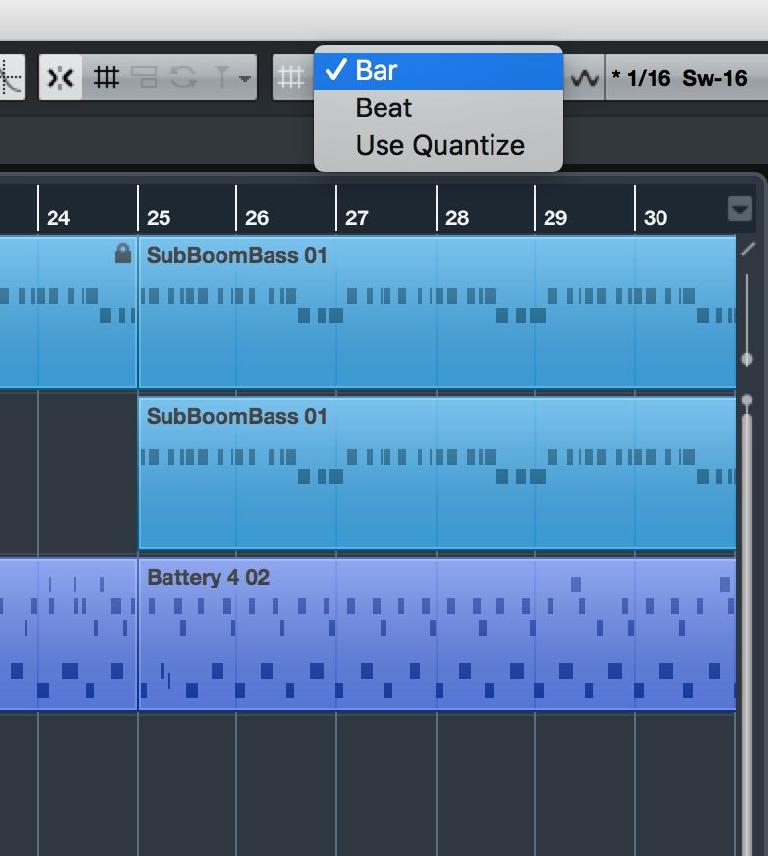
The main Project view allows you to make quick and effective edits to audio and MIDI parts, and once you get used to it you’ll find it almost second nature. It’s vital to understand the grid and snap systems at work here to edit properly. Cubase uses a musical grid of bars and beats, and with snapping turned on you can choose a snap value like Bar, 1/2 beat, 1/4 beat and so on. The Use Quantize option lets you select extremely specific snap values if you need to. Snapping governs the behavior of position-based actions like cutting and moving clips, and is vital to maintain correct timing when arranging and editing. If moving regular blocks of data, stick to a Bar setting. If you are cutting clips into smaller clips, you might need finer resolutions like 1/8, 1/16 and so on.
2. Cut up Clips
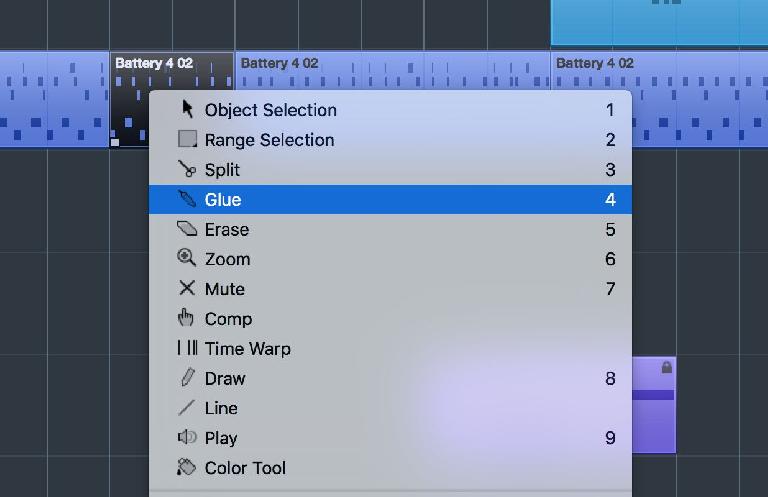
Select the Scissors tool and check your snap setting is correct. In this case I am sticking with Bar. Move the cursor over a bar marker and you will find you are able to cut clips up and then work with them independently of the original clip. It’s important to understand that audio clips are edited nondestructively, meaning that if you cut a section out, you can just drag the original clip back out to restore the missing part. MIDI clips however are edited destructively so if you cut one up, it’s permanently changed. When you have cut part of a clip you can right-click on it to reveal the tools including options to mute or erase the clip, or glue it back together to undo the cut.
3. Move, copy and paste
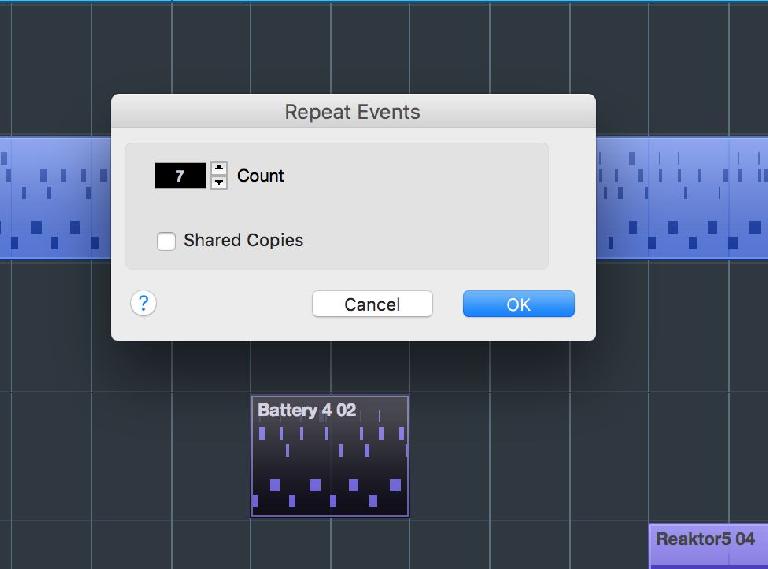
Any clips of any length can be moved around a project and this is the basis of editing and arranging any kind of music. Use the pointer tool and the copy and paste commands to move clips around, copy them to new tracks, or delete them. One cool trick is to select a clip—perhaps a MIDI or audio drum loop or a sample—and then press Command (Mac)/Control (Win) and K. This activates the Repeat function and Cubase lets you specify a number of repeats for the clip. Put in 12 repeats for example and it will instantly create 12 copies of that loop. Provided your clip is correctly quantized and the snap settings are right, it’s a quick way to generate long stretches of a part with just a couple of clicks.
4. Set up zooming shortcuts
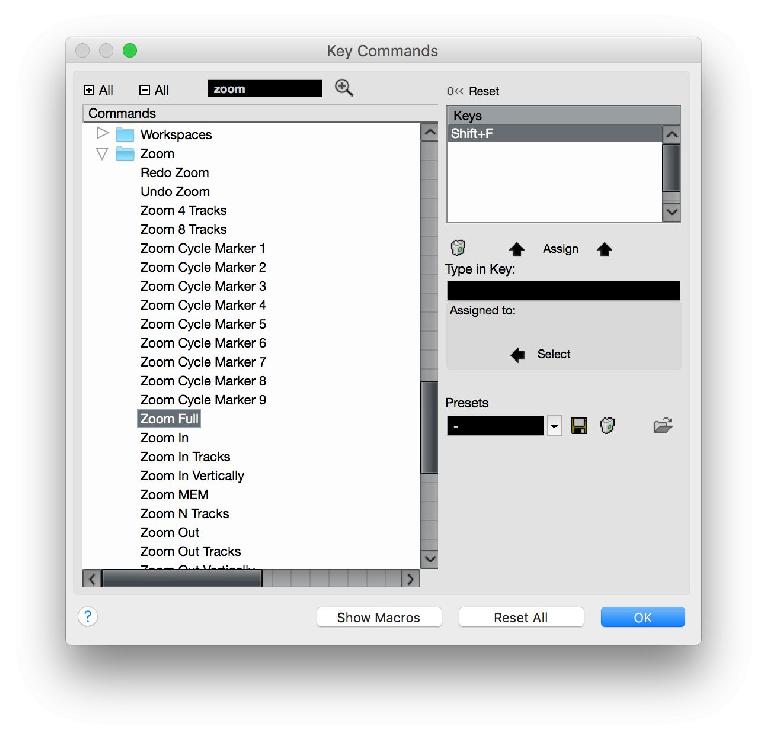
This might sound a bit dry but it will save you endless fiddling about when you are actually doing real-world work on projects in Cubase. You will know about the zoom sliders in the corners of the project window that let you increase or decrease the horizontal and vertical zoom levels. If you’re constantly reaching for these tiny sliders, it’s going to take up a surprising amount of your time. Instead, go to the File > Key Commands window and scroll to the bottom to find the Zoom folder, inside which are lots of different zoom commands. Find the ones you’re likely to use most often—for me it’s Zoom Full, Zoom In Tracks and similar, because these let me quickly zap to a specific view like the whole project, or the area between the cycle markers for example. Assign key commands to the ones you will use most often and you’ll save a lot of time in the long run.
5. Explore the Arranger Track
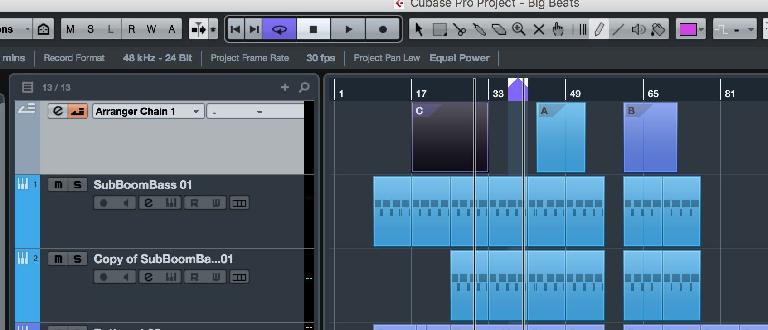
Cubase has a cool feature called the Arranger track and it can be used for trying out multiple arrangements without having to actually create the physical layouts on the timeline. Select Project > Add Track > Arranger and drag the track to the top of the track list, which makes it easier to follow. Now press the Activate button (which turns orange) and select the Pen tool from the toolbar. Use the pen to define areas of the project in the Arranger track: they will be labeled A, B, C and so on. The snap settings will define where the boundaries of these areas snap to.
6. Make different arrangements
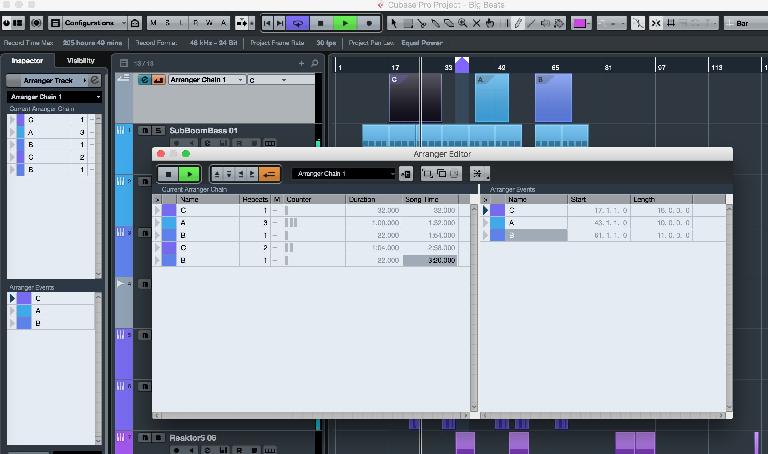
Define parts of your project like the intro, verses and choruses using these Arranger blocks. Then press the E button on the track to open the Arranger Editor and drag Events from the right-hand column into the Chain area on the left. Drag an Event more than once in succession to add more than one repeat of that event, or enter numerical values in the Repeats column. What you are doing when you now play back is telling Cubase to jump seamlessly to these different areas of the project to play them in the order you have specified. If you edit the audio and MIDI clips that fall under these defined areas, this will be reflected as the arrangement plays back.
7. Render an arrangement down
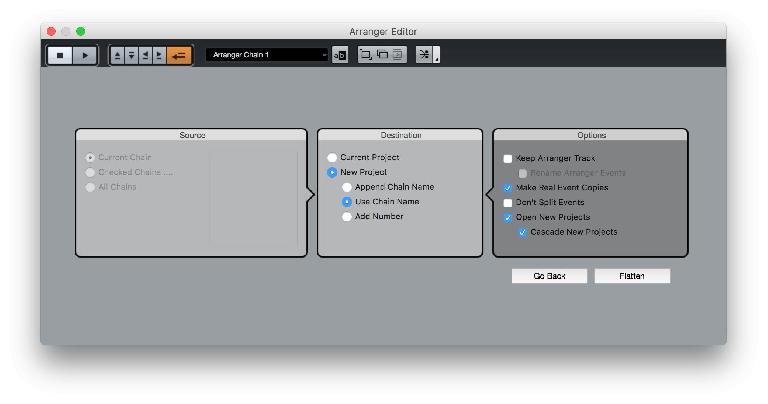
You can create multiple Arranger chains from any project, potentially creating subtly or wildly different versions of tracks without having to do lots of copying and pasting on the timeline. The button at the far top right of the Arranger Editor window is called “Flatten with options and preferences” and if you click on this you can choose to render any chain out to a new project, or to overwrite the current project with the current arrangement. Using this system it would be easy for example to quickly create and then render out different versions of a track like radio edit, album version and instrumental version—all without having to physically make those edits on the timeline, which would take far longer than using the Arranger track.
8. Save New Version
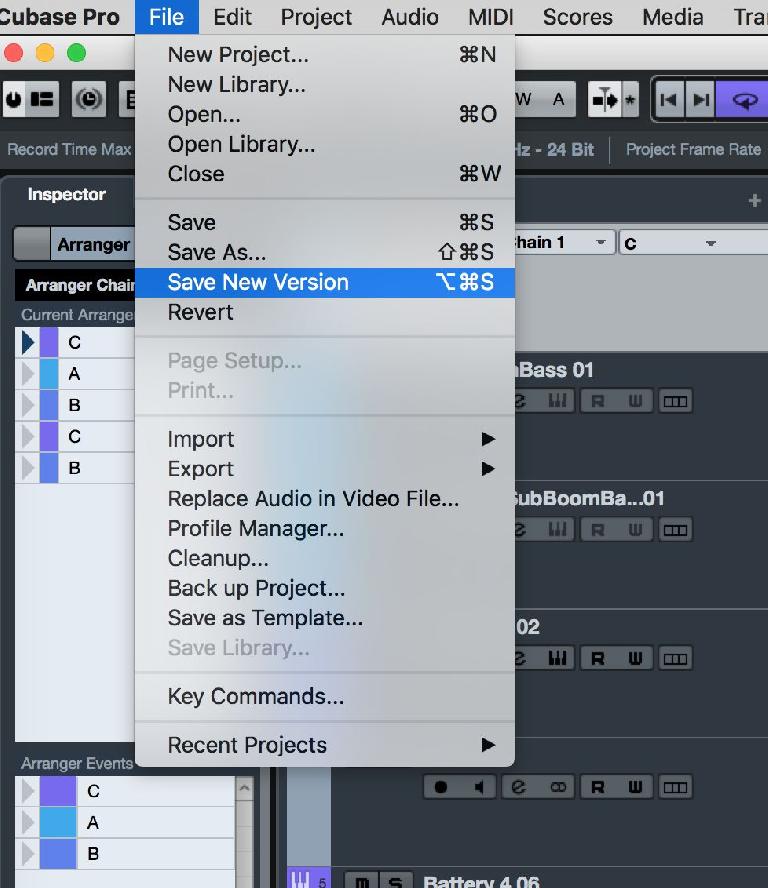
You should have Cubase set up to auto save for safety reasons but you can also manually create a new project version using the File > Save New Version command. This creates a new version with a number so you can make edits and then roll back if you decide later that you don’t like them.
Stay tuned for Cubase Start to Finish, Part 5 coming next week.
Learn Cubase tips, tricks and more in The AskAudio Academy here.


 © 2024 Ask.Audio
A NonLinear Educating Company
Discussion
Want to join the discussion?
Create an account or login to get started!