One of the key differences between hardware and software studios is the extent to which you can or cannot easily patch signal between different channels. In a hardware studio, patch bays are often used so that more or less any source or channel can be easily routed to outboard effects, groups or other destinations. In a DAW however, routing tends to be a little more opaque, with the exception of Reason and its rather nifty draggable patch cables. Although it may be a little unclear, it is generally always possible to do some creative routing in your DAW and Cubase is amongst the most flexible DAWs in this regard.
Why might you want to start reassigning your channels from the default “master out”? The most obvious use is for the purposes of grouping. Grouping tracks is common both in live sound and hardware studios, and it can be used to great effect in software studios as well. Imagine that you have a big project with drums, guitars, several vocals and maybe even some strings or horns. As you mix, you decide that the drums need to be a little quieter. The only problem is, your drums are recorded on eight separate channels, one for each drum mic. And the balance of the drums is perfect, it's the kit as a whole that needs to be quieter. Manually altering each fader will almost certainly mess up your perfect drum sound.
Enter grouping: the process of assigning each of the drum channels, in this example, to a single stereo grouped pair so that the level of the whole kit can be brought up or down but without altering the relative levels of the individual drum mic channels. The same thing can apply to any channel, though it makes sense to group like with like when mixing. So your backing vocals might all be sent to a group, your rhythm guitar parts to another, or your horns to their own group. By using grouping your mix gets simplified since once you have balanced each set of sounds you can then alter their volume by group, which is easier. Suddenly you have four or five groups to work with rather than 25 channels. Of course you can use as many or as few groups as you like, and the channels that feed each group still retain full editability, so you're not committed to any changes that you make.
Step 1
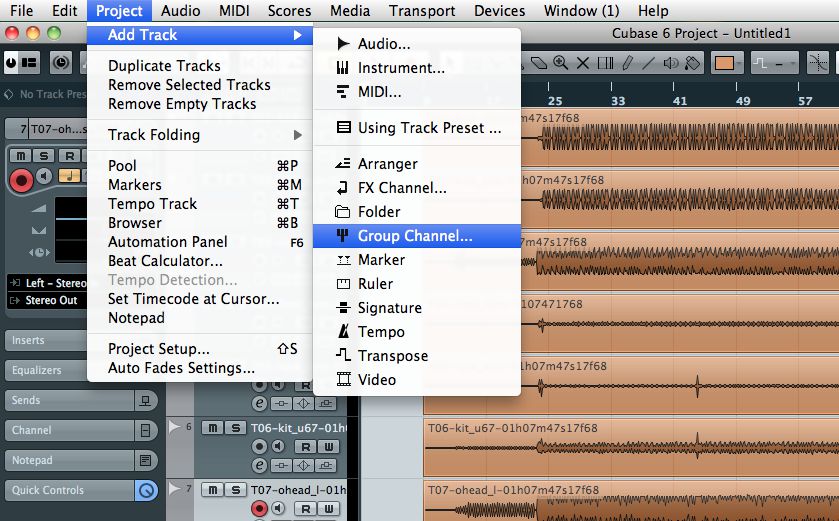
In Cubase, take a project with several tracks. In the Project, right-click or use the Project > Add Track menu to add a Group Channel Track to the project. In the resulting window you can choose a channel type, and in this case we're going to stick with a simple stereo track.
Step 2
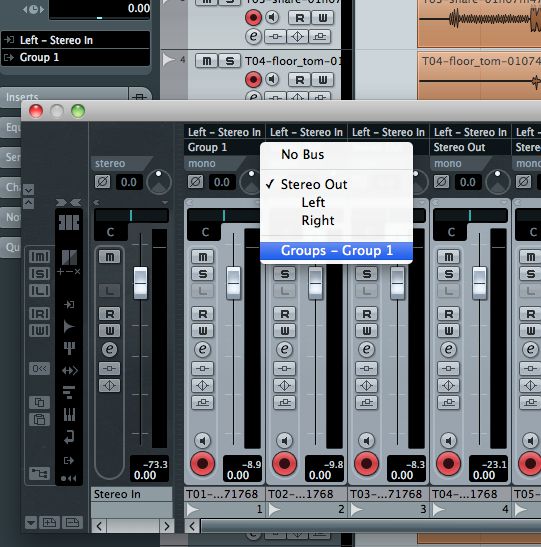
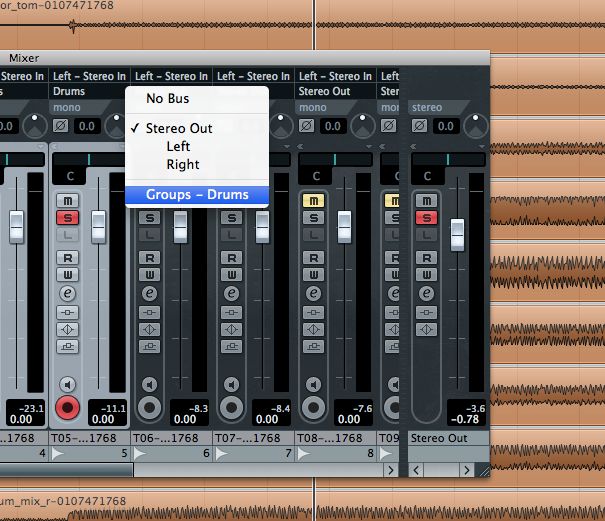
Next, open the mixer. At present the Group track looks just like any other. Choose which tracks in your project you want to group, and go to the input/output section at the top of the mixer. For each channel you want to assign to the group, click in the Output tab and reassign the output from Stereo Out to Group 1.
Step 3
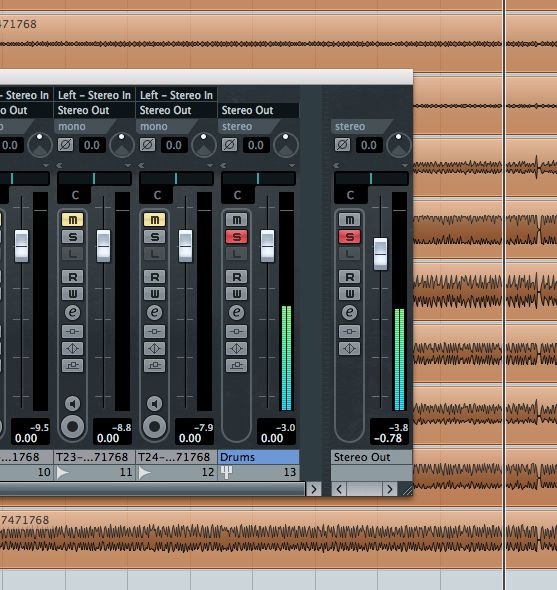
Double-click on the Group channel's name and give it a sensible name. You could also do this prior to routing: the name is updated elsewhere in the mixer automatically. Solo the Group channel and you will see the grouped drum channels are also soloed. Changing the volume on the Group channel will now bring the volume of all routed channels up and down.
Step 4
If you decide you want to add more channels to the drum group you can simply use the same output assignment technique to add them. By changing the levels, pan, EQ or insert effects of any channels feeding a group you can still change individual elements within it.
Step 5
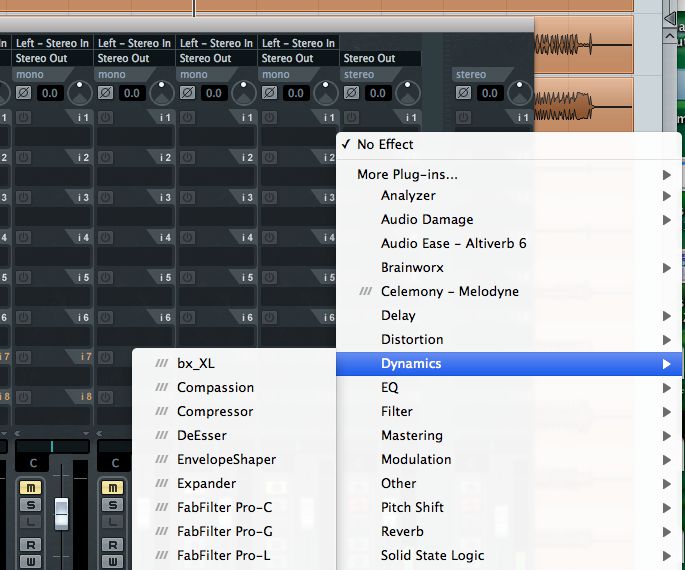
Expand the mixer by clicking its arrow to reveal the EQ and insert sections. Here you will see that you are able to add insert effects, EQ and send effect processing to the Group channel just like you can with any other channel. This is really useful because it means you can route all your drums, for example, through a nice drum compressor. Or, EQ your drum part without having to apply EQ to every individual channel, though this is still an option available to you of course. You can't set a Group channel's input because by definition it is fed by other channels, but you can set its output to any available master or surround buss.
Step 6
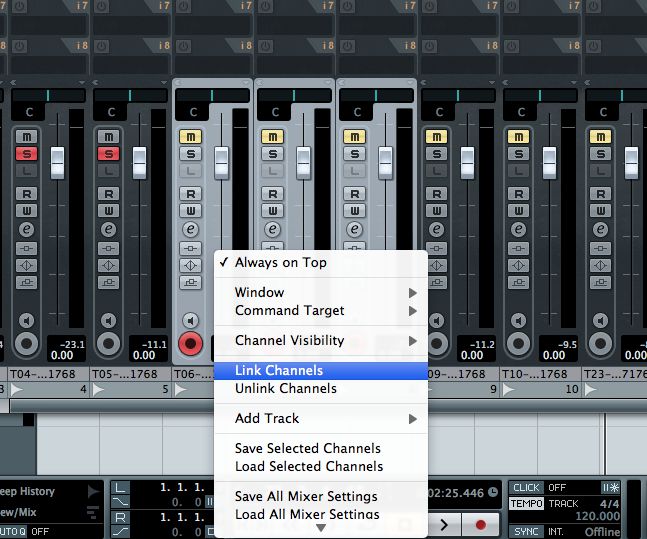
Here's another trick that lets you link channels without routing all their outputs to a single audio channel. Select two or more channels and then right-click on their names at the bottom and then choose Link Channels. Whenever you move the fader on one of these channels from now on, the others will all go up or down by the same amount; their relative levels however, , will stay the same. So they are linked but their outputs remain separate. This does mean you can't apply effects or EQ in a group. To unlink them simply choose the Unlink option.
Step 7
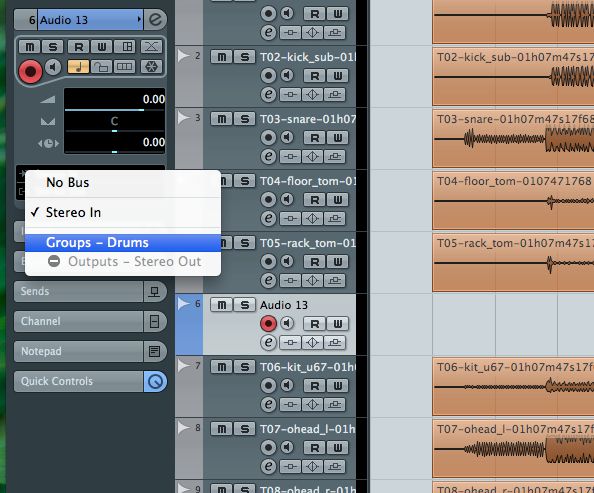
Here's an interesting trick for bouncing down or printing Groups within a project that makes use of Cubase's free routing abilities: With your channels already grouped, create a new stereo audio track in your project. In the mixer or in its inspector in the Project window, set its input to the output of the Group channel.
Step 8
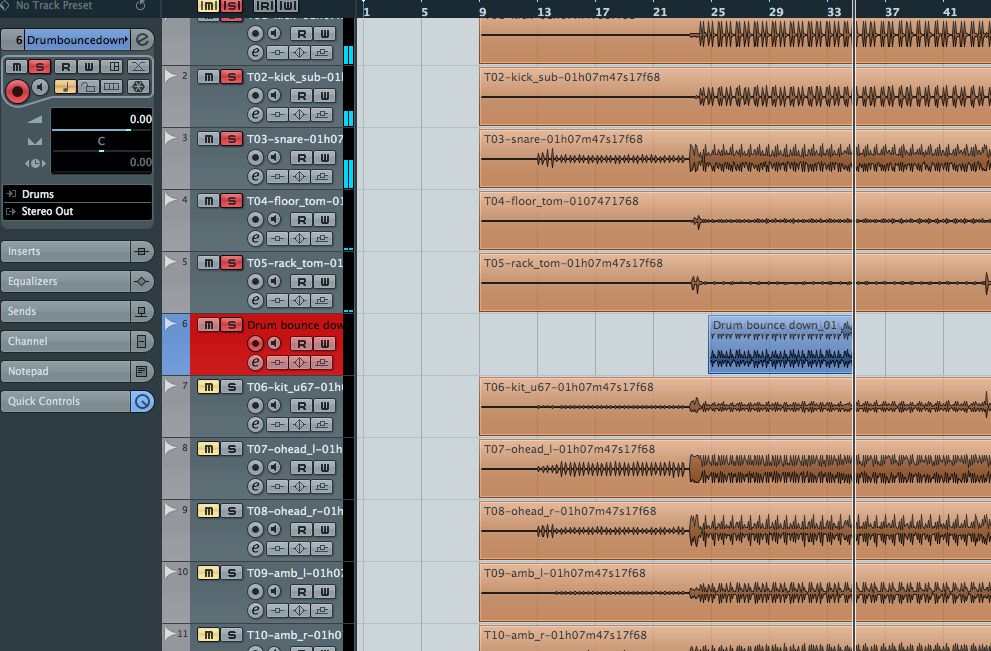
Now, record arm the new audio track and name it sensibly, as your bounced file will inherit the track name. Solo up the group and new audio tracks (this will also solo up the individually grouped tracks). Soloing isn't vital since the new audio track will only record what its inputs feed it, but it can be helpful in keeping track of what's going on. Press record and play and the drum group is bounced down to the new track as a stereo file, complete with any effects.
Your original tracks remain editable and intact. This is a good trick as it can help you with quick test mixes or quick stem bounces.


 © 2024 Ask.Audio
A NonLinear Educating Company
Discussion
Want to join the discussion?
Create an account or login to get started!