
If you’re like me, you’re always looking for ways to fill out the tracks you produce, so that they are bigger, bolder and sonically pleasing to the point that your listener is sure to remember. But you’ve probably noticed that just sitting down and recording some vocals with a drum beat, even with a thick voice and kit, can still have some holes in the overall mix. After all, it’s not easy to listen to only vocals and drums, non-stop. You need other elements! Right?
Flesh It Out…
Over the years, instruments like Native Instruments' Flesh have come around that are designed with the intention of giving you simple, thick and full accompaniment, from humble beginnings - like a drum loop that will sit in certain places within a mix where bass might be sorely needed. Or, perhaps a mid-range area that fills out an area where a lead guitar might be, thus psychologically stimulating your listener's brain in to thinking they are hearing a full mix, including guitar. When in fact, it’s just a really mid-range(y) synth, filling in with some power chords of its own.
Roll Your Own Flesh…
Technically speaking, you can easily fulfill the promise of Flesh on your own. After all, what makes the Reaktor instrument so cool is that any old drum loop can be the source audio that modulates synths to get them to groove in funky, crazy ways. Because the synths being modulated can have their root notes adjusted via MIDI keyboard, you create the illusion that a synth is being played in a seemingly groovy and complex manner, when you’re really just hearing a drum machine looping over and over, modulating some synths which are having their currently played root note changed periodically, by changing a sustained note on the synths. Yeah, it’s a little crazy!
1. Simple Starts, Ideal!
To give you an example of using simple methods to flesh out your tracks via creative rendering or bouncing I’d like to show you one very easy scenario to emulate. I’ll create a basic drum beat in Ableton Live, using any old drum kit within my Live Library. In my case, I choose the Kit-Core 909 patch, as I loves me some Rolands. At 80 BPM and Record Quantization set to 16th note, I’ll lay down a basic hip-hop beat, where I’ll start with the kick and snare.
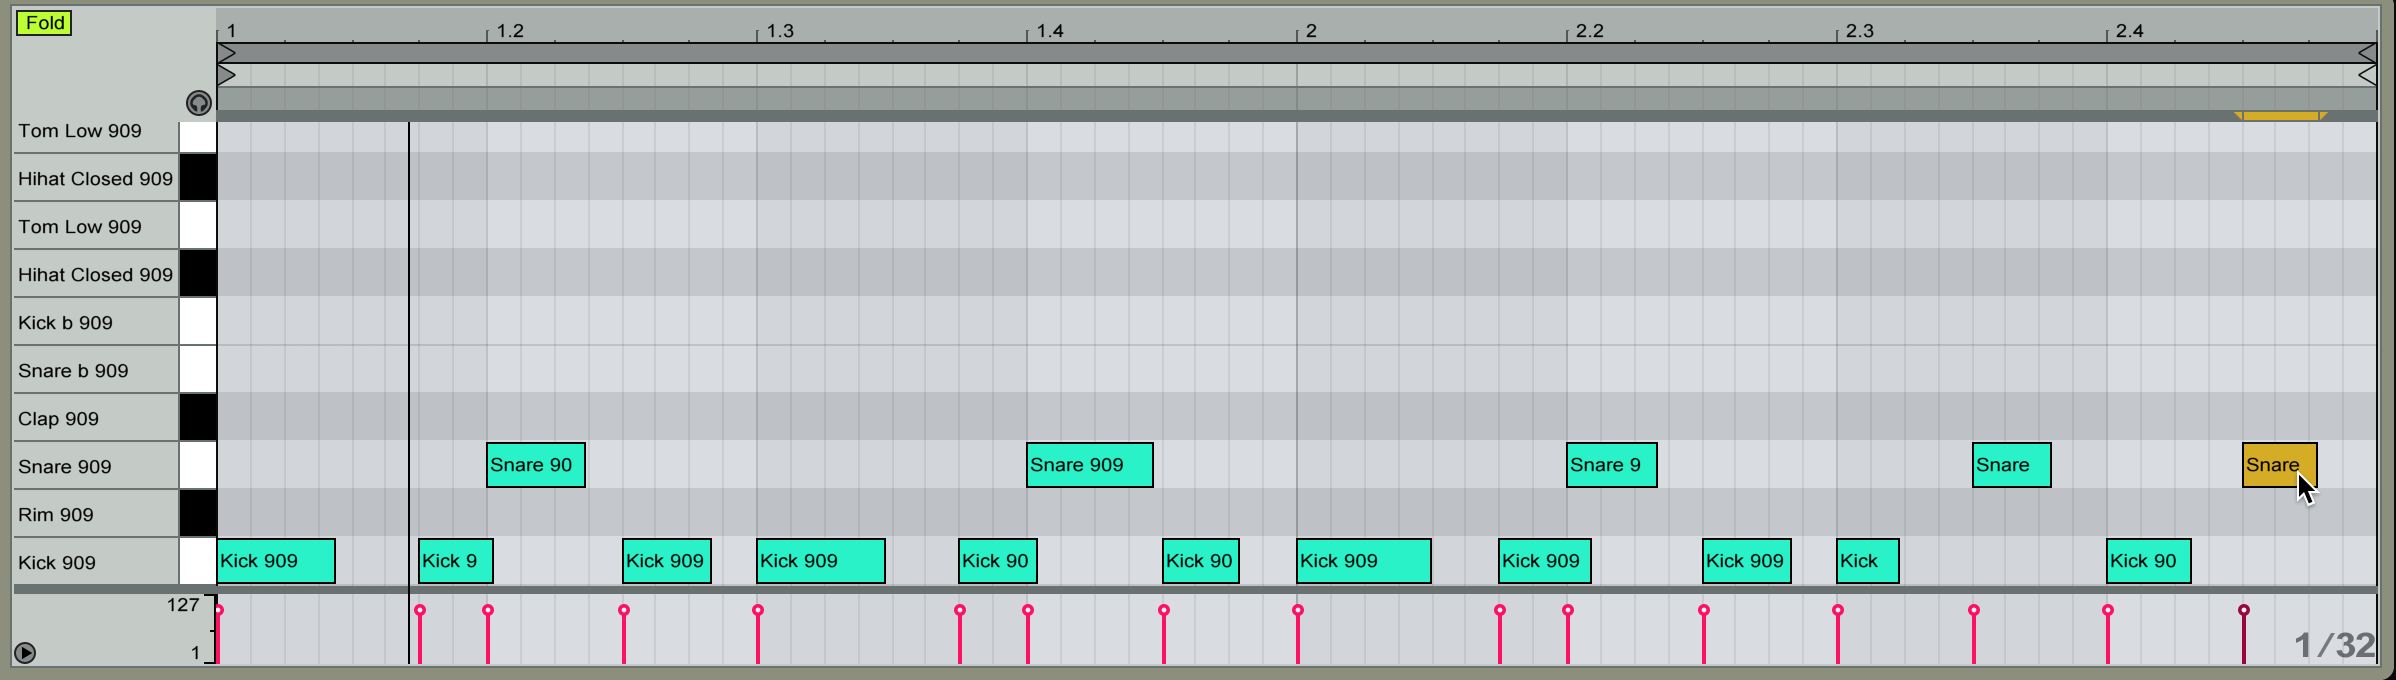
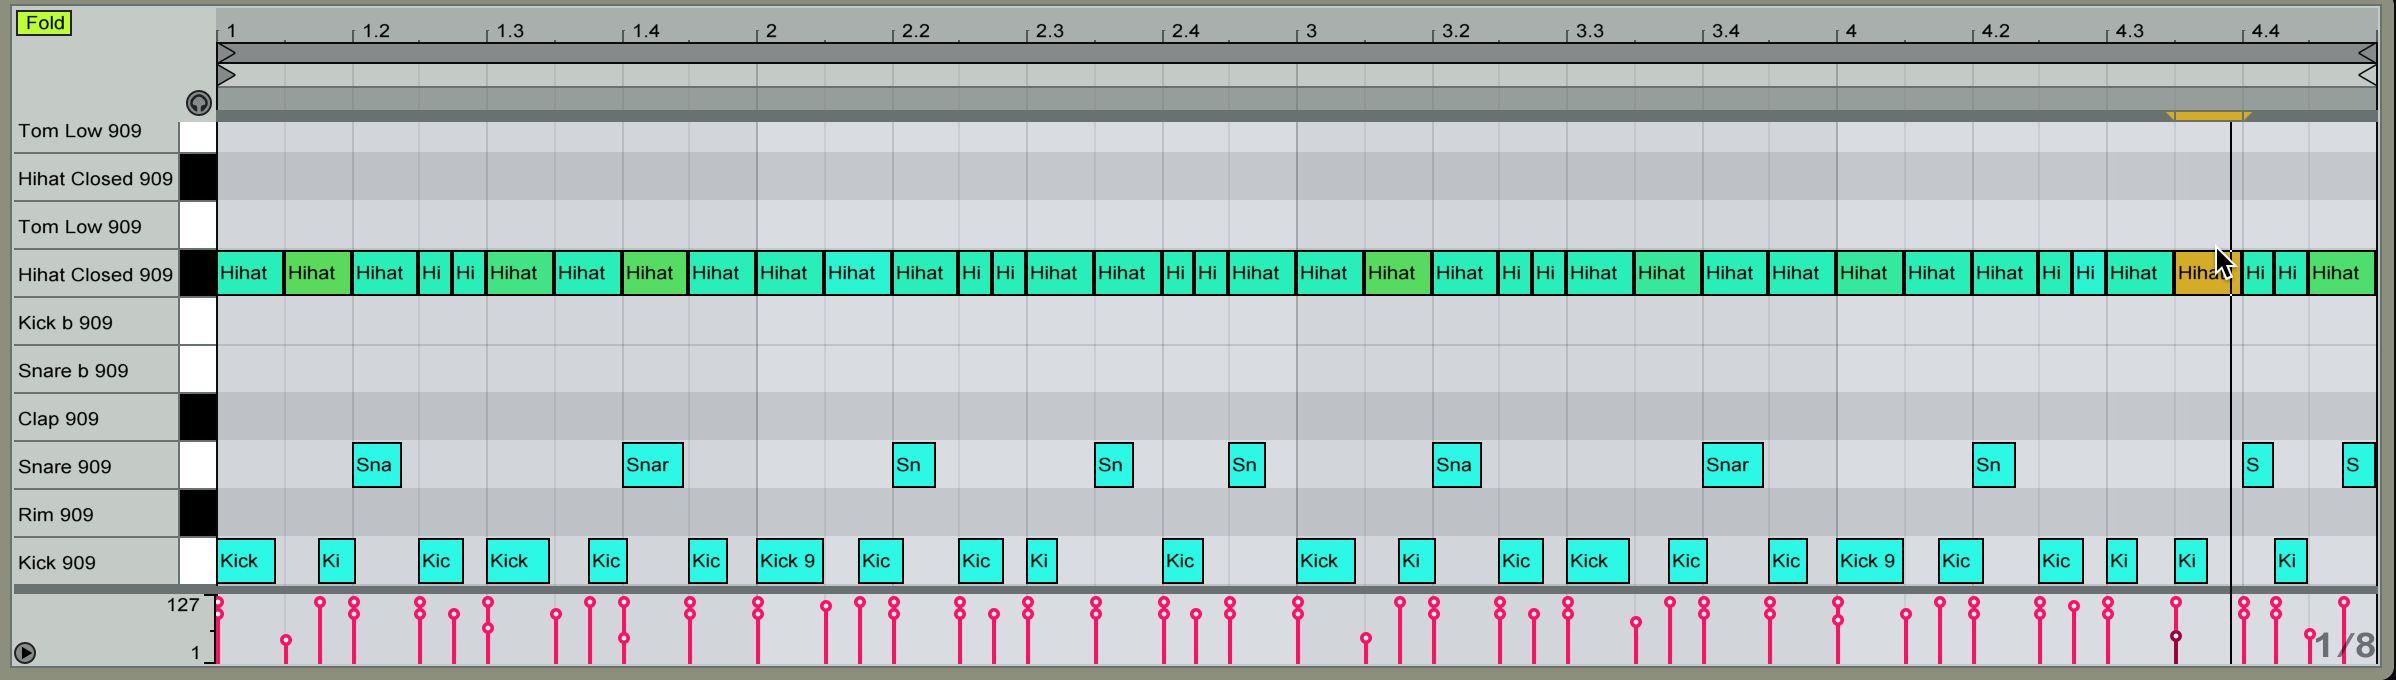
Then lay down a little hi-hat over the top, later, to complete the picture, with a solid drum foundation for me to build off of.
Now, after a little bit of panning and mixing, I’m going to send a giant, healthy bit of the whole drum mix over to the A Return Channel currently occupied by a Reverb. I’ll also ensure that the Channel A Send is set to Pre, so that the auxiliary channel gets the signal before the fader!

On Return Track A, I’ll remove the High and Low Shelving Filters within the Diffusion Network of the Reverb unit, giving me a much bigger and brighter reverb for my drum beat and increase the Decay time of the Reverb. Normally, I don’t want to create a reverb setting that is this big. But I’m in a sense trying to create an oscillator here. So I want to get big!
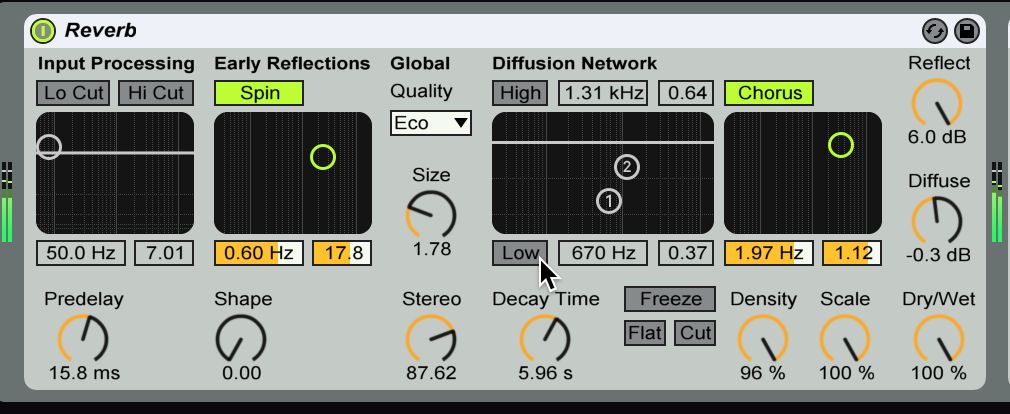
And just to prove my commitment to big reverb, I’m going to go ahead and place a compressor just behind my reverb, so that I can further boost my Reverb’s potency and presence.

2. Render A Scene
Now that I have a big reverb on Return Track A, I’m going to do the unthinkable and render my Return Track by using the Command+Shift+R shortcut, and render out what is currently just a loop. But from Return A only. I’ll select my A-Reverb/Compressor Return channel from the Rendered Track drop-down menu and I’ll increase the Render Length by one measure so that I don’t lose my reverb tail. I’ll convert my rendered Return track to Mono, keeping things simple, and the pan under my firm control.
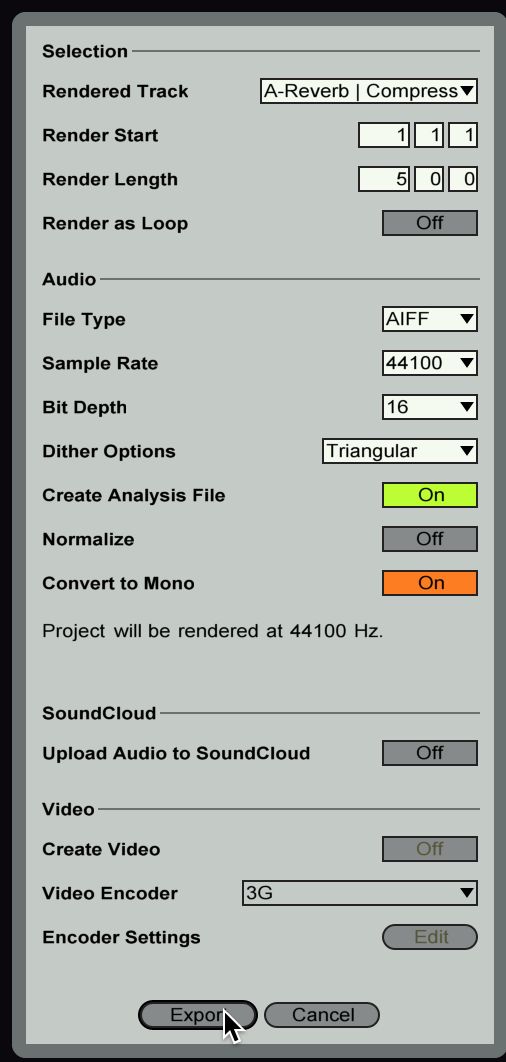
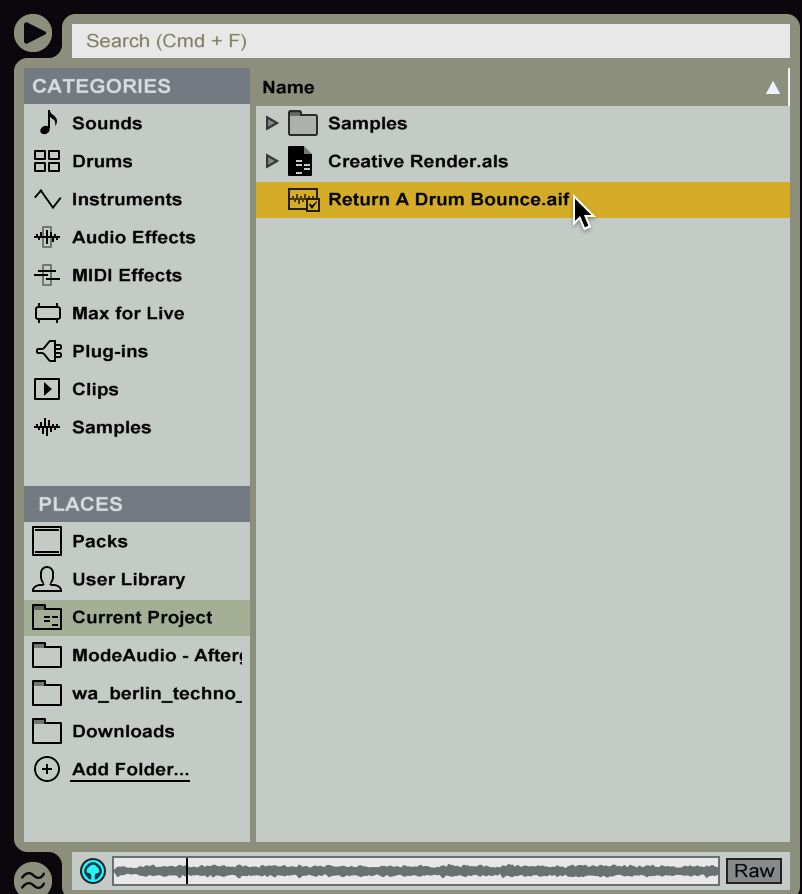
I’ll export the Return track audio to an AIF file within, named Return A Drum Bounce, within my project folder. Then, within the Current Project location within the Places section of the Ableton Browser…
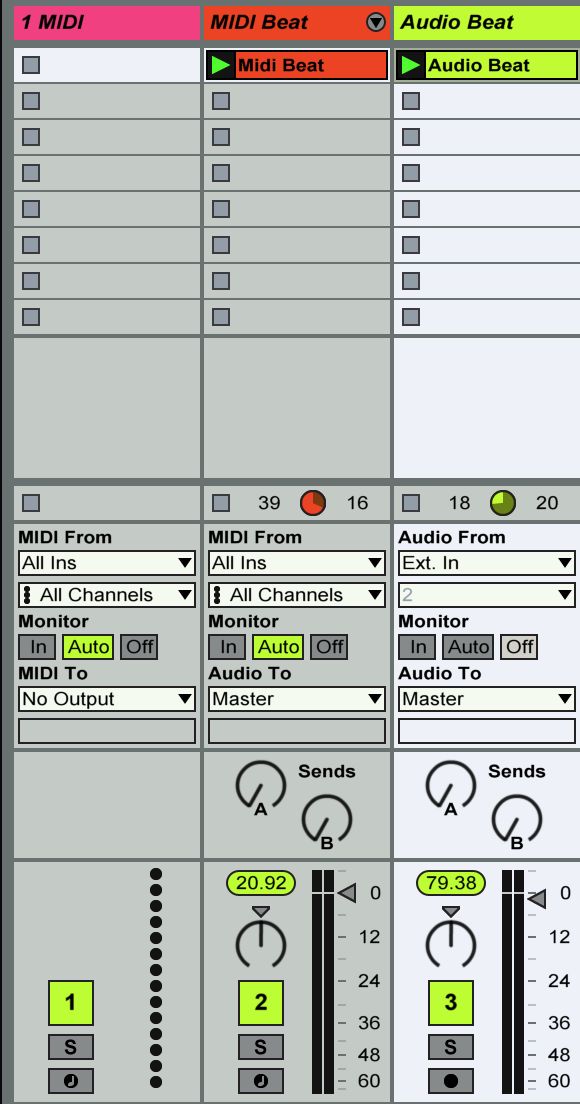
I’ll locate my newly created render and drop it on a new audio track by simply dragging it in to an empty audio track clip within the same Scene as the MIDI clip used to create the render which I’ve just renamed to MIDI Beat, and the dropped clip as Audio Beat, my creative render.
3. Sculpt A Render
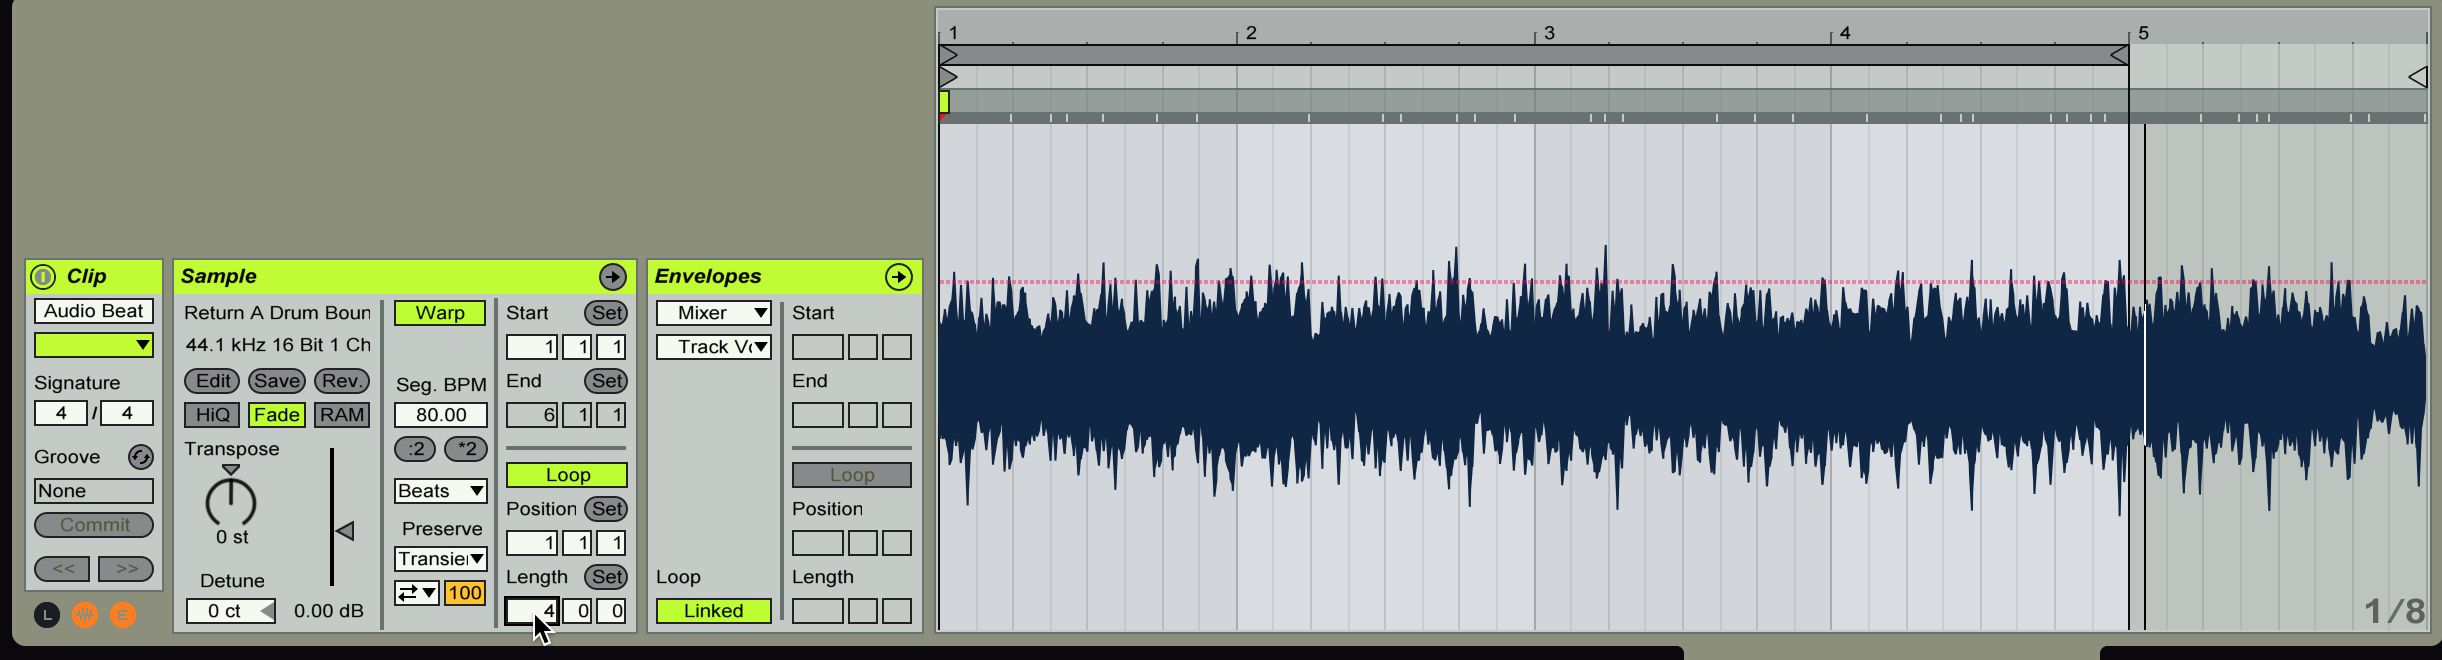
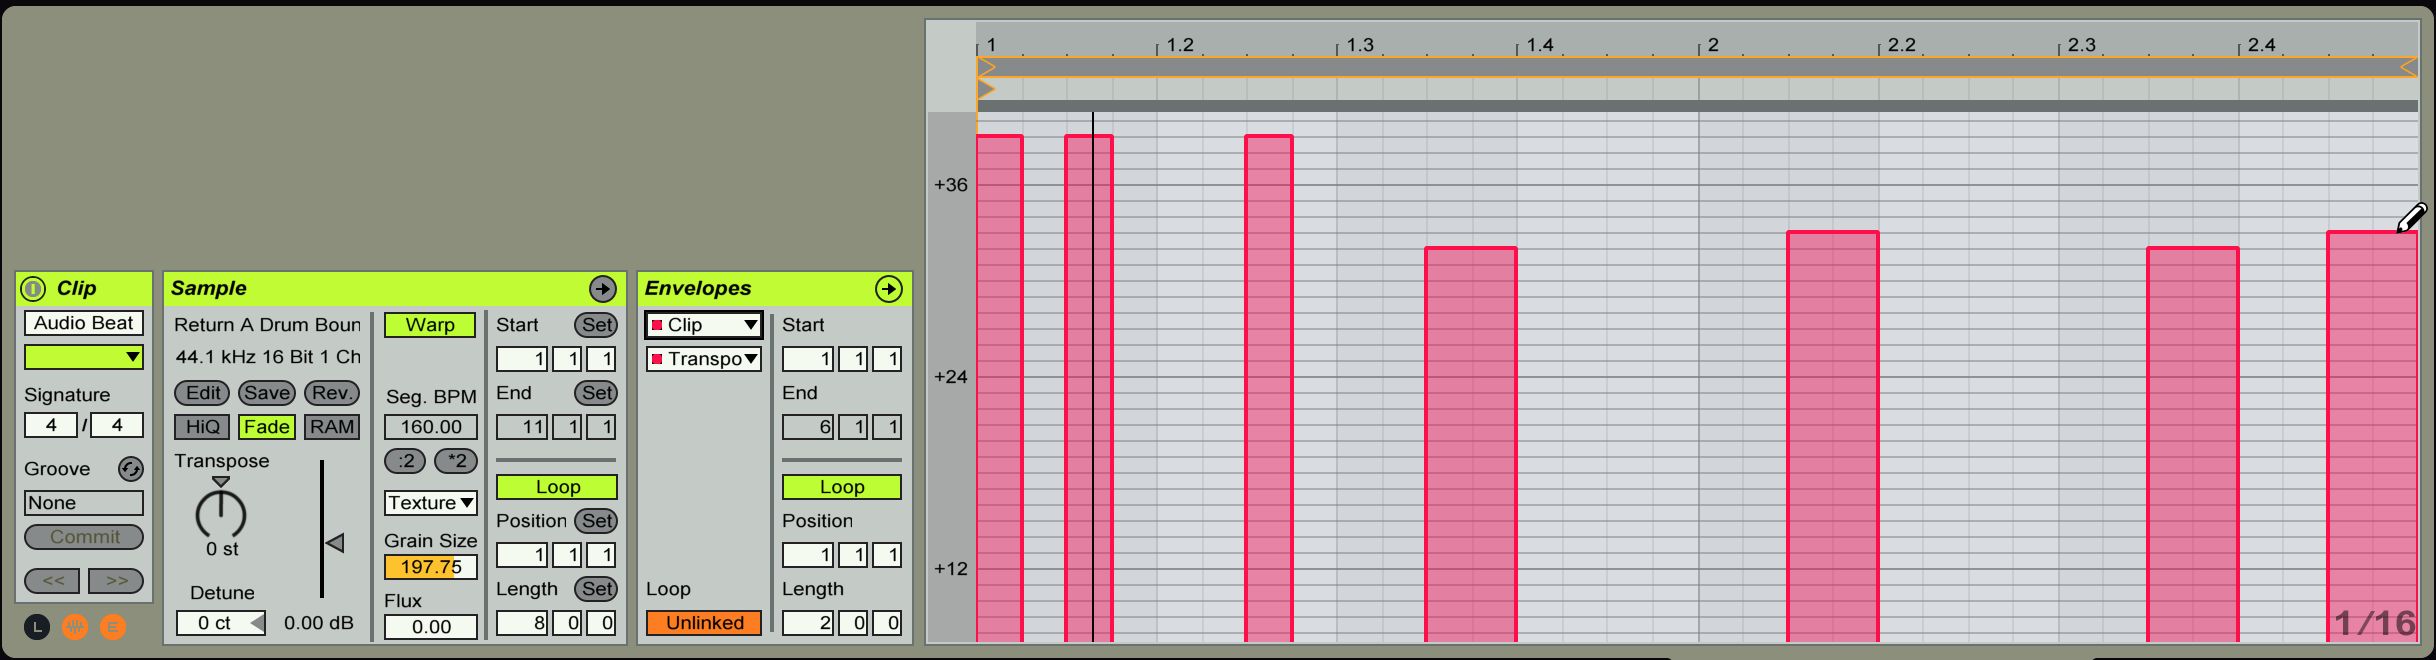
To tidy things up, I’ll reduce the length of my new audio clip to 4 instead of 5. I want the reverb tails but I want them for later, when I’m arranging. For now, I just want to have them groove and stay in time.
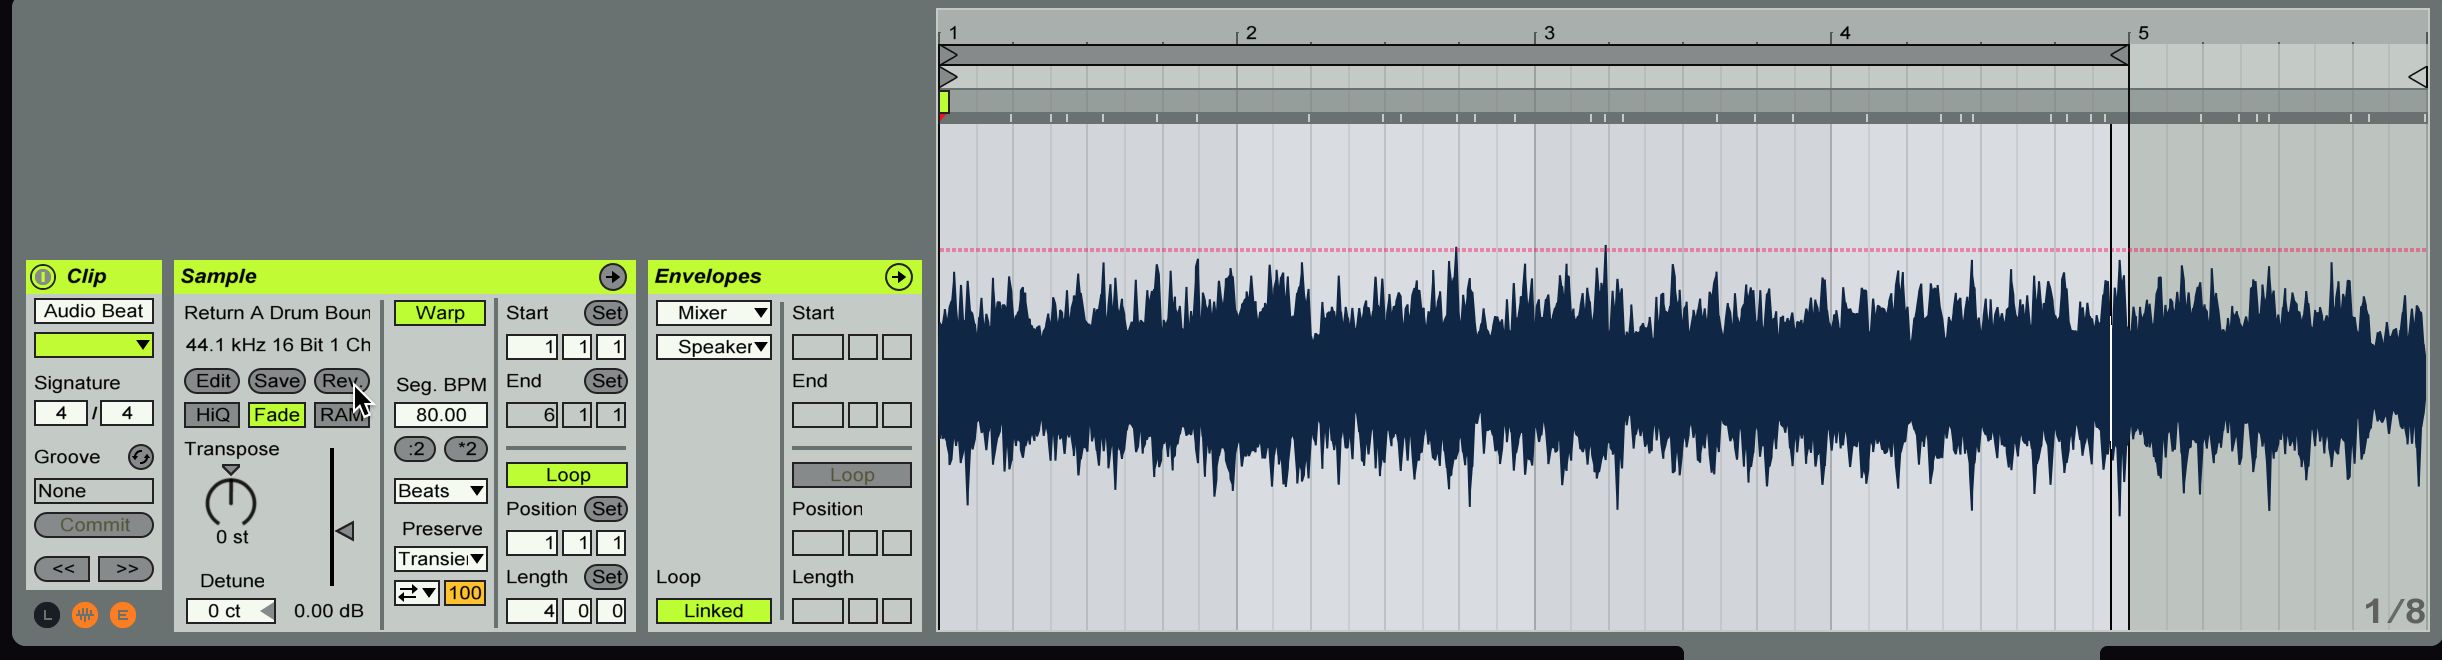
With my former return track now safely within a clip, I have a lot more power over what I can do with it and much of it does not rely on any plug-in. In fact, I can use the native tools of Ableton to really change the audio from the return to something else. For example: I can use the Rev, or Reverse function within the Audio Clip I’ve created to make the return track, washed out drums to play backwards.
Because of the longer reverb tails, this creates a very familiar, ghostly effect since now the reverb tails are slowly gliding in, instead of pounding in. But this is only the beginning! Because now I can start using the loop like a synth, to accompany the drums as well! If I go under the Warp Mode, I can set the Clip to Texture mode.
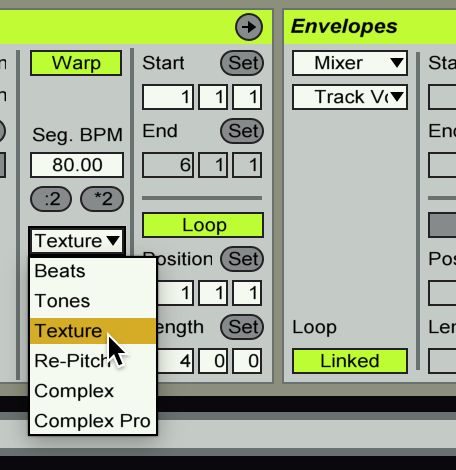
In this Mode, if I increase the size of a Grain, I can center upon small sections of audio that sound more like synth parts, if the overall Clip Transposition knob in the Clip Editor is Increased. Because of this little exploit, I can increase the Grain Size of the Texture to something stupid, like 197.75.

Then with the Transposition Modulation Editor of the Clip, I can unlink the Editor, so that I can make a shorter, melodic melody within the bounced return….
Going Forward…
You kind of forget how much Ableton can actually do on its own. And it’s also very easy to forget how much an Auxiliary effect absorbs, as more and more sources are sent to it. Imagine what it would be like bouncing a reverb send that has several instrument routed to it, only to destroy it as an audio file later? When effects begin to be applied to the rendered audio, they will take on a new life of their own again. Who knows if you might want to bounce or render again? That’s what’s so fun about rendering. You close off some of the options you get in the original sound design, once the source is no longer a plug-in. But you make the audio into something new. It’s total alchemy!

Discussion
Want to join the discussion?
Create an account or login to get started!