
When MIDI was new and digital synths were in their infancy, layering one sound over another required using at least two hardware synthesizers. A third layer would require a third synth, and so on. That's because most synths on the market were monotimbral, meaning that each synth was capable of only playing one sound at a time. Later on, advances in technology allowed a single synth to be multitimbral, or being able to play multiple sounds simultaneously. This meant that musicians could create layers of two, four, eight, or even sixteen sounds.
Today, the various virtual instruments found in Cubase 7 also fall into the monotimbral and multitimbral categories. Retrologue and Padshop are both monotimbral, whereas HALion Sonic SE is multitimbral. If all the sounds you want to layer are part of the HALion Sonic SE library, it's very easy to create layers. But when the sounds come from different synths (virtual or physical alike), setting up layers can be a little more challenging. In this article, I'll take you through three powerful methods of layering synths in Cubase 7.
Note: While it is possible to create some layers with Instrument tracks, I'll be using MIDI tracks in conjunction with the VST Instruments rack for the examples in this tutorial.
Creating Layers in HALion Sonic SE
Since HALion Sonic SE (hereby referred to as HSSE) is multitimbral, it's very easy to create dense layers with only a single instance. First, you'll need to reveal the VST Instruments rack by clicking the Devices menu and selecting VST Instruments. (As a shortcut, you can type F11 on your computer keyboard.) Next, you'll need to load HSSE into one of the empty slots. For example, an empty slot will have “no instrument” shown in the display. Clicking on that empty slot will open a drop-down list showing all the VST Instruments you have installed on your computer. For this example, scroll down to the Synth category and click HALion Sonic SE as shown in Figure 1.
, Synth category, and HALion Sonic SE.")
Figure 1: VST Instruments Rack (background), Synth category, and HALion Sonic SE.
After selecting HSSE, you will get a dialog box asking if you'd like Cubase to “create a track assigned to the plug-in 'HALion Sonic SE'?” Click the Create button to proceed. You will now see the control panel of HSSE in its own floating window, and you'll also see a MIDI track in your track list with the name “HALion Sonic SE 01”. Make sure to record-enable that track, then play some notes on your MIDI keyboard (or other MIDI controller). What you'll hear is the default sound called First Contact loaded into the HSSE slot 1, which is a rich swirling soundscape. But for this tutorial, you're going to load three different sounds into the first three slots of HSSE. You can use any sounds you'd like, but if you refer to Figure 2, you'll see that I chose YAMAHA S90ES Piano, Vintage Strings, and [GM099] Fx 3 (Crystal). (You load the sounds by clicking the drop-down arrow at the right of each individual slot, which will reveal the sound browser.)
, HALion Sonic SE control panel, and three sounds loaded.")
Figure 2: The MIDI track (upper left, record enabled), HALion Sonic SE control panel, and three sounds loaded.
Now play some notes on your MIDI keyboard. Even though you have three sounds loaded, you'll only be hearing the sound in the first slot. That's because each slot of HSSE is assigned to an individual MIDI channel; slot 1 is MIDI channel 1, slot 2 is MIDI channel 2, and so on. To complete the layering, you'll need to locate the MIDI tab on the HSSE control panel. It's near the top-center to the left of the orange Mix tab. Click the MIDI tab (it will now turn orange) and look at the Channel column just to the right of the sound slots as shown in Figure 3.
 and Channel column, channels set to 1.")
Figure 3: The MIDI tab (upper box) and Channel column, channels set to 1.
Notice that by default, the Channel numbers are equal to the slot number. But by changing the channel numbers to that of the MIDI track (in this case, MIDI channel 1), you'll hear all three sounds layered together when you play notes on your MIDI keyboard. Once you have your layered sounds assigned in HSSE, you can record the musical performance for the layer on one MIDI track. Then if you want more layered sounds, you can use the remaining thirteen HSSE sound slots (as long as you use MIDI channels other than 1), or you can load another instance of HSSE into another VST Instrument slot.
Creating Layers with Monotimbral VST Instruments
As I mentioned previously, creating layers with monotimbral instruments is a bit more work. There are two methods for monotimbral instrument layering, and the choice of which method you prefer will be determined by how many layers you'll want, along with how much post-recording editing you're likely to do to the MIDI event data.
Method One: Using Multiple Tracks
This method can also be accomplished with Instrument tracks, but let's keep using MIDI tracks and the VST Instrument rack. Refer to the instructions for and included in Figure 1, but load Padshop into slot 2, and Retrologue into slot 3. (When prompted for the automatic creation of MIDI tracks for each VST Instrument, click the Create button on the corresponding dialog box.) Then load a sound into each instrument. Remember, Padshop and Retrologue are both monotimbral, so you can only load one sound into each instance. I chose Airy Bell for Padshop, and Vintage PWM Strings for Retrologue as shown in Figure 4.
 and control panels (overlapping) for Padshop and Retrologue, sound names in boxes.")
Figure 4: The MIDI tracks (record-enabled) and control panels (overlapping) for Padshop and Retrologue, sound names in boxes.
Now click the record-enable button on the Padshop and Retrologue tracks, then play some notes on your MIDI keyboard. You'll hear both sounds layered together for a thicker, more complex result. In fact, you could even record-enable the HSSE track for another layer of complexity, or add as many VST Instruments and tracks as you wish for virtually unlimited layering.
However, there are two disadvantages to this method, one of which you'll encounter as soon as you're finished recording. You see, every track will have its own MIDI event. That means that if you want to do any editing, such as quantizing, splitting, transposing, or note editing, you'll need to make the edits on every single MIDI event. That's a lot of work, but there is a solution.
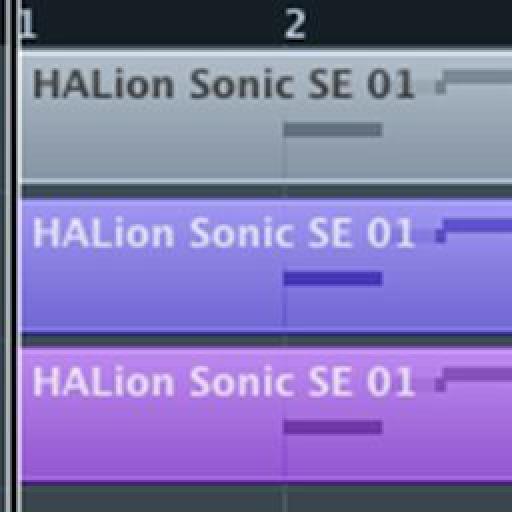
After you've completed the recordings, erase all of the MIDI events except for those on the first track. Then select all the events on the first track, type and hold Shift-Alt/Option (Windows/Mac) on your computer keyboard, then click and drag the events from the first track to each corresponding track that comprise the layer. (This must be done track-by-track.) Dragging the MIDI events with those modifier keys held down creates shared copies, wherein any edit to one event will affect the other shared copies identically. Shared events have a small = icon in the upper right-hand corner as shown in Figure 5.

Figure 5: Shared events, circles indicating the “=” icons.
The other disadvantage to layering with tracks is the amount of screen real estate they occupy. And if you've already got (or are planning to add a lot) of tracks, that can make the Project Window a bit more confusing. For that reason, it's a good idea to drop the layered tracks into a Folder track. That will allow you to hide or reveal the tracks when you need to, plus you can click the record-enable button on the Folder track to enable all the tracks contained within.
Layering with MIDI Sends
MIDI tracks have MIDI Sends, and using them allows you to layer up to four sounds from four different VST instruments. So if you're not needing more than four layers, the MIDI Sends method will save you screen real estate, and not require that you record any more than one MIDI event that will drive all the synths in the layer. Therefore, the MIDI Sends method is my personal favorite way to layer.
We can use the VST instruments you already have in the VST Instruments rack, so for this example, simply add one MIDI track to your Track List. Click on the new track to select it, then refer to the Inspector as shown in Figure 6.
 and default Inspector tabs.")
Figure 6: The selected MIDI track (upper box, record-enabled) and default Inspector tabs.
By default, the MIDI Sends tab is not visible in the Inspector. To make it visible, right/Control-click just below (but not on) the Quick Controls tab to reveal the Tabs list. Click on MIDI Sends in that list, then the MIDI Sends tab will appear in the Inspector. Click on the MIDI Sends tab to reveal the settings within as shown in Figure 7.

Figure 7: The MIDI Sends tab showing top-to-bottom: Power button, MIDI Effect slot, MIDI Send Destination, and MIDI Channel, all settings disabled.
You will notice four Sends (labelled s 1 through s 4), and each Send has four components: Power, MIDI Effect slot, Send Destination, and Send Channel. However, all of those components are currently inactive. Since we're layering, we won't be using the MIDI Effect component. For layering, click the Power button on Sends 1 through 3, then notice that the Destinations appear as “Not Connected” and the Channels appear as 1. Click on the Destination of the first Send and choose 1-HALion Sonic SE - MIDI from the list. When you play notes on your MIDI keyboard, you'll hear the sounds you'd loaded previously into HSSE. Then repeat the process on Sends 2 and 3, but choose 2-Padshop - MIDI and 3-Retrologue - MIDI respectively as shown in Figure 8.

Figure 8: HALion Sonic SE, Padshop, and Retrologue in MIDI Sends 1 through 3.
Those three MIDI Sends are now routing the data from the MIDI track (named MIDI 04) to all three VST instruments simultaneously. This creates the same sonic result you'd get with the multiple MIDI tracks method, with the advantage of having only one track to record-enable, record onto, edit, and be shown in your Project Window. The MIDI Sends method saves you the screen real estate and you won't have to make shared copies prior to editing recorded MIDI data because the synths all come from the same MIDI track.
Lay It On!
You can certainly use these layering methods with 3rd party VST instruments. The layering method you choose will be partially determined by whether those instruments are multitimbral or not. But it doesn't stop there because you can even use hardware synths as part of your VST instrument layers, provided you have some way to monitor the audio outputs of each hardware synth. But whether you use VST instruments and/or hardware synths, these layering methods in Cubase 7 will help you create sonic landscapes from a minimum of MIDI notes.

Discussion
Want to join the discussion?
Create an account or login to get started!