
Native Instruments' Battery is a really competent drum machine and is more than capable of handling all your drum programming requirements. Not only is it perfect for browsing large drum libraries and building custom kits but it has extensive synthesis and effect processing-based features.
Here we look at how to build your own kit, process individual sounds and the entire drum mix to get the best possible finished result. I've included all the kit and patterns used in this article for you to download here.
Step 1 - Three Ways To Import
If you aren't familiar with Battery or have never built your own custom kits in the instrument, the first challenge will be getting your own sounds assigned to the pads. It's nice and straight forward but there are actually a few different ways we can go about it.

A fresh instance of Battery 3 ready to go!
First up you can right-click on any 'cell' in Battery and select Add Sample... This is probably the fastest way to get audio onto each pad and it uses a traditional file browser to do so. The only real downside here is that there is no way to audition the incoming audio.

The 'Add Sample' route.

Choosing the right samples.
Alternatively you can drag and drop files from anywhere in your system straight to the pads. I really like working in this way as it's extremely intuitive. If you are on a Mac you can also take advantage of the 'Quick Look' function to quickly audition any drum samples you are planning to use.

The drag and drop approach.
For most out there the obvious route to getting your one shots into Battery will be to use NI's built-in browser system. This is actually one of the tabs in the lower section of Battery's interface and gives you an overview (albeit a miniature one) of all the files on your system.

... And finally NI's own browser.
The real bonus of using NI's system is that it gives you extensive playback options, extended info about each file, and the ability to add 'favorite' folders and files. Of course which way you use is up to you!
Step 2 - Naming And Organization
One you have imported your sounds you can go ahead and name each cell. This makes things nice and clear when you come to load up the kit at a later date. The last thing you want is to use a kit months later that is made up of complex file names!

Renaming the cells.
You can also add and remove rows and columns, making your custom kits as large or as small as you like. Some of the kits included in the supplied sound library use huge amounts of cells. In this case I've stuck to the default amount but you can make it as complex as you like.

Our modest cell count.
You can also go a step further and color the cells if you feel this helps you keep track of what sounds are in your kit. You can do this by right-clicking and bringing up the color palette.

Coloring cells can help to keep things clear.
Step 3 - Processing Cells
With your sounds in place, named and looking pretty, it's time to start making them sound good! There are actually a huge number of parameters that can be tweaked, including looping, pitch, time stretching, LFOs and envelopes. It's this freedom that makes me enjoy using Battery every time I load it up.
Some of the best sound sculpting features can be found in the effects section. The processors found under this tab are specific to each cell. So any effects you set up here can have different settings and amounts on every sound in your kit.

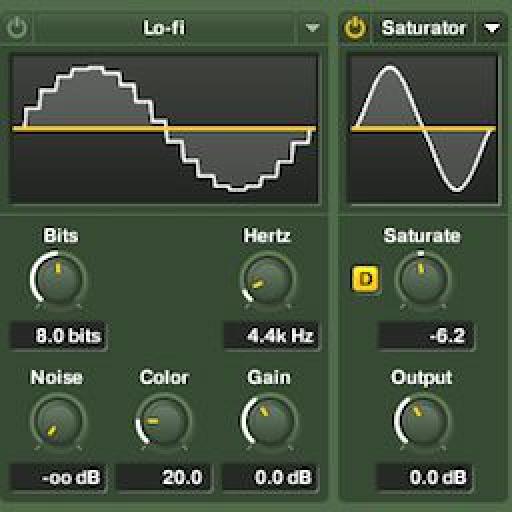
Battery's insert effects section.
To give you an example I added some processing to the very first few sounds I programmed. The kick was subjected to some saturation and the snare some bit reduction. This gives them an edgy, upfront feel. Great for electronic drum tracks of any style.
The basic kick and snare pattern processed by some saturation and bit crushing:
Step 4 - Master Processing
As well as effect processors for the individual sounds there is also a processing section for the whole kit. When activated these effects act as buss processors and can be ideal for pumping up the entire output of Battery.
There are also return effects in this area. These are actually set to effect every cell by default but I like to select all the cells and turn down the sends in by using the Option key. This means you can then send certain sounds to the delay and reverb as opposed to them effecting the whole kit.

The master effects including the delay and reverb returns.
There are some great tools for controlling levels and frequency here, too. A dedicated EQ, compressor and limiter keep things in line and can add extra volume if needed as well.

Sending specific sounds to the delay and reverb from the cell effects page.
Step 5 - Editing The Drum Samples
If you need to get a little deeper and move beyond the capabilities of the effects processors then you can actually edit the audio files themselves from within Battery. No need for an external sample editor here.
You can perform reverses, gain changes, fades and trims all from the editor. I actually needed to trim and fade some noise from the end of the kick drum used in this kit and you can see the process taking place below.

Editing sounds right within Battery.
Step 6 - Using And Saving Your New Kit
With everything in place you can now start programming beats using your custom kits. You can see that I've put a basic pattern together here using Battery as an Audio Unit plug-in within Logic Pro.

The new kit in all its glory!.
I find that it's a good idea to make individual tracks for each drum sound you are working on, regardless of the DAW you are using. This gives you the most freedom when editing and allows you to clearly see what sounds are where.
The beat plays back:
When you are ready you can save the kit from within Battery using the local File menu's Save Kit As… command. At this point I like to save it in 'monolith' mode as this includes all the samples used in the kit. You can then load this file on any system without worrying about file locations.

Saving the kit.

The monolith mode bundles all used samples in one file.
The kit that I've included was made in this way. Now go away and make your own custom kit and get producing some killer beats in NI Battery!

Discussion
Want to join the discussion?
Create an account or login to get started!