Recording is a digital activity nowadays, and has been for quite some time now. Every year, more powerful tools become commonplace, like pitch and time manipulation, and plug-in processors are more sophisticated and better sounding than ever. This makes it all the more ironic that so many digital tools work so hard to simulate the sound of older analog recording and mixing equipment, right down to the “flaws” that gave that gear such a wonderful, warm sonic character. And not only do digital processors emulate analog equipment, but the world of analog recording gear is bigger and better than ever, and it's not just the larger, traditional studios using all this physical hardware.
Many DAW-based setups, despite the heavy use of digital processing, still maintain an analog signal path, especially for audio signals being recorded. Processing the analog source audio through analog gear, before digitizing it in the A/D converter, is how many recordists prefer to impart that still-elusive “analog warmth” to their recordings. While smaller rigs may not be able to afford the racks and racks of high-end vintage (or modern) analog boxes that the larger studios often employ, many maintain what's usually referred to as an analog front-end—a series of analog processors that are used and re-used on each track. Since many recordings nowadays are assembled by overdubbing the tracks one or two at a time, even a basic front-end of one or two channels' worth of outboard gear can be utilized to add that analog sheen to most every track that's recorded, and later, in mixing, any available analog hardware units can be pressed into service on at least one or two key tracks, even while the rest of the mix is being processed in the box.
Fig 1) Analog hardware.
The Front-End
Putting together a good analog front-end for a smaller DAW rig usually means assembling a few very high-end components, particularly ones that are known for imparting a bit of analog “character” to signals, even with a minimum of processing. The main elements of such a front-end are microphones, pre-amps (mic-pre and/or inst/DI), compressors, and eq. For that classic analog “character”, vintage circuit designs are popular—this could mean actual vintage gear (if any can be found that's affordable, given the high cost of true vintage hardware nowadays), or modern analog designs that either faithfully reproduce vintage circuits, or use them as a stepping-off point for designs that maintain that analog warmth and edge, but also provide the benefits of more modern design.
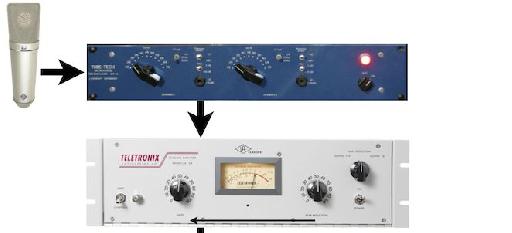
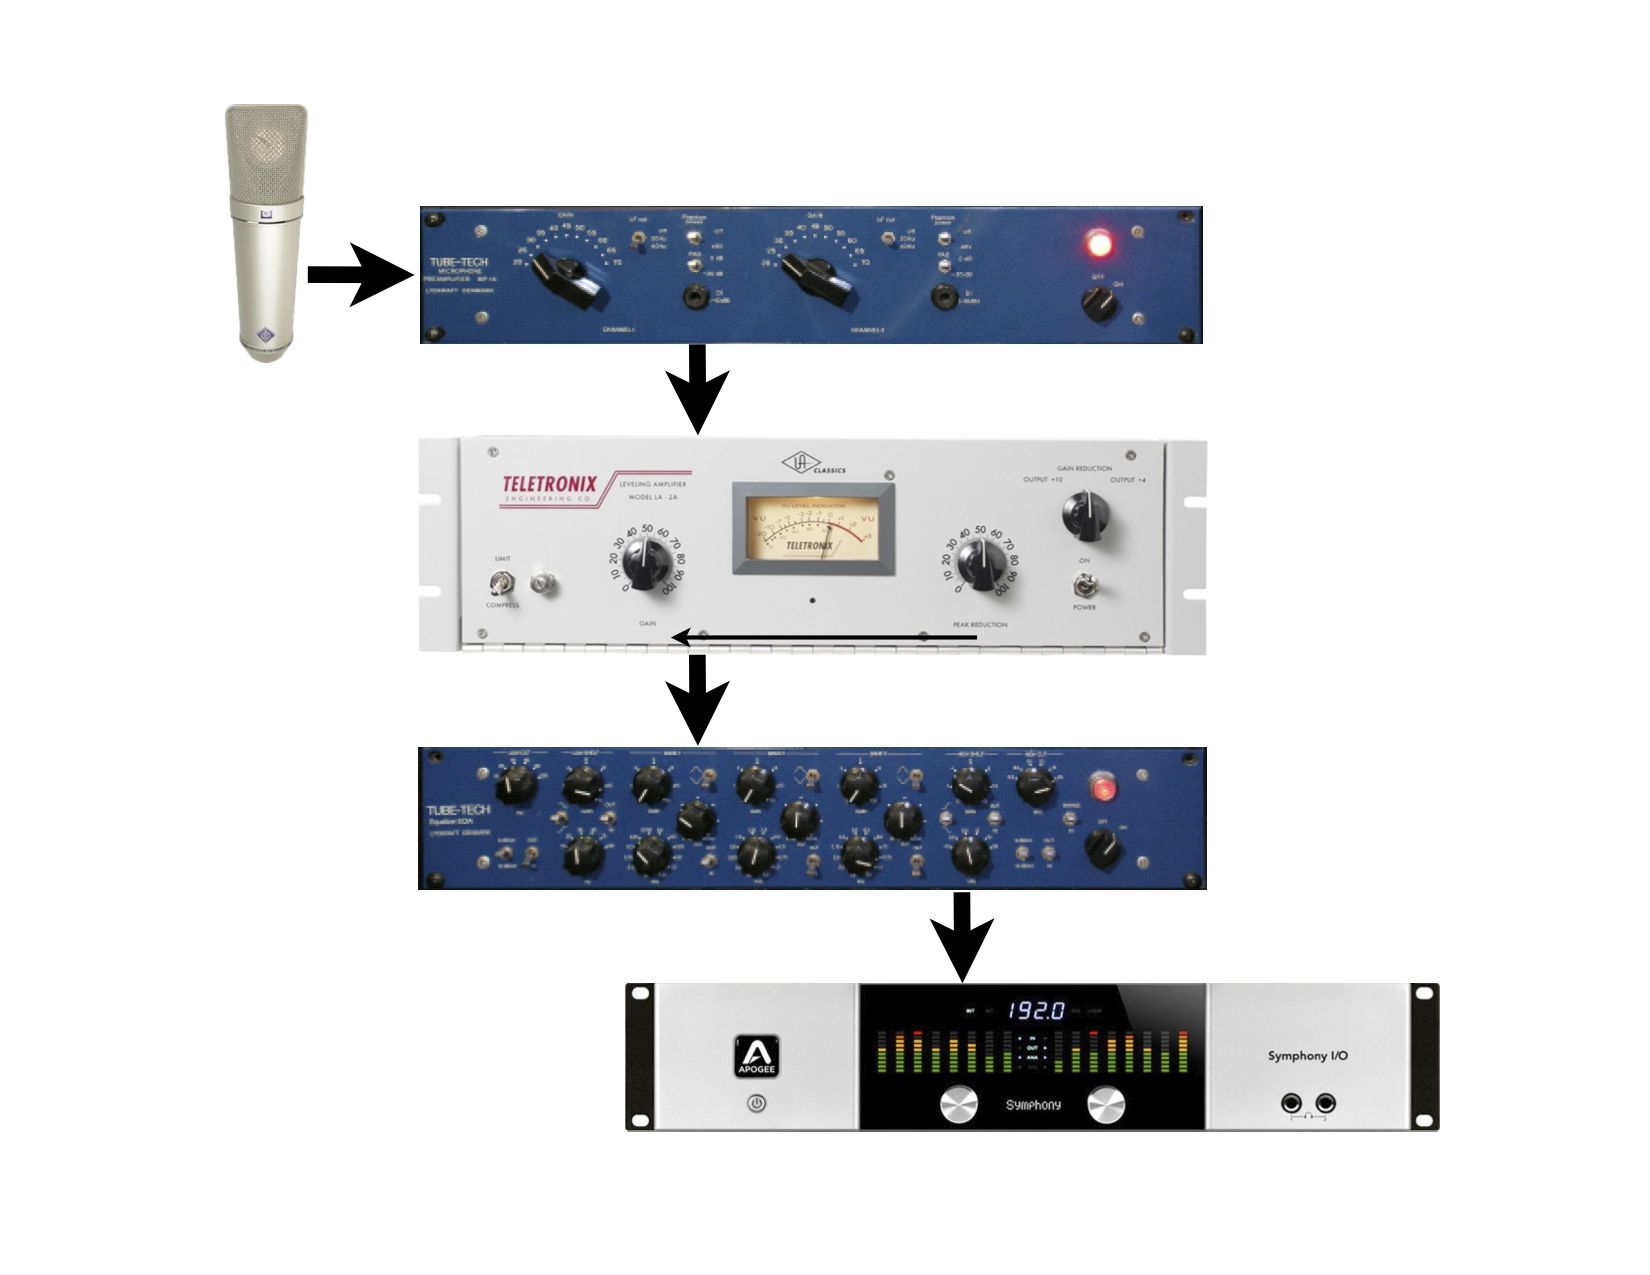
A typical front-end might be laid out like so: Mic -> Preamp -> Compressor -> EQ -> Interface (A->D Converter).
Fig 2) A typical Analog front-end setup.
The mic and preamp are key—these comprise a suitable analog front-end on their own. Compression and EQ are optional, and, should be employed subtly if used in the initial recording—it can be difficult to undo excessive compression or EQ later on, and, with the best gear, the desired analog character can be achieved without heavy use of the actual processing. In fact, many engineers run signals through analog components like compression or EQ without really using the effect, just to get the benefits of the analog warmth that comes from simply passing the audio through the circuitry itself.
Mic magic
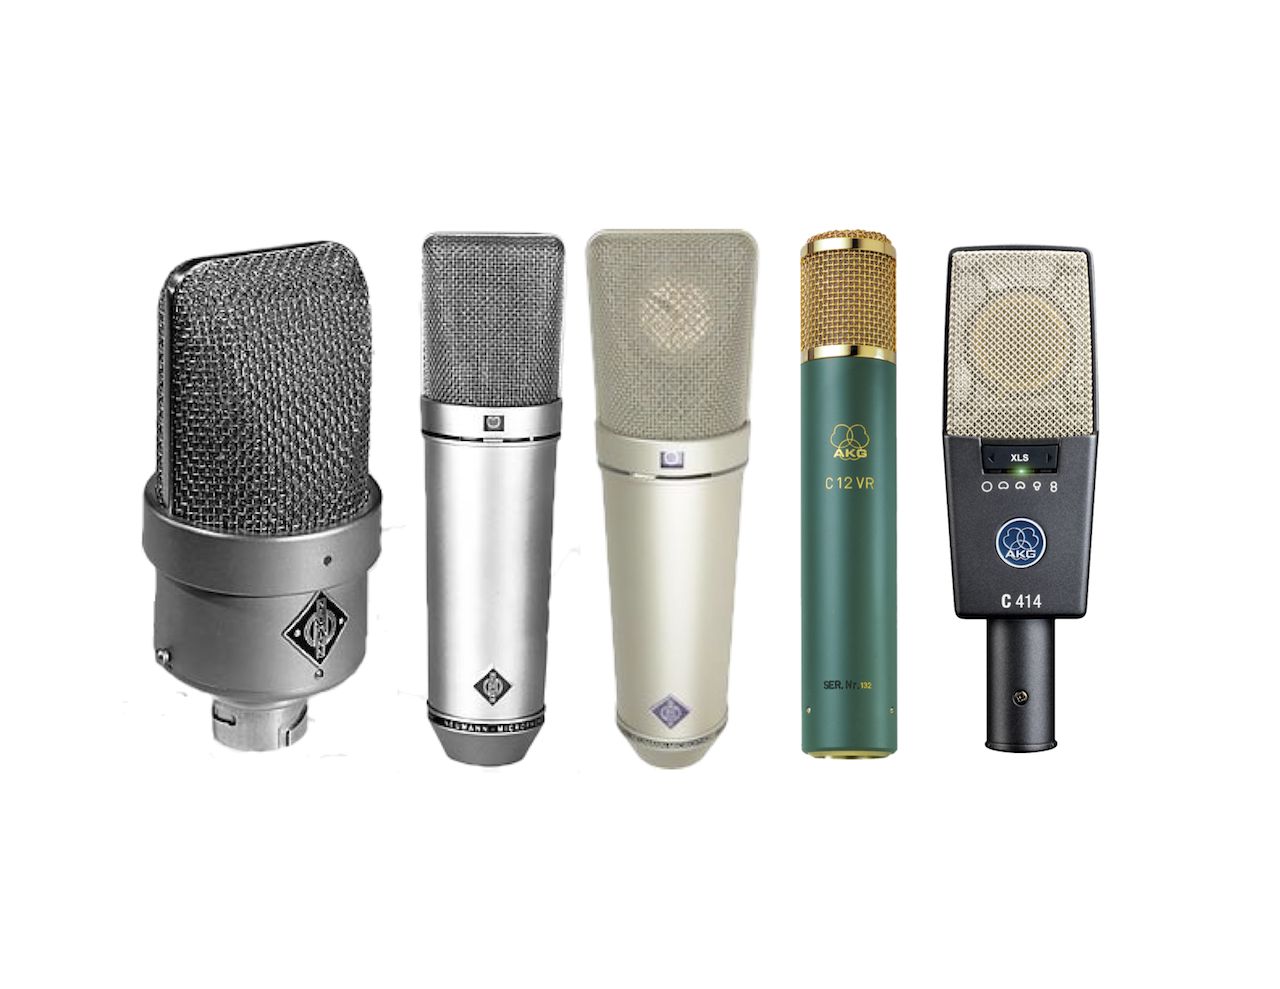
The microphone is probably the most obvious component, when it comes to imparting a sonic signature. Ideally, even the smallest studios would want to have two or three high-quality mics: a large-diaphragm vocal mic, possibly one or two small-diaphragm condensers, and maybe even a good ribbon mic. If the budget doesn't allow for this, then at least one really good mic can do the trick, and I wouldn't be afraid to spend a significant portion of the budget on it. Large-Diaphragm condensers serve best as vocal mics, as well as handling instruments, and that's what I'd go for.
Fig 3) Some high-end microphones.
On the real high-end, $2000–$3000+ will get you a classic-style Neumann or AKG, but there are also many, many boutique manufacturers, and some of their designs are even fairly faithful takes on classic mic models, like the U47 or C-12. Alternatively, at around $1000–$1500, you'll find many excellent models from the same companies. Often the sound is uncompromised, but the feature set is smaller—usually the first thing to go is multipattern capability, settling on Cardioid (unidirectional) only, but for typical small-studio applications, this is probably of little concern. There are even decent mics in the lower (sub-$1000) price ranges, and if the workflow requires greater flexibility, or stereo recording, say, such designs could be a viable options as well. I won't even try to list brands or models, there's just too many, but a visit to the local audio store to audition the choices, especially if the mic will be used primarily on a particular voice or instrument, is highly recommended.
Preamp heaven
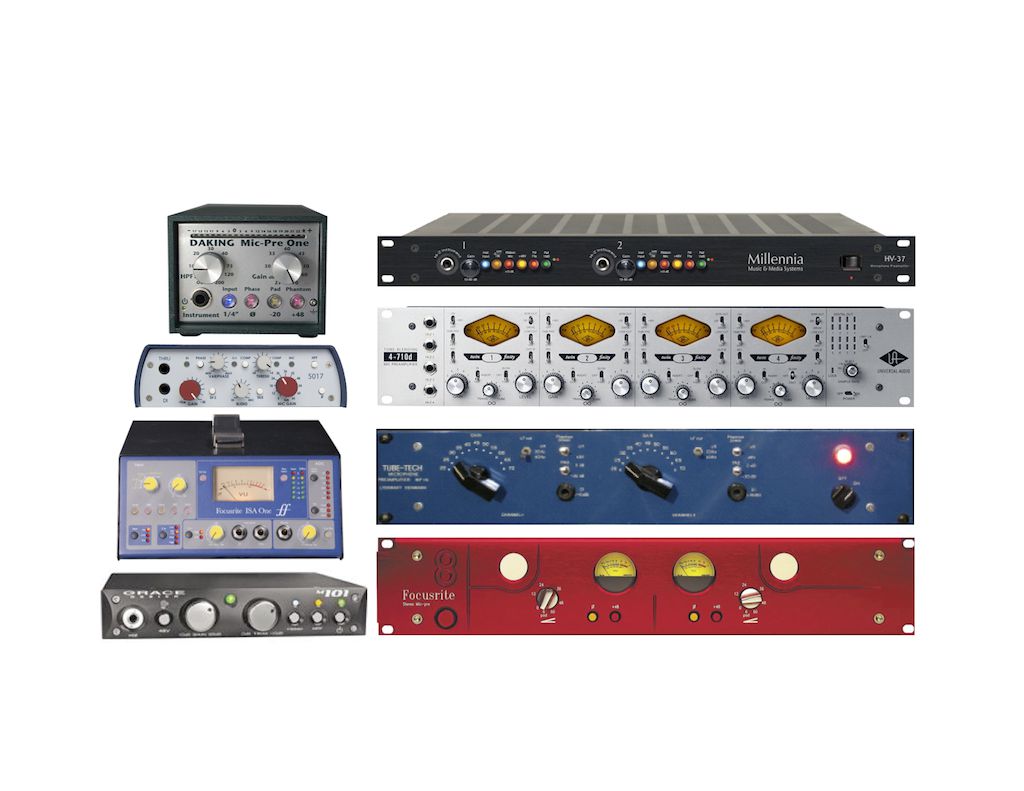
A less obvious component of a good analog front-end is a really high-end mic pre(amp). The better the mic (and this is especially true with tube-based mics), the greater the difference a really good mic pre will make. Good ones range in character from ultra-clean and open, to warm and fat, with tons of analog “character”. The differences will be subtle (compared with the more obvious differences between high-end mics), but they'll definitely add something to the signal that you just won't get from a typical console mic pre (especially the ones often found in the budget mixers small studios sometimes employ for signal routing). Your choice should be based on the kind of sound you're looking for (as above), and the primary mic (or mics) you'll be running through it. Some preamps just sound better with some mics, and the only way to know if the combination you're considering will be one of these made-in-heaven pairings is to try 'em out. (If you have a good relationship with your local equipment dealer, auditioning them in your own studio environment is way better than doing it with headphones in the store's little try-out booth).
Fig 4) Some high-end mic pre's.
Tube-based mic pre's can often add a little extra warmth, but make sure the combination of mic and pre you choose doesn't go too far in that direction, if you also need open, detailed sound—you won't go wrong with the best units, but with slightly more budget units, you'll want to watch out for that. A mic pre's impedance value is a big factor in how it couples with a mic (especially with vintage mics)—some high-end Mic Pre's have a variable Impedance option, and this can not only provide a wider range of subtle tonal enhancement, but also potentially make them a better match for a wider variety of mic models. Just as with mics, prices vary, from $1000–$2000+, down to around $600–$800 in the lower end of the high end. Be cautious with those really inexpensive tube-based mic pre's that you see for $100–$150 or so, especially the ones that are powered by a wall wart. They provide lower voltage to the tube, which can make them sound harsh if you push signal levels too hard. Some of them can add a nice warmth, again, something you won't get from a comparable lower-end console pre, but it could come at the expense of clarity and openness. I've used them myself at times, but for the main front-end signal path, you'll definitely want something in the higher range of price and sound quality.
Other Front-End components
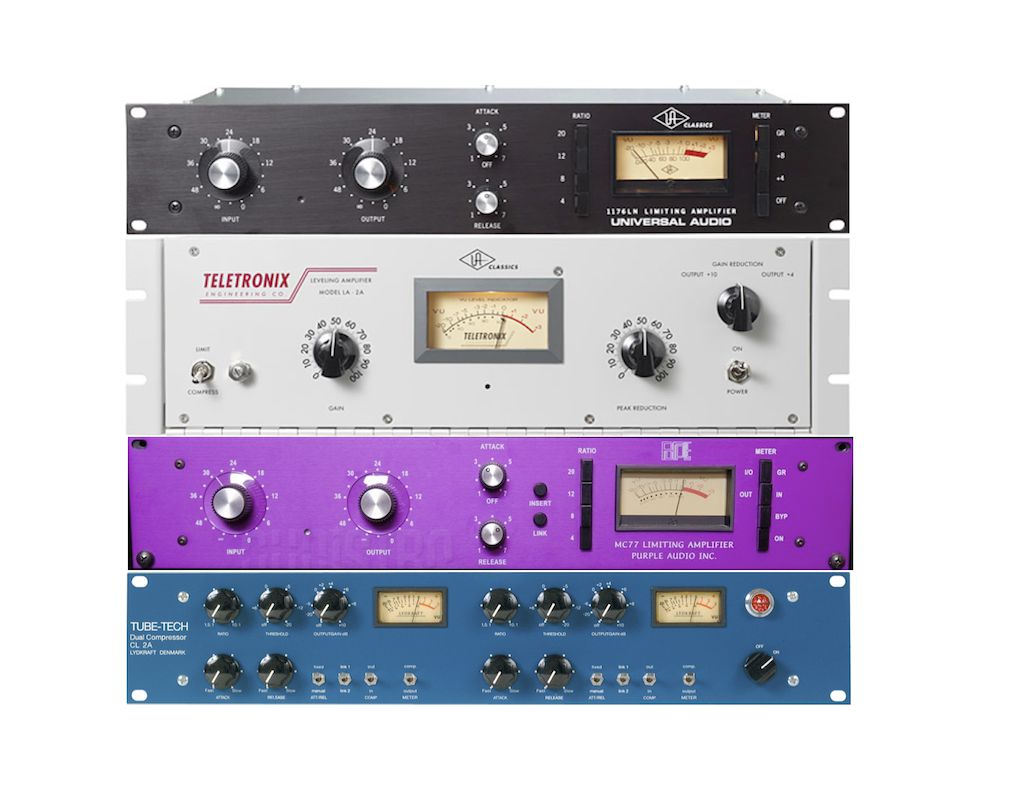
Analog compressor and EQ units can go even further in imparting that analog magic, but in the initial recording stage, I'd recommend they be used sparingly, if at all—especially compression. It's too easy to over-compress a signal, even if you get a lot of nice analog character in the process, and it can be very difficult to undo the compression later on, when it turns out to be problematic in the mix. That said, a little gentle compression, no more than about 2–3 dB of gain reduction, on the way in, from a good analog unit, can really warm up a track nicely. “Character” compressors are often the choice here—they may employ tubes or transistors, and there are different circuit designs, with distinctly different compression characteristics. Optical compressors, most famously the vintage Teletronix LA-2A (a reissue is now manufactured by Universal Audio), use a specialized optical circuit to compress the signal, and a tube-based signal path for warmth. This would be the choice for subtle compression—you almost can't get a bad sound with a good example of this design, even if you apply a fair bit of compression.
Fig 5) Some high-end compressors.
Besides the UA reissue, there are a number of companies that make opto compressors, in the $1000–$1500+ price range, and any of them would be a good bet for a front-end rig. Alternatively, faster, more aggressive FET (transistor-based) compressors like the vintage UREI 1176 (also reissued by UA, and modeled by many other companies, like Purple Audio) could be used, but you would have to be much more careful not to overdo the compression on the way in, especially on tracks like vocals. If used later on in mixing, though, good examples of this kind of design can do wonders when pushed hard. For anyone who might be less experienced with compression, I'd suggest a good opto-compressor, and a light touch.
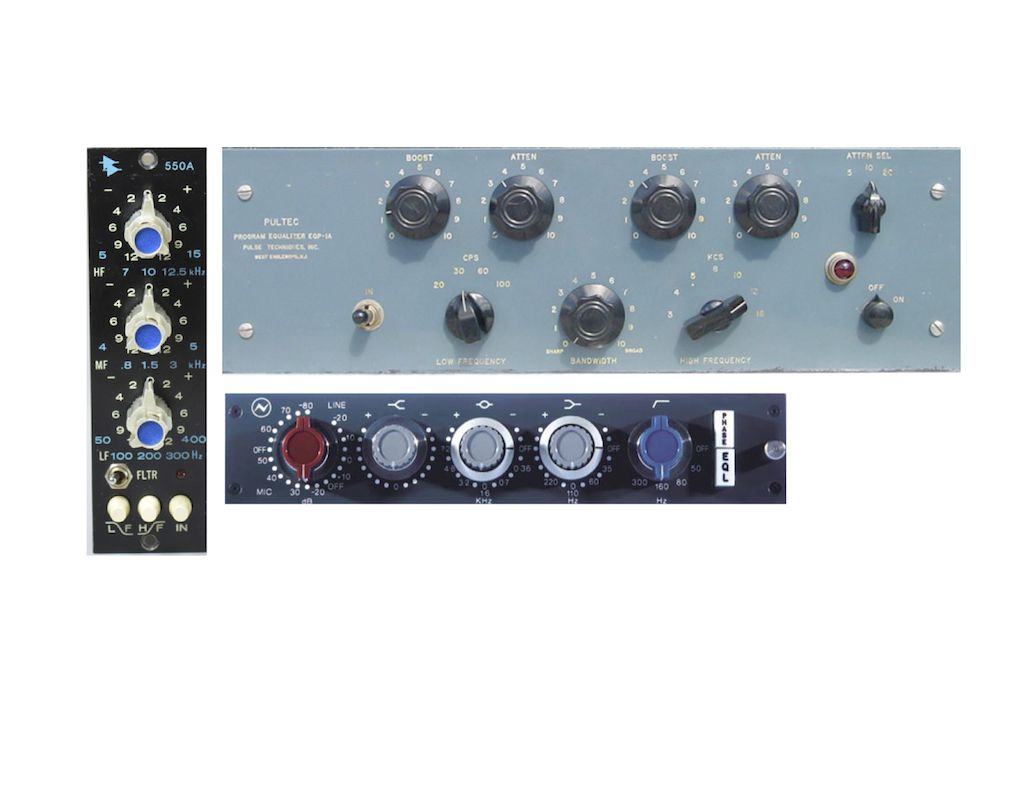
Among the most popular outboard “character” EQs are designs that employ tubes, often modeled after the classic Pultec EQP-1A model. Another option is EQ designs that are based on the EQs in some classic consoles, like the Neve 1073, and the API 550.
Fig 6) Some high-end EQs.
These various EQs are available from a wide variety of companies, and each will have distinctly different sound, but, like with the other components, you don't have to do a lot of heavy EQing to get some analog quality from them, especially the tube-based Pultec-style designs. I often ran signal through a Tube-Tech Pultec-style EQ with everything set flat, or just a dB tweaked here and there, and it still added a nice warmth to the track—subtle, but unmistakably analog.
All-In-Ones
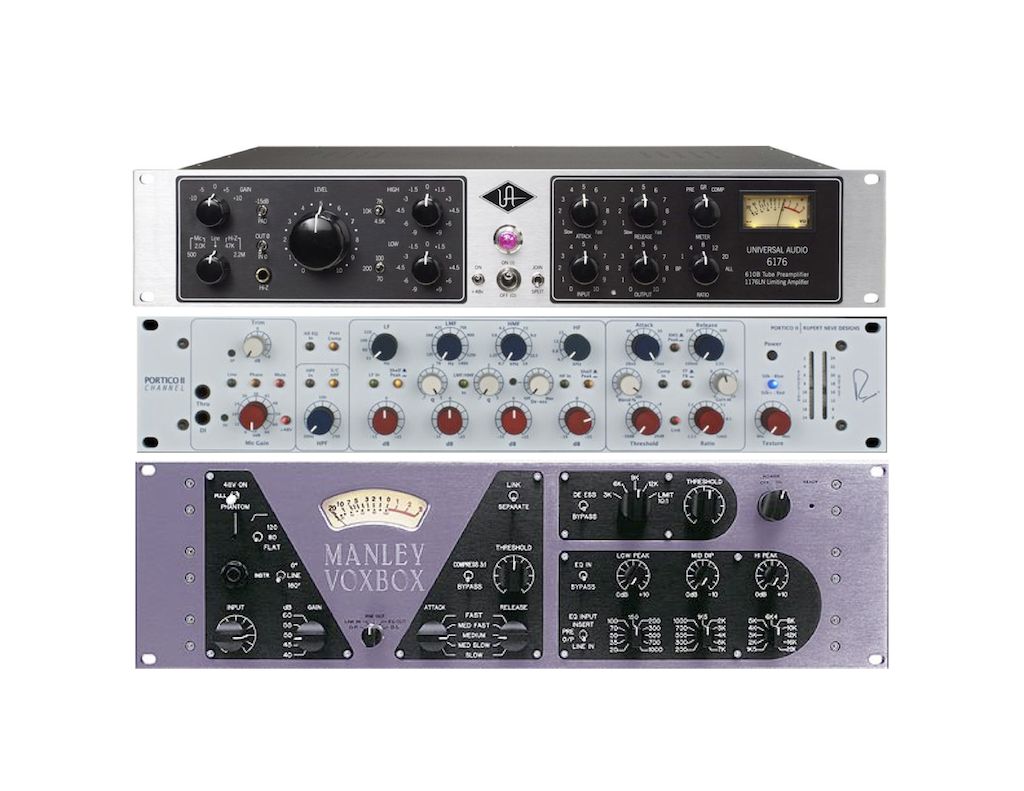
As an alternative to assembling an analog front-end out of discrete units—which as you can see, can run into several thousand dollars easily—you could also choose from a number of all-in-one “Recording Channels”. These are usually mono (or sometimes stereo) boxes that combine a mic pre, compressor, and eq into a single chassis—just add the mic and you're good to go. The main advantage is cost—sharing the same power supply can bring the expense down considerably ($1000–$3000), and you'll be getting a set of components that you know will work well together.
Fig 7) Some All-In-One “Recording Channels”.
Obviously, you sacrifice the option to mix and match, and you may feel that having all the front-end stages from the same company doesn't offer as much subtle variety in sound quality, but for recordists on a tight budget, most of the same companies that make the best separates also offer their wares in this format, so you won't really go wrong.
Wrap-up
Anyone can afford to set up a DAW-based studio nowadays, but capturing live sounds is still one part of the process that can separate the pros from the amateurs. Assembling a good analog front-end is a great way to bathe everything in that fantastic analog warmth that we all love so much, as it goes down, without having to depend so heavily on simulated analog processing down the road, in the mix. It's also a great way to get a better handle on the subtleties of classic analog gear and processing, which will certainly lead to better usage of digital simulations, as well. With a front-end of carefully-chosen analog hardware, for a (relatively) modest investment you can enjoy the best of both worlds, and bring your recordings and mixes that much closer to the sound in your head!



 © 2024 Ask.Audio
A NonLinear Educating Company
Discussion
Can anyone suggest any alternatives for a similar front end under £1,000 ?
Has any person asked Apple Window or any computer made by CPU = China Public UnderVoltage data.
Why do you not pay professional recording Tax like Studer Ampex Solid State Logic Neve AMS Neve Neumann Reel to Reel Tape Dolby Labs Sony.
Apple Windows statement facts will never support audio we are made for 24 stem thing mixing and public mastering under NSA Government guide lines.
and micro thin usb ip base Dj short film not high Voltage analogue
Sony Japan has questions why master before you record ?
Tracking needs muititracking Voltage Rupert Neve Facts.
Want to join the discussion?
Create an account or login to get started!