1. Select a Loop
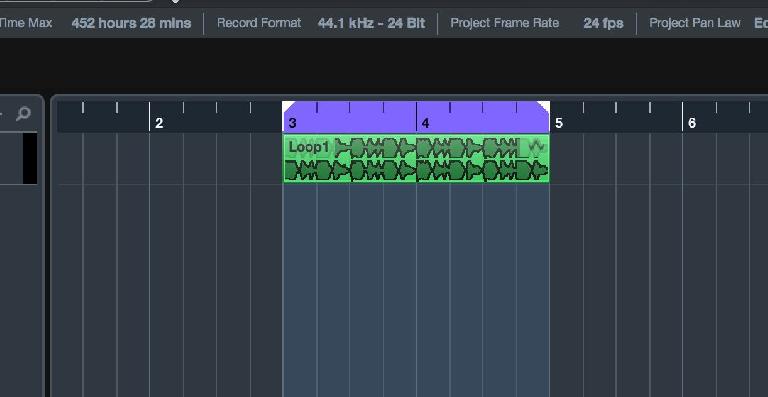
The following works with Groove Agent SE that comes bundled with Cubase, or with the full commercial version of Groove Agent. Obviously the full version has an expanded feature set, but you don’t need it to complete this workshop. Here I have loaded a loop, which happens to be a drum but it could be anything rhythmic such as a vocal or a piano part. The key is that it needs to have some kind of transients. So, anything except pad sounds should be good. If the loop isn’t at the correct tempo yet, use the time stretch tool to snap it to a bar marker.
2. Create some Hitpoints
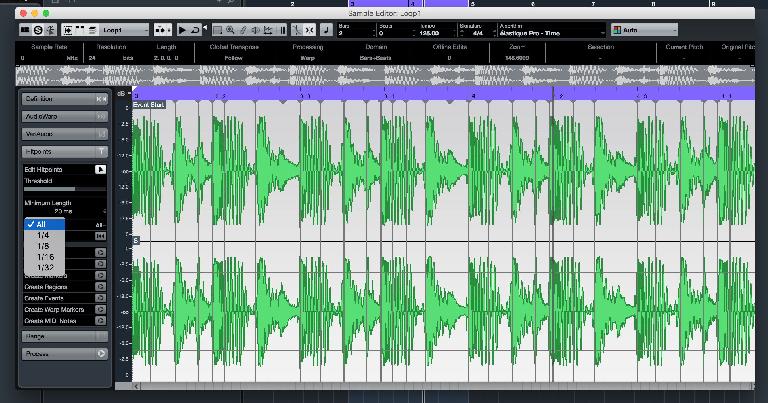
Double-click on the loop to open it in the Sample Editor window. From the panel on the left, go to the Hitpoints tab and click the button marked Edit Hitpoints. This will make Cubase analyze the loop based on its transients and place markers at major points like snare, kick and hi-hats. If it’s a vocal loop, it may choose to put markers on syllables and at the beginning of words. You can manually drag the hitpoints around to alter them, set a threshold at which Cubase makes a new marker, or use the Beats menu to force it to create a marker every 1/8, 1/16 beats and so on. As long as it looks to have captured all the major transients you’re safe; you will be able to edit these later if you need to. Then click Create Slices and you will be returned to the Project window.
3. Create an instance of Groove Agent
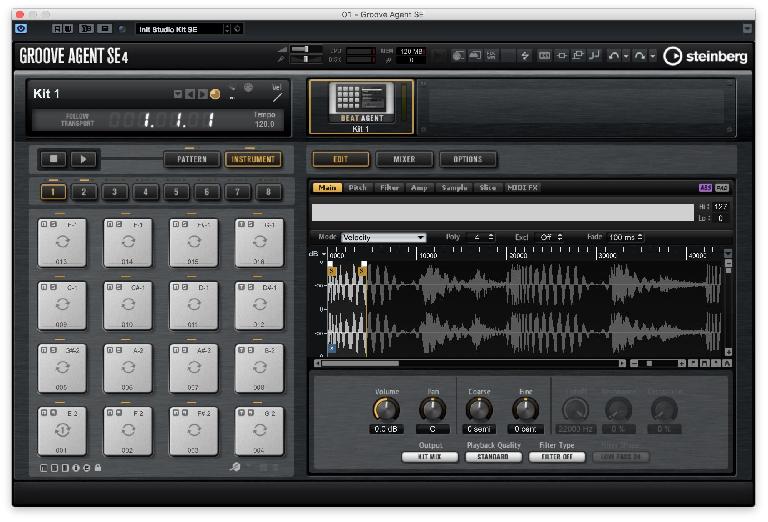
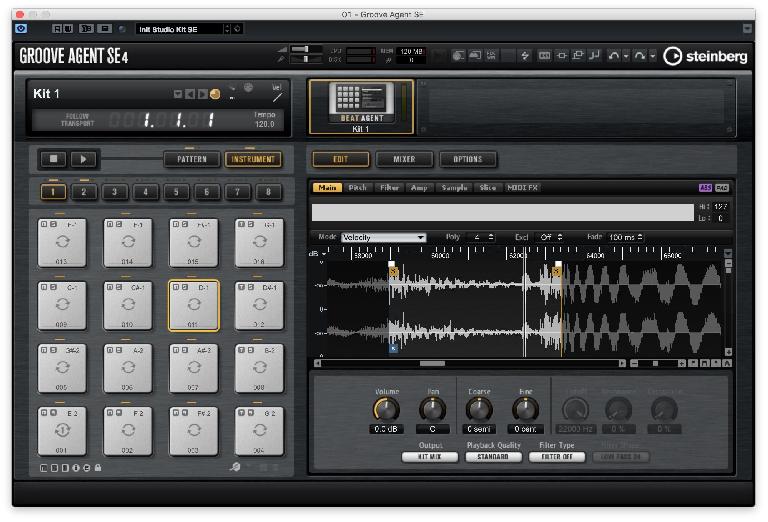
Load up an Instrument track and assign an instance of Groove Agent to it—here we’re using SE4. If a kit is loaded by default, right-click on the Kit display box and choose Cut Kit, which will clear out all the settings. Make sure that the Group select row of buttons (numbered 1–8) is set to group 1, unless you want your mapping to start higher up the keyboard. Go to your sliced audio loop on the audio track and drag it onto pad E-2, the lowest pad at the bottom left of group 1. Groove Agent will now map the audio slices over as many pads as are necessary to accommodate them all. It actually has eight groups of 16 pads which is way more than most sliced loops will contain unless you’re creating extremely short slices.
4. Consider Alternative Mapping
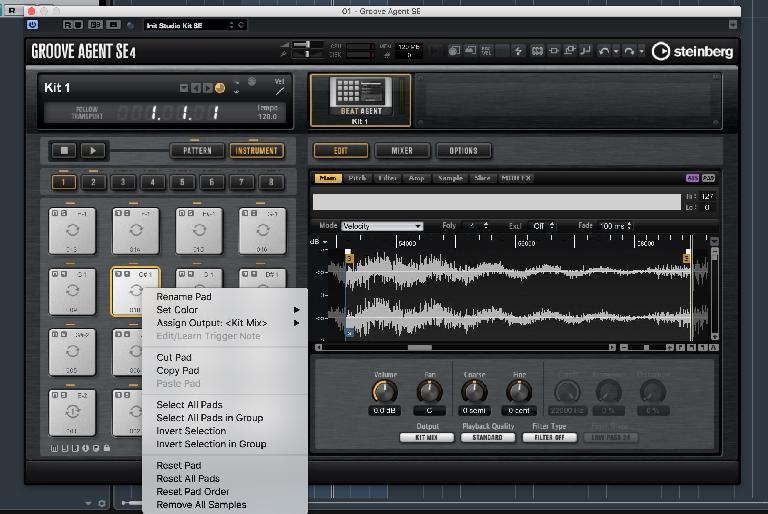
You will find that the slices are now playable using the pads, or the MIDI keyboard attached to your system. Your loop has been transformed into a glitch machine! If you had dropped the sliced loop onto a different pad or selected a higher numbered group, the slices would have been mapped higher up the MIDI keyboard. This is worth knowing because it means you can take advantage of the 128 pads available to you and use several loops within a single instance of Groove Agent to create a massive sliced instrument made up of different kinds of loops. You will also find that you can drag and drop slices between pads and right-click to access lots of options including cutting, copying and setting custom outputs into the mixer, which is great for advanced processing of slices.
5. Tweak Slice Lengths
What’s great is that although you had sliced up the clip in a previous step, the slice markers aren’t set in stone. When you trigger a slice you’ll see its waveform appear on the right of the drum machine. If you use that viewer to zoom out a little, you will see the left and right slice markers, and these can be altered by simply dragging them with the mouse. So if you decide you want one pad to be a little longer or shorter, just alter it here. If you click on the Slice tab you get an overview of all the markers, and moving any one will automatically select the pad it’s assigned to.
6. Tweak Slice Parameters
There are multiple tabs available for each slice including filter, amp and pitch settings and also a Main tab which contains important settings like volume, pan, coarse and fine tuning and output assignment. These can be used to quickly change any given slice independently of the others. Setting a level for a slice here for example can deal with an overly loud or quiet slice more surgically than the drum machine’s mixer can.
7. Record or Load a Pattern
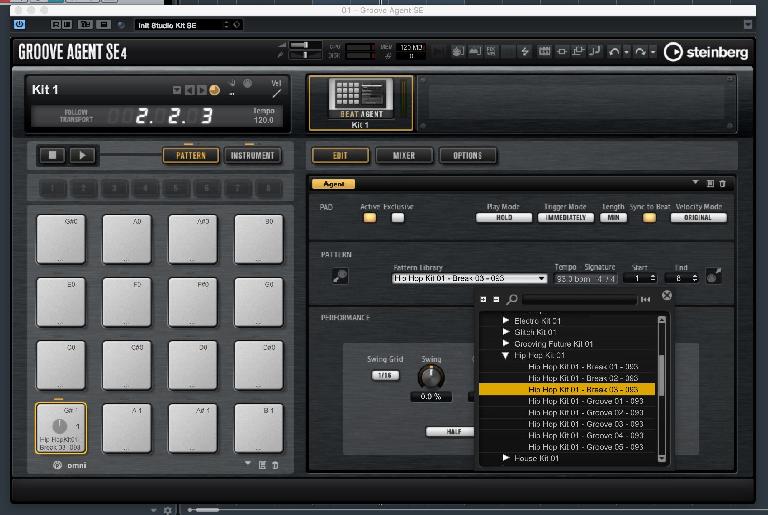
You can now record or program a MIDI part through Groove Agent and create a new beat or loop just as you would record any MIDI instrument. Remember also that Cubase will have remembered the original groove from the clip and this will be available in the Pattern section. If you go into the Pattern library here, you can access a bunch of preset MIDI grooves that can be easily applied to your newly sliced instrument to save you some time. Bear in mind that most of them are mapped around Middle C, so if you plan on using a preset groove it’s worth initially dropping your sliced loop onto the pad C1, in group 3. This should avoid any issues with silent playback.
8. Add Effects
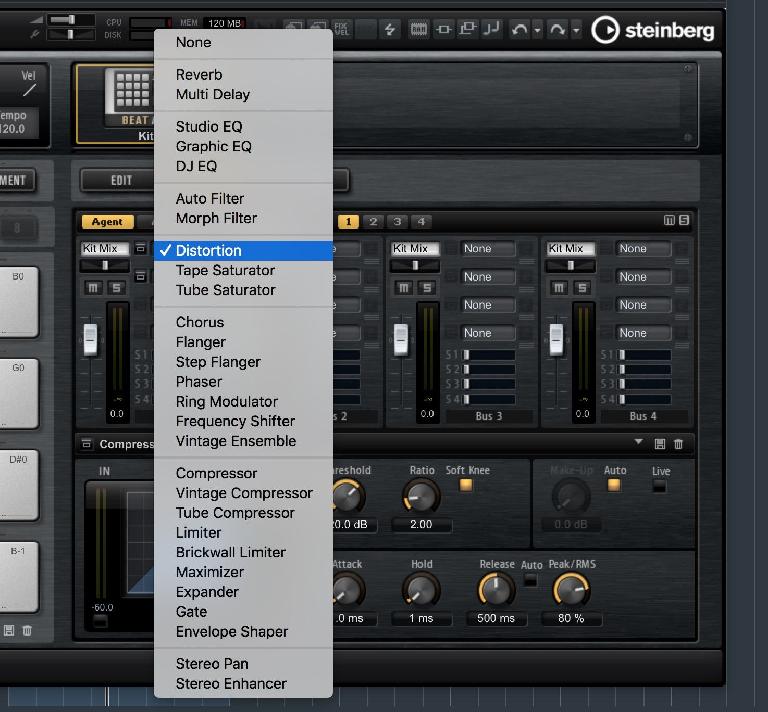
If you go to Groove Agent’s Mixer section you can submix a kit’s 16 internal channels, the aux bus and the master channel. Some of these have insert effect slots and there’s actually a surprisingly comprehensive array of effects available inside the instrument. Select any effect and you get to use its control panel. Clicking the “e” button for an effect will reveal its interface.
9. Activate More Outputs
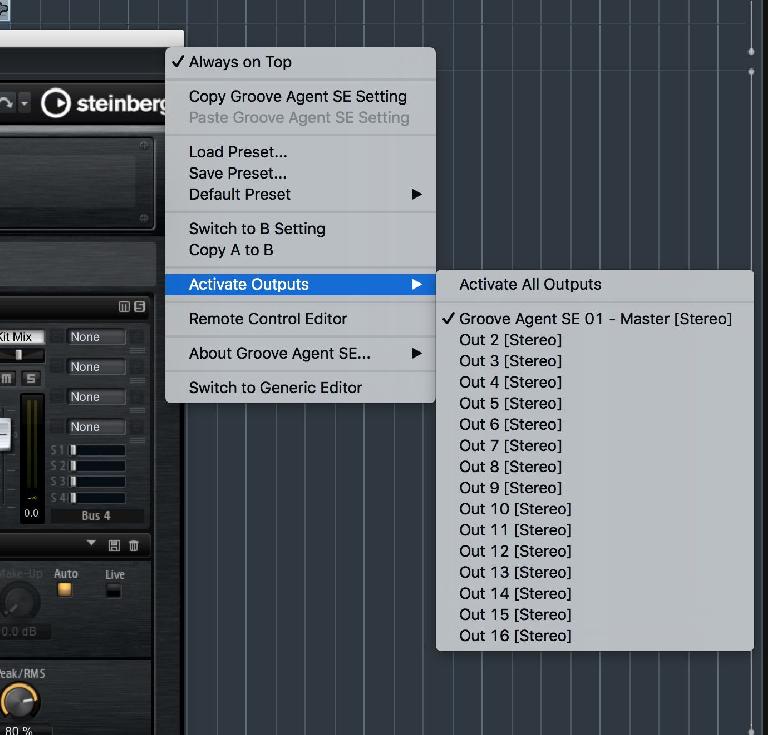
By clicking on the instrument’s main options menu at the top right corner you can choose to activate up to 16 stereo outputs as well as the main stereo output. Individual pads can be sent to any of these once activated and will be routed into the mixer as separate channels. It’s a great way to apply specific VST effects to some pads but not others, and get a more complex sound for your sliced loops.



 © 2024 Ask.Audio
A NonLinear Educating Company
Discussion
Want to join the discussion?
Create an account or login to get started!