Many of the more ominous soft synths are usually what most musicians will prefer and utilize for big, techno basslines, and trance textures. However, it's actually in the meat of the smaller soft synths, in my opinion, where I'm able to get those big, flowing, arp synths. In this tutorial, I'd like to give you a quick demonstration on how to make a massive arp bassline with Sawer.
Step 1. Basics First!
Usually, when I'm creating a new, original, synth bassline, I like to start from scratch, all the way. So, as result, I'll play sustained notes around the vocal part, or whatever I'm working with. The result is a very bland, annoying, high pitched sound, pretending to be a bass in the background, like this...
To obtain this high-pitched, basic sound, simply use the options menu in Sawer and select Reset Program.

By starting off so plain, I have full control on the sound and characteristics of the patch that I'm working on. And, ultimately building something more of my own design.
When I'm ready for more action, I'll click on the Image-Line logo, to expose the Arpeggiator, along with the other effects included in Sawer.
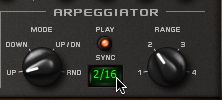
Within this section, I'll enable the Arpeggiator and set it to 2/16 and keep it at a range of 2. Many musicians tend to think that going with 1/16 will produce the punchiest, biggest bass line. I tend to like the arp playing at half the speed. This allows me to use the delay to fill in the rest of the notes. It adds more of a ghost quality, and also creates an atmosphere that I enjoy. Also, it adds a little bit of extra rhythm!
Step 2. Sculpt!
Now that we have a little bit of movement, let's make this thing sound like a real bass! First, I'll go to the upper left hand corner of Sawer and reduce all the Sustain, out of the patch, and then reduce the Decay (1.002) down to a lower setting. This will make the arp/bass sound a little choppier. I'll also keep a moderate supply of Release, as well, around 0.194s.
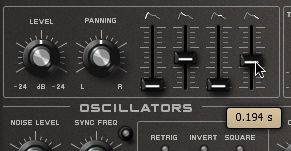
Also, and this is just a personal thing for me, as a player; I'll drop down the Transpose -12, so that the low notes are a lot nearer the middle of the keyboard, an area of the keyboard usually where I prefer to play bass parts.

Now, let's get some thickness in. We'll go over to the upper left hand corner of Sawer and enable Retrig, and then bump our Unison Voices up to 4. With that many voices added, it would behoove us to add in some Detuning. I'll bump it up to 69%, and now things are much bigger. Maybe a little too big. Let's get some filter going!

Tip: Unison Panning If you're considering using an arp bass as more of a mid-range filler instrument, I'd recommend adding in some unison panning. This will spread the bass out, and give your true bass synth, and kick drum some breathing room! |
Step 3. Filter it!
In the filter section, I'll lower the Cutoff down to 29%. This will assist in giving up that murky, JP-esque bass sound that will flutter in the background. We'll give it a fair amount of Resonance, as well, 68%, as a matter of fact. By pushing the cutoff range, we'll get a nice bounce, once we add in the filter envelope. I'll also change the Filter Mode to LP 12. Also, I'll increase the keyboard tracking to 35% (KBD Track). Generally, I don't care for any Keyboard tracking with basses. But, if the bass I'm making is more or less intended as an arp to fill in a background, with another bass acting as a simple, more 'main bass, well, then that's different. It makes the instrument become more like an effect, and much more dynamic with the keys played.

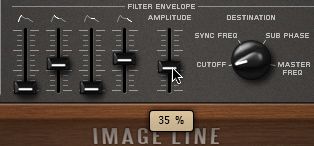
Alright, now let's get some filter envelope action happening to take some of the mud out of our filter adjustment and give it that bit of 'pop'. I'll raise the Filter Amplitude slider, within the Filter Envelope section up to 35%. Once I've raised the Filter Envelope Decay to 0.545s and the Filter Envelope Release up to 1.342s, I'll have a nice, plucky synth arping along when I press a key. But, it's still just a hair thin for my taste. Let's add in some beef!
Step 4. Modulate it!
Now for some easy modulation that adds a some subtle movement that will lead to a greater groove. Raising the Amplitude knob, within the LFO section, to 74% will get the ball rolling, and give the LFO plenty of power. I'll set the LFO Wave Shape to a Square wave. The cool choppiness will add some really cool rhythm, and if I invert it, I get something more akin to a rhythm that you'd really hear with someone playing a bass synth, techno style. Also, I'll raise the Release to keep the LFO's modulation wide and big. But, the most important part is enabling TMP Sync, or Tempo Sync, to keep the rhythm going along with tempo of the host clock of the DAW.
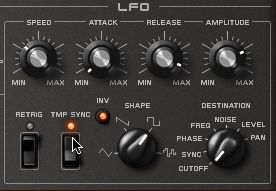
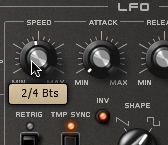
Finally, switch the LFO rate to 2/4. This puts our LFO Shape in to a timing that sounds cool to my ears, and really makes it seem like I'm doing more work playing than I really am!
Step 5. Effect it!
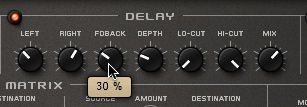
Now we'll use Sawer's delay to add a little more complexity and drive. I'll enable the Delay and raise the Mix up to 65%. This would wash a lot of instruments out. But, with these light, plucky bass chirps, we'll essentially create an etheric wall of sound, that's light enough to hear through, and will add some cool, retro, new age complexity. I'll set the Left knob to 3/16, which controls the left speakers delay rate. And, set the right to 5/16. And, lastly, for delay, let's give it some extra power by adding 30% to the Feedback knob.
Finally, and I mean finally, let's go ahead and enable the Chorus, a great way to add a little bit more beef, without adding too much mud. I'll enable the Chorus and set the mix to 58%. Then, I'll raise the Rate and Depth to 50%. With this much chorus going on, we've gained a little more beef!

Conclusion
Sawer is a powerful, cheap, and big sounding synth that works as a big pad, big lead, and as we've seen here—a big bass. Don't forget to save. But, also experiment! Try toggling the Retrig button in the LFO section, randomly, to get different rhythmic textures during your track!



 © 2024 Ask.Audio
A NonLinear Educating Company
Discussion
Want to join the discussion?
Create an account or login to get started!