Eventide recently released the popular H3000 Factory plug-in as a Native version. This means users of non TDM hardware can enjoy the heavenly delay, filtering and pitch shifting of this now infamous effects unit.
Getting your head round the H3000 can be a little confusing if you've never used one, but once you get the modular approach to the interface of the plugin, it's really easy to program and is capable of producing some really far out effects.
In the quick tutorial, I'll show you some basic patching and ideas that should end up with a nice chorused, filtered delay sound. I'll use a basic guitar idea for the example. The signal is being sent to an effect Bus in Logic where the H3000 is inserted.
Step 1 - Load The Default Preset
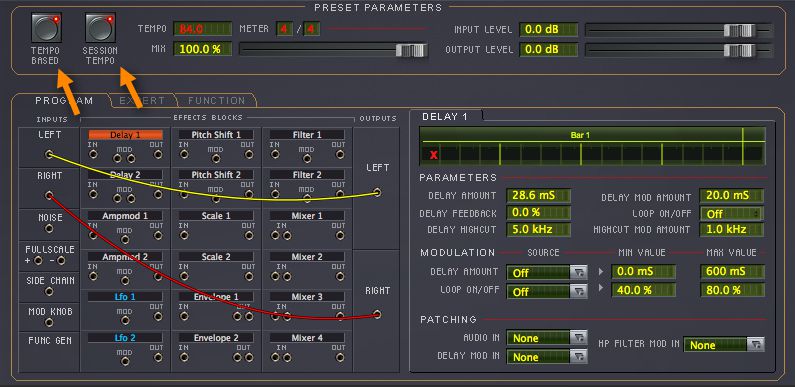
To start with a clean slate we can choose the 'default' preset from the presets list.
Make sure that both the Tempo Based and Session Based buttons are engaged. This will allow us to sync the delay times to our track. Mix is 100% wet.
You can see that the H3000 has a very modular look with cables that allow you to route your signal (much like Reason). Start off by disconnecting the cables between the ins and outs.
Step 2 - Moving the Modular Blocks
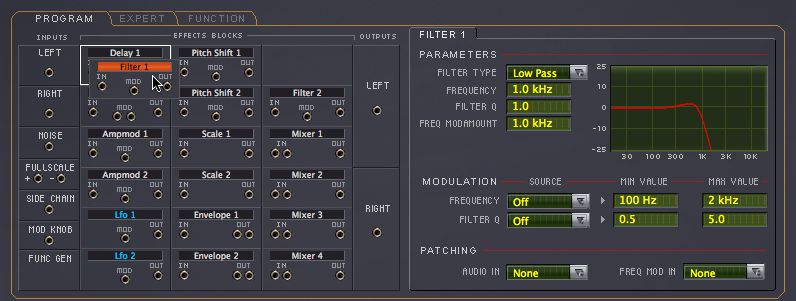
You can set up the layout of the effects blocks any way you like by simply dragging a block onto another one. Although this isn't necessary, it does make things a bit more logical to look at depending on what you're doing. Ultimately, the signal path is defined by the cables.
I want my filter to come before my delay so I'll drag it to the front block. This will just tidy up the cables.
Step 3 - Start Routing
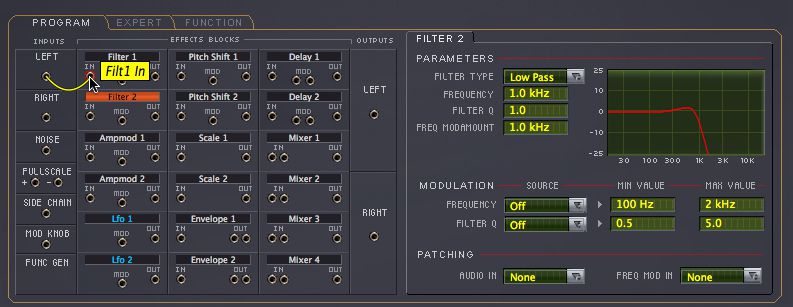
Start by routing the Left input into Filter 1. Since this is a Mono track we only need the Left input although we'll come out in stereo later as I've selected a Mono > Stereo version.
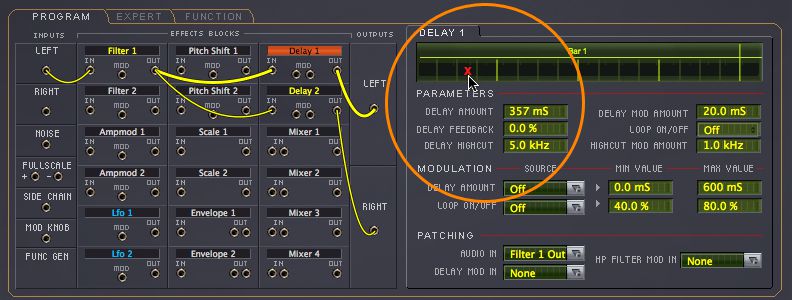
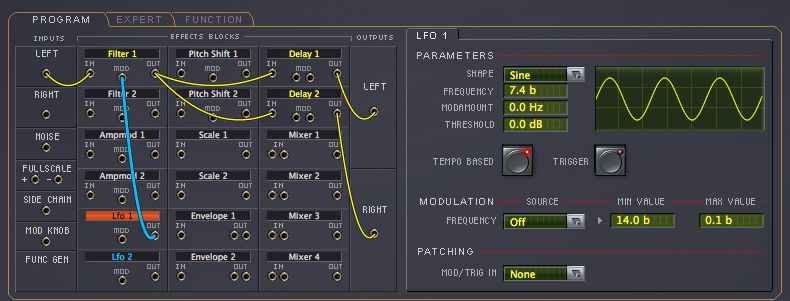
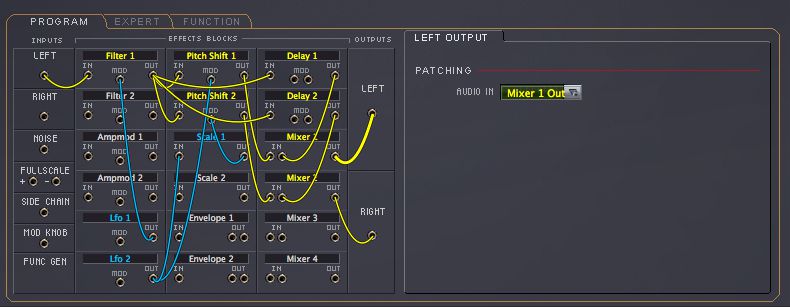
Route the output of the Filter into Delay 1 and 2 and then their outputs to the Left/Right Outs.
Select Delay 1 and drag the X to the third block in the tempo grid. This is an 8th note delay.
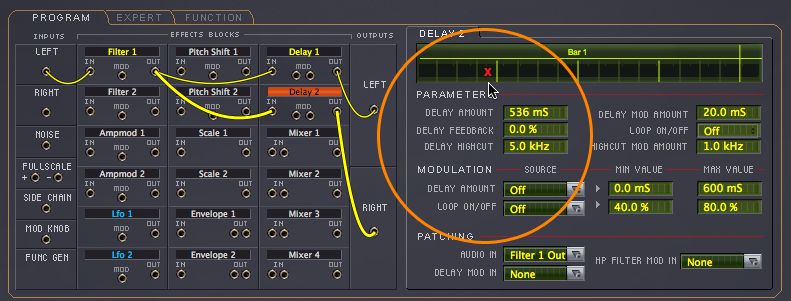
Select Delay 2 and move the X to the fourth block. This is a dotted 8th. Note: The plug-in has a maximum delay time of 600 ms!
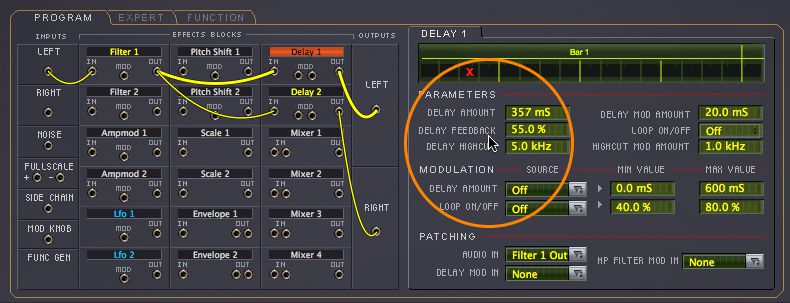
Set the Feedback for both delays at around 55%.
Step 4 - Modulate the Filter
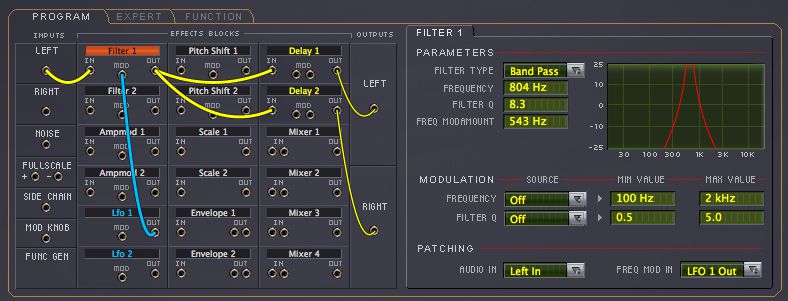
Select the Filter and choose Bandpass with a Frequency of about 800 Hz. Q is at 8.3 and set the Freq ModAmount to around 540 Hz.
Patch the Out of LFO 1 into the Mod input of the Filter block.
Set the LFO to a Sine. Engage the Tempo Based button and set a value of your liking. Something slow is good.
We now get a nice filtered delay effect.
Step 5 - Add Some Chorusing
So now we have a basic filtered delay effect going, let's take things up a notch and add some chorusing to our delays. This will add a much richer sound to our effect, exactly the kind of thing the H3000 is known for!
To do this were going to add some modulated pitch shifting which is essentially what chorusing is. To chorus just the delays, I need to run the pitch shifting in parallel with my delay lines.
First up we'll set up the modulation for the pitch shifting.
Step 6 - Set Up the Pitch Modulation
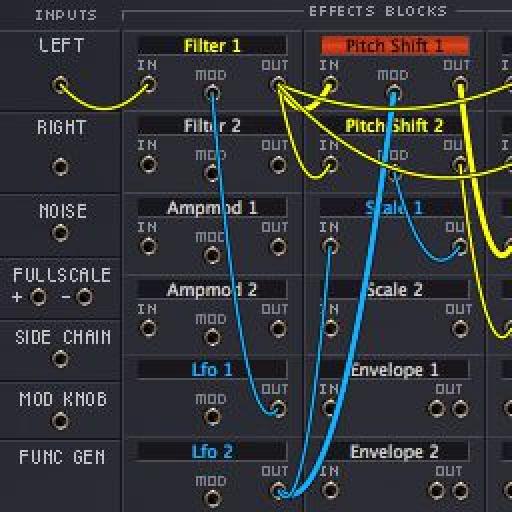
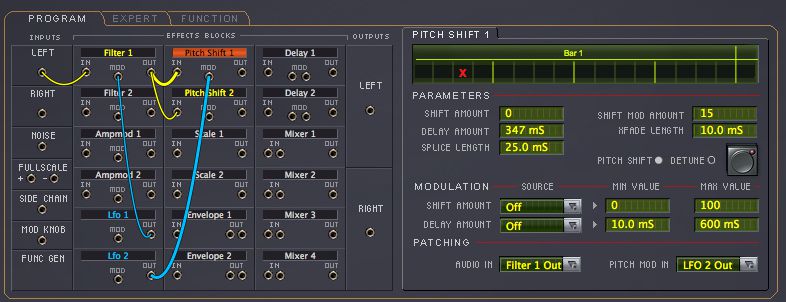
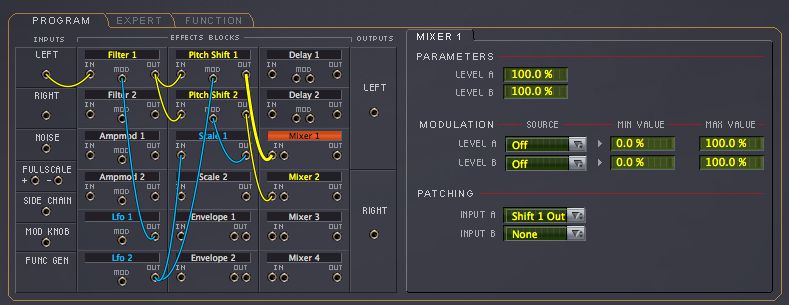
Unlink the outputs of the Filter from the delays and disconnect the delays from the Left/Right outs. Plug the Filter into Pitch Shift 1 and 2. Take the out of LFO 2 and route it to Pitch Shift 1 Mod In. Set your LFO up as you wish.
Set the Shift Amount to 0, the Shift Mod Amount to 15 and the Shift Delay to around the 8th note value but not bang on (10-15ms either side). This will give a slight separation to the Pitch and Delay signals.
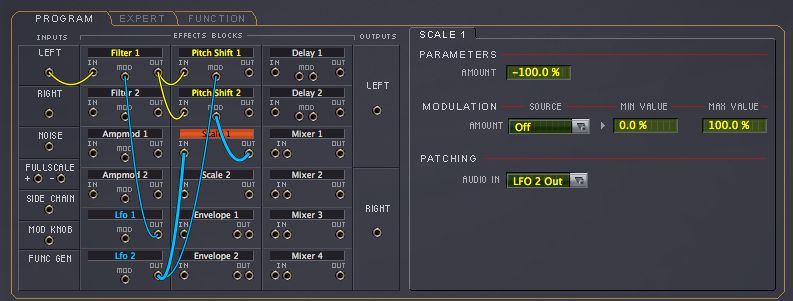
Now we'll use a handy feature called Scale which is useful for offsetting modulation signals. Plug another cable from LFO 2 into Scale 1 in. Set the scale amount to -100 (this will invert the signal) then plug the Scale 1 out to Pitch Shift 2 Mod in.
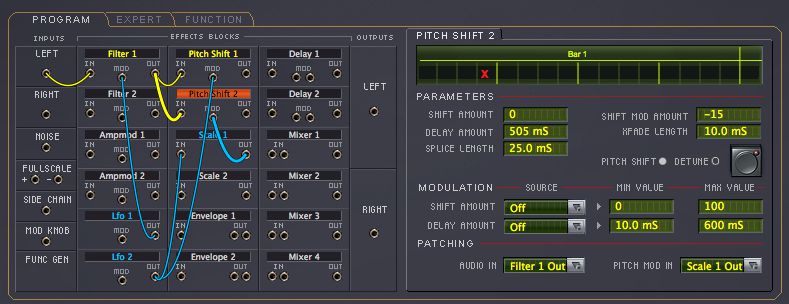
Set Pitch Shift 2 to just off a dotted 8th with no shift and the Shift Mod Amount to -15.
Step 7 - Merge the Shift And Delay Signals
Instead of plugging the Shift blocks into the Delays plug PitchShift 1 into Mixer 1 and Pitch Shift 2 into Mixer 2.
Then take the output of the Filter into Delay 1 and 2. Plug Delay 1 into the second input of Mixer 1 and Delay 2 into the second input of Mixer 2. Finally, take the Mixer outs and connect them to the Left/Right outs.
We now get a much richer effect as you can hear in this example. Essentially we're thickening up the delay sound by doubling it with the pitched signal. You can obviously set the amount of blend between the signals inside the mixer modules.
If you want a more radical effect, just increase the Mod Amount on the Pitch Shifters. Here's a higher setting on the Mod Amount with a faster rate on LFO 2.
After a bit of tweaking to the settings here's my final effect on another musical example.
A really nice spaced out delay sound!
This is obviously just one example of this kind of effect. The flexible modular routing features of the H3000 make it extremely versatile and a lot of fun to play with. Just the Pitch Shifting alone make it great for doubling effects on vocals.
If you haven't checked out this plugin you should. You can request a demo, all you need is an iLok 2 to authorize it. Head over to Eventide and take a look!!
Find out more about the Eventide H3000 here.



 © 2024 Ask.Audio
A NonLinear Educating Company
Discussion
Want to join the discussion?
Create an account or login to get started!