
Così ho avuto questo tizio che è stato davvero dubstep in contatto con me, (wha? Dubstep? Sicuramente scherzando!).
Aveva un'idea. Voleva controllare i tassi di LFO della sua ES2 utilizzando un controller MIDI. In particolare, ha voluto utilizzare specifiche note MIDI per provocare una variazione del tasso di LFO per dare l'infame .... wub wub-wub-WubWubWubWubwWubWub del dubstep.
Ciò richiederebbe la modifica di una nota MIDI dalla sua tastiera in un parametro tasso di LFO. Ora, si potrebbe assegnare un controller tramite incarichi automazione della traccia, ma questo non è abbastanza specifico. Ho scelto di usare ....
Wub wub wub Wuuuuuuub ....
L'ambiente a finestre.
Fase 1 - Impostazione della ES2
In primo luogo, Copia queste impostazioni nella ES2:

Ive anche incluso un
Se si riavvia Logic, tale impostazione channel strip dovrebbe sollevarsi fino nel vostro software di channel strip strumento che stabilisce area.
Fase 2 - trovare il valore Fader
Aprire una finestra per l'ambiente. Vai allo strato Mixer, dove i nostri ES2 vita. Nel menu a discesa Nuovo, selezionare monitor e collegare l'uscita dell'oggetto ES2 al monitor.

Fare doppio clic sul ES2 nella finestra di ambiente, in modo siamo in grado di modificare il tasso di LFO per LFO 2. Mentre facciamo questo, e visualizzare i dati nel monitor che ci raccontano il valore fader per quel parametro.

Fare clic sul valore per la frequenza LFO2s. Utilizzare
Stiamo andando a prendere nota dei valori Fader seguenti:
- 32 = 1/2 note
- 39 = 1/4 note
- 40 = 1/4 note triplet
- 44 = 1/8 note
- 46 = 1/8 note triplet
- 49 = 1/16 note
- 51 = 1/16 note triplet
- 55 = 1/32 note
- 57 = 1/32 note triplet
Fase 3 - Configurazione del Transformers
Dal nuovo menu dell 'ambiente, scegliere Transformer.
Fare doppio clic sull'oggetto trasformatore. Vi verrà chiesto di condizioni (quello che stanno interessando) e operazioni (ciò che siamo gonna do a loro).
Copiare le seguenti impostazioni:

Ora, questo trasformatore sta prendendo un valore di nota di C0, e convertirla in un valore fader che fisserà il tasso di ES2 LFO a 1/2 nota.
Copia e incolla questo trasformatore 8 volte di più. Modificare il valore operativo che era 32 nel primo trasformatore 39, 40, 44, ecc nei trasformatori successiva. Anche cambiare il valore della nota nelle condizioni di C # 0, D0, D # 0, ecc
Ora create un altro trasformatore e utilizzare le seguenti impostazioni:

Dal momento che stiamo utilizzando un valore di nota, si ottiene una nota sulla, e fuori. Questo trasformatore prende atto che il valore soglia e la cambia in modo che il nostro tasso LFO sarà 0 quando non stiamo giocando una nota.
Fase 4 - Il Hookup finale
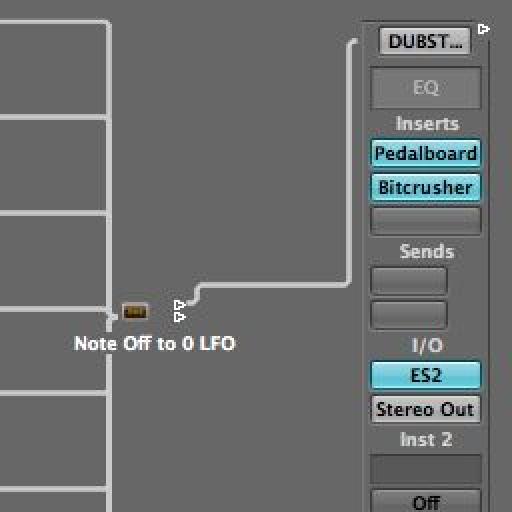
Prendere il precedente 9 trasformatori e indirizzarli in questo nuovo trasformatore. Collegare il monitor al 9 trasformatori e scollegare il monitor dalla ES2 selezionando il cavo e premendo Delete.
Rinominare il monitor dalla Nota di ingresso con lo strumento Testo e accendere l'icona del monitor in Impostazioni. Infine, collegare il trasformatore ultima al ES2:

Fase 5 - Prendi le note in là!
Vai a Click e lo strato porte della finestra Environment.
Opzione-clic sul Input Output Note tastiere e Nota di ingresso selectFrom. Se non avete il

Ora le note C0 - G # 1 controllano il tasso di ES2!
Fase 6 - Tasto Campo limite
Sarà ancora sentire il C0 - G # 1 note giocano quando sono utilizzati per la LFO. Un modo rapido per tenerli fuori dal mix è quello di limitare il campo chiave della striscia di canale nella finestra Arrange di C1 - G8

Ci sono modi ancora più per perfezionare questa configurazione, ma questo è un bel modo per dimostrare il concetto.

Discussion
Are you Option-clicking on the output of the output triangle on the Keyboard object?
If the Transformer's are still not visible in the drop-down menu go the layer with your Transformers, select each one and make sure (in the Inspector on the left of the Environment window) that "Icon" is ticked/selected.
There are other ways to connect one object to another. If they are in the same layer simply drag the output to the input of another object... or open two Environment windows (both displaying different layers), place them side by side and track from one object's output to another in the other window.
Hope that helps
R
Want to join the discussion?
Create an account or login to get started!