
When you buy Native Instruments Reaktor not only do you get 70 awesome instruments and an online library of over 3000 user created instruments, you can also build your own!
The software comes with a library of modular building blocks (called Macros) that can be wired together to create anything you can imagine. You can even build your own Macros from the ground up. In this tutorial I'll show you how to get started building your own simple subtractive synth.
Step 1 - Create A New Ensemble
An Ensemble is a master patch that can hold any number of smaller Instruments. Open Reaktor in stand alone mode an go to File > New Ensemble.

Step 2 - Structure View
To open Stucture view click the top icon to the left of the Panel view then hit the 'Split View' switch. You'll see the Structure window appear beneath your empty Ensemble. This is where we build our synth. Reaktor will create an empty Instrument for you.

Step 3 - Open the Instrument
Double click the instrument to open it.

Once inside select and delete (backspace) the two audio inputs. We don't need these.

Step 4 - Add an Oscillator
In the Factory library open Macros > Building Blocks and select Oscillators. Doing this will give you a list of the prebuilt oscillators that ship with Reaktor.

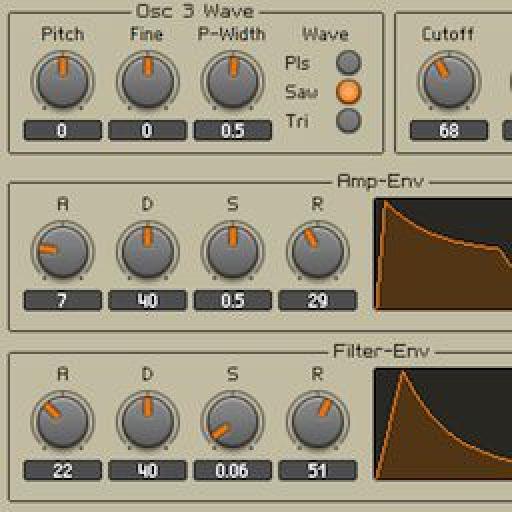
Select Osc (pls, saw, tri).mdl and drag it into the Structure window. This oscillator lets you choose between Pulse, Triangle and Saw waves. You'll see the Macro in the Instrument interface window.

Step 5 - Create a MIDI Note Pitch Module
Control click in the Structure window to bring up the contextual menu. This contains a list of smaller elements and utilities. Select Built-In Module > MIDI In > Note Pitch.

This transmits the Pitch info from the MIDI coming into Reaktor. You'll need to turn on any inputs inside File > Audio And MIDI Settings.
Connect this to the Pitch Input (P) of the oscillator by clicking on the small red dot and dragging the cable to the input.

In Reaktor Red ports transmit MIDI, Black deal with Audio.
Step 5 - Create An Amp Envelope
Select Envelopes inside the Building Blocks folder and drag in an ADSR envelope. Wire the Note Pitch into the Pitch input of the Envelope (Controls Key Tracking) and wire the red output of the Envelope into the Amplitude port of the Oscillator.

Step 6 - Clean Up the Interface
You'll notice the envelope is overlapping the oscillator.

Click the Edit Panel icon to unlock the instrument interface. You'll see a grid of dots. Make sure your envelope is selected in the edit window and drag it down. Lock the instrument interface when you're done.

Step 7 - Create a MIDI Gate Module
Control click in the Structure window and choose Built-In Module > MIDI In > Gate. This transmits Note On/Off messages.

Connect this to the Gate input (G) of the envelope. This will trigger it when you hit a note.

Step 8 - Create A Filter
Choose Multimode Filter from the Filters folder and drag it in. Clean up the interface.

Connect the Note Pitch to the Pitch input on the filter (For Key Tracking) then wire the oscillator into the filter. Wire the output of the Filter to the Audio Outs. When you play a note you should hear your synth!

Step 9 - Create A Filter Envelope
Create another ADSR envelope and connect the Pitch and Gate to it. Wire the Out port to the Envelope input (ENV) on the filter.

Rename your envelopes. Just double-click its name and use the text input in the Functions pane.

Our synth is nearly done!

Step 10 - Create A Master Volume
Go to Amps+Mixers and drag in an Amp 1ch. Wire your filter through this. To delete a cable just select it and hit backspace.

That's it for now! Next time we'll create an LFO and modulate the Pulse Width of the Pulse waveform!
Hopefully you can see how easy it is to make a synth in Reaktor. There are loads of pre built macros to play with so try and wire some up. Use different oscillators, filters and envelope types!
Find Part 2 of this article here.

Discussion
Want to join the discussion?
Create an account or login to get started!