
There are two seldom used Flex modes in Logic Pro called Speed and Tempophone. Let’s take a look at what they can do for beat and loop manipulation. In this article I’ve taken a couple of basic EDM/House audio loops and processed them with these two cool modes to create fills and randomness. Read on!
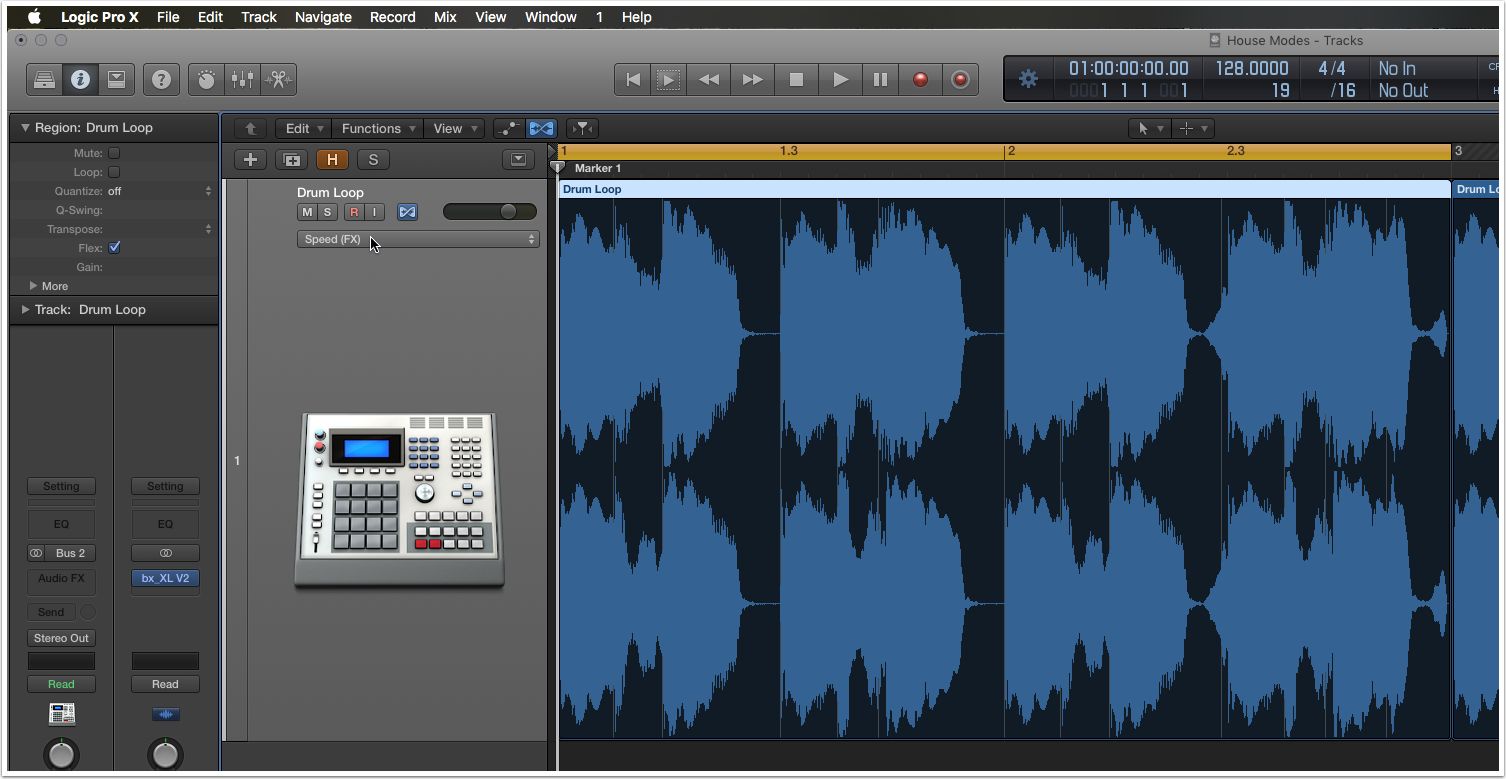
Speed FX Flex Mode
First, let’s try out the “Speed” mode. Start with an empty project and drag in a couple of loops. I chose a beat and a percussion topper. To enable Flex, press . Then on the track itself make sure the Flex button is also enabled (Looks like a bow tie and turns blue when enabled). Click the menu below the flex button on the track and choose the “Speed FX” mode. Zoom to a comfortable level so you can see the entire loop, then start to add flex points.
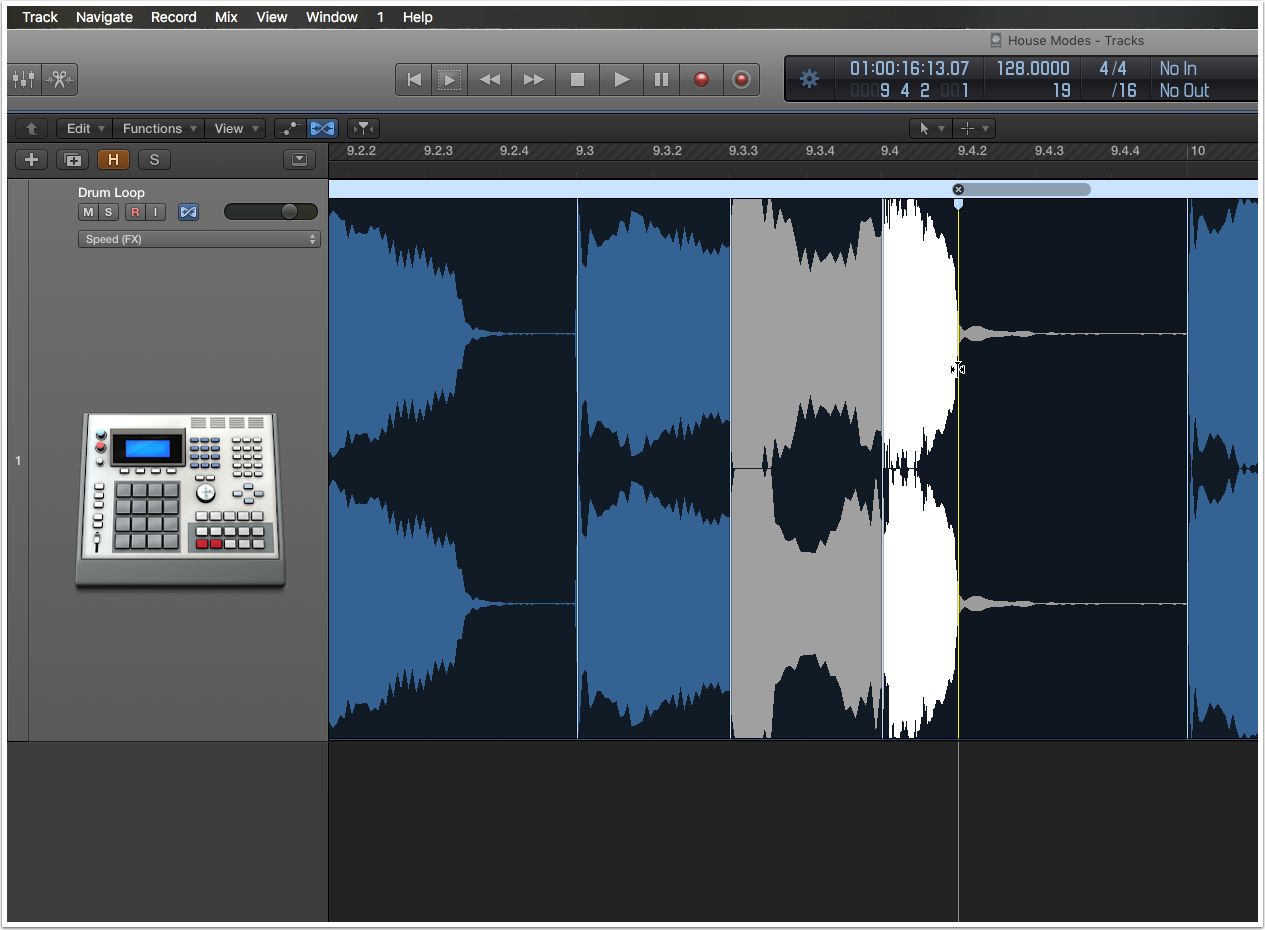
Getting the timing right here is important. Where you click, can result in an out of time mess, or a perfectly synchronized result. Always remember to protect the past and the future areas of the loop by placing markers at the starts and ends of the areas you want unaffected. Beat positions are good for this. When you’ve surrounded the area you want to effect, click and drag left/right on a transient to literally speed up or slow down that section. In the image below I’ve locked down bar 9 beat 3 and bar 10 with flex markers to the left and right, then dragged a couple of points inside to manipulate their speed. If you're already familiar with Flex mode, remember that you can click below the waveform’s center position and three flex points will automatically be created …often in the wrong position however for this mode. It’s best to click in the upper area to create single flex points for both the Speed and Tempophone modes.
Tempophone FX Flex Mode
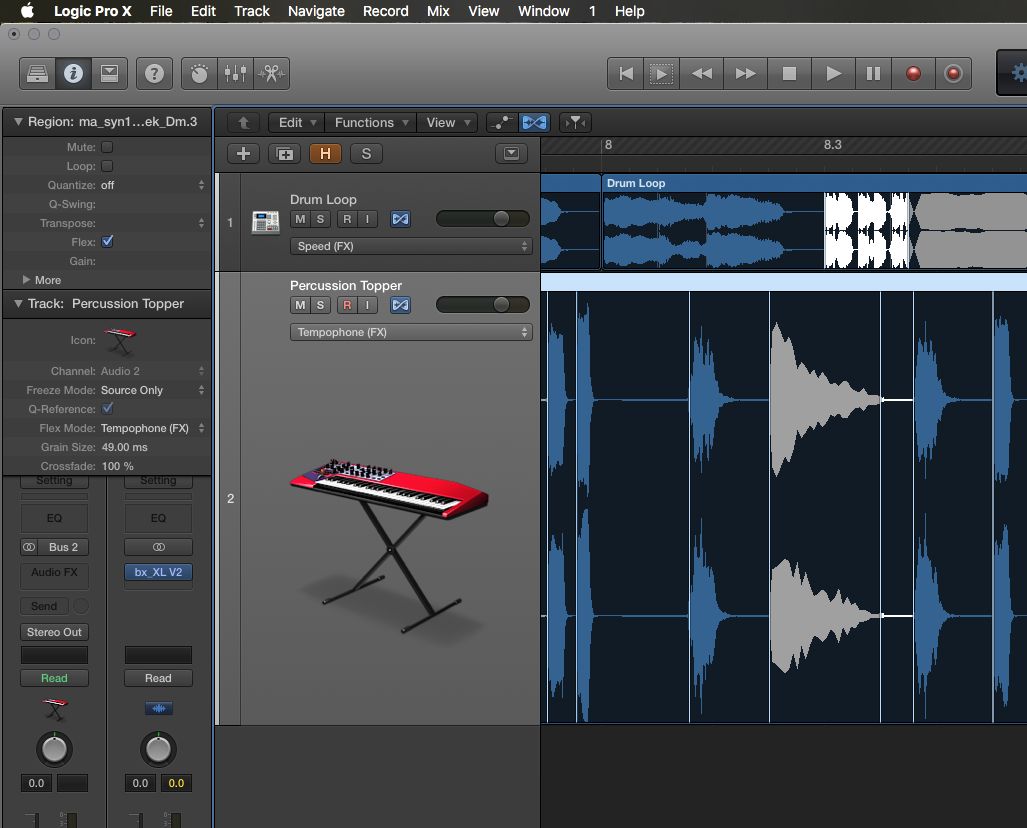
On my second kick-less percussion topper I chose to process it with the Tempophone mode. Think of this mode as a sort of “granular” effect. When you stretch or compress with flex points in this mode, a super fast loop starts at the beginning of the processed section that slides across the length of it, picking up new material as it goes. When lengthening sections with this, you get a sort of robotic or sometimes metallic stretched effect.
Choose Tempophone from the list on the track as you did with Speed, or even better, from the “Track Parameters” dropdown window (usually second from the top of Logic’s Inspector). Here, you have two extra Tempophone parameters; Grain Size and Crossfade. Place your flex points in the same way as the speed mode points. Try to position points at the starts of division, beat or bar positions boxing in the area you want to effect, then creating another point and dragging it out.
Here’s my example while writing the article:
Unprocessed:
Processed:
Finishing Touches
You might need to correct the pitch on processed areas of the loop, or play with timing on areas. You can switch between modes but I found it more reliable to simple bounce in place, then start processing again from there. To do this, simply right-click the loop you’ve edited, and from the Bounce and Join menu, select Bounce in Place. Choose to mute the source just in case you need to go back to it.
Thanks for reading, and enjoy altering your beats with these fun Flex modes.

Discussion
Want to join the discussion?
Create an account or login to get started!