1. Waveform Vs.Multitrack
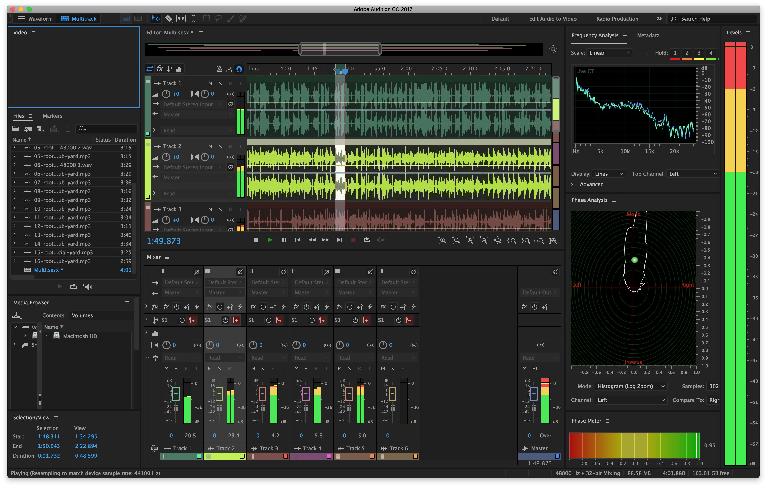
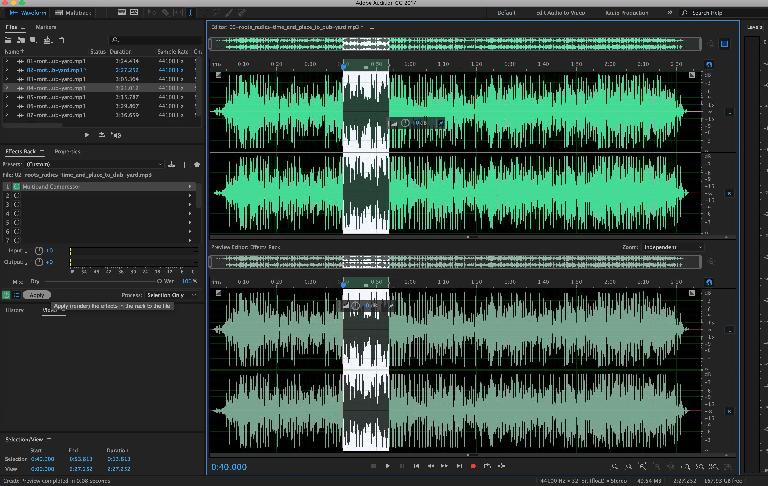
Audition has two main views for working with audio. Waveform view is where you perform detailed edits on individual audio files, either in regular transient view or one of the two spectral views available. This is good for the more forensic tasks – identifying clicks, pops or clipping, and reaching inside sounds to alter certain frequencies spectrally. Multitrack view is much more like how a DAW works: a linear, stacked group of tracks. You can use this either to record and mix sound in a conventional sense – say, recording a band – or to create audio montages, multitracking different sounds over time. This approach is ideal for sound to video, podcasts, radio broadcasts and the like.
2. Apply effects to parts of clips
There’s a difference in Audition between effects that are applied to a track and those applied to a clip. Track FX are basically like inserts in a DAW, affecting all audio on the track and being processed in realtime. Clip FX are applied onto a clip, but don’t affect any other clips on the same track. Within a clip effect you also have the option of selecting just a part of the waveform and applying an effect (or several effects at once) to that area. In the FX rack, select Process Selection Only and hit Apply. By doing this you can for example apply compression just to one loud part of a clip, but leave the rest untouched.
3. Understand Fades
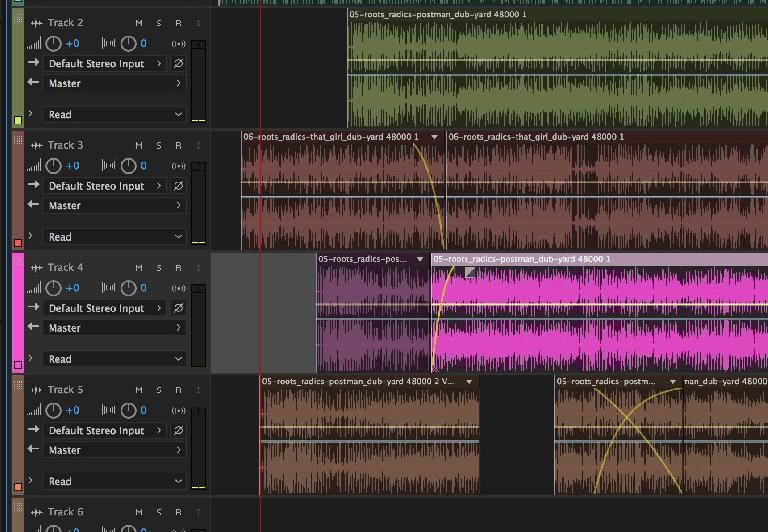
Audition will automatically create fades when you drag one clip over part of another clip on the same track in Multitrack view. This means you don’t have to do it yourself and it’s a great tip for quickly overlapping sounds without creating jarring transitions. You can manually adjust the fade curves by picking up their handles (the grey boxes) and these also exist at the start and end of any clip. So to fade between clips on different tracks, simply drag one fade curve out and the other one in. No processing required.
4. The FX Rack is more flexible than you might realise
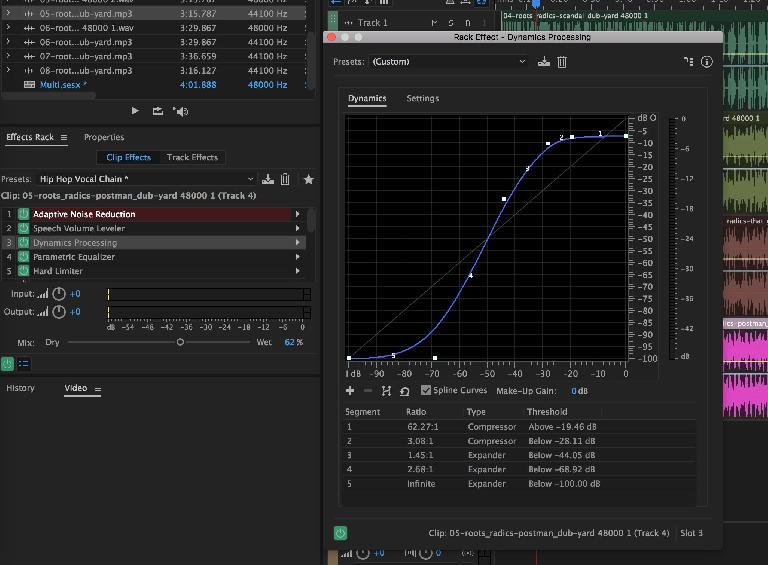
The FX rack is a great way to manage the realtime or “glued down” processing you choose to apply to clips. As well as having 16 slots per clip or track, it also has a bunch of ready made presets for all kinds of common tasks, and of course you can save your own presets from the window as well. It also has input and output level controls for the rack as a whole, and most importantly, a dry/wet master control. This enables you to control how much of the effected signal is blended with the dry, regardless of whether you’re using one effect in the rack or all 16 slots.
5. Know Your Workspaces
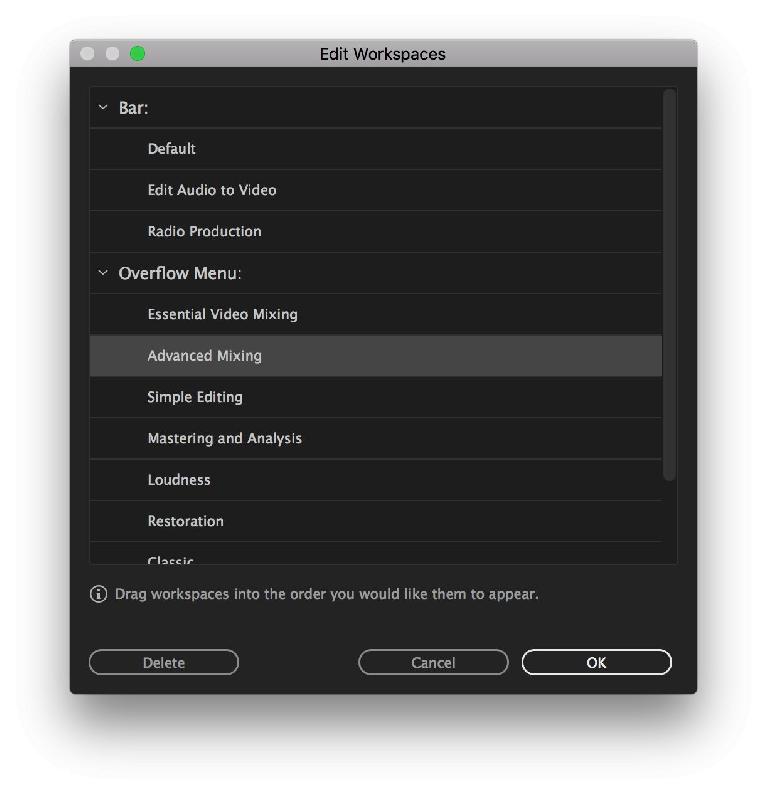
Each of Audition’s many sections can be called up or hidden from the Window menu, and window borders can be dragged manually. All sections can also be undocked from the main one-window interface so that they float, and re-docked by dragging their title bars to an area. At the top of the main window is a menu containing various preset workspaces and you can quickly flip between these to call up different combinations of tools and displays. If you select Window > Workspace and choose Edit Workspaces you can manage the list, creating your own custom ones as well. Although the single window interface is perfect for laptops, and very flexible, if you are working on a bigger project it can be helpful to spin off, say, the mixer to its own window so you can get a better view of everything.
6. Get Inside Frequencies With Spectral View
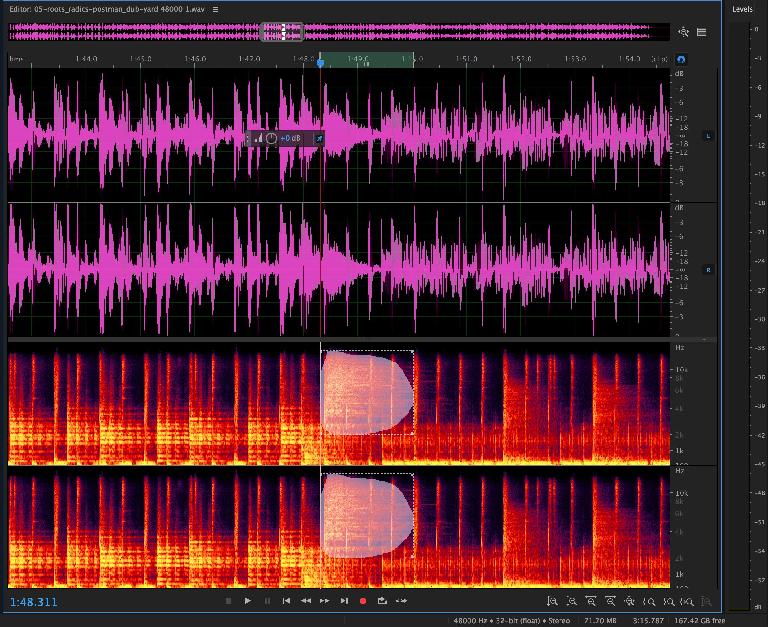
By switching into Spectral view from Waveform view, you will see a visual representation not just of the amplitude of a clip but also its frequency characteristics. The tools that then become available – select, lassoo, paint brush and healing brush – allow you to select frequencies visually and perform actions on them. In this way you can for example find a background noise that occurs during someone’s speech, and effectively delete it. Using regular EQ tools this would be almost impossible to do without affecting the speech. There’s also a spectral pitch view that lets you see different pitches represented graphically.
7. Batch Process Files
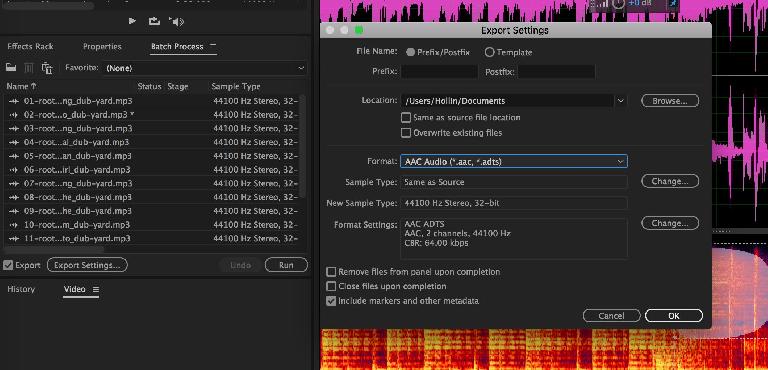
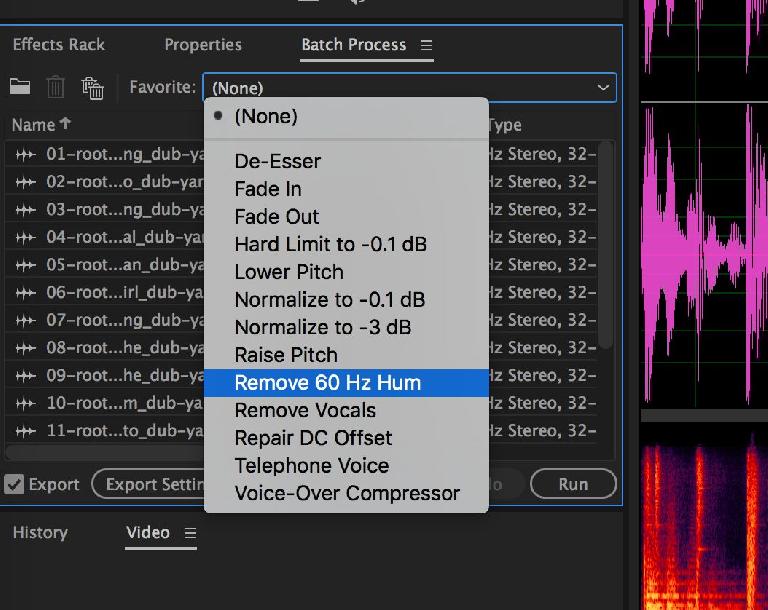
Sometimes, you need to change the properties or format of a bunch of files. Audition’s batch processor lets you do this easily, and has presets for things like normalizing files, removing hum, removing vocals and so on. You can also use it to convert lots of files to new formats – 48kHz WAVs to 44.1kHz MP3s, for example. You can choose to keep these files inside Audition’s browser for use in a project, or fire them out to your hard drive so they exist independently and can be transferred to other apps.
8. Know About Essential Sound
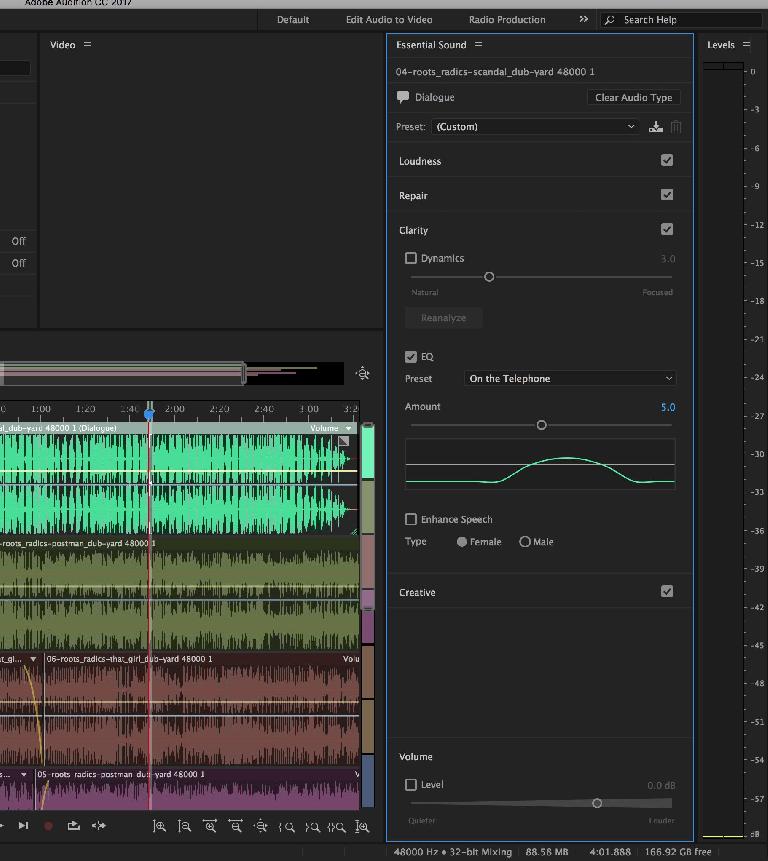
The Essential Sound panel which can be invoked from the Window menu is an interesting addition to the CC world. What it does is let you assign a type to any clips in a project – dialogue, music, sfx or ambience. Each of these categories has its own set of effects / parameters that can be controlled like EQ, dynamics, enhancement and so on. These provide a quick way to clean up or process types of clip instead of using the FX rack.
More importantly, these characteristics and tags are kept when you fire audio projects through to Premiere, provided you’re using the latest version of both apps. This means that audio data can be much more easily tagged, organised and recognised in both apps. For anyone working with multichannel video projects this is great news as it really speeds up your audio workflow when dealing with multiple audio tracks along with video. It’s also good with radio or podcast projects.


 © 2024 Ask.Audio
A NonLinear Educating Company
Discussion
Want to join the discussion?
Create an account or login to get started!