
Mid/Side processing is a process that is applied at the mastering stage. With Mid/Side processors we are able to separate the mix into two parts: the mids, where you will find all the mono sound sources such as bass vocals, and kick; and the sides where your wider sounds and reverbs will be found. This allows one to process specific parts of the stereo mix independently without affecting the other part. For example you could add more bass to the Kick and Bass parts without affecting the reverbs and wider instruments. Or you could add more presence to your instruments on the side and not affect your Kick and Bass.
I am going to be using iZotope's Ozone to demonstrate what is possible with some basic Mid/Side processing. There are other plugins available but I find that Ozone has an easy interface to navigate.
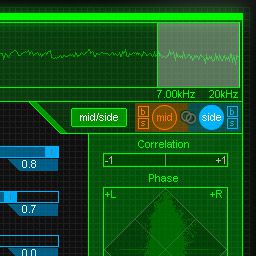
Here is the stereo track I will be working with.
Now here are the isolated Mids:
And here is the isolated Side:
Step 1 - Reverb With Mid/Side Processing
So you have gotten to the mastering stage of your track. After listening to the track you find that it could do with a bit more “room” sound or “air”. When you apply a reverb to the stereo track, you may find that the Bass and Kick get lost in the mix. They lose their attack as it gets buried in the reverb. This is where Mid/Side processing with the reverb can come in handy.
Here is an example of my audio track with a stereo reverb applied to it. With iZotope's Ozone you can separate the mids (Bass, Kick and central sounds in the mix) from the sides (the wider panned sounds and reverbs). I have enabled the mid/side with the reverb setting, jumped across to the Sides and applied some reverb. You will notice that this does not get applied to the central items and does not affect the bass and kick. You will also find that you can push your settings a bit more.
Listen to the amount of reverb applied to the stereo track:

Take a listen to the effect after the Mid/Side reverb has been applied to the sides. It provides you with a “room” sound but keeps the attack and presence of the Bass and Kick.

I have used some drastic settings here for mastering, but it is merely to illustrate what is possible with Mid/Side processing. Normally during the mastering process you will be subtler with your changes.
Step 2 - EQ with Mid/Side Processing
You may find that after you have mixed your track and enter the mastering stage, some frequencies may be lacking in your mix. You could go all the way back to your mix, but amazing results can be had with applying Mid/Side EQ to your stereo track. Sometimes you don't have access to the mix, and this is where Mid/Side processing is your best friend.
With my track I want to boost some of the lower register. More specifically: I want to increase the perceived volume of my Bass and Kick. With the Ozone Parametric EQ, I can move over to the Mids, and then apply an EQ boost in the lower registers. I have applied a boost in the 300Hz region. To make this boost more apparent I have jumped over to the Sides and added a dip in the 300Hz region. This will allow my Kick and Bass to punch through more in the mix.

I also want to add more sheen in the higher register. This can be done on the Sides by adding a boost in the 6kHz region. This will add more presence to my higher register instruments such as my hats, higher pitched synths, and the reverbs as well.

Step 3 – Harmonic Exciter with Mid/Side Processing
A harmonic exciter is an audio signal process that enhances the sound source. It uses harmonic synthesis of high frequency signals and adds subtle harmonic distortion. With the ability of mid/side processing one can decide whether to enhance specific frequency ranges of the Mids, specific frequency ranges of the Sides, or both. In my track I want to add some harmonic excitation/distortion to the 140Hz – 6kHz region on the Mids. This will add some sheen to my Mid instruments and sounds.

I also want to add harmonic excitation/distortion to the Sides at 2kHz-15kHz. This will really add some presence to the Sides and the instruments sounds and reverbs associated with it.

Here are the Mids soloed with the Harmonic Exciter applied:
And here are the Sides soloed with the Harmonic Exciter applied:
And now both the Mids and Sides applied to the Stereo Track:
Now, that's quite impressive especially when you don't have the opportunity to go back and tweak the original mix.
Conclusion
You can achieve great results with a stereo file and Mid/Side processing, which would be quite impossible using other means. Working with a stereo file really allows you to be critical about the track and decide how you want the mids and the sides to relate to each other.
One can find many ways to open up their stereo tracks when entering the mastering phase. Adding boosts in the Sides at 6khz can add rich high end to your tracks. You can also cut the mid frequencies in the sides if your sounds and instruments sounds too clogged up. The Rich High end boost will open up the track. You can also add harder compression on the Mids than the Sides, which can help bring the bass and kick to the front of the mix.
There are many opportunities for enriching your tracks with Mid/Side processing. With these tips under your belt you can continue experimenting to help your mastering work.
Discussion
Want to join the discussion?
Create an account or login to get started!