
Amplitube 3 has a number of different ways you can control it's parameters in real time. Host Automation, MIDI Controllers and IK Multimedia's dedicated Hardware Controllers can all be used to morph, switch and sculpt your tone on the fly.
In this quick tip I'll guide you through the various ways you can control this powerful amp software in Logic Pro. The steps are similar for other DAWs.
DAW Automation
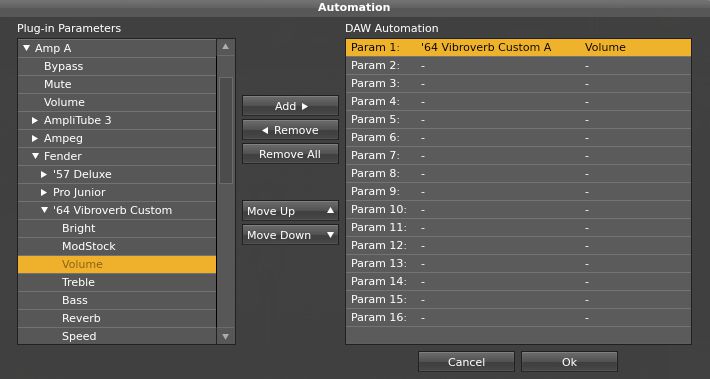
When automating Amplitube in a DAW you'll first need to assign your parameters to one of the 16 host automation slots. These will show up in your DAWs track automation list like so.

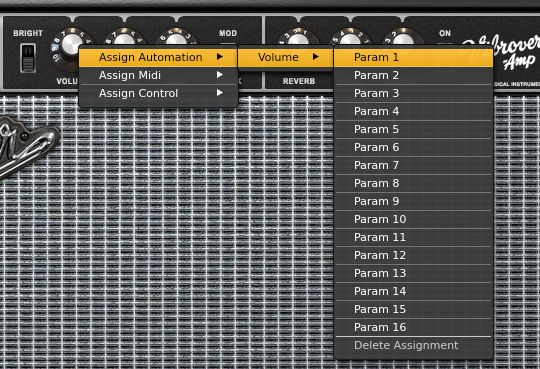
When assigning any Amp, Stomp, Cab or Rack parameter to one of these slots the best way to do this is to Control-Click (Right-Click PC) on the desired parameter (in this case Volume) then choose 'Assign Automation' and simply choose the slot you want!
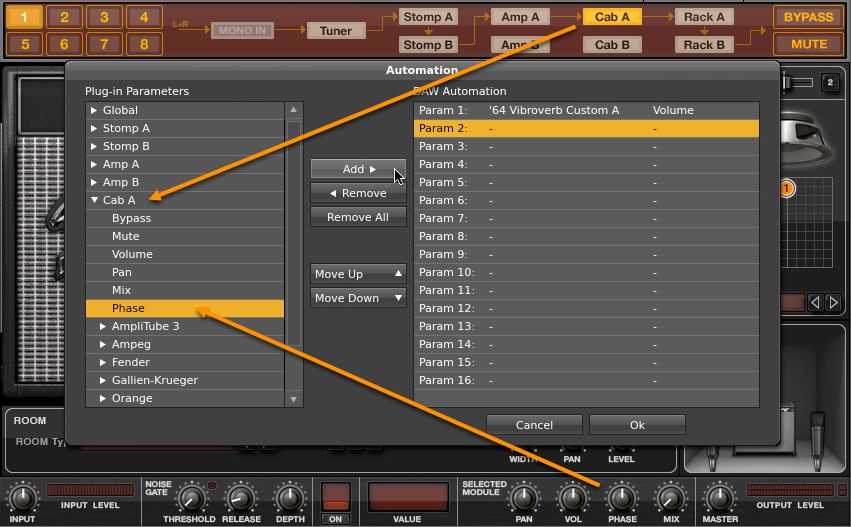
You can assign parameters by accessing the Automation window located in the bottom right of the plugin as well.
The disadvantage of this is you'll have to physically go and find the particular amp you're using from the Plug-In Parameters List which can be a bit confusing if you don't know quite which product library it comes from.
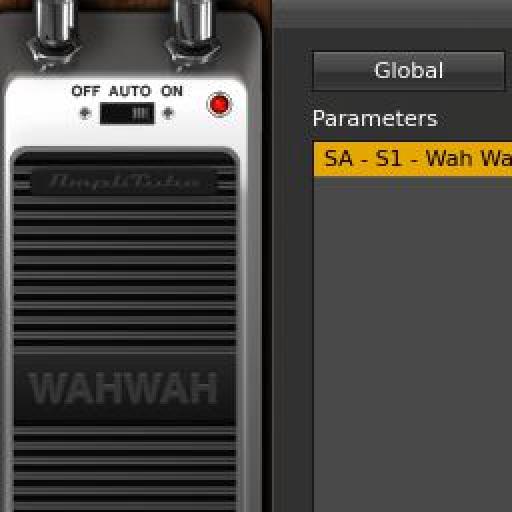
Saying that the Automation window is where you can edit your assignments like adding and removing etc. It's also where you'll need to go if you want to assign parameters that don't belong to the main interface, like Global and Module parameters which are located in the toolbar strip at the bottom of the plugin. These parameters can't be assigned by keyboard shortcuts.
If I wanted to assign 'Cab A' module parameter Phase to an automation slot I'll need to find Cab A in the Plug-In Parameters List and assign it manually.
MIDI Controllers
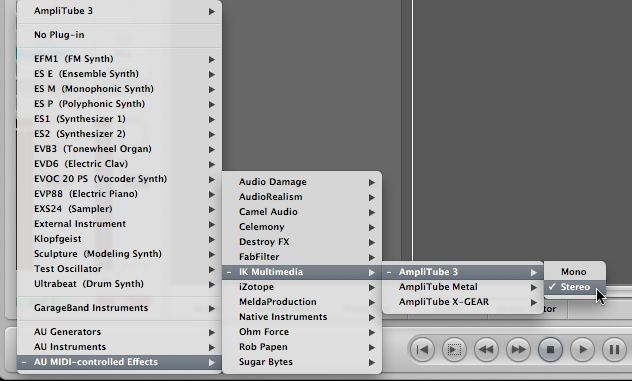
In order to control Amplitube 3 with MIDI CC messages in Logic you'll need to load it in as an actual Software Instrument. In Logic this would be found in AU > MIDI-Controlled Effects in the instrument slot of a Software Instrument channel.
[Ed - This is specific to Logic as some other DAWs will not require that you instantiate AmpliTube as an Instrument in order for it to be controlled with MIDI CC messages.]
Your signal will need to be fed in via the Side Chain.
Once this is set up you can assign parameters to MIDI CC messages in much the same way you would assign the Automation slots. Control-Clicking (Right-Click PC) the parameter will bring up the assignments drop down and this time choose 'Assign MIDI'.
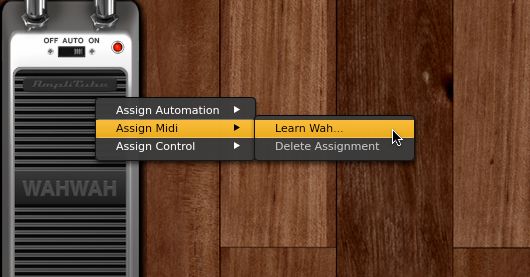
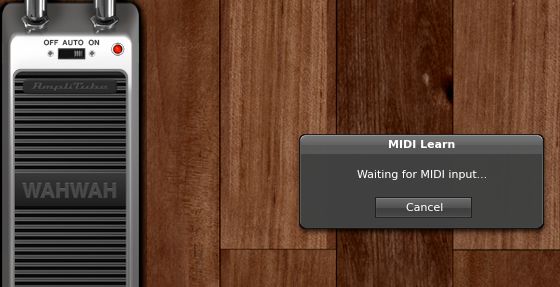
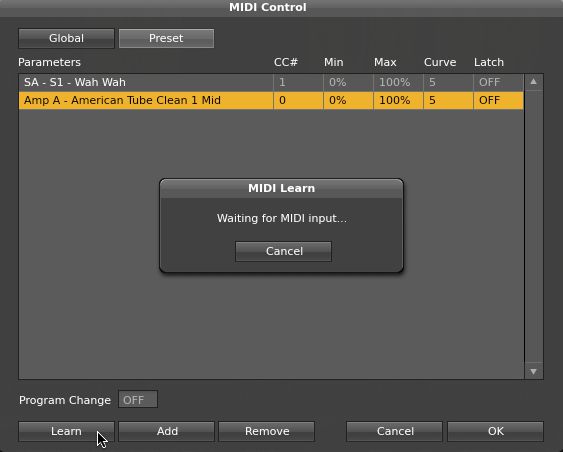
Amplitube will then await a MIDI CC message.
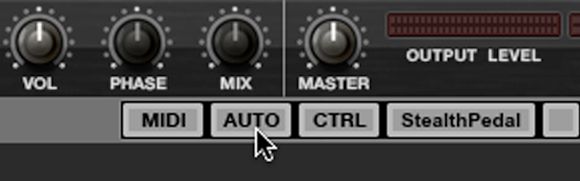
You can edit or add new assignments in the MIDI dialogue page which is accessed using the MIDI button in the lower right of the plug-in.
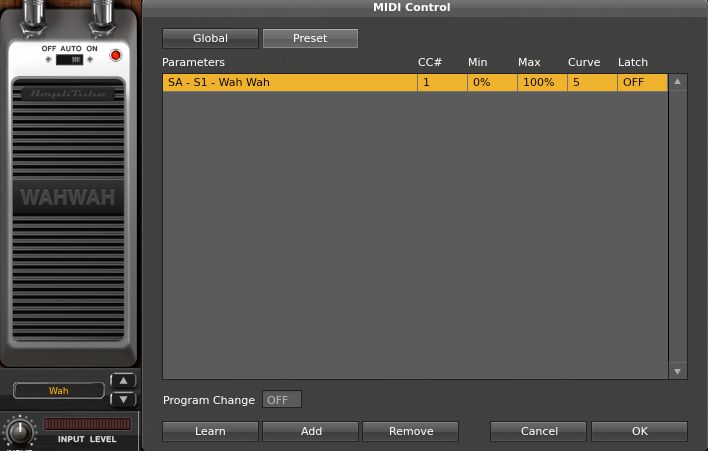
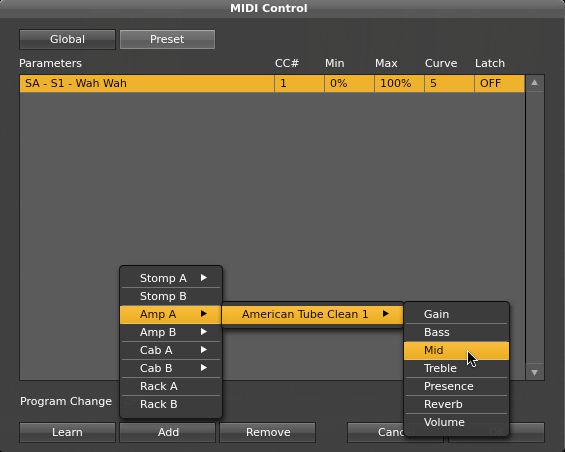
To add a new MIDI controller press Add and select the parameter from the drop down.
Select it in the window and click 'Learn'. Turn a controller to assign it.
Note: You can not assign Global or Module parameters to MIDI assignments.
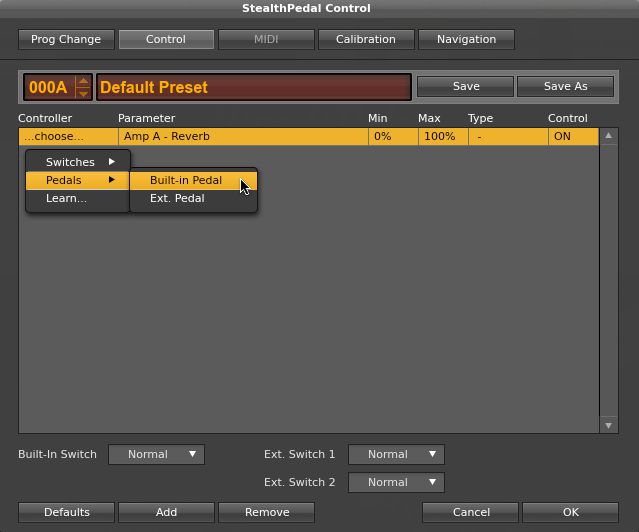
IK Hardware
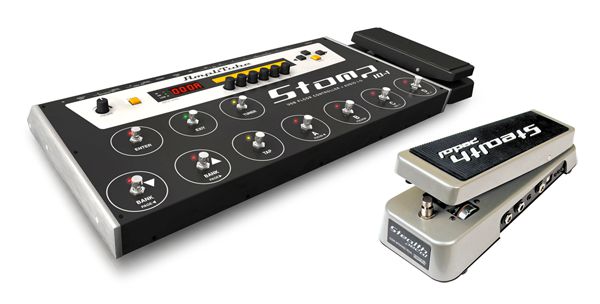
Ik Multimedia has two hardware controllers for Amplitube, the StompIO and the StealthBoard. The StompIO, although still widely used, is no longer being produced and will be replaced by the StealthBoard in Autumn (Fall) of 2011.
You'll need to launch the StompIO MIDI Control/Stealth Pedal MIDI Control application before launching your DAW to make them work. Once your up and running the process is exactly the same as assigning Automation and MIDI but this time you'll select Assign CTRL from the drop down when Control-Clicking (Right-Click PC) on a parameter with further editing done via the CTRL window.
Amplitube 3 really shines when being controlled in real time and allows you to pull off some really creative guitar sounds that are otherwise impossible to achieve.
Check out our related IK Multimedia based articles on The MPV Hub.
Learn more about IK Multimedia direct on their website and discover the AmpliTube Custom Shop which since this article was written is now available inside AmpliTube 3.

Discussion
Want to join the discussion?
Create an account or login to get started!