
Working with tempo is one of the more advanced things you can do with Cubase and although it is sometimes thought of as more of a scoring technique, used to mix different pacing within a single project while composing music to picture, it actually has many more uses. To give just a couple of examples, tempo or time signature changes within regular songs are not uncommon, and manipulating speed within samples is a good way of creating special effects. Let’s look at some of the ways you can use tempo changes inside Cubase to make your projects more interesting.
1. Record Tempo Changes Live

Once you have created a Tempo Track for a project (only one per project is allowed), go to the Project menu and choose to show the dedicated Tempo Track editor. Even though the Tempo Track displays in the main Project window, this dedicated editor gives you more control over the changes you make. One interesting tool here is the live slider, and if this isn’t visible by default you can click on the Setup Toolbar icon at the top right of the window and choose to show the Tempo Record slider. Now when you record tempo changes, you can use for example a mouse wheel or ball control to smoothly, manually change tempo over time by changing this slider. It’s more natural than using the mouse or trackpad to drag up and down.
2. Types Of Point
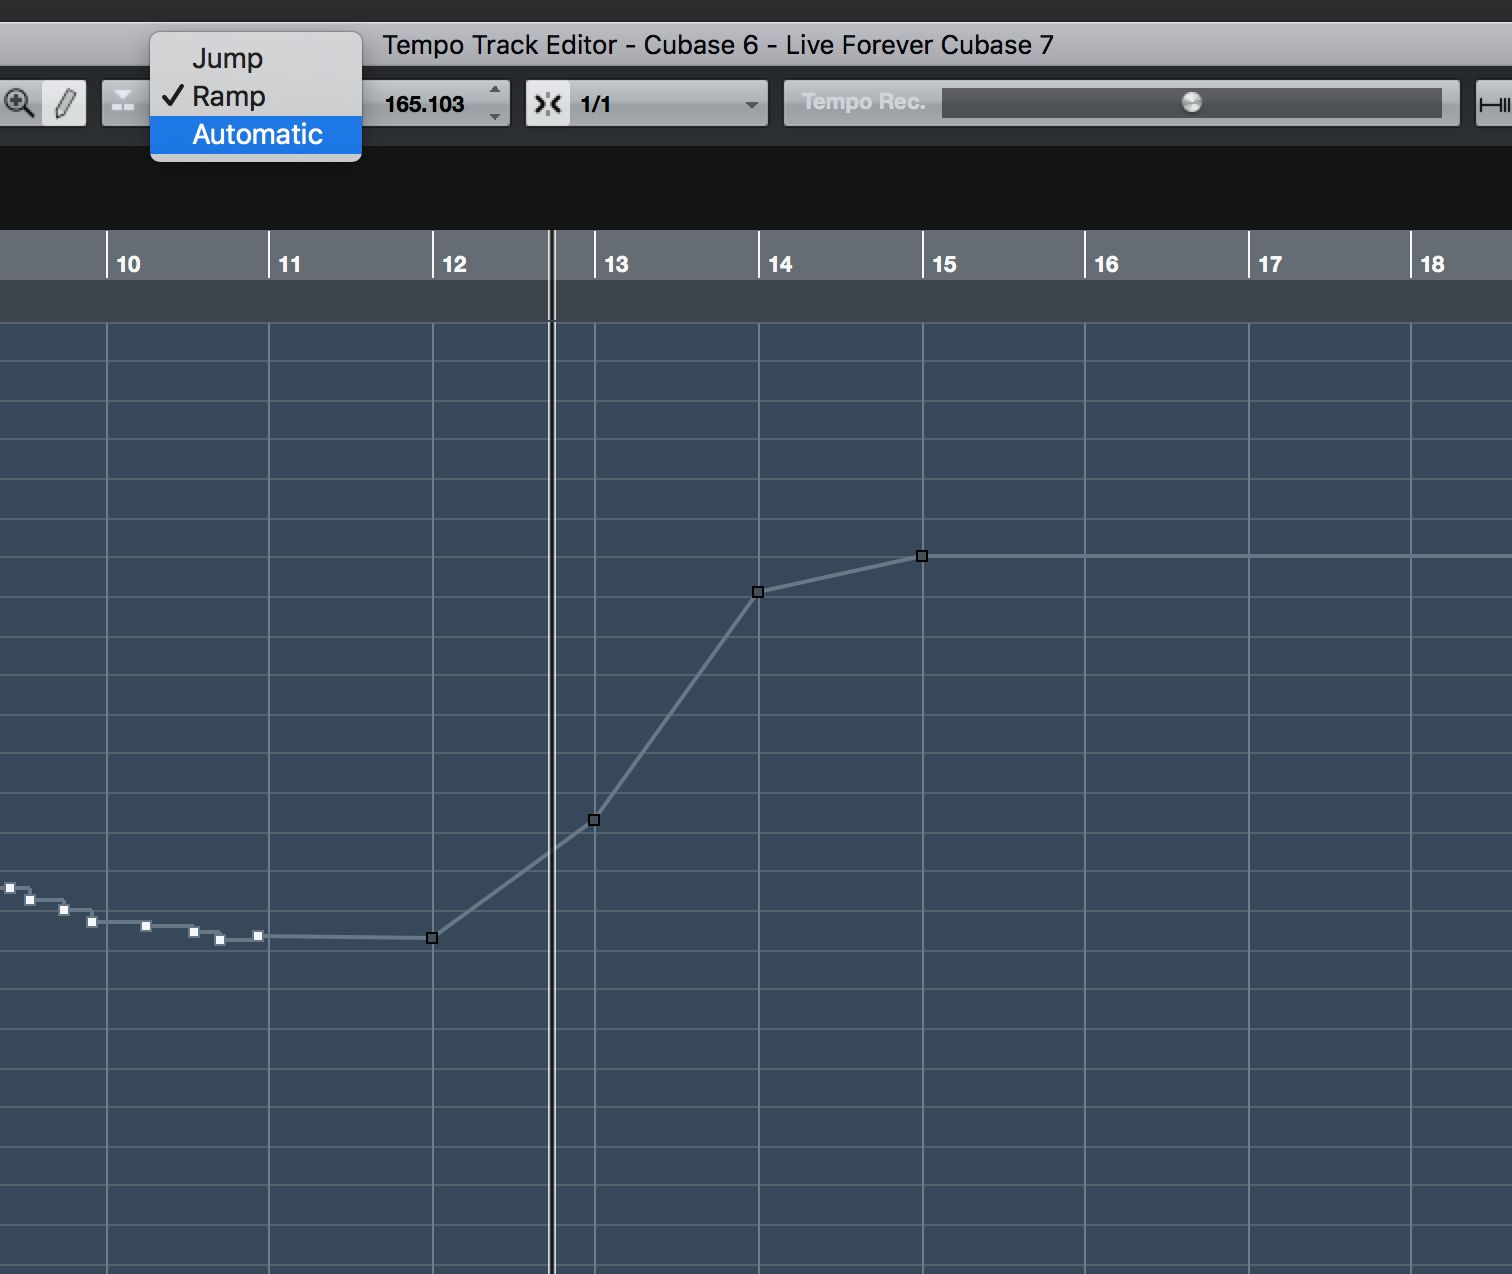
The Tempo Track has three behaviour modes for how it handles automation and these can be selected from the Type menu either in the dedicated window or inline in a project. Jump will make a tempo go directly from one value to another using the project snap settings to determine where this change occurs. Ramp will transition more smoothly between values, gradually speeding up or slowing down. Automatic makes a best guess based on the type of data you are inputting so is perhaps preferable if you’re experimenting with tempo changes.
3. Warp Speed
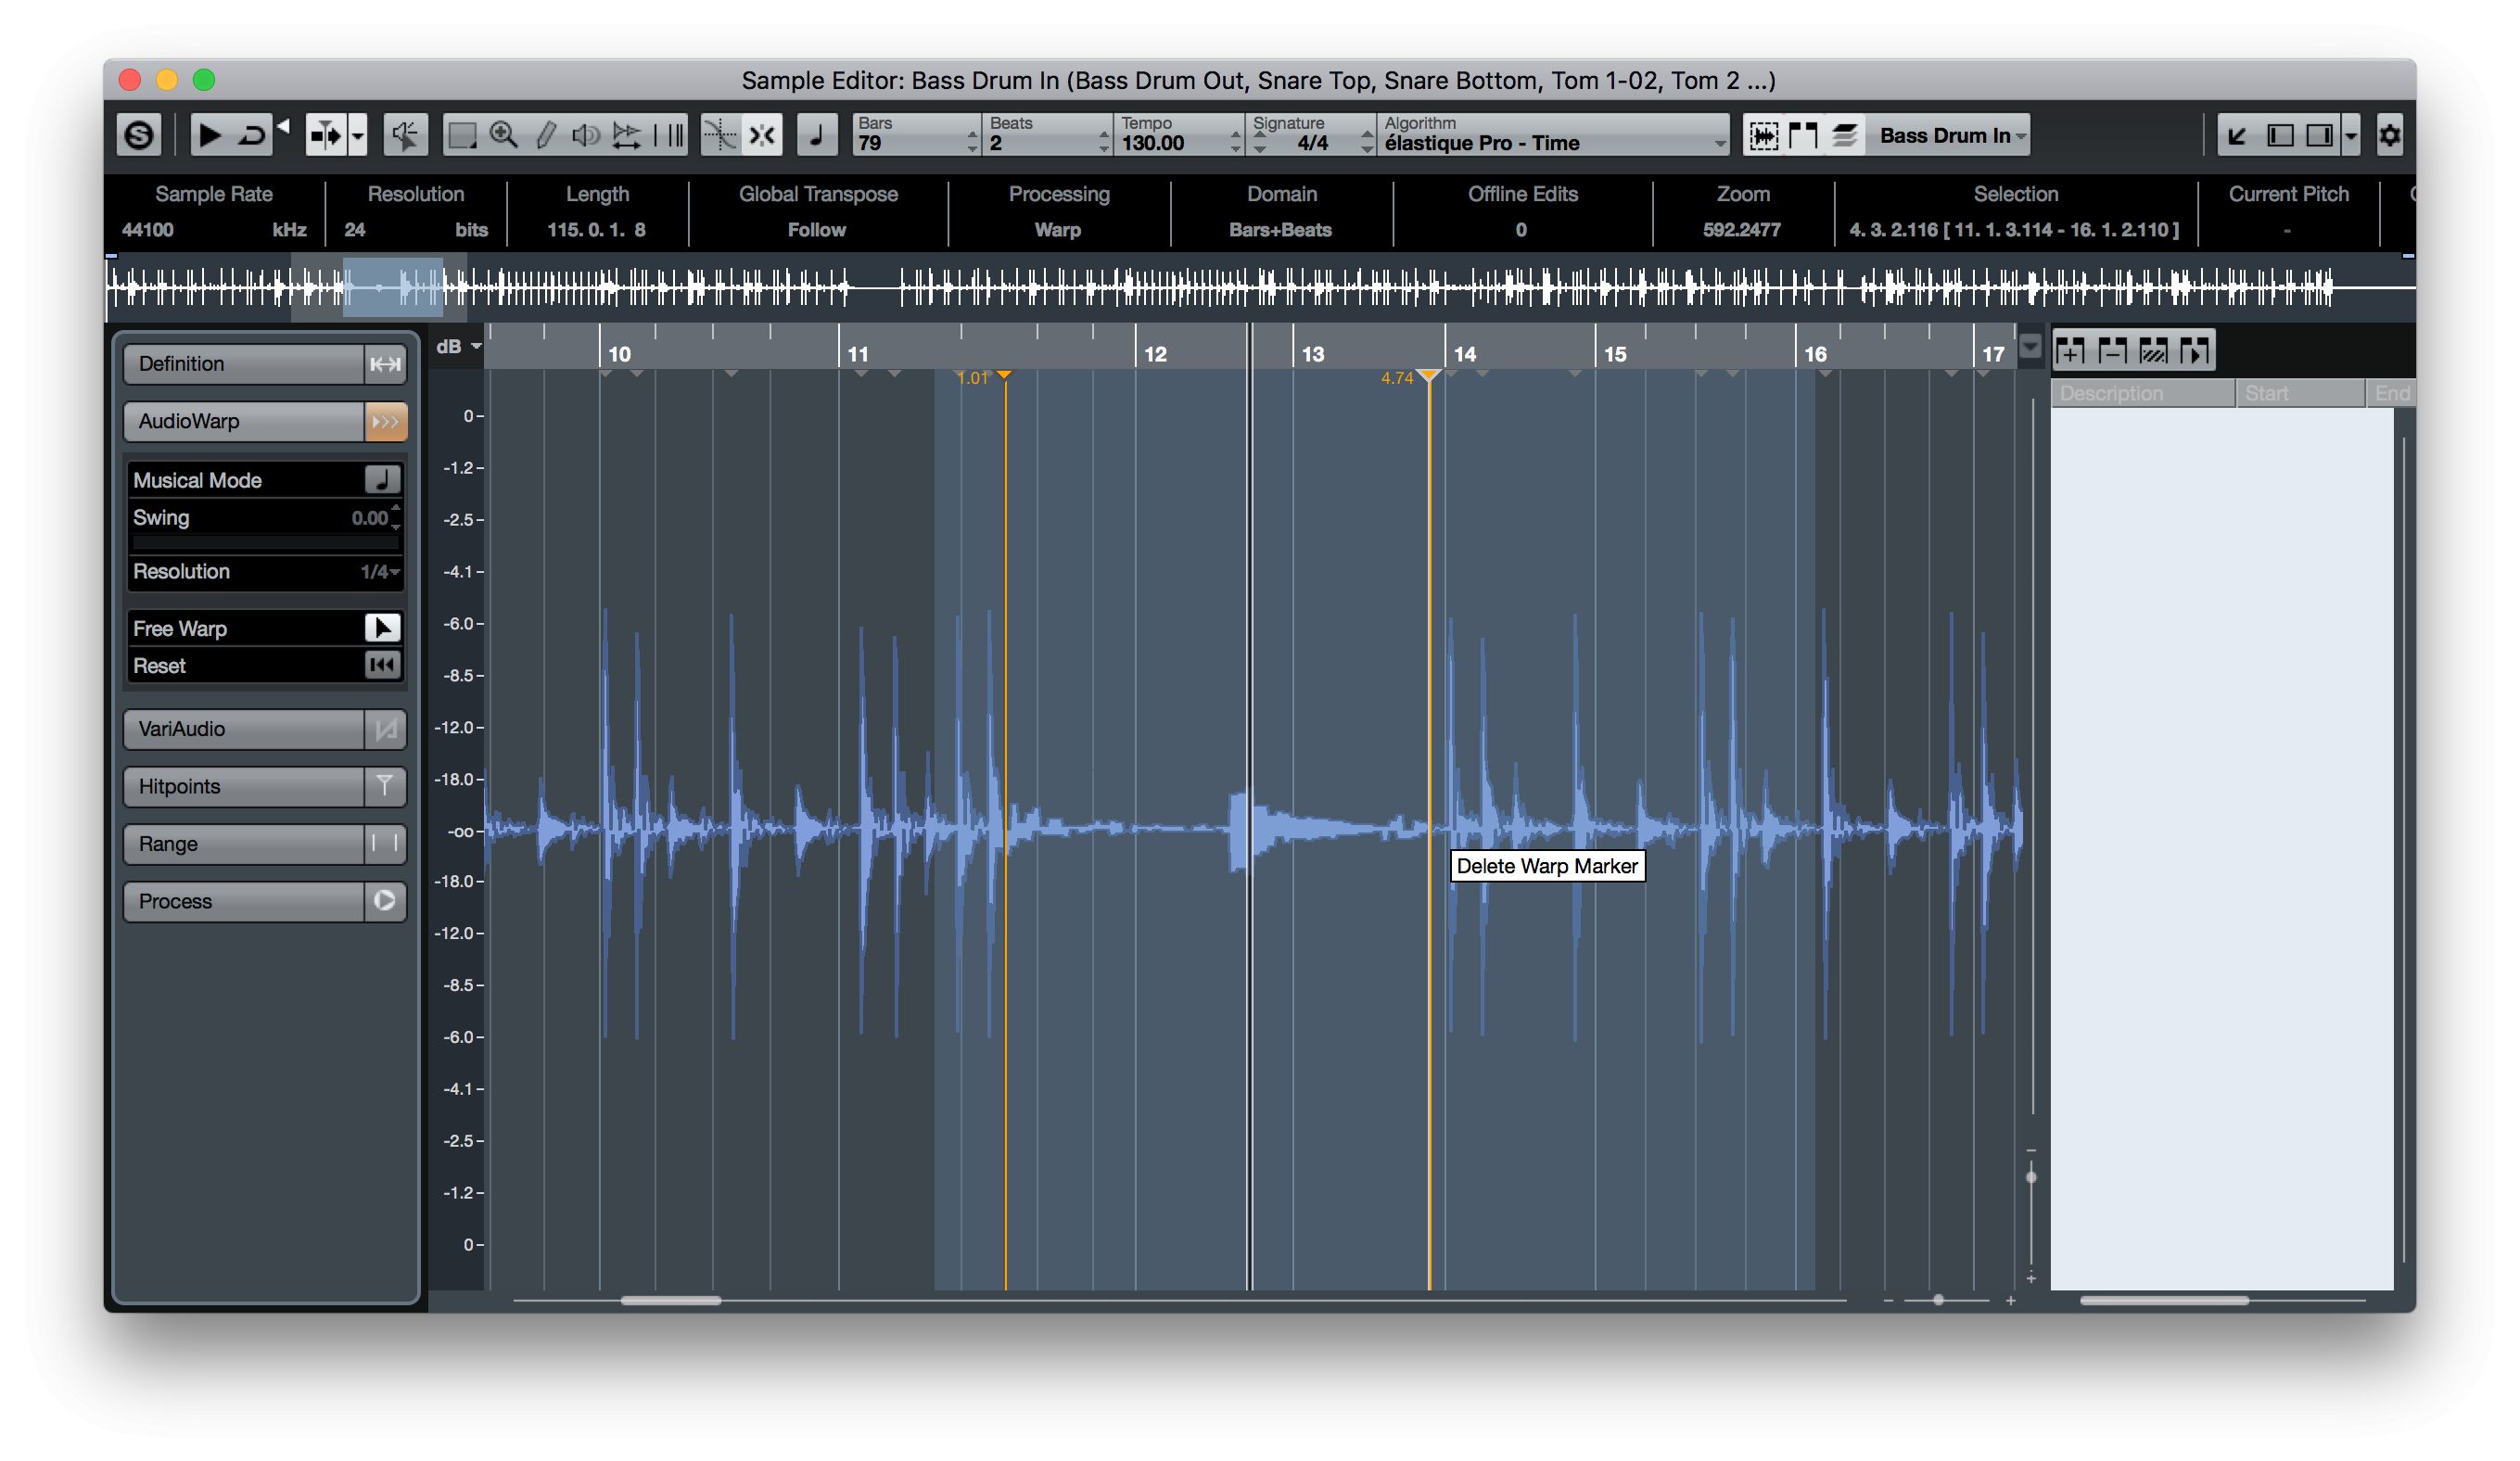
AudioWarp has been a part of Cubase’s Sample Editor for a while now, but it’s still immensely useful in many situations. Open any audio in the Sample Editor window and activate AudioWarp mode to render it elastic. Now you can click anywhere inside the waveform to add warp markers and then drag these freely left or right to change the length of the audio between those markers, but without changing the overall length of the audio clip. This is incredibly handy for cleaning up or otherwise altering the timing of a part without having to actually slice the audio up. You could go in and move one word in a vocal clip for example, or one snare hit, or one guitar note. Once these markers have been created you can even quantize them just like you would with MIDI, again altering the feel of an audio clip but without having to do anything particularly destructive to it.
4. Create Events From Hitpoints

Hitpoints have been in Cubase for even longer than AudioWarp and are a kind of simpler verison of warping. Activate Hitpoint detection from the Sample Editor and set a Threshold to determine how accurate the detection is. From the list of commands in this section on the left of the window you can now do things like creating markers or slices from the different parts of a waveform. As far as tempo goes, if you choose to create slices from this menu, your audio clip will be divided into separate audio slices on its audio track in the project, meaning you can now take those slices and re-order or stretch them as you see fit.
5. Activate Time Warp
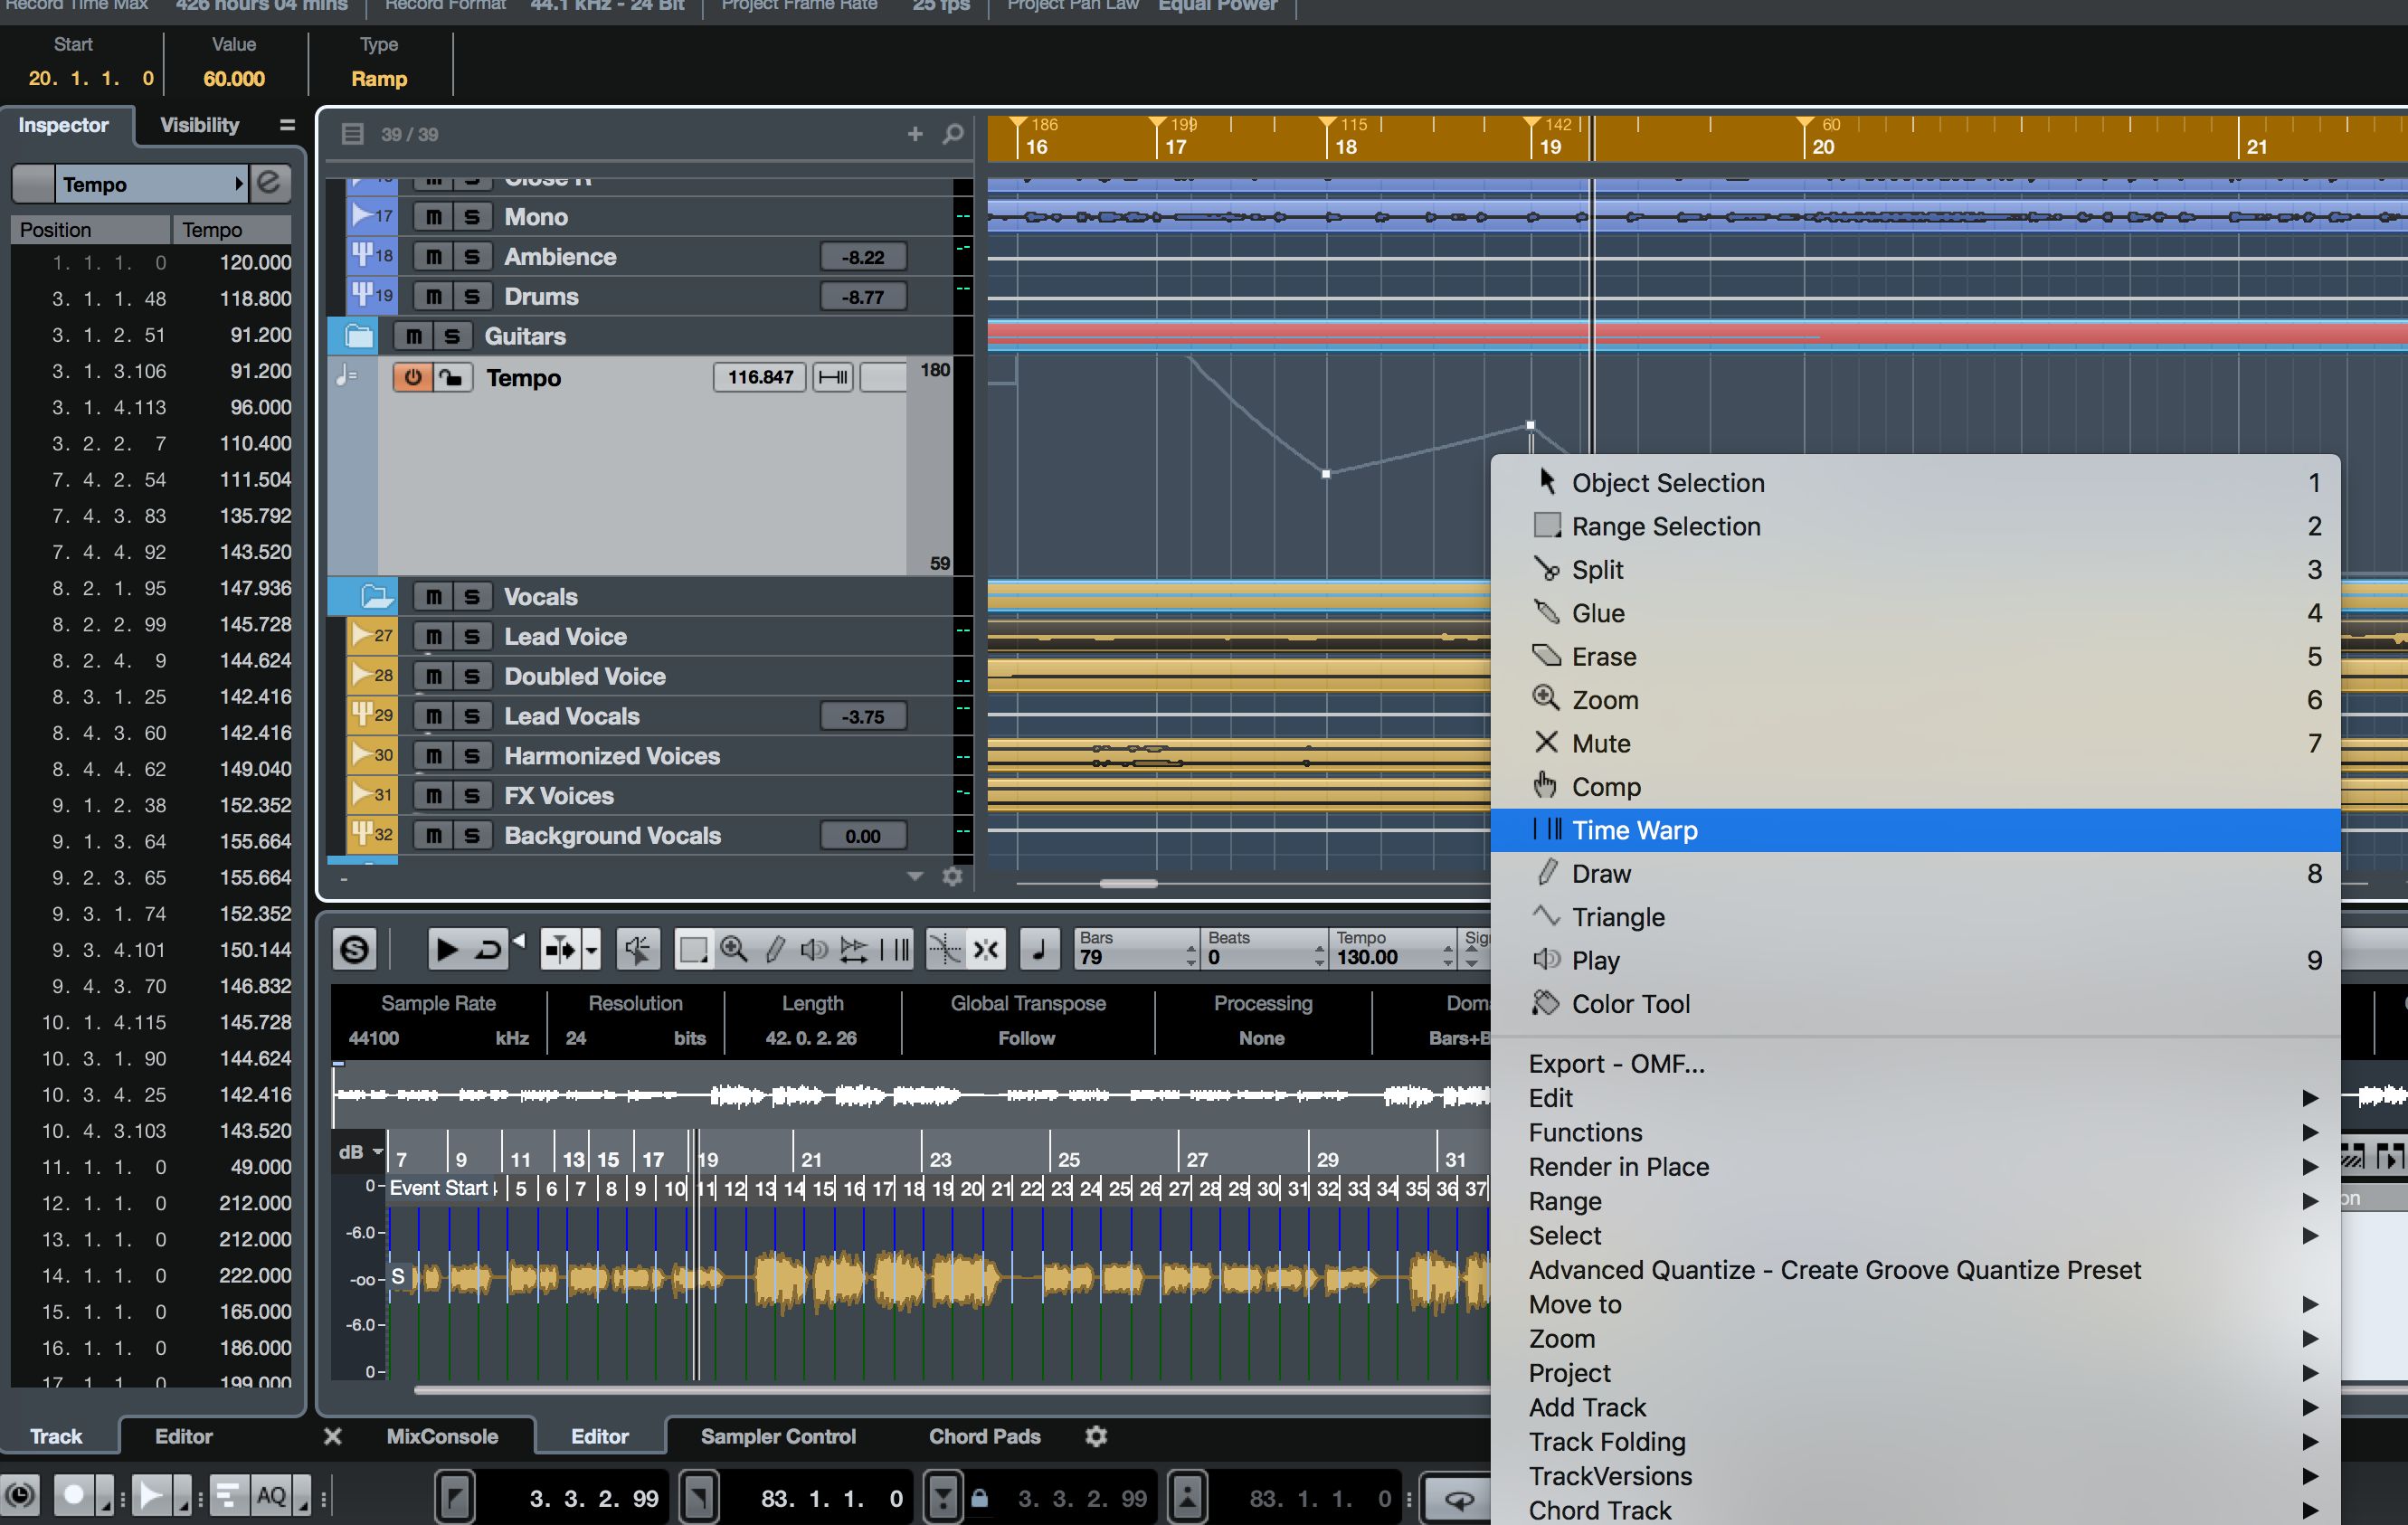
If you right click in a project or go to the project window’s main toolbar you can choose to activate the Time Warp feature. When you do this and make changes to project tempo using the Tempo Track, audio parts that have AudioWarp enabled will be recalculated to adjust their tempo at the required points to follow the new tempo information you have entered. MIDI is easy since it’s just a bunch of instructions, but audio needs to be rendered elastic before it will adapt. Any clips that have been sliced into events will adjust the spacing between those events, though this is unlikely to sound good as it will invariably leave gaps. Use AudioWarp plus the Time Warp tool for really flexible audio-follows-MIDI tempo changes.
6. Extreme Time Stretching

Select any audio clip in a project and go to the Audio > Process menu, then select the Time Stretch process option. This pops up a new window where you can manually enter all kinds of settings to time stretch the clip, making it longer or shorter either subtly or to an extreme extent. You can select an algorithm appropriate to the kind of material you are working with, and use the handy Preview button to hear what it’s going to sound like before committing to the edit. This tool is particularly good for turning regular sounds into extreme slowed-down granular-sounding effects.
7. Shortcut To Tempo Stretching
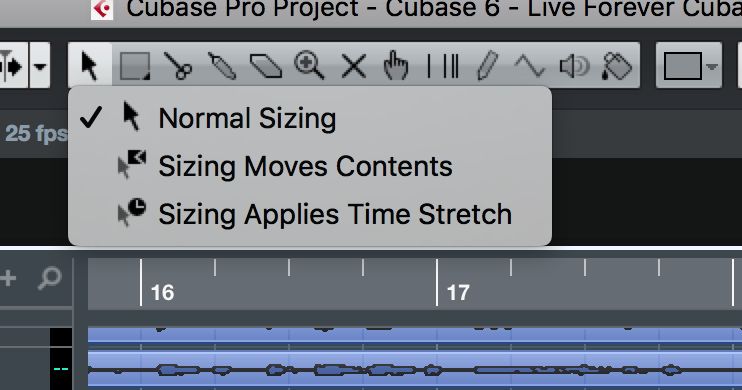
Time stretching doesn’t always have to be a complex process. The regular pointer tool has a couple of alternate modes which you can see if you click on it on the toolbar, or press the number 1 key to cycle through its modes. The interesting one here is the third mode – Sizing Applies Time Stretch. With this active, dragging any audio clip left or right won’t move it but it will perform a quick time stretch on it. This will obey the project snap settings, meaning it’s good for quickly conforming a loop to project tempo, or you can disable snapping to perform a free stretch, making the sound any length you like. This option is more useful for non-rythmic parts like sound effects, since conforming to beats is less of an issue with that type of sound.

Discussion
Want to join the discussion?
Create an account or login to get started!