With last year’s major release of version 10, long time Live users knew there would be more features on the way in the form of incremental updates. With 10.1, we’re getting the first round of significant value add-ons. Available in beta for a couple weeks now, we’ve had a chance to sink our teeth into it properly. Here’s what stuck out so far.
Wavetable Expanded
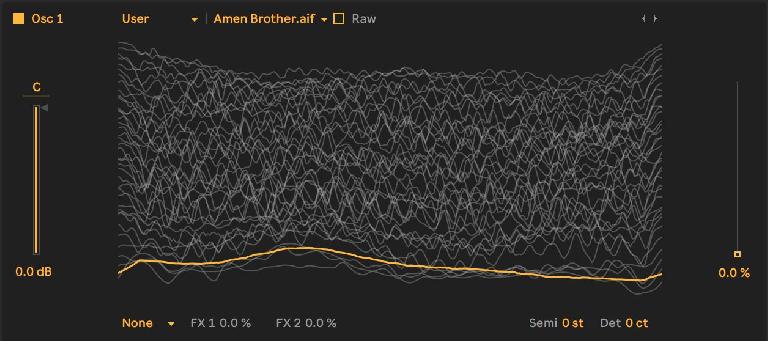
There’s no doubt 10.1’s improvements to the new (as of 10) Wavetable instrument will be of particular interest to avid sound designers and synthesists alike. Much requested since it first arrived as Live flagship new synth, user Wavetables are now as easy drag and drop: drag a sample from anywhere in the browser, Finder, or your set onto the Oscillator Wave table display and there it is – it really couldn’t be more simple.
Initial sonic results may seem somewhat haphazard. First, bear in mind any significant silent portions of a sample will be reproduced as dead zones in the wavetable, so a bit of homework preparing files may be recommended to avoid this.
Having pointed that out, there is some advanced math helping interpolate user samples as accurately as possible, reducing phase issues and smoothing volume levels in the process. This generally works remarkably well, particularly with smaller sample lengths.
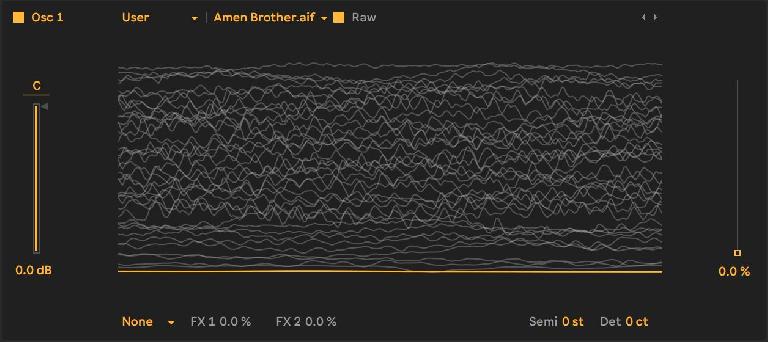
However, if you want to disable the interpolative code designed to squeeze sonic lemonade out of your audio lemons, just click the oscillator Raw toggle, and you’ll be left with a series of waves chopped strictly to 1024 samples a piece. Either way, results are reliably tuned to middle C regardless of the original sample pitch.
As one of Ableton’s primary Wavetable programmers explained, “With Raw off you can try anything, and we do some magic to try and adjust the cycles as much as possible without killing the charter. But making a good wavetable doesn't come for free, so don't expect every audio sample to sound good right away. For example, inharmonic content doesn't fit in one clean cycle, nor does noise. For optimal results, there are 1024 samples per wave, and 255 waves in a table. That means at 44.1kHz sampling rate you should play a single time at F0 (or F1 depending on your standard) at -23 cents for optimally tuned results.”
For producers already committed to Serum, they may or may not find reason to switch over to Wavetable – though they will likely find it interesting to know that Wavetable can load any custom tables exported from Serum.
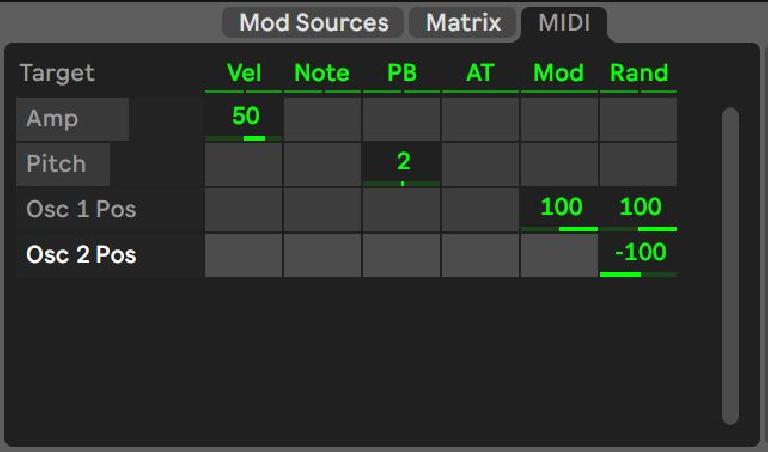
A vital new Modulation source has been quietly added to Wavetable’s MIDI Matrix section as well: Rand. Each new MIDI note triggers a random value that can be assigned positively or negatively to modulate any parameter in Wavetable. Applying it to Wavetable position creates particularly compelling dynamic timbral changes, but Unison amount, LFO rate, and Filter Frequency are other viable targets that should generate considerable listener interest assigned to Rand.
Intelligent Modulation
Speaking of modulation, Live’s Clip modulation envelopes have been revamped and made considerably more intelligible in terms of how they interact with Automation. While Automation ultimately controls a unipolar parameter’s ceiling – or anchors a bipolar parameter’s center – in the linear Arrange view, parameter Modulation interacts with that ceiling or central value in relative fashion.
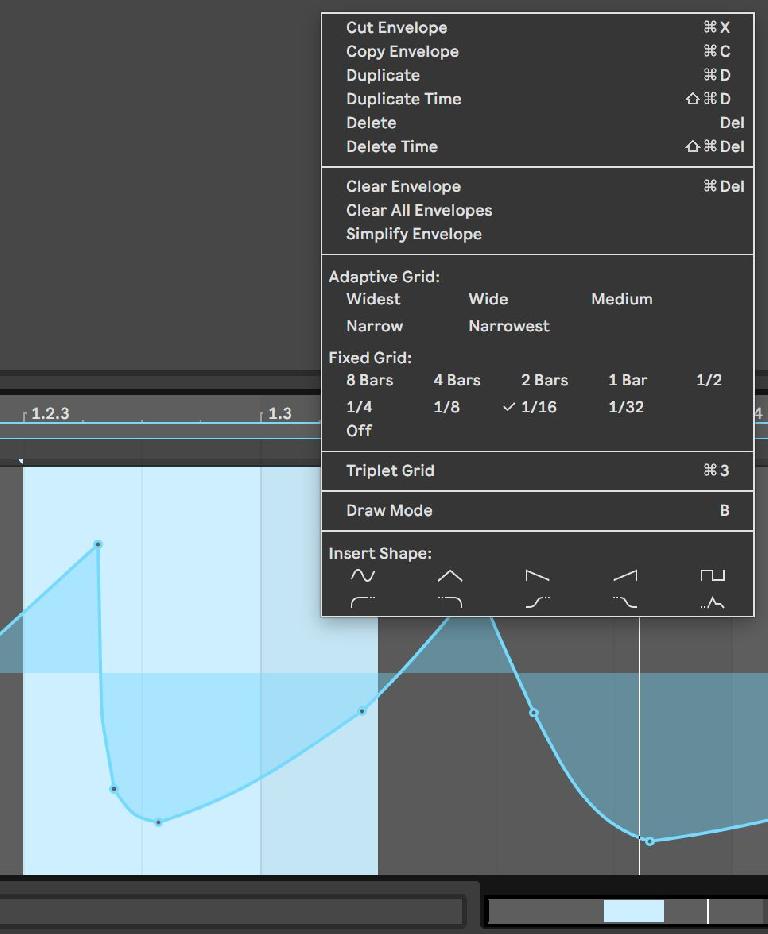
Now clearly distinguished by the color blue – as opposed to Automation’s red – Modulation is clearly visible in relation to a parameter’s Automated value. In the envelope area, a shaded blue area denotes when the modulation is diving below or above the relative Automated value, and when looking at a parameter dial itself, a blue modulation line flashes within the dial itself. Better still, in Session Clips, an Aut / Mod toggle has been introduced to select whether you’re editing a parameter’s fixed Automation envelope, or relative Modulation envelope.
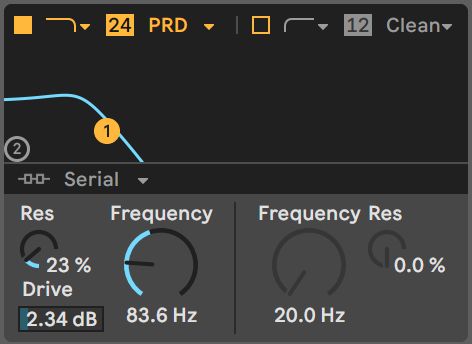
Modulation of a Wavetable’s Filter Frequency displays as a blue value exceeding the anchored Automation value.
Much noise has been made about the new Automation curves, and rightfully so. But where they may come in most handy for sound design is in the Clip Modulation envelopes. When Unlinked, Clip Modulation envelopes can be deployed as freeform, fully customizable LFOs, giving each parameter its own loop brace to layer long sweeping Modulation with some parameters over shorter, rhythmic Modulation of other parameters.
The ability to rapidly insert Sine, Triangle, Ramp Up or Down, Square, S, Fade In or Out, and ADSR curves for any selected time span from an easily-accessible context menu rapidly accelerates the quantized shape drawing potential. Once drawn, any selection of time can be adjusted up or down from the horizontally-centered top or bottom handles, skewed up or down in either direction from the corner handles, and squeezed left or right or even inverted temporally when dragged past its original selection from the vertically-centered right or left handles.
Again, all of this is undeniably useful when it comes to Arrangement Automation – but especially so when utilized with Live’s revitalized Modulation envelopes as well. The long-awaited Edit Value function allows Breakpoint values to be manually typed in, which is great, though a key command to do so – perhaps Option + click on a Breakpoint – in addition to the context-menu access would be a welcome workflow enhancement.
Hot Key Work Flow
Speaking of workflow, 10.1’s new H and W hot keys are the sort of seemingly minor add-on that soon become indispensable. You can hide all tracks or expand them to fit the exact current vertical area available as dictated by Detail view size via the H key. Toggling from the current zoom of your Arrangement to a fully zoomed out overview via the W key – combined with the Z key which zooms to your currently selected area – make for an important combination of navigational tools.
Fresh Effects
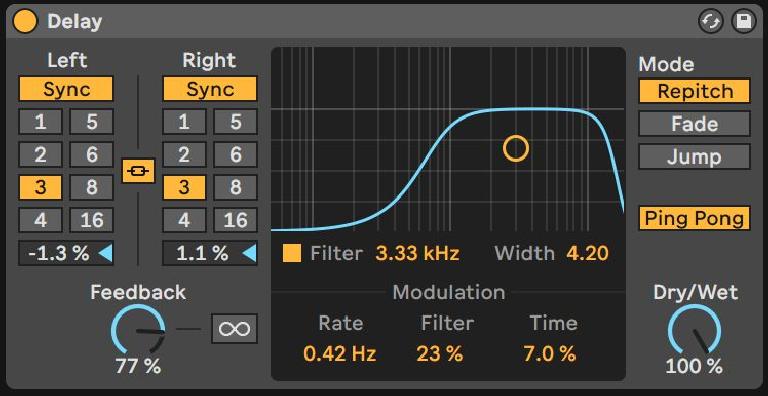
The consolidation of Simple and Ping Pong Delay makes good sense. The new Delay device sounds great as a clean digital delay. The timing transition modes – Repitch, Fade, and Jump – have been made more accessible, and by pulling them out of the device title bar context menu where they were previously hidden, they’re now available for Automation control.
Even without Ping Pong mode engaged, it’s nice to have an in-line filter for a Simple delay, and the Filter and Time modulation is welcome, though it’s perplexing there’s no tempo-synchronized note interval rates available. Also vexing for anyone seeking less common polyrhythmic timings are the strict grid rates that only allow even-numbered 16th note intervals above 5, making, for example, 3/16L-7/16R or 5/16L-11/16R timings impossible. These timing grids have been used on these devices since the early days of Live, and it’s astonishing they’ve not yet been updated in this device, despite recent advances made with timing functionality in Live 10’s excellent Echo.
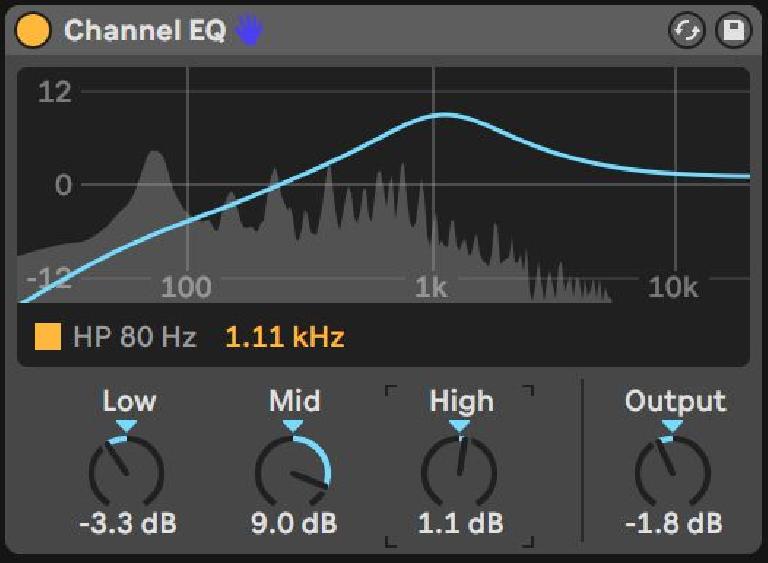
The Channel EQ succeeds in bridging the rather distant gap between the DJ-friendly EQ3 and the surgical precision offered by EQ8. Modelled on a classic three-band mixer EQ with a sweepable Mid, it sounds transparent yet delivers punch and brilliance or carves out space as needed with hard-wired Low and High Shelves.
An optional High Pass fixed at 80 Hz can be enabled to remove unwanted mud or rumble, though range-fixed yet sweepable High and Low Pass filters would bring it closer to certain vintage channel strip emulations. The Real-Time Analysis is handy, though CPU-starved users might want the option to disable it. Finally, an Output control helps compensate gain to keep your signal path nice and tidy.
Point One
Most of these new features are presumably close to finished with this Beta, though technically there may still be a tweak or two. But given this is only Live 10’s first incremental update, anyone who is on Live 10 already should be salivating at the prospect of new features surely on the road map after the significant upgrades afforded here. Meanwhile, for users reluctant to update to 10 yet for one reason or another, 10.1 should offer more than enough sweetener to convince anyone who can afford it to finally take the plunge.




 © 2024 Ask.Audio
A NonLinear Educating Company
Discussion
Want to join the discussion?
Create an account or login to get started!